
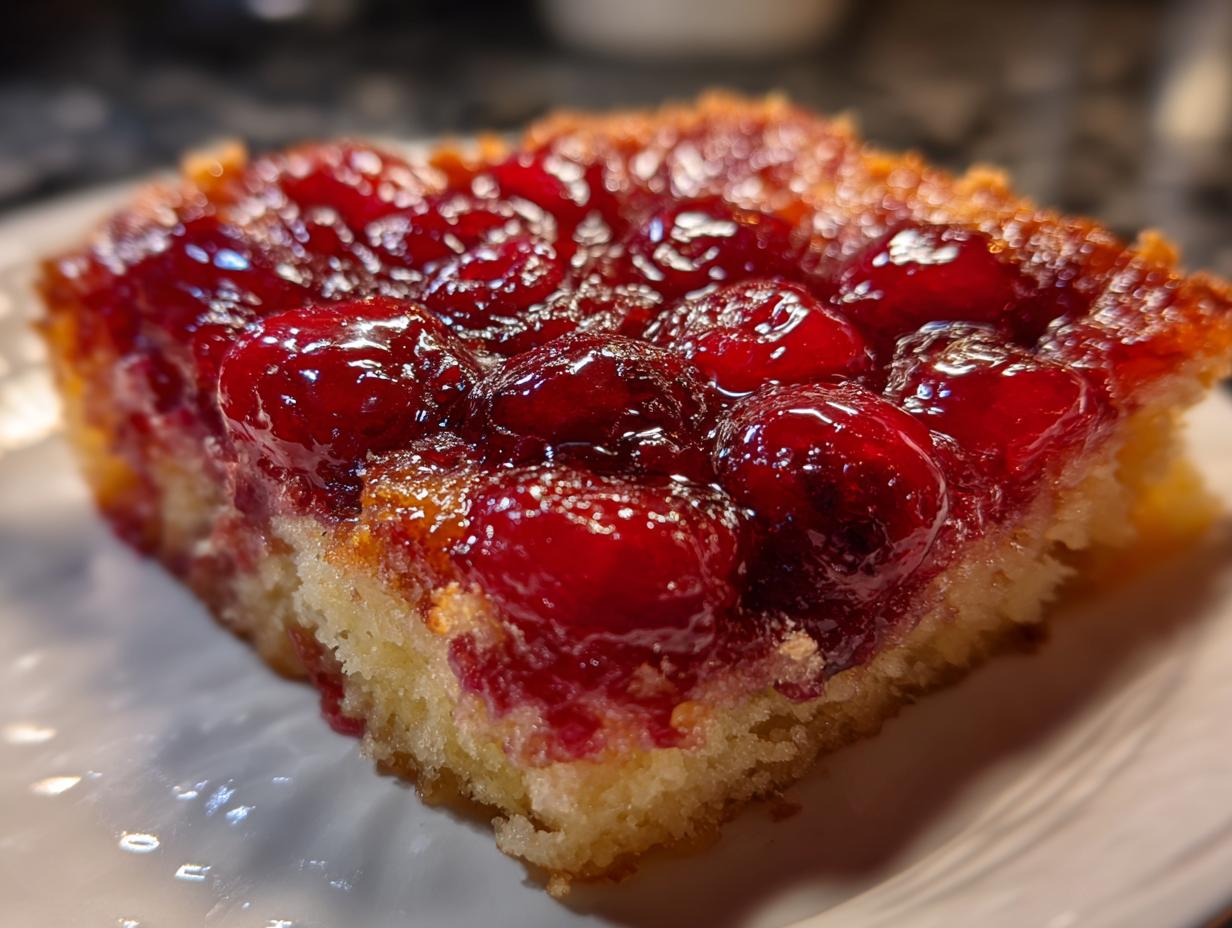

Oh my goodness, are you ready for the most unbelievably simple dessert you will ever meet? Seriously, I’m talking about something so fast and so cheerful that it practically makes itself. When I started Cut Cook Taste, I promised myself I’d share recipes that feel like a hug in a bowl, and my desserts category wouldn’t be complete without this superstar.
I’m talking about the magnificent cherry dump cake. My goal in the kitchen, whether I’m channeling my grandmother’s patience or my dad’s weekend energy, is to make great food accessible. This beauty fits that perfectly. We are talking three ingredients, zero mixing bowls, and maybe five minutes of actual hands-on time. No stress, just pure, bubbling, wonderful fruit flavor underneath a buttery, crisp topping. Trust me, this is the ticket when you need a fast fruit dessert that tastes like you worked all day.
- Why This Cherry Dump Cake is the Easiest Cake You Will Ever Make
- Gathering Ingredients for Your 3-Ingredient Cherry Dump Cake
- Step-by-Step Instructions for the Perfect Cherry Dump Cake
- Tips for Serving Your Gooey Cherry Dessert
- Making the Cherry Dump Cake a Potluck Dessert Easy Star
- Storage and Reheating Instructions for Leftover Cherry Dump Cake
- Variations on the Classic Cherry Dump Cake with Cake Mix
- FAQ About Making a Cherry Dump Cake
- Nutritional Estimates for This Simple Cherry Cobbler
- Share Your Cut Cook Taste Creations
Why This Cherry Dump Cake is the Easiest Cake You Will Ever Make
Honestly, the cherry dump cake is the star player when I need a win without the work. It’s the ultimate example of no fuss baking. When I talk about a true no mix cake, this is it! You don’t even dirty a spatula, let alone a big mixing bowl. The whole point is the ‘dump and bake’ concept—you’re just layering ingredients. It’s so simple, it barely feels like baking, but the results? Pure dessert heaven.
I love that this recipe proves you can satisfy that craving for a simple cherry cobbler texture without any of the usual fuss. It’s the definition of minimal ingredient baking, and it builds confidence when you realize how easy it is to pull off something this good.
Quick Cherry Dessert: Prep Time Under 5 Minutes
This is where it really shines! The prep time is genuinely under five minutes. That’s less time than it takes my kids to decide what they want to watch on TV! If I see a sudden need for a quick cherry dessert—maybe we have unexpected company or I just had a tough day—I grab the can opener. It’s the easiest, fastest way to get a warm, bubbly, fast fruit dessert on the table. You just layer, and it’s ready for the oven!
Gathering Ingredients for Your 3-Ingredient Cherry Dump Cake
This is the part that makes everyone do a double-take. When I say this is a simple dessert, I really mean it. You only need three core things to make this magical cherry dump cake happen. Don’t overthink it, and don’t wander off to grab extra sprinkles yet! We are sticking to the basics because that’s the genius of this 3 ingredient dessert.
Here are the only three things you need waiting on your counter. I like to list them out so you can check them off as you grab them. This clarity really helps build trust; you know exactly what you are getting into with this formula!
- 1 (21 ounce) can cherry pie filling
- 1 (15.25 ounce) box yellow cake mix
- 1/2 cup (1 stick) unsalted butter, melted
Ingredient Notes and Substitutions for Your Cherry Dump Cake
Now that we have the basics, let me share a few little secrets I’ve picked up over making this for every potluck imaginable. These small additions take it from great to absolutely unforgettable, especially if you are aiming for that gooey cherry dessert experience everyone talks about.
For instance, if you really want to deepen that cherry flavor and ensure the filling is gloriously bubbly and flavorful, try adding just one teaspoon of almond extract right into the can of cherry pie filling before you pour it into the dish. It’s a subtle background note that really sings! Also, while yellow cake mix is traditional, don’t feel chained to it. You absolutely can use a white cake mix for a lighter topping, or my personal favorite substitution—a spice cake mix! That little bit of warmth goes beautifully with the cherries.
Step-by-Step Instructions for the Perfect Cherry Dump Cake
Okay, let’s get this show on the road! This is the fun part where we literally just layer things and watch magic happen. My dad always said the key to home cooking, especially for amazing *dump cake recipes*, is trusting the process and *not* trying to overcomplicate these simple wonders. We’re building this beautiful, **gooey cherry dessert** layer by layer, and the most important thing to remember is to leave those layers alone!
Here are the exactly steps I follow every single time to ensure I get that perfect, crispy, yet tender topping on my **cherry dump cake**:
- First things first, get that oven ready! Preheat your oven to 350 degrees Fahrenheit. While it’s warming up, take a 9×13 inch baking dish and give it a quick little grease. I just use a tiny bit of cooking spray or softened butter—nothing fancy needed here.
- Now for the fruit layer. Open that can of cherry pie filling and dump the entire contents right into your prepared baking dish. You want to spread it out roughly so it covers the bottom evenly. It doesn’t have to be perfect, but try to get it flat.
- Next comes the dry cake mix. Take that entire box of yellow cake mix and gently sprinkle it evenly over the cherry filling. This is crucial: Do not mix the layers! We want that defined separation for the final texture. If you mix it, you get cake batter, not dump cake.
- Time for the butter magic! Take your 1/2 cup of melted butter and drizzle it evenly over the dry cake mix layer. You can pour it in clean lines, or just drizzle it wherever you see fit. Don’t worry if you have dry spots; the butter will spread as it bakes in the oven and turns into that beautiful topping.
- Pop this beauty into that preheated oven and plan to bake it for 40 to 50 minutes. This is where your patience really matters!
- When you think it might be done, pull it out carefully. You are looking for two main things: the topping should be golden brown, and the cherry filling should be actively bubbling up around the edges. That bubbling means those cherries are hot and ready to burst with flavor!
- Once it looks perfect, carefully remove the **dump and bake dessert** from the oven. And this is hard, but you have to let it cool for at least 15 minutes before diving in. This resting period lets the bubbling calm down a little, making it safer and ensuring it holds its shape when you scoop it.
Baking Tips for a Golden Buttery Topping Cake
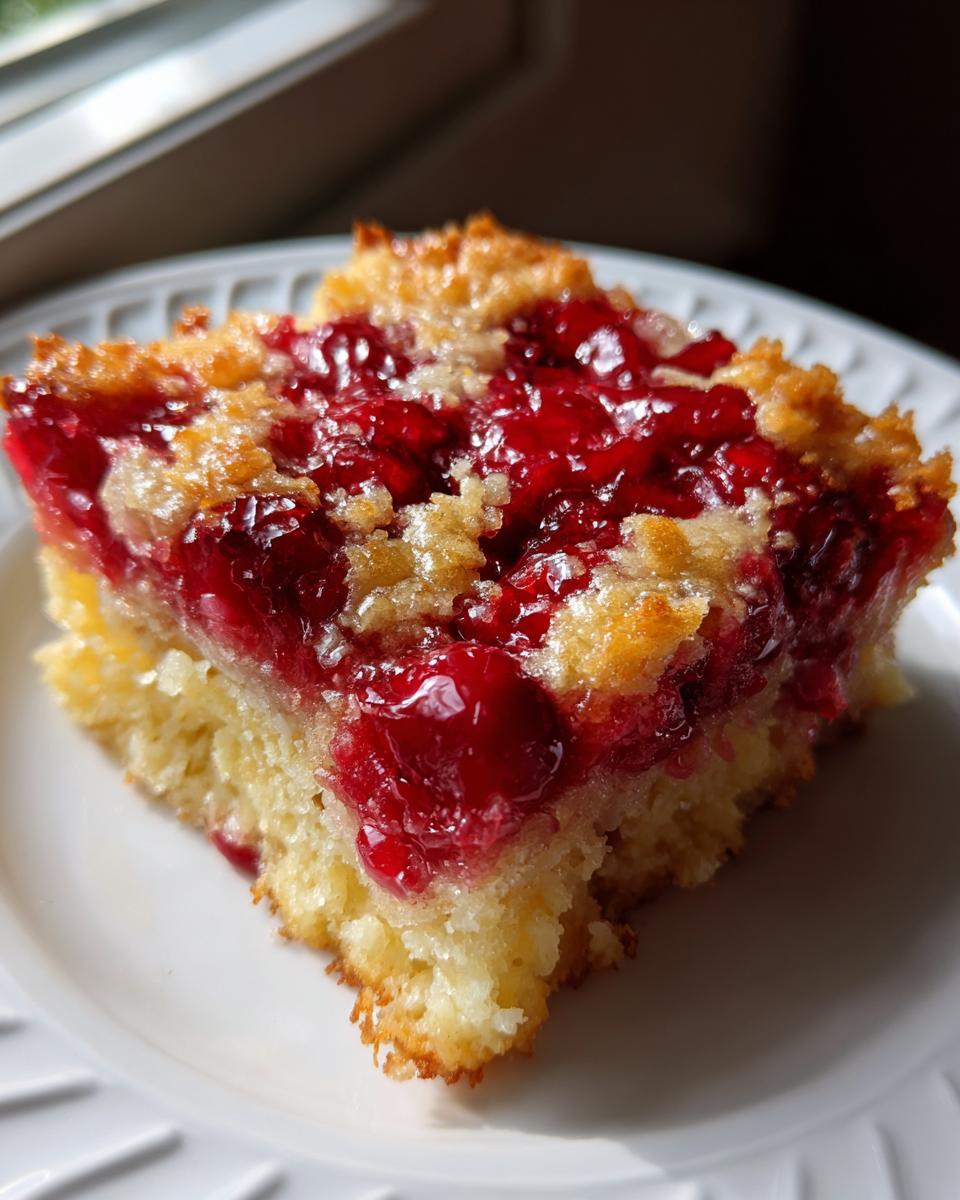
The difference between a good **cherry dump cake** and an absolutely stunning one often comes down to watching it those last 10 minutes of baking. You’re aiming for that iconic **buttery topping cake** crust. It should look deep golden, kind of toasted, but crucially, the edges of the fruit must be actively simmering—you want to hear it gently sputtering! That tells you the filling has fully cooked through.
Here’s my personal trick for avoiding that slightly crunchy, dry patch right on top: don’t be afraid to gently tent the cake with aluminum foil if the top is getting too dark before the center is bubbly. Pulling it out early is the death of a truly gooey cherry dessert. If I use a slightly smaller pan than the 9×13, I know I can pull it back closer to 40 minutes. Always check the edges for that beautiful, active bubble action—that’s my secret signal that it’s ready to come out of the oven and start its cool-down period. I found this great flaky crust technique works wonders on these toppings, too, if you ever want to upgrade the cake mix layer slightly!
Tips for Serving Your Gooey Cherry Dessert
The hard part—the baking—is done! Now we get to the reward. This cherry dump cake comes out piping hot, and while I already mentioned letting it rest for those 15 minutes (seriously, don’t skip that step!), the real magic happens when you decide how to serve it. Because this recipe creates such a wonderful, bubbly base, it really shines when treated like a proper, deep-dish dessert.
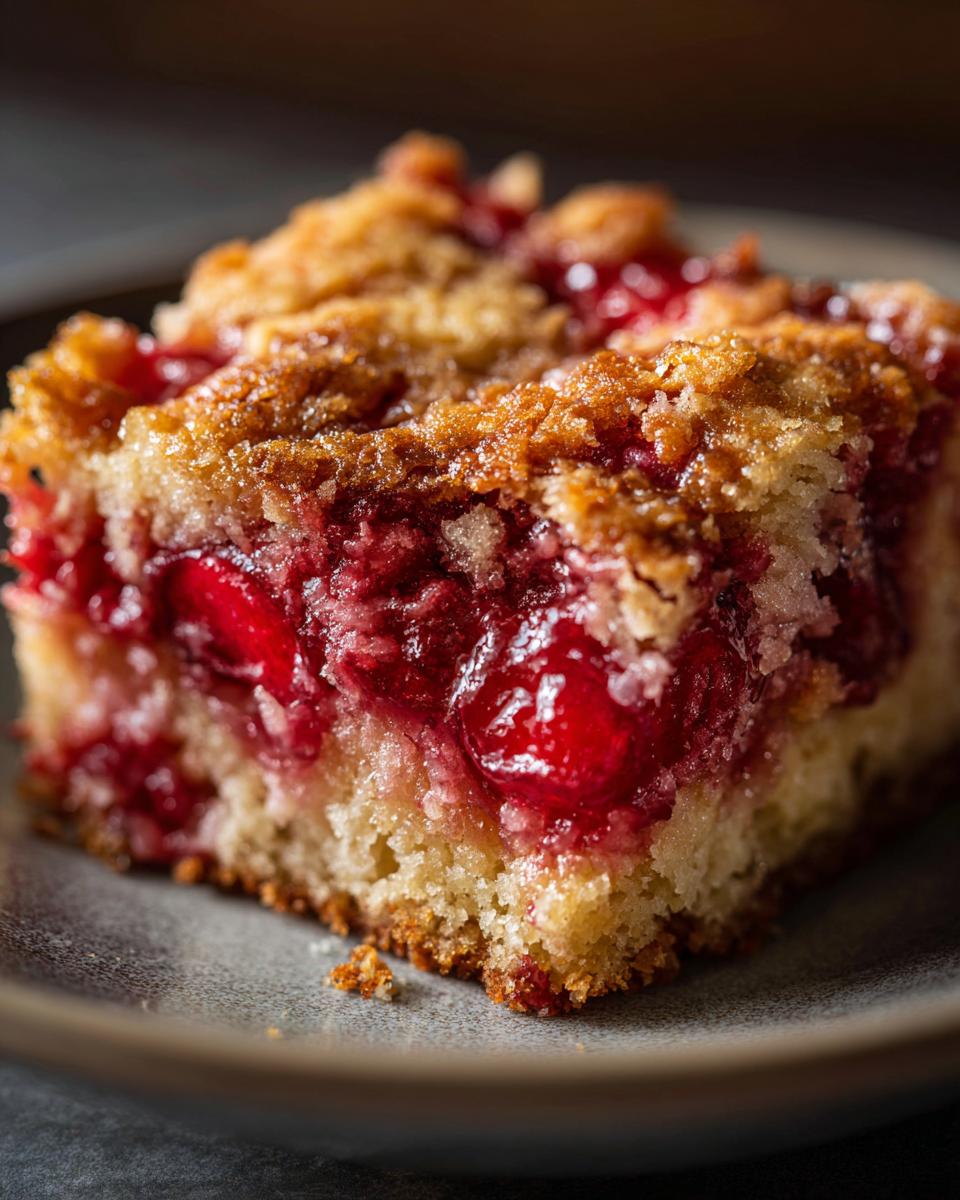
Think of it as a quick version of my grandmother’s best simple cherry cobbler, but with that irresistible baked cake topping instead of a biscuit crust. It’s structurally sound enough to scoop onto a plate without everything falling apart, but it’s so jammy and warm you’ll need something cool alongside it.
My absolute top recommendation, the pairing I always reach for when serving this quick cherry dessert, is a giant scoop of good quality vanilla ice cream. The contrast between the hot, tart, buttery cake and the cold, creamy vanilla is just divine. You just let that ice cream melt slowly down into the warm cherry pockets; it is heavenly!
If ice cream isn’t handy, a big dollop of freshly whipped cream works wonderfully too. It lightens up the richness of the butter and cake mix topping beautifully. We also sometimes serve it slightly cooled with a sprinkle of toasted pecans on top—which is a *slight* cheat since it adds an ingredient, but goodness, it’s worth it. If you’re looking for other ways to serve up summer flavors alongside this treat, check out my strawberry shortcake cheesecake recipe for another crowd-pleaser!
Making the Cherry Dump Cake a Potluck Dessert Easy Star
If you are looking for a way to impress a crowd without sacrificing your entire Saturday afternoon, look no further. The cherry dump cake is not just a dessert; it’s a social strategy! This recipe is honestly my secret weapon for any gathering, whether it’s a neighborhood potluck, a big family get-together, or even just having friends over last minute.
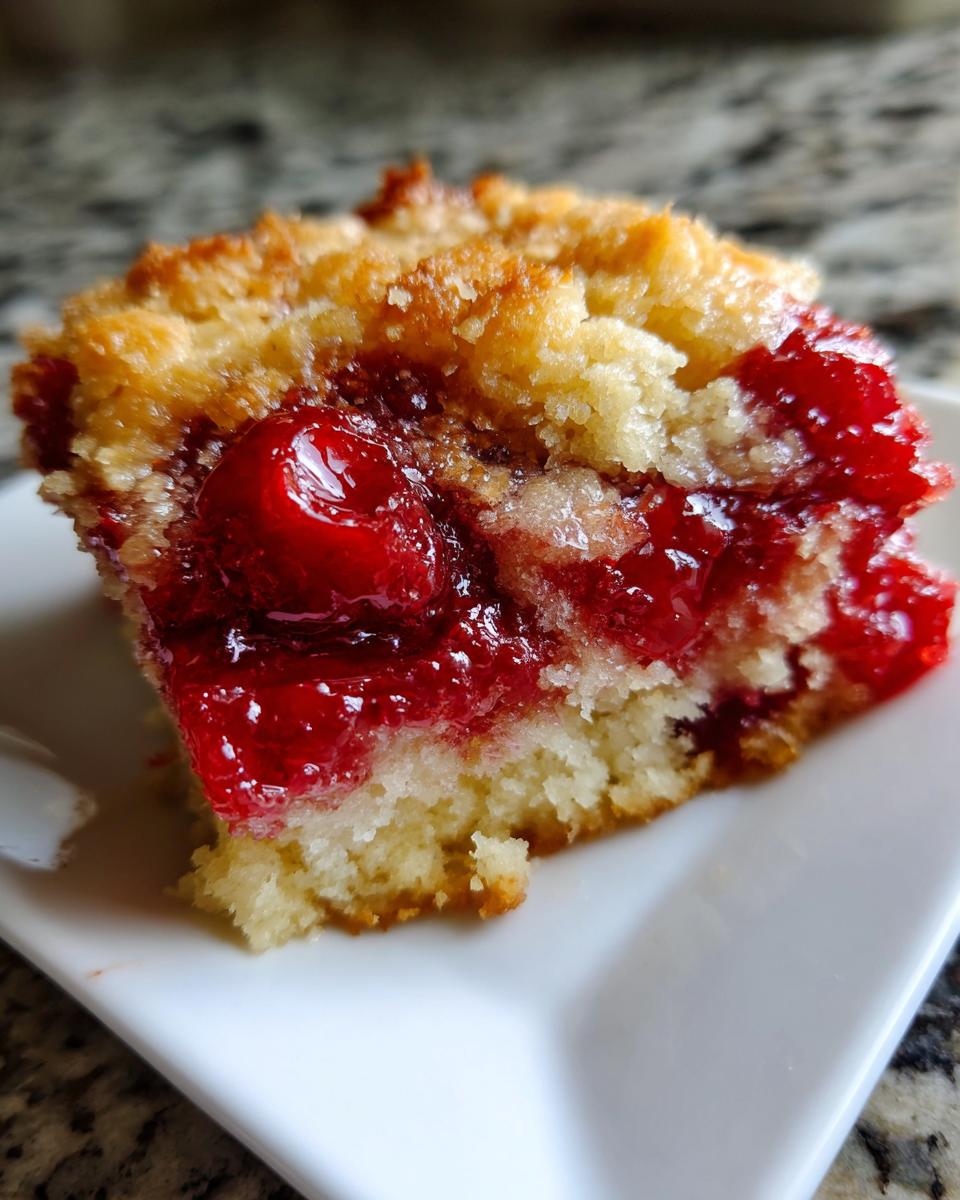
It scores top marks as a potluck dessert easy choice because it travels so well. Unlike a delicate layered cake that risks sliding or a pie that might get squished, this dessert stays put in its sturdy 9×13 pan. When it comes out of the oven, that crisp, buttery top is firm enough to handle being packed up and transported without looking completely tragic upon arrival. It looks rustic and inviting, which everyone seems to love!
Plus, who doesn’t love a dessert that feels homemade but takes zero actual effort? It has that wonderfully appealing texture—a mix between a crisp and a cobbler—which makes it universally loved. It solidifies its status as a top-tier dump and bake dessert because everyone is always asking me for the recipe, thinking I must have wrestled with butter and flour for hours.
When I bring this to events, I usually keep it warm in a slow cooker on the “keep warm” setting until serving time, especially if I’ve made some savory appetizers, like my favorite stuffed mushroom dip. It keeps everything cozy and ready for when people get hungry! If you’re looking for another great recipe that got rave reviews, check out this version from our friends who use frozen cherries—amazing what a few simple ingredients can do!
Storage and Reheating Instructions for Leftover Cherry Dump Cake
Now, let’s talk about the reality of having leftovers, which, with a dessert this easy and delicious, happens less often than I’d like! Even though this cherry dump cake disappears fast, it’s nice to know you can save some for a treat tomorrow. Since we are dealing with a canned fruit base here, you do need to be a little careful with storage compared to, say, a standard chocolate chip cookie.
Once the cake has cooled down—remember, don’t seal it up when it’s still steaming hot—cover your baking dish tightly with plastic wrap or transfer the leftovers into an airtight container. Because of that lovely **gooey cherry dessert** filling, this needs to live in the refrigerator. It should keep nicely for about three to four days in there. It’s still perfectly safe and tasty cold, which can be a nice, tart little snack, but let’s be honest, warm is always better!
When that craving hits the next day and you want to bring back that magic crust, reheating is key. You don’t want soggy, cold cake mix topping, right? I find the best way to revive that beautiful buttery topping cake texture is popping a portion or two onto a microwave-safe plate. Start with about 20-30 seconds on medium power. That gently warms the fruit underneath without turning the topping rubbery.
If you have a larger slice and you want that crispness back, use the oven! Pop your individual serving onto a baking sheet or an oven-safe dish and heat it at 300 degrees Fahrenheit for about 8 to 10 minutes. Keep an eye on it, though! You just want it warmed through and maybe see a tiny bubble or two; you don’t want to bake the moisture out of the cherries again. Serving any reheated slice with a tiny splash of cold cream just makes it feel brand new again!
Variations on the Classic Cherry Dump Cake with Cake Mix
Part of what I love about this cherry dump cake formula is how incredibly flexible it is. It’s built on such a solid, simple base—fruit, dry mix, butter—that you can use it as a blueprint for so many different quick cherry desserts throughout the year. It allows for such creativity while demanding almost no extra effort. This is where you can really show off your flair without breaking a sweat!
You don’t always have to be stuck with just cherries, even though they are glorious! Since we aren’t using traditional batter, the structure holds up beautifully to different kinds of fruit fillings. Think of this as your go-to template for any simple cherry cobbler style treat you can imagine. It’s the ultimate in minimal ingredient baking experiments.
If you’re tired of cherry—or maybe you just have another can staring at you from the pantry—swap it out! Peaches are fantastic; they bake up buttery and sweet, just like the cherries. A can of blueberry pie filling makes a stunningly vibrant dessert, though sometimes I like adding a squeeze of lemon juice to the blueberries to keep the tartness present.
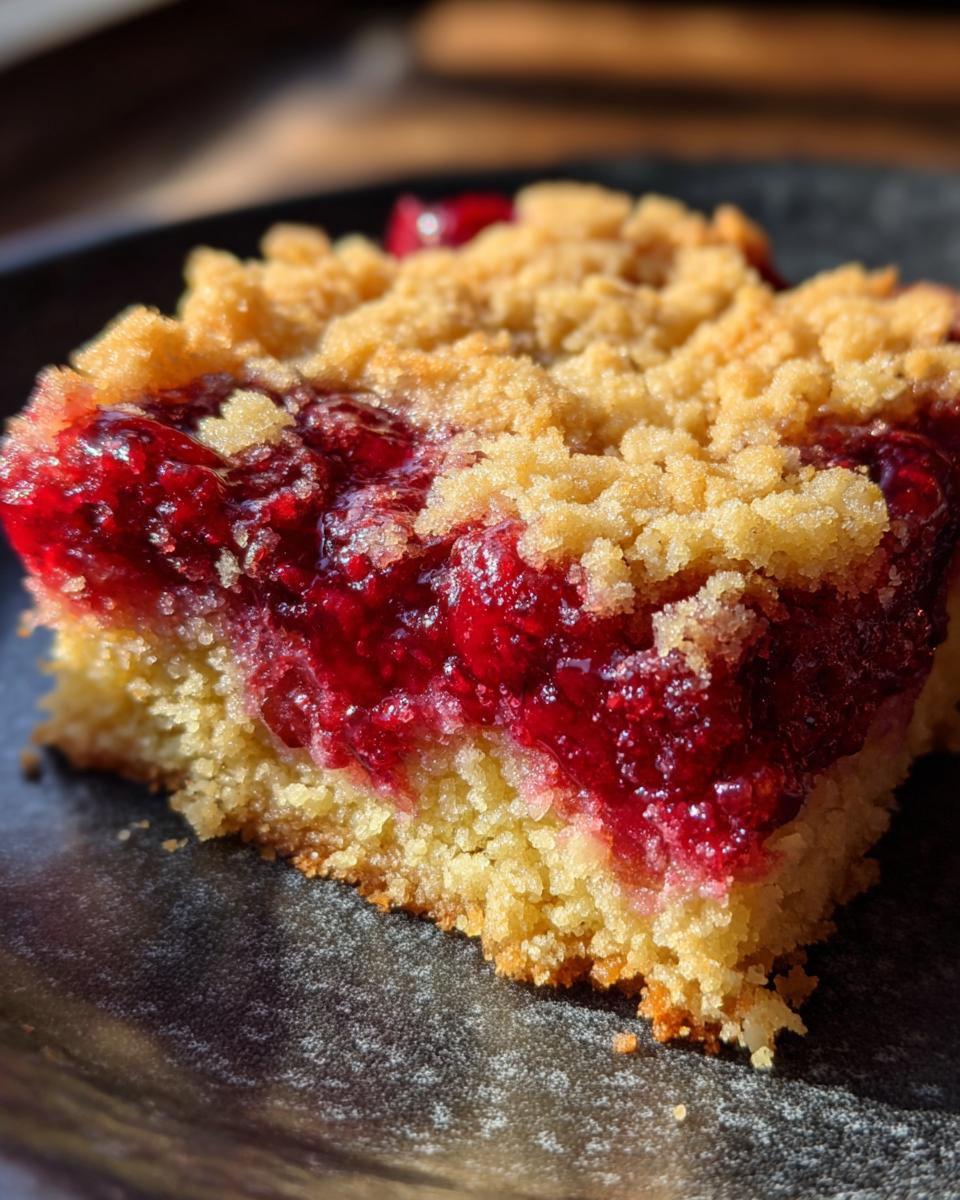
And don’t forget about the cake mix itself! While yellow is classic for that great **buttery topping cake** texture, I have had amazing success using chocolate cake mix with cherry filling. That combination tastes almost like a Black Forest dessert, and it satisfies a totally different kind of sweet craving. If you’re playing around with flavor profiles, you might also look at my recipe for the ultimate chocolate caramel crunch cake for another level of layered decadence, but remember, this dump cake keeps it fast!
For those who want to combine fruits, I highly recommend checking out how others handle the cherry and pineapple combo. My friends over at Unsophisticook have a great take on a cherry pineapple dump cake if you want to see how balancing those two fruits works out. It’s always fun to see how slight variations keep this dump and bake dessert exciting year after year!
FAQ About Making a Cherry Dump Cake
I get so many questions about this amazing, simple recipe! And that’s exactly what I love to see—people diving into **easy dump cake recipes** and making them their own. I’ve pulled the most common questions I get asked about ensuring this is the best and easiest **quick cherry dessert** possible. If you’re still unsure about technique or substitution, this section should help clear everything up so you can get baking!
Can I use fresh or frozen cherries instead of pie filling in my cherry dump cake?
That’s a great question that touches on the “fresh vs. convenience” debate! While the core beauty of the **cherry dump cake** is using convenient canned pie filling, you absolutely *can* use fresh or frozen cherries. If you use fresh cherries, you need to replace the filling component with about 4 to 5 cups of pitted cherries.
Here’s the catch: fresh cherries don’t have the sugar or stabilizers that pie filling does. So, if you go that route, you must add sweetener! I would suggest tossing those fresh or frozen cherries with about 1/2 cup of sugar (maybe a splash of lemon juice if they aren’t very sweet), and you might need to add just a tablespoon or two of cornstarch mixed with water to thicken the juices once they release them in the oven. It becomes a little more involved than the classic 3 ingredient dessert, but it’s definitely doable!
What is the best way to prevent the cake mix topping from getting too dry?
This is the #1 textural concern, and it all comes back to the butter distribution! If you want that perfect, golden, slightly crunchy-yet-tender crust that makes this such a great **buttery topping cake**, you have to be generous and even with the butter drizzle. Don’t be stingy when you pour it over the dry cake mix!
My tip is to think of the surface area of the dry mix as needing to be completely kissed by butter. If you pour it all into one spot in the middle, the edges of the cake mix will bake up dry and sandy. If you see little dry patches where the butter hasn’t touched, try to use a fork or spoon to gently spread the melted butter right over those spots *before* you put the pan in the oven. That even coverage ensures every bite of that topping is rich.
Is this considered a 3 ingredient dessert if I add ice cream?
Ha! That is the million-dollar question when it comes to defining these super simple recipes! For the actual baked portion—the thing that comes out of the oven—yes, it is strictly a 3 ingredient dessert: cherries, cake mix, and butter. That is the magic formula we are proud of here at Cut Cook Taste!
When we talk about toppings like vanilla ice cream or whipped cream, those are absolutely optional, but highly recommended! They are accompaniments to serve *with* the dessert, not components *of* the core recipe that defines the “3 ingredient” claim. Think of those delicious extras as the flair you add on top of your incredibly **no fuss baking** achievement. Don’t worry, your secret to the amazing chocolate covered cherries recipe won’t be ruined if you serve this with a scoop of ice cream!
Nutritional Estimates for This Simple Cherry Cobbler
I always feel a little funny talking about nutrition when we are talking about pure comfort food like this cherry dump cake, but I know many of you like to have a general idea of what you’re serving up, especially when you’re taking it somewhere like a big family dinner or a church social. Since this recipe is so wonderfully simple and uses packaged ingredients alongside canned fruit, the numbers can vary slightly depending on the brand of cake mix you grab, but I wanted to give you the best estimate based on the standard ingredients.
Remember, these figures are just helpful guidelines for one serving of this delicious, bubbly, simple cherry cobbler. They assume you are serving up the recipe as written—the 3-ingredient base without any extra scoops of ice cream or whipped topping!
- Serving Size: 1 serving
- Calories: 350
- Sugar: 45g (Yes, it’s sweet, but that’s half the fun!)
- Sodium: 300mg
- Fat: 17g
- Saturated Fat: 10g
- Unsaturated Fat: 7g
- Trans Fat: 0
- Carbohydrates: 48g
- Fiber: 1g
- Protein: 3g
- Cholesterol: 40mg
What I love about calculating these numbers for our **easy dump cake recipes** is realizing that even though this tastes rich and decadent, it’s surprisingly reasonable for a classic fruity baked treat! Just be mindful of the sugar, especially if you are serving seconds. I always feel so much better about serving things when I know the ingredients are straightforward, and this dump and bake dessert definitely delivers on transparency!
Share Your Cut Cook Taste Creations
Now that you’ve created this incredible, truly simple dessert, I really, really want to see it! Part of why I created this space—my little corner of the internet—is to connect with all of you who also find so much joy in the kitchen, even when the recipe is as straightforward as this cherry dump cake.
If you whipped up this treat for a weeknight dessert or took it to a party, please come back here to this recipe and click that five-star rating button! Your feedback truly helps me know which recipes I should be sharing more of. It assures me that these easy dump cake recipes are hitting the spot for busy home cooks like you.
And if you took a beautiful shot of that bubbly, golden topping, please tag me on social media! I love scrolling through and seeing all your amazing recreations. Mentioning that you used my recipe brings me so much happiness. Sharing food is sharing love, after all, and seeing your versions of this quick cherry dessert puts a huge smile on my face. You can see what I’m cooking up today over on my main blog page!
PrintEasiest 3-Ingredient Cherry Dump Cake
This Cherry Dump Cake is a simple, no-fuss dessert with a sweet cherry base and a buttery, crispy topping. It is like a cherry cobbler without the effort.
- Prep Time: 5 min
- Cook Time: 50 min
- Total Time: 55 min
- Yield: 8 servings 1x
- Category: Dessert
- Method: Baking
- Cuisine: American
- Diet: Vegetarian
Ingredients
- 1 (21 ounce) can cherry pie filling
- 1 (15.25 ounce) box yellow cake mix
- 1/2 cup (1 stick) unsalted butter, melted
Instructions
- Preheat your oven to 350 degrees Fahrenheit. Lightly grease a 9×13 inch baking dish.
- Pour the entire can of cherry pie filling into the prepared baking dish. Spread the filling evenly across the bottom.
- Sprinkle the dry yellow cake mix evenly over the cherry filling layer. Do not mix the layers.
- Drizzle the melted butter evenly over the dry cake mix layer. You can pour it in lines or dots; the butter will spread as it bakes.
- Bake for 40 to 50 minutes, or until the topping is golden brown and the cherry filling is bubbly around the edges.
- Remove the dump cake from the oven and let it cool for at least 15 minutes before serving.
Notes
- For an extra gooey cherry dessert, you can add a teaspoon of almond extract to the cherry filling before baking.
- If you want a richer topping, substitute the yellow cake mix with white cake mix or even a spice cake mix.
- Serve this fast fruit dessert warm with a scoop of vanilla ice cream or whipped cream.
Nutrition
- Serving Size: 1 serving
- Calories: 350
- Sugar: 45
- Sodium: 300
- Fat: 17
- Saturated Fat: 10
- Unsaturated Fat: 7
- Trans Fat: 0
- Carbohydrates: 48
- Fiber: 1
- Protein: 3
- Cholesterol: 40