
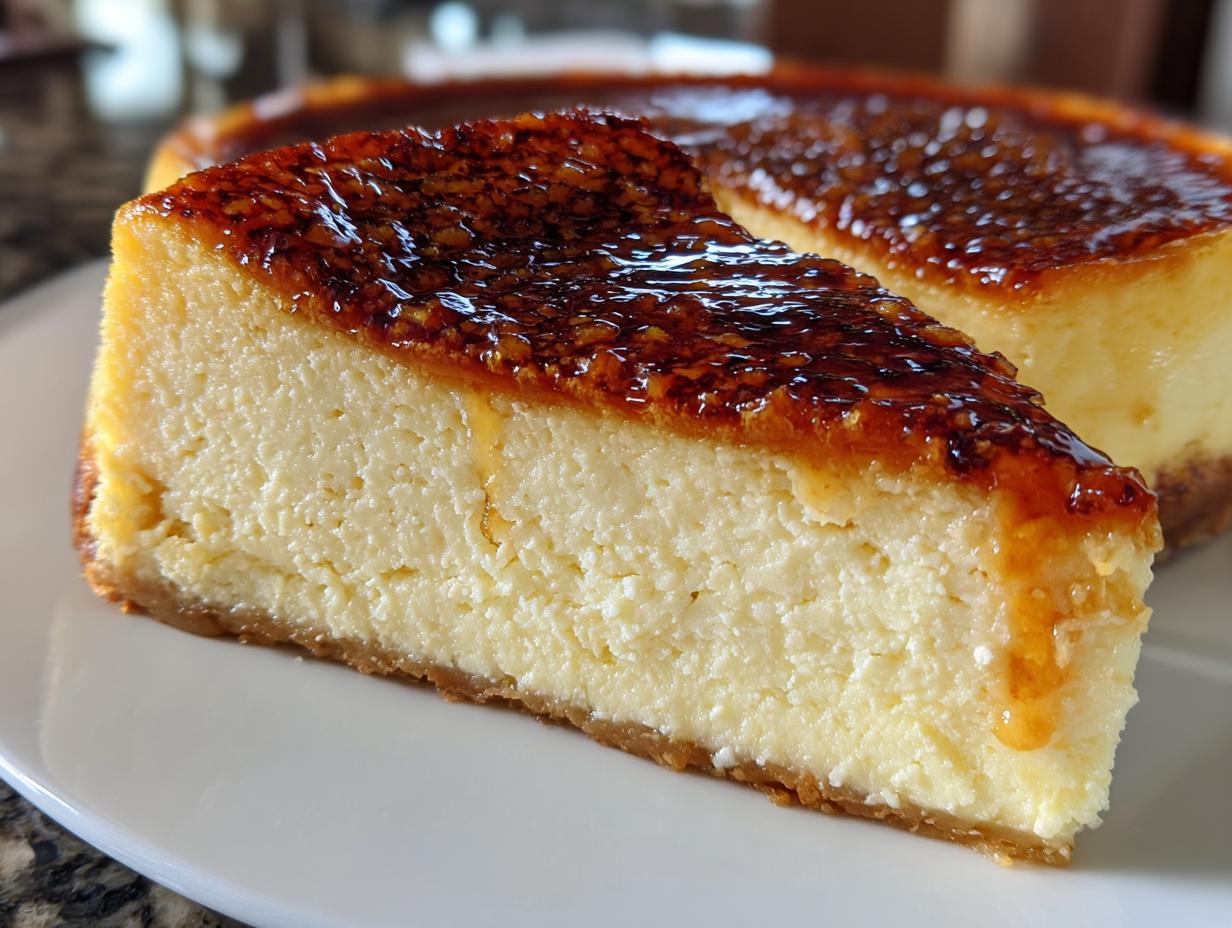

If you’ve ever stood in the bakery aisle completely torn between grabbing a slice of creamy, tangy cheesecake OR cracking into that stunningly crisp, caramelized top of a crème brûlée, then I have the answer for you! We aren’t doing fusion desserts halfway around here—we are blending the best of both worlds into the ultimate treat: the creme brulee cheesecake. This recipe gives you that rich, blanket-smooth filling with that signature shatteringly crisp sugar crust. Trust me, I spend my evenings perfecting these classics in my kitchen right here in the West Coast, taking inspiration from the comforting Midwest traditions I grew up with, especially the celebrations my dad used to host. It’s pure indulgence!
- Why This Creme Brulee Cheesecake Recipe is Your New Favorite Dessert Fusion Recipes
- Essential Ingredients for Your Creme Brulee Cheesecake Recipe
- Step-by-Step Instructions for the Ultimate Creme Brulee Cheesecake
- Mastering the Caramelized Sugar Top Dessert Finish
- Tips for Success with Your Creme Brulee Cheesecake Recipe
- Make Ahead Desserts and Storing Your Creme Brulee Cheesecake
- Popular Variations: Mini Creme Brulee Cheesecakes and Bars
- Frequently Asked Questions About Creme Brulee Cheesecake
- Serving Suggestions for This Gourmet Cheesecake
- Estimated Nutritional Data for Creme Brulee Cheesecake
- Share Your Creme Brulee Cheesecake Creations
Why This Creme Brulee Cheesecake Recipe is Your New Favorite Dessert Fusion Recipes
Why choose one amazing dessert when you can have both? This creme brulee cheesecake isn’t just a dessert; it’s a textural miracle! When I first nailed this recipe, I knew instantly it was going to be a staple for my big family get-togethers. It takes that familiar comfort of a great baked cheesecake dessert and gives it a gourmet, jaw-dropping finish.
- The filling offers the creamiest cheesecake ideas you can imagine—so smooth!
- It delivers that incredibly satisfying, crisp snap, making it one of my go-to decadent dessert recipes.
- It looks like it took days of complicated work, but really, it’s shockingly straightforward.
Achieving the Perfect Creamy Cheesecake Dessert Fusion Recipes
The secret to that unbelievable texture? It’s all about handling the batter gently! When you use room temperature ingredients, like those eggs, they mix in without forcing air into the mixture. You absolutely do not want to overmix once the eggs are in! Seriously, just mix until streaks disappear. This is my professional tip for avoiding those ugly cracks in your gorgeous baked cheesecake dessert.
The Signature Caramelized Sugar Top Dessert Experience
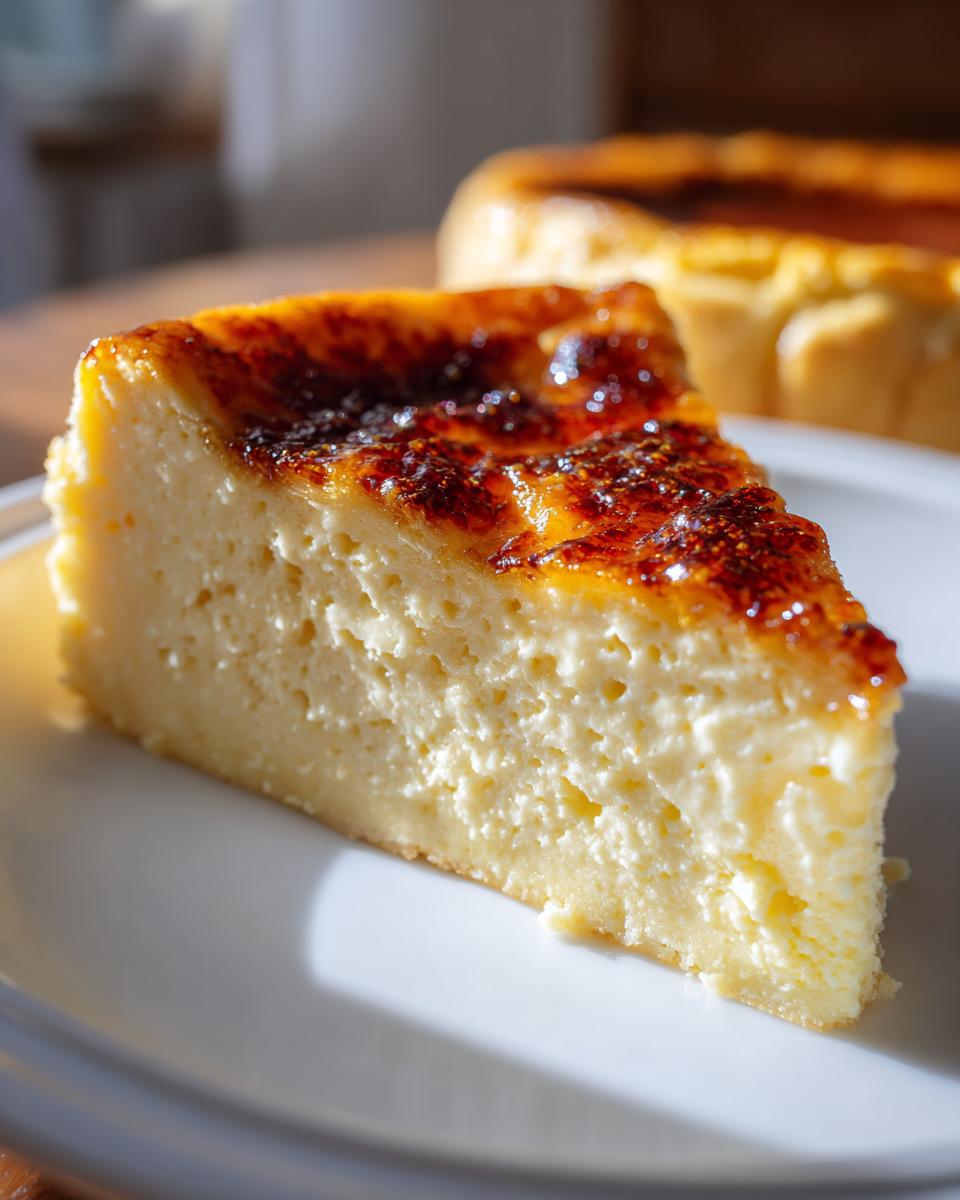
This top layer is non-negotiable! It’s the whole reason we call it a creme brulee cheesecake. That moment when you crack the hardened sugar with your fork? That’s the magic! It adds a warm, slightly bitter crunch that balances the rich vanilla bean flavor of the filling underneath perfectly. It sets this dessert apart from any other cheesecake you’ve ever made.
Essential Ingredients for Your Creme Brulee Cheesecake Recipe
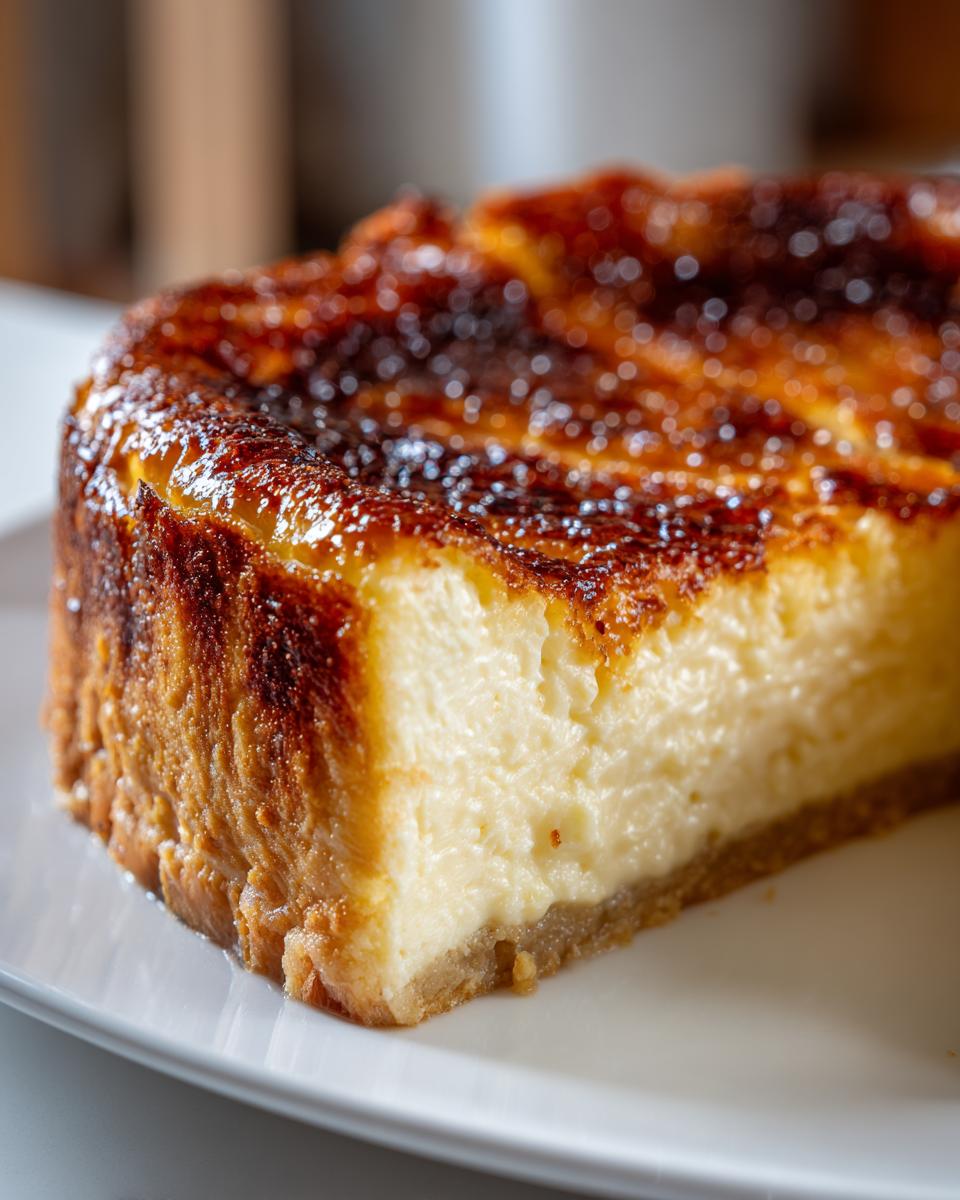
Okay, let’s get down to brass tacks. To pull off this incredible creme brulee cheesecake recipe, you need to respect the ingredients—especially their temperature! I always lay everything out before the mixer even comes out. Why? Because temperature control is key to avoiding lumps and getting that super smooth final texture we are aiming for in this baked cheesecake dessert. We need that perfect base for our decadent vanilla bean cheesecake!
Crust Components for the Creme Brulee Cheesecake
We start simple with the base. You’ll need your graham cracker crumbs, of course. Make sure you grab only 1/4 cup of granulated sugar just for the crust. That small amount helps bind everything perfectly when baked. Then, mix that up with 6 tablespoons of butter that’s already melted. Press this mixture firmly into the bottom of your springform pan. You want a solid foundation that can hold up to all that creamy filling!
The Rich Vanilla Bean Cheesecake Filling
This is where the luxury comes in. You absolutely need three full 8-ounce packages of cream cheese, and they *must* be softened. Don’t try to rush this; slightly softened cream cheese beats up perfectly smooth! We are using 1 1/2 cups of sugar filling the rest, plus a small spoon of flour for stability. For that deep, rich flavor that screams gourmet, get yourself some vanilla bean paste. It’s my secret weapon for a spectacular vanilla bean cheesecake. The most important thing here, and I cannot stress this enough, is that your 4 large eggs must be at room temperature. Cold eggs shock the smooth cream cheese batter and lead to lumps!
Step-by-Step Instructions for the Ultimate Creme Brulee Cheesecake
Alright, now that we have gathered our gorgeous ingredients, it’s time to put my ‘Cut, Cook, Taste’ philosophy into action! Baking a perfect creme brulee cheesecake is all about patience and technique, especially when you want that incredibly creamy filling. Don’t rush these steps, and you’ll end up with a showstopper that tastes better than anything you could buy!
Preparing the Crust and Preheating for Baked Cheesecake Dessert
First things first, we need that oven ready! Preheat your oven nice and steady to 325°F (160°C). While that warms up, take your graham cracker crust mixture and press it down firmly into that 9-inch pan. We are going to give it a quick head start: bake that crust for exactly 10 minutes. While it’s baking, this is the perfect time to wrap your springform pan. I use heavy-duty double layers of foil—wrap it tight, all the way up the sides! This tight wrapping is crucial because we are using a water bath, and we absolutely do not want any leaks ruining our crust.
Mixing the Smooth Creme Brulee Cheesecake Batter
Here is where we avoid the lumps! Grab your softened cream cheese and beat it until it’s perfectly smooth *before* you even think about adding sugar or flour. Once that’s done, gradually beat in the rest of your sugar, the flour, the salt, and that amazing vanilla bean paste. See how smooth that looks? Now, the eggs. This is key for a rich vanilla dessert: add them *one at a time*. Beat it just until the yolk disappears before adding the next one. Once the eggs are incorporated, gently mix in the heavy cream until the batter looks flawless. Stop mixing the second it looks combined—overmixing makes a tough, cracked cheesecake!
Baking and Cooling the Creme Brulee Cheesecake
Time for the water bath, or bain-marie. Carefully set your foil-wrapped pan inside a larger roasting pan. Pour very hot water into the larger pan until it comes about halfway up the sides of your cheesecake pan. Bake this whole setup for about 60 to 75 minutes. When the edges seem set but the very center still wobbles slightly—that’s your cue! Turn the oven OFF. Seriously, turn it off! Crack the door open just a hair, and let the cheesecake cool down gradually inside the oven for a full hour. This slow cooling prevents temperature shock which causes those awful cracks. After an hour, pull it out, let it finish cooling on the rack, and then cover it up and chill it until it’s firm—I demand a minimum of 6 hours, but overnight is best for the ultimate creme brulee cheesecake experience.
Mastering the Caramelized Sugar Top Dessert Finish
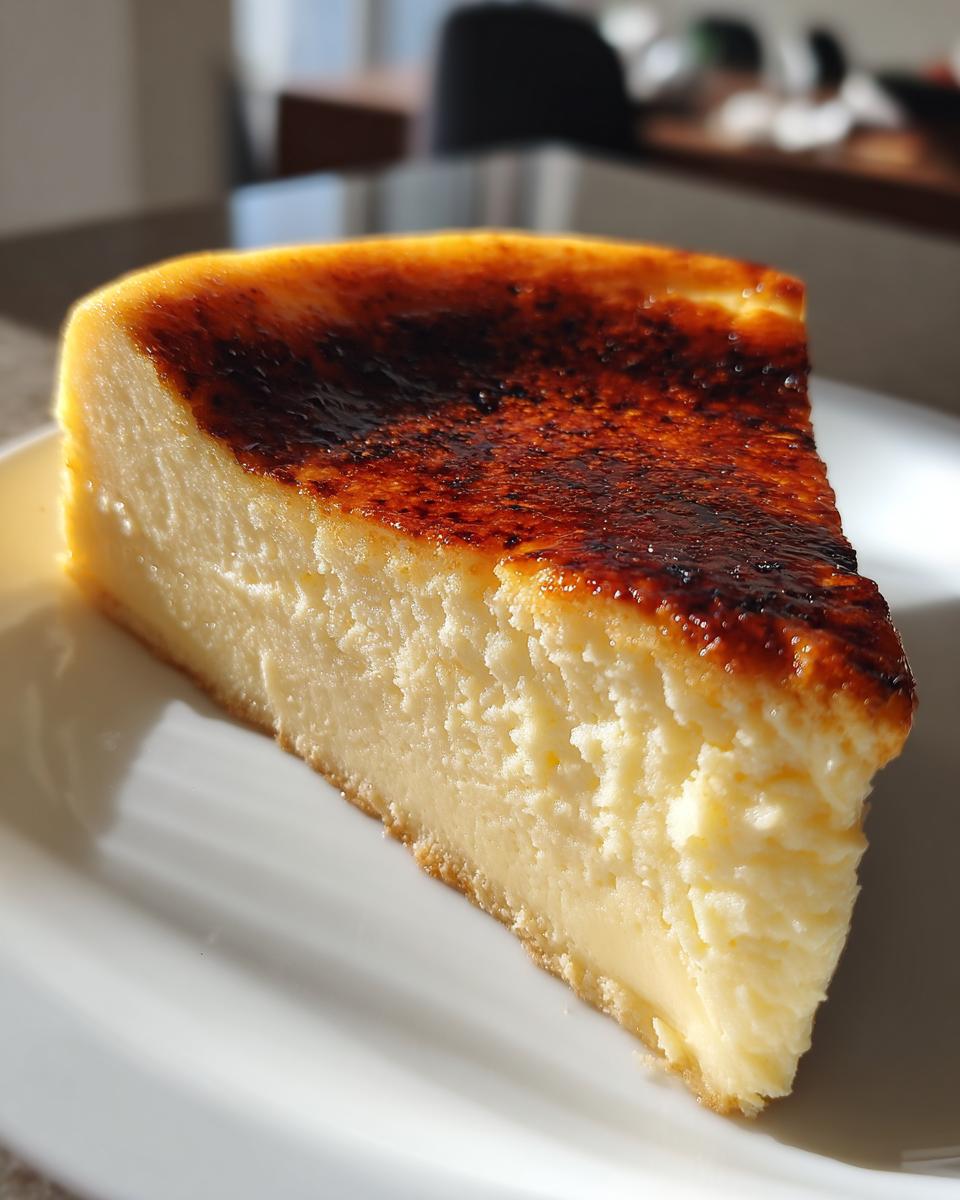
This is it! The grand finale! Getting that perfect, glass-like, shatteringly crisp sugar top is what transforms a great cheesecake into a true creme brulee cheesecake. You want that loud CRACK when you tap it with your spoon. After chilling the cheesecake overnight, sprinkle the remaining 1/2 cup of sugar over the chilled surface. Keep that layer even—it’s so important for an even melt!
Using a Kitchen Torch for the Perfect Brûlée
If you have a kitchen torch, use it! This is the best way to master how to torch sugar topping. Hold the torch about three inches from the surface and keep the flame moving constantly in small circles. You need to watch it like a hawk! You are working toward a rich, deep amber color. If you stop moving, it will instantly burn and taste bitter, which would be a tragedy after all that work on your creamy filling!
Broiler Alternative for the Caramelized Sugar Top Dessert
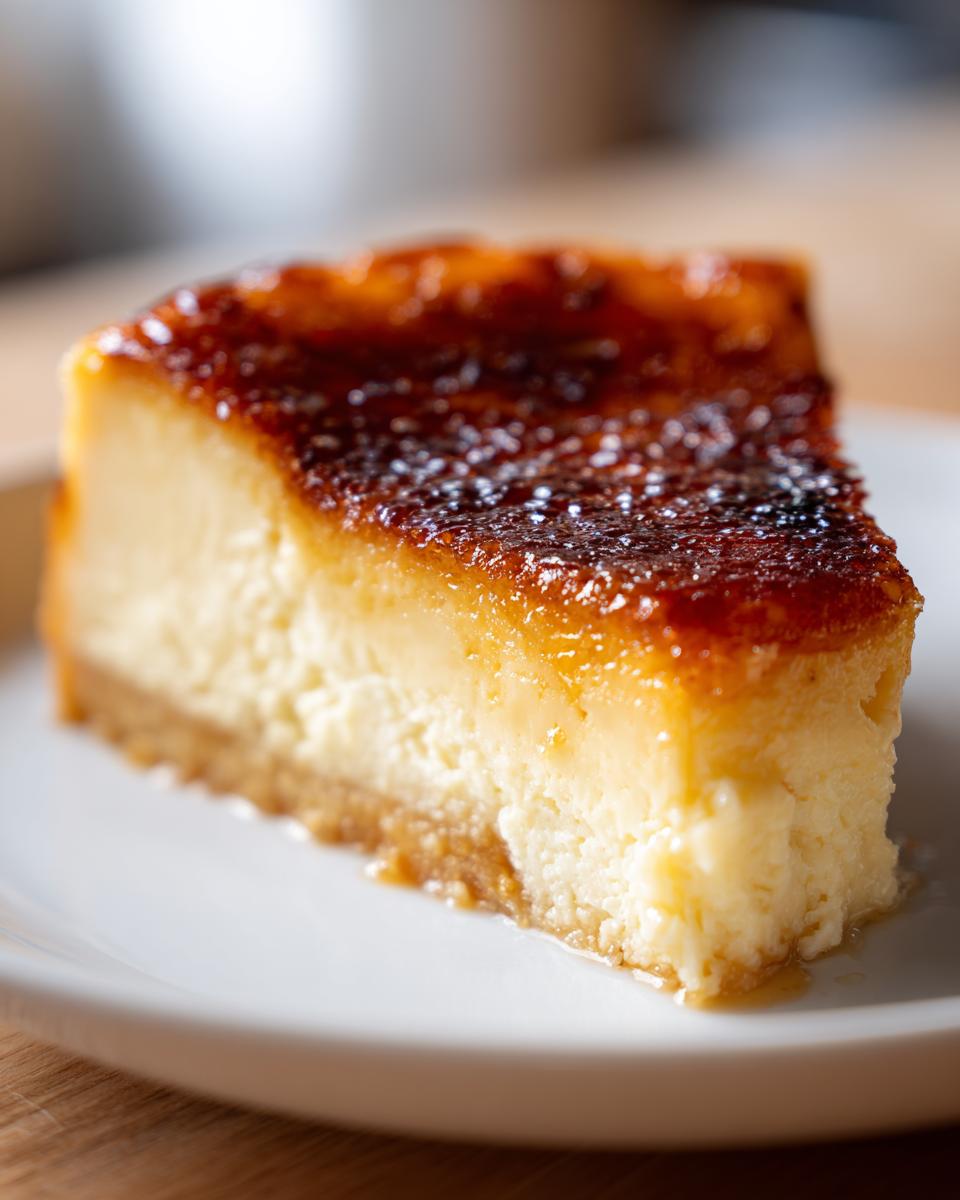
Don’t stress if you don’t have a torch; we have a backup plan for that caramelized sugar top dessert finish. Set your oven rack close to the broiler—the absolute highest setting. Place the cheesecake on a baking sheet and slide it in just for a minute or two. You must stay right there staring at it, or it will burn! Pull it out the second it turns golden brown. Then, chill it for about 15 minutes before slicing so that beautiful new crust has time to harden up solidly.
Tips for Success with Your Creme Brulee Cheesecake Recipe
I’ve made this creme brulee cheesecake so many times now, and I’ve picked up a few tricks that just make the whole process smoother. Remember, baking takes patience, which aligns perfectly with my whole ‘Cut, Cook, Taste’ philosophy!
First, when you are getting ready to slice this gourmet cheesecake, don’t just pull the knife out. Wipe your knife clean, run it under hot water, and dry it completely between *every single slice*. That seriously helps keep your vanilla bean cheesecake layers looking pristine and gorgeous.
Also, a huge tip from my notes: if you’re planning ahead—which is smart for an impressive party dessert—you can bake and chill the whole thing for up to four days! Just skip the torching until about an hour before you plan to serve it.
We hate burning the sugar topping, so knowing you can make it ahead reduces the last-minute rush when you’re using that kitchen torch. It’s all about making these decadent recipes work for a real home cook’s schedule!
Make Ahead Desserts and Storing Your Creme Brulee Cheesecake
One of my favorite things about making a spectacular creme brulee cheesecake is that it is a gift to a busy host! This falls right into my category of wonderful make ahead desserts. You can absolutely prepare the whole thing—the crust, the creamy filling, the baking, and the chilling—and have it ready to go for days!
Here is the crucial timing detail you need to know: You must let that rich vanilla dessert chill thoroughly, which means at least six hours but preferably overnight. This solid chilling time is what sets the cheesecake structure so it doesn’t fall apart when you unbuckle the springform pan.
But, about that gorgeous, crackly topping! You never ever want to torch the sugar until you are ready to serve it. Once you caramelize that sugar, it absorbs moisture from the air and the cheesecake itself really quickly. If you torch it too early, you end up with a sticky, gooey puddle instead of that satisfying crunch. So, do the bulk of the work ahead of time, keep the whole cheesecake wrapped tightly in the fridge, grab that kitchen torch, and *then* get that sugar golden about 30 minutes before your guests arrive. It gives them that “just finished” wow factor!
Popular Variations: Mini Creme Brulee Cheesecakes and Bars
I see so many of you searching for smaller, easier-to-serve versions, and honestly, I get it! Sometimes you don’t want a whole giant cheesecake staring at you in the fridge. Since this creme brulee cheesecake recipe is so popular, I wanted to share how easily you can adapt it for parties or simple portion control.
My dad always loved making big sheet pan meals for gatherings, so I naturally gravitated toward easy serving formats, too. Converting the classic recipe into either mini creme brulee cheesecakes or bars makes cleanup a breeze!
Making Mini Creme Brulee Cheesecakes
To turn this into mini creme brulee cheesecakes, just skip the water bath and use a standard muffin tin lined with paper liners. Press the crust mixture right into the bottom of each liner—just a little bit, not up the sides. After you pour the creamy filling in, the baking time drops dramatically! You’re usually looking at just 18 to 22 minutes at that same 325°F (160°C). Watch them carefully; when they are set, they are done. You can still torch the tops individually one by one for that incredible caramelized top!
Easy Creme Brulee Cheesecake Bars with a Crunchy Glaze
If you want something you can cut into squares and handle easily (perfect for a crowd!), the bar format is fantastic. Instead of the round springform pan, you’ll want to use a 9×13 inch baking dish. Line that heavy pan with parchment paper, making sure you leave some overhang on the sides so you can lift the whole thing out later—that’s the secret to perfect, clean cuts!
The baking time for the bars is a little different because the depth changes. You’ll need to bake them longer than the minis, probably closer to an hour, but definitely watch that center wiggle. When you’re done chilling, just lift the whole block out using those parchment handles, slice it into squares, and then you can torch the top of each individual bar. If you want to see another excellent version focused just on bars, you should definitely check out this guide on creme brulee cheesecake bars!
Frequently Asked Questions About Creme Brulee Cheesecake
It’s totally normal to have questions when you tackle a dessert fusion this magnificent! I learned so much perfecting my ultimate creme brulee cheesecake, and I want to make sure your experience is flawless. Here are the things I get asked most often about getting that perfect creamy texture and that signature crackle!
Can I make a no bake creme brulee cheesecake?
That’s a great question, especially when we talk about easy desserts! For this specific recipe—the kind that has that deep, rich vanilla flavor and the structural integrity to hold up to the torch—baking is really necessary. The eggs and flour we use in the filling need heat to set properly to achieve that truly classic, creamy cheesecake texture. If you spot a no bake creme brulee cheesecake recipe, know that it will be softer, more like a chilled mousse, which is tasty in its own right, but it won’t replicate this baked version!
What is the best sugar for the caramelized sugar top dessert?
For that incredible caramelized sugar top dessert, you absolutely need standard granulated sugar. Don’t try to use brown sugar here, even though I love it in the filling! Brown sugar contains molasses, which burns way too fast under the heat of the torch or broiler, and you’ll end up with bitter, black spots rather than that beautiful, even amber shell.
You only need a very thin, even layer of plain white granulated sugar for the best results. Trust me on this one—precision matters right at the end for that perfect snap!
How do I prevent my baked cheesecake dessert from cracking?
This is the eternal struggle of the cheesecake baker! My top advice for ensuring your baked cheesecake dessert stays smooth and crack-free is a three-pronged attack. First, make sure those ingredients are room temperature so the batter mixes smoothly with no lumps. Second, always use that water bath! It introduces steam into the oven environment which stops the edges from setting too fast. And finally, the cooling phase is non-negotiable: cool it slowly in the turned-off oven with the door cracked open. Do all three of those things, and you’ll have a perfectly creamy cheesecake with minimal fuss.
Serving Suggestions for This Gourmet Cheesecake
Even though this gourmet cheesecake truly stands on its own as an impressive party dessert, sometimes I like to offer just a little something extra on the side! You want accompaniments that enhance that rich vanilla bean flavor without overwhelming the beautiful crunch of the caramelized sugar top, right? We worked hard to get that balance!
For a beautiful pop of color and fresh acidity, you simply cannot go wrong with fresh berries. I usually have a bowl of raspberries or sliced strawberries on hand. They just look gorgeous piled neatly next to a slice of the dense cheesecake on the plate.
If you are serving this after a heavier meal, I sometimes skip the massive dollop of whipped cream and just do a very fine dusting of high-quality unsweetened cocoa powder over the plate—not the cheesecake itself, but the plate space around it. It offers a lovely, slightly dark contrast against the golden brown sugar top. It’s simple, elegant, and really lets that creamy element shine through. Remember my philosophy: Cut, Cook, Taste! Keep it simple so you can enjoy the taste you created!
Estimated Nutritional Data for Creme Brulee Cheesecake
You know, when I talk about these decadent dessert recipes, people always want to know the damage, right? I focus on flavor first, but it’s good to have an idea of what you’re sinking your fork into! This data is based on one standard slice of our beautiful creme brulee cheesecake, made exactly as written.
Remember, this is my estimate based on the standard ingredients I use in my kitchen—since we are talking about homemade goodness, these numbers can shift depending on your specific cream cheese or sugar used! But this usually gives us a great bench mark for this gourmet cheesecake.
- Serving Size: 1 slice
- Calories: Approximately 450
- Sugar: Around 35g (Hey, that caramelized top adds up!)
- Fat: About 28g
- Protein: Roughly 8g
- Carbohydrates: Around 42g
So, yes, it’s a treat—but goodness gracious, is it worth every single rich, vanilla-bean-infused bite! This is definitely not an everyday item, but rather a perfect, impressive party dessert for when you want to pull out all the stops!
Share Your Creme Brulee Cheesecake Creations
Well, that’s it! We’ve walked through every step to create what I truly believe is the ultimate rich vanilla dessert—the show-stopping creme brulee cheesecake. Now, I’m handing the whisk over to you! I absolutely love hearing from people who’ve tried my family-tested recipes, and this one always gets rave reviews.
When you finish torching that sugar and finally take that first bite—I want to know all about it! Did your sugar crackle perfectly? Did your guests swoon over that incredibly creamy texture? Don’t be shy!
Please head down to the comments section immediately after giving this recipe a try. If you loved the marriage of the cheesecake and the brûlée, please give it a solid 5 stars! Your feedback helps me know which of my recipes to keep updating and sharing with everyone here on Cut Cook Taste.
And if you took a picture of your perfectly golden, cracked masterpiece, please tag me on social media! Seeing your versions of this dessert helps me feel like I’m right there in the kitchen with you, making memories around the dinner table, just like my grandmother taught me. Happy baking, friends!
PrintClassic Baked Creme Brulee Cheesecake with Torched Sugar Top
You make this decadent dessert by combining a creamy vanilla bean cheesecake with the signature crisp, caramelized sugar crust of a traditional creme brulee. This recipe yields an impressive, rich vanilla dessert.
- Prep Time: 30 min
- Cook Time: 75 min
- Total Time: 8 hours 45 min
- Yield: 12 servings 1x
- Category: Dessert
- Method: Baking
- Cuisine: American
- Diet: Vegetarian
Ingredients
- 1 1/2 cups graham cracker crumbs
- 1/4 cup granulated sugar (for crust)
- 6 tablespoons unsalted butter, melted
- 3 (8 ounce) packages cream cheese, softened
- 1 1/2 cups granulated sugar (for filling)
- 1/4 cup all-purpose flour
- 1 teaspoon vanilla bean paste
- 1/4 teaspoon salt
- 4 large eggs, room temperature
- 1/2 cup heavy cream
- 1/2 cup granulated sugar (for topping)
Instructions
- Preheat your oven to 325°F (160°C). Wrap the outside of a 9-inch springform pan tightly with heavy-duty aluminum foil.
- Prepare the crust: Mix graham cracker crumbs, 1/4 cup sugar, and melted butter. Press the mixture firmly into the bottom of the prepared springform pan. Bake for 10 minutes. Let cool slightly.
- Prepare the filling: In a large bowl, beat the softened cream cheese until smooth. Gradually beat in 1 1/2 cups sugar, flour, vanilla bean paste, and salt until just combined. Do not overmix.
- Beat in the eggs one at a time, mixing only until each egg is incorporated. Mix in the heavy cream until the batter is smooth.
- Pour the cheesecake batter over the cooled crust. Place the springform pan inside a larger roasting pan. Carefully pour hot water into the roasting pan until the water reaches halfway up the sides of the springform pan (this is a water bath).
- Bake for 60 to 75 minutes, or until the edges are set and the center has a slight jiggle.
- Turn off the oven, crack the door open slightly, and let the cheesecake cool in the oven for 1 hour.
- Remove the cheesecake from the water bath and let it cool completely on a wire rack. Once cool, cover and chill in the refrigerator for at least 6 hours, or preferably overnight.
- When ready to serve, remove the cheesecake from the pan. Sprinkle an even, thin layer of the remaining 1/2 cup sugar over the top.
- Caramelize the sugar using a kitchen torch until it melts and turns deep amber. Alternatively, place the cheesecake under a preheated broiler for 1-2 minutes, watching constantly to prevent burning.
- Chill for 15 minutes after torching to allow the sugar crust to harden before slicing and serving.
Notes
- For easier slicing, run a thin knife under hot water and wipe dry between each cut.
- If you are planning ahead, you can prepare this dessert as part of your meal planning; it keeps well refrigerated for up to 4 days before torching.
- If you do not have a kitchen torch, using the broiler works, but watch carefully as the sugar burns quickly.
Nutrition
- Serving Size: 1 slice
- Calories: 450
- Sugar: 35g
- Sodium: 250mg
- Fat: 28g
- Saturated Fat: 17g
- Unsaturated Fat: 11g
- Trans Fat: 0.5g
- Carbohydrates: 42g
- Fiber: 1g
- Protein: 8g
- Cholesterol: 110mg