
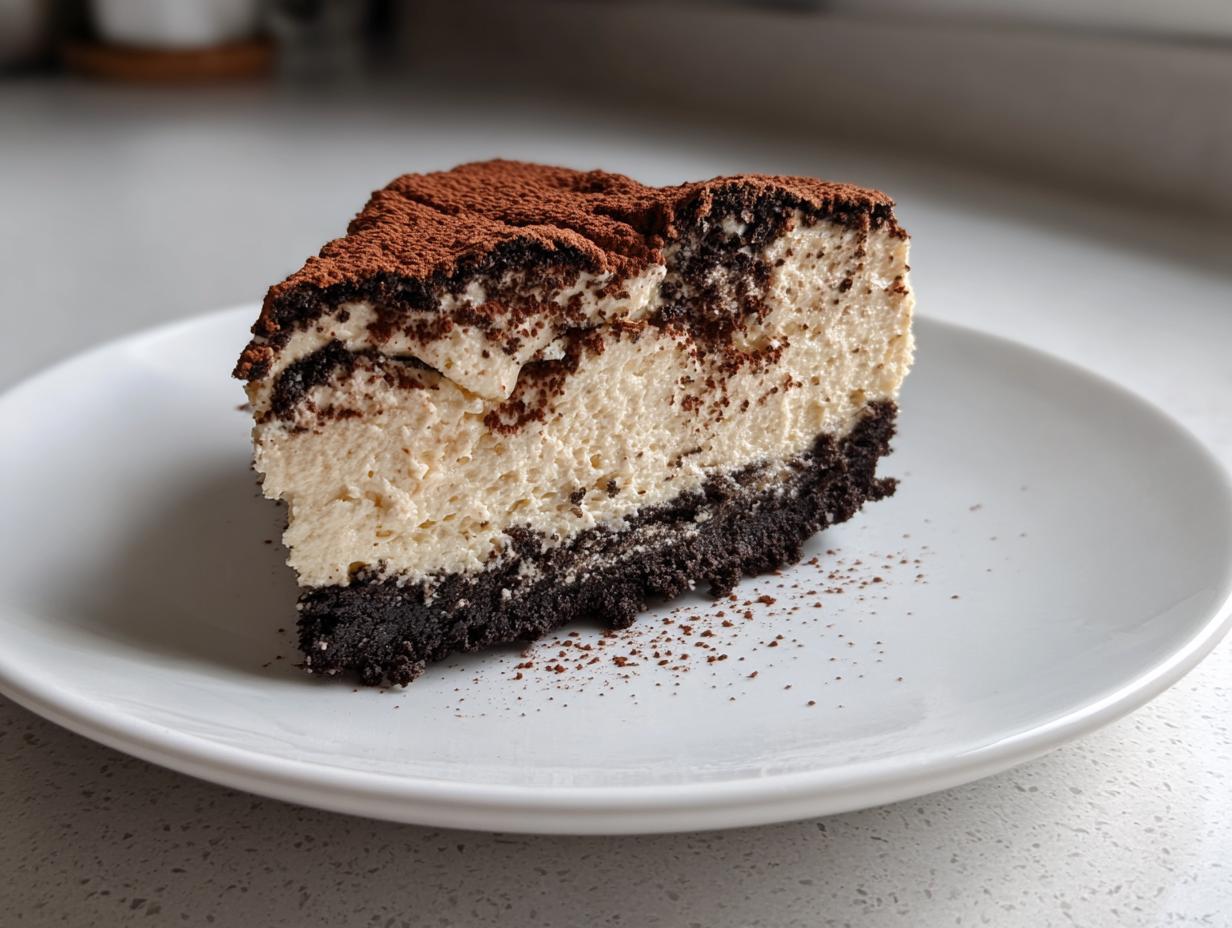

Oh my goodness, have you ever tried to mash up two of the greatest desserts in history? Well, I did, and the result is pure magic! We are talking about the tiramisu cheesecake, folks. Imagine the sophisticated, bold coffee flavor of a classic Italian tiramisu wrapped up inside the luscious, creamy body of the best cheesecake you’ve ever had. It sounds fancy, I know, but trust me on this one!
I’m Sarah, and while I spent years learning the ropes in a real kitchen—from my grandma’s pie crusts to my dad’s barbecues—I’m here to prove you don’t need a culinary degree to nail this showstopper. That’s why the recipe I’m sharing today is my super reliable, can’t-mess-it-up, No-Bake Tiramisu Cheesecake version. It gives you all the elegance with none of the oven drama!
- Why This No-Bake Tiramisu Cheesecake Recipe Works (Easy Tiramisu Cheesecake)
- Gathering Ingredients for Your Tiramisu Cheesecake Recipe
- Step-by-Step Instructions for the Layered Cheesecake Dessert
- Expert Tips for the Best Tiramisu Cheesecake
- Variations on the Tiramisu Cheesecake
- Storage and Serving Suggestions for Your Tiramisu Cheesecake
- Frequently Asked Questions About Tiramisu Cheesecake Recipe
- Quick Reference: Tiramisu Cheesecake Recipe Details
- Nutritional Estimates for This Creamy Cheesecake Recipe
- Share Your Homemade Tiramisu Cheesecake Creations
Why This No-Bake Tiramisu Cheesecake Recipe Works (Easy Tiramisu Cheesecake)
Honestly, this recipe is my go-to when I need something that looks incredibly complicated but is actually a breeze. Life gets busy, right? I want those sophisticated Italian flavors without babysitting a water bath or worrying about cracks! For those of you looking for quick, reliable cooking inspiration beyond dessert, make sure you check out my easy turmeric rice recipe, but today, we focus on the coffee and cream!
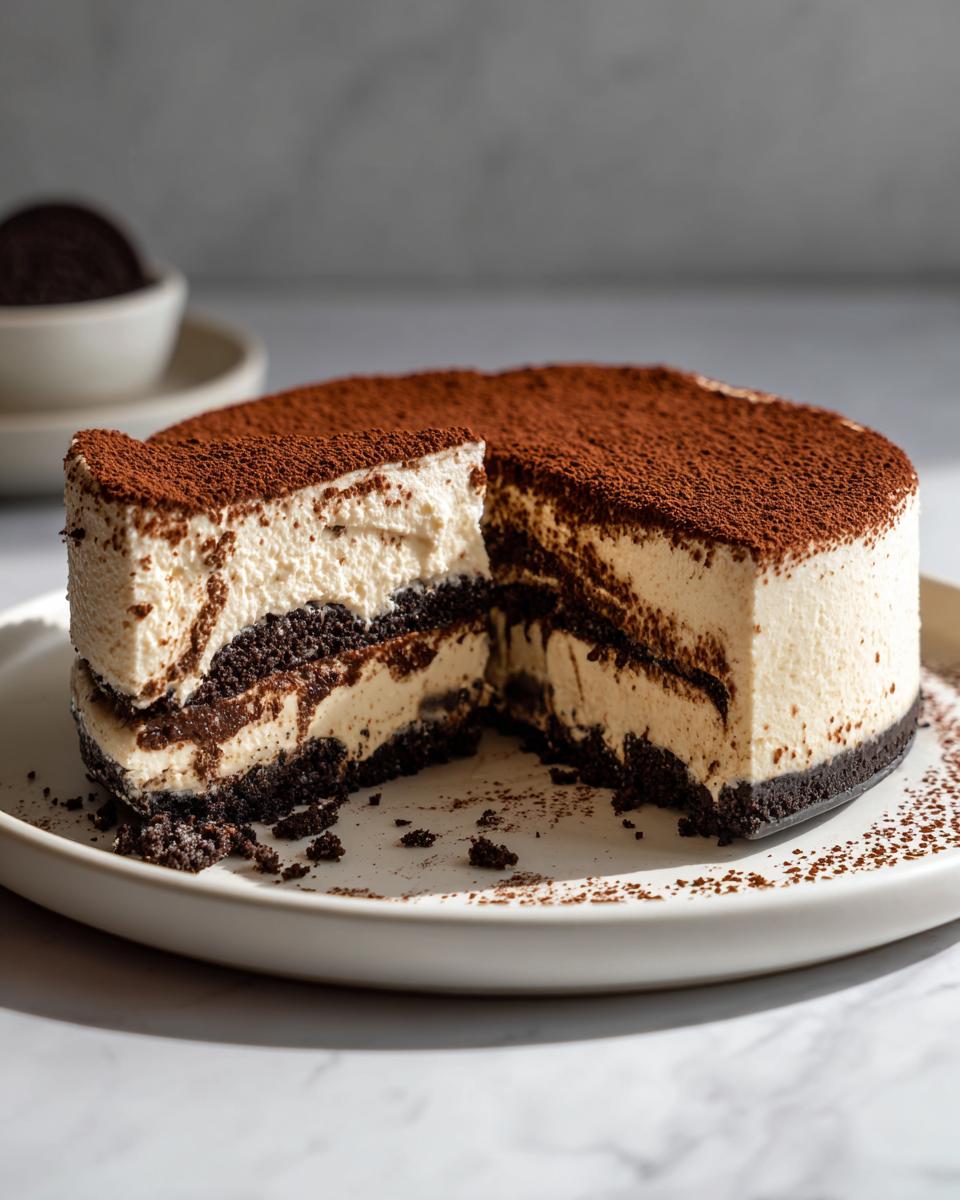
- It delivers the pure elegance of an Italian fusion dessert without turning on the oven—big win!
- We use simple pantry stars like Oreos and cream cheese, making it accessible for any home baker.
- It perfectly balances that beloved coffee kick with creamy decadence, making it one of the best dessert recipes I’ve perfected.
Decadent Flavor Profile: Creamy Mascarpone Dessert
This isn’t just cheesecake; it’s an experience! When you bite into it, you get layers of flavor hitting you all at once. The richness comes from that double dose of cheese—both cream cheese for structure and gorgeous mascarpone for that silky, authentic mouthfeel. The espresso cuts right through that richness, giving you that necessary little zing. It’s intense, it’s elegant, and it tastes exactly like the tiramisu you dream about, just holding its shape perfectly!
Time-Saving No Bake Tiramisu Cheesecake
This is the real magic, folks. We skip the scary baking part entirely. Active prep time is tiny—seriously, maybe 30 minutes if you’re chatting while you work. That means you mix it up, layer those coffee-soaked ladyfingers, pop it in the fridge, and forget about it. It sets up beautifully in the cold! Forget fighting with cracks; you just get that perfect, smooth top ready for dusting. If you want an Easy Tiramisu Cheesecake, this is your answer.
Gathering Ingredients for Your Tiramisu Cheesecake Recipe
Okay, assembling the components for this tiramisu cheesecake is almost as fun as eating it. Because we aren’t baking, we need high-quality ingredients to shine through, especially since everything has to set up cold. Don’t worry about running all over town, though; these items are pretty standard! I’ve broken down exactly what you need for all four parts of this layered masterpiece so you can make one glorious shopping list.
For the Oreo Crust
We are skipping the graham cracker world for this one and diving straight into chocolate heaven. The chocolate cookie crust pairs so nicely with the coffee soak, trust me!
- 1 3/4 cups Oreo cookie crumbs (just crush up the whole cookie, that chocolatey filling is our binder!)
- 6 tablespoons unsalted butter, melted (Make sure it’s measured correctly here; no guessing!)
For the Coffee Soak and Ladyfingers
This is where the authentic tiramisu flavor really punches through. You need robust coffee here—not weak stuff!
- 1 package (7 ounces) ladyfingers (The classic Italian Savoiardi work best here.)
- 1/2 cup strong brewed espresso or coffee, cooled (It needs to be totally cool before dipping!)
- 1/4 cup coffee liqueur (Optional, but if you’re feeling celebratory, the Kahlúa or similar really elevates this!)
For the Creamy Mascarpone Filling (Tiramisu Cheesecake)
When we blend these cheeses, we are aiming for that signature smooth, slightly tangy filling. This combination is what makes it a true Creamy Mascarpone Dessert.
- 1 pound cream cheese, softened (And I mean *softened*. Take it out an hour before!)
- 8 ounces mascarpone cheese, softened (The star of the show, make sure it’s room temperature too.)
- 1 1/2 cups powdered sugar (Sifted if you want zero lumps, but I usually just whisk it well.)
- 1 teaspoon vanilla extract
- 1/4 cup strong brewed espresso or coffee, cooled (This is the second coffee element in the filling itself.)
For the Whipped Topping and Dusting
We finish this beauty off simply, just like traditional tiramisu. You want light, airy cream contrasting the dense cheesecake underneath.
- 1 cup heavy whipping cream
- 2 tablespoons granulated sugar
- Cocoa powder, for dusting (Don’t skimp here; you want a deep, dark color contrast!)
Step-by-Step Instructions for the Layered Cheesecake Dessert
Alright, let’s get this show on the road! Since this is a no-bake wonder, the workflow is actually super easy, but we have to respect the chilling times. If you try to rush the fridge, you end up with a soupy mess instead of a beautifully structured tiramisu cheesecake. I’ve tried rushing it—it never works! For those of you looking for similar layered treats, check out my easy no-bake Oreo dirt cake, but for now, focus on these steps!
Preparing the Base and Coffee Soak
First things first, let’s get that Oreo crust packed in tight. Mix your crumbs and melted butter until it looks like wet sand, then press it firmly into your springform pan. Pop that in the fridge for about 20 minutes while you make your soak. Now, for the ladyfingers: pour your cooled espresso (and liqueur, if you’re using it) into a shallow dish. Quickly dip each ladyfinger—I mean *quickly*! We want them moist with that beautiful coffee flavor, but if you let them sit, they turn to mush and you ruin the structure of the final tiramisu cheesecake.
Creating the Tiramisu Cheesecake Filling
This needs a good stand mixer or a sturdy hand mixer. Beat the cream cheese and mascarpone together until they are completely smooth—no lumps allowed! Then, slowly add your powdered sugar and vanilla. Once that’s mixed in, drizzle in that 1/4 cup of cooled espresso slowly, just until everything turns a uniform pale coffee color. Be careful not to whip it too long once the coffee is in, or your filling might get a little too soft when you spread it!
Assembling and Chilling the Tiramisu Cheesecake
Time to layer! Spread half of that creamy filling over your coffee-soaked ladyfingers. Then, lay down your second layer of dipped fingers. Try to keep them somewhat covering the cream, so you don’t have huge air pockets. Top it all with the remaining filling and smooth it out. Now, listen to me on this: Cover it loosely and put it in the fridge for a minimum of 6 hours. Honestly? Make this the day before! Overnight chilling is the secret to a sliceable, perfect tiramisu cheesecake.
Finishing Touches: Whipped Cream and Cocoa Dusting
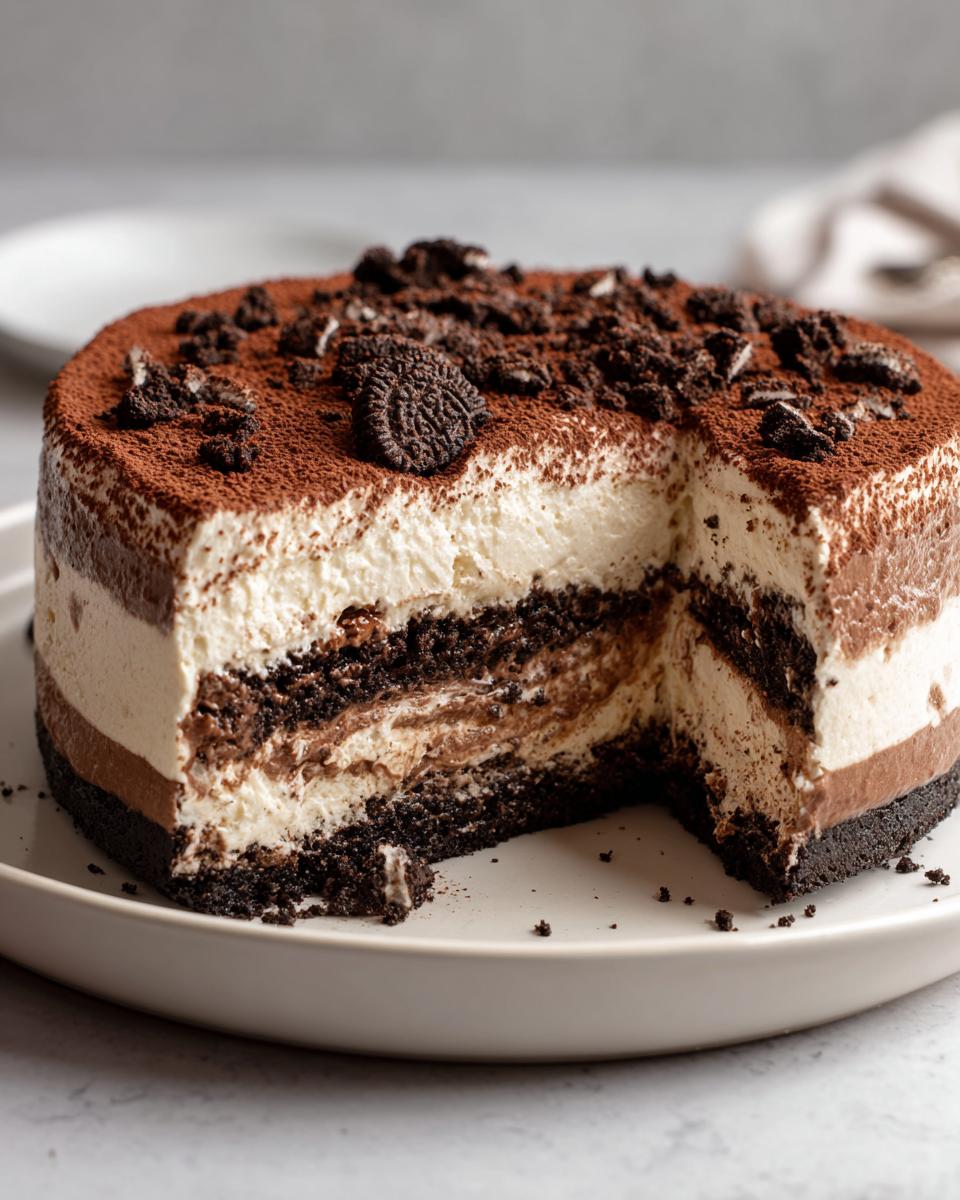
Once it’s rock solid, make your topping separately. Beat the heavy cream and granulated sugar until you have perfect stiff peaks—you want it able to stand up tall! Gently spread that cloud of cream over the set cheesecake. Then, grab your fine mesh sieve and dust the whole top generously with cocoa powder. That dark, dusty layer is what signals to your guests, “Yes, this is the good stuff.” Slice and enjoy!
Expert Tips for the Best Tiramisu Cheesecake
You know, when I’m developing these fusion recipes, I always think about what little details separate a *good* dessert from one that makes people stop talking just to take another bite. This tiramisu cheesecake is one of my proudest moments, and it’s all thanks to a few little tweaks I learned over trial and error. If you’re looking to elevate your collection of Best Dessert Recipes, keep these notes handy!
Achieving Perfect Creamy Mascarpone Dessert Texture
The biggest enemy of a smooth cheesecake filling is cold cheese! I can’t tell you how many times I’ve rushed this and ended up with tiny lumps of cream cheese floating around. I know you’re excited to get this delicious Creamy Mascarpone Dessert made, but please, pull out your cream cheese and mascarpone at least an hour before you start mixing. They need to be truly pliable. You should be able to press your finger into them easily. If they are stiff, you’ll never get that perfectly velvety texture we are after for this no-bake wonder.
Another thing: when you’re adding the liquid coffee to the cheese base, add it slowly while the mixer is on low. If you dump it all in at once, it can cause the fats in the cheese to seize up a bit. Slow and steady wins the race for smooth creaminess!
Coffee Intensity in Your Tiramisu Cheesecake Recipe
The coffee is what makes this taste like true tiramisu, not just a coffee-flavored cheesecake. If you use regular drip coffee, you’re going to get a much milder flavor. I really stress using strong brewed espresso or Moka pot coffee for this Tiramisu Cheesecake Recipe. It should be strong enough to almost taste bitter on its own because the sugar in the filling will balance it out.
Now, about that coffee liqueur—if you skip it, which is totally fine if you’re cooking for kids or avoiding alcohol, you need to make up for that depth of flavor. I usually add an extra tablespoon of strong cooled coffee to the main filling if I leave out the liqueur. If you *are* using it, make sure you use a good quality one. It adds warmth and complexity that makes this an amazing Espresso Coffee Dessert.
If you want to see how another fabulous dessert handles rich flavor profiles, take a peek at my tips for my sour cream coffee cake—it teaches similar lessons about balancing richness with tang!
Also for inspiration on decadent flavors, be sure to look at how others are making this incredible dessert over at Olives + Thyme; their version sounds amazing!
Variations on the Tiramisu Cheesecake
Part of the fun of cooking, especially when you’re blending two huge recipes into one amazing tiramisu cheesecake, is playing around with it! I love making small swaps to see how it changes the final product. While this no-bake version is my absolute favorite for reliability, sometimes you just need a change, or maybe you don’t have ladyfingers on hand. Don’t panic! We can tweak this Layered Cheesecake Dessert easily.
If you are interested in seeing how I handle adapting other rich desserts, you must check out my pumpkin cheesecake bars recipe; the principles of adapting pan size carry over well here too!
Making a Baked Tiramisu Cheesecake
Okay, I know I screamed about how easy the no-bake version is, but I get asked *all the time* if you can bake it. The answer is yes! If you want that denser, classic baked cheesecake texture instead of the mousse-like filling, you’ll need to treat it like a normal bake. That means ditching the Oreos and making a simple graham cracker crust, which you can pre-bake for 10 minutes.
The main difference is adding eggs to the filling—usually two large eggs will stabilize it enough for baking. And here’s the critical step: you absolutely must bake it low and slow, preferably in a water bath (or *bain-marie*). This prevents the top from cracking, which is super important when you want that elegant presentation. Expect a bake time around 50 to 60 minutes after the ladyfinger layer is set. For more ideas on baking this style, peek at the Baked Tiramisu Cheesecake inspiration!
Substitutions for Ladyfingers in Your Tiramisu Cheesecake
Sometimes the grocery store runs out, or maybe you just don’t like the slightly puffy texture of ladyfingers when they soak up coffee. Perfectly okay! You can absolutely use cookies for that bottom layer of fun in your tiramisu cheesecake recipe. My personal preference outside of ladyfingers would be a thin layer of shortbread cookies or even just plain vanilla wafers.
You still dip them in the espresso soak, but be even quicker! Cookies tend to absorb liquid faster than ladyfingers do. If you use a thicker cookie, like a shortbread, you might find the texture yields a firmer bottom layer—less light and airy, but still delicious. It changes the overall experience from classic tiramisu to something more like a truly decadent layered cookie dessert, but it works beautifully!
Storage and Serving Suggestions for Your Tiramisu Cheesecake
You’ve done the work, you’ve chilled it perfectly, and now you have this unbelievably Elegant Dessert ready to present. But what happens next? Should you leave it out? How long will it actually last in the fridge? Don’t let your gorgeous Tiramisu Cheesecake go to waste! Protecting that creamy mascarpone filling matters, especially after all that hard work getting the layers just right.
Since this is a no-bake recipe filled with dairy, we treat it like any other rich cheesecake. I always prefer making these a day ahead because the flavors meld together beautifully overnight, but knowing how to manage leftovers is just as important as the recipe itself!
How Long to Store Tiramisu Cheesecake
Because we skipped the baking, the texture is more delicate than a traditional New York style bake. You must keep this lovely creation chilled the entire time. I find that wrapping the pan—or the leftovers—tightly in plastic wrap is essential. If you don’t cover it well, it’s going to soak up every single smell lurking in your refrigerator. Trust me, you don’t want your rich coffee dessert smelling like last night’s garlic chicken!
Stored properly in an airtight container or well-wrapped in the springform pan, this Tiramisu Cheesecake will stay perfectly firm and fantastic for up to four days. Any longer than that, and the ladyfingers start getting a little too soft for my liking, even though the flavor will still be good.
Pairing This Italian Fusion Dessert
This Italian Fusion Dessert is incredibly rich, so you want to skip heavy desserts afterward! Right after you dust it with that gorgeous cocoa powder, the perfect accompaniment is a really strong, hot espresso. It just doubles down on that authentic flavor profile we worked so hard to achieve in the filling.
If you’re serving this after a big holiday meal, you might want something lighter on the palate to balance the richness. A nice, sharp dessert wine works wonderfully, or if you’re looking for something fruity to cut through the cream, I highly recommend pairing it with a light, tangy fruit salad—nothing too sweet! You can find some great ideas for simple, bright accompaniments over on my easy creamy smoked salmon dip recipe; it serves as a lovely counterpoint to this heavy dessert!
Frequently Asked Questions About Tiramisu Cheesecake Recipe
I get so many messages from people who have made this Tiramisu Cheesecake Recipe, which is the best compliment! Because this dessert combines cheesecake structure with tiramisu flavors, people always have a few great questions. I tried to cover everything based on what you usually ask me in the comments section. Addressing these points helps everyone make the absolute best Layered Cheesecake Dessert imaginable!
Can I make this Tiramisu Cheesecake without coffee liqueur?
Absolutely, you can! I totally get it; sometimes we don’t have liqueur on hand, or we prefer to keep things alcohol-free. If you skip the liqueur, you aren’t losing much complexity since the dessert flavor comes mostly from the strong coffee anyway. Just make sure you boost the coffee flavor in the filling slightly. I suggest adding an extra tablespoon of that chilled, strong espresso to the cheese mixture where the liqueur would have gone. It keeps that wonderful, punchy coffee flavor that makes this an authentic Espresso Coffee Dessert without any issues.
What is the best way to get a clean slice of Tiramisu Cheesecake?
This is crucial, especially since we have that delicious, gooey layer of ladyfingers inside! Because this is a no-bake version, it needs to be completely set (refrigerated overnight is ideal). When it’s time to cut, forget sawing away at it! You need heat. Heat up a really sharp, thin knife under very hot tap water for about 15 seconds. Wipe it dry quickly, and then slice straight down through the cheesecake just once. Don’t wiggle!
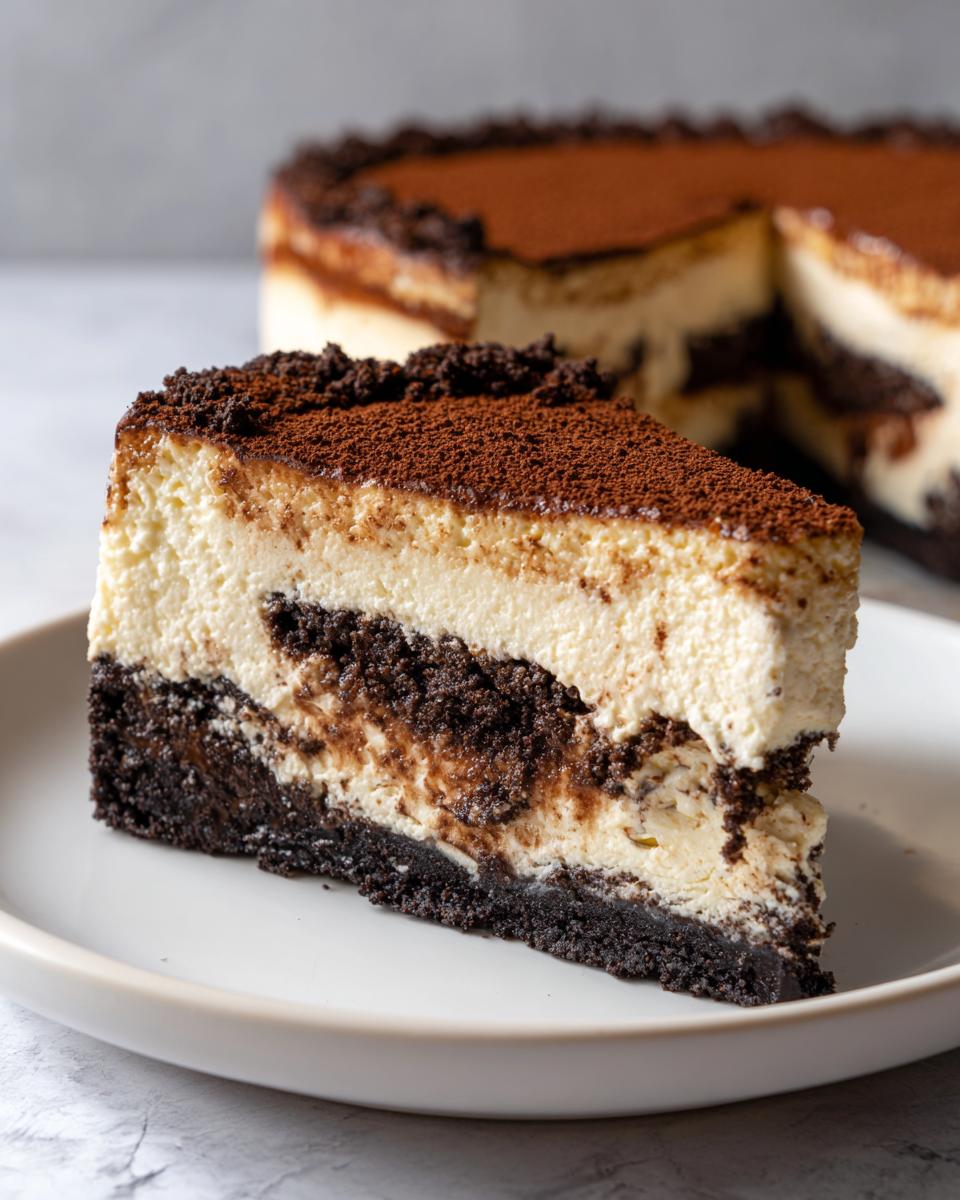
Quickly rinse that knife, reheat it, wipe it dry, and cut the next slice. Repeating this heating process between every single slice is the secret to getting those beautiful, defined layers and a gorgeous slice to bring out when you’re serving this Elegant Dessert. It keeps the cocoa dust and whipped topping neat and tidy!
Is this a good Holiday Cheesecake Idea?
Oh, yes! I think it might be one of the best Holiday Cheesecake Ideas out there! Since it’s no-bake, it takes stress off your oven during busy holidays like Christmas or Thanksgiving when you’re making big roasts or baked sides. Plus, the dark cocoa dusting against the white whipped cream looks instantly festive and fancy. It carries that rich, warming spice profile people crave in the cooler months, even though it’s based on an Italian summer favorite. It’s rich, it’s impressive, and you can make it completely ahead of time. It’s a total crowd-pleaser that saves you kitchen real estate!
If you need other ideas for making lighter, refreshing sides for those big holiday meals, check out my cheesecake fruit salad recipe—it serves as a lovely counterpoint to this heavy dessert!
Quick Reference: Tiramisu Cheesecake Recipe Details
I know sometimes you just need the facts quick—maybe you’re running into the store or just checking if you have enough time to whip this up before company arrives. I totally get it! No need to hunt through all my rambling stories to find out how long this takes. Here’s the super-fast rundown on what you’re looking at for this fantastic No Bake Tiramisu Cheesecake.
This is all about efficiency, folks. We want to prove that a truly decadent, Layered Cheesecake Dessert doesn’t require hours over a hot stove. If you’re looking for more reliable, quick-reference recipes, head on over to my main blog page!
- Preparation Time (Active): 30 minutes. That’s the time you are actually mixing and layering—incredibly fast for a showstopper dessert!
- Total Time (Including Chill): 6 hours 30 minutes. This sounds long, but 6 of those hours are hands-off chilling time in the fridge!
- Servings Yield: This recipe makes 10 generous slices. Keep in mind, this is a rich one, so 10 slices is usually plenty!
- Method Used: Absolutely No-Bake!
- Style: Italian Fusion Dessert (The best kind of hybrid, if you ask me.)
See? Easy planning! You can easily fit this into a busy schedule just by starting it right after dinner the night before.
Nutritional Estimates for This Creamy Cheesecake Recipe
Now, I want to be super honest here. When you are making a decadent, rich treat—especially one that marries cheesecake with mascarpone and an Oreo crust—it’s not going to taste like celery sticks! This Tiramisu Cheesecake is pure indulgence, and that’s okay sometimes.
These numbers are rough estimates based on the ingredients I listed above, using standard supermarket products. They are for guidance only, okay? If you use low-fat cream cheese or skip the liqueur, your numbers will change dramatically. I’m not a nutritionist, I’m just a passionate home cook sharing a fantastic dessert, so take these estimates with a little grain of salt!
- Serving Size: 1 slice (A generous one, I’ll warn you!)
- Estimated Calories: 450 per slice
- Total Fat: About 30 grams
- Saturated Fat: Roughly 18 grams (That’s where the richness from the cheeses comes from!)
- Total Carbohydrates: Around 40 grams
- Sugar Content: Approximately 35 grams (It’s a dessert, you expect sugar!)
- Protein: About 8 grams
- Cholesterol: 95 milligrams
Remember, this is a special occasion dessert—a true showstopper! You add this to your rotation when you want something truly memorable, not an everyday snack. It’s part of that joy of home cooking, celebrating when you make something this rich and delicious!
Share Your Homemade Tiramisu Cheesecake Creations
Now comes the best part for me—hearing from you! I spent hours testing this Tiramisu Cheesecake Recipe to make sure it would shine in your kitchen, and I truly hope it brought a little bit of joy and decadence to your table. When you’ve made this beauty, please, please come back downstairs and tell me all about it!
Did the Oreo crust stay firm? Did you use the coffee liqueur or skip it? Did you dust it with extra cocoa powder like I love to do? Don’t just keep your success a secret! Drop five stars in the rating section below if this was the creamy, elegant dessert you were hoping for. Your feedback helps me know which family favorites to share next!
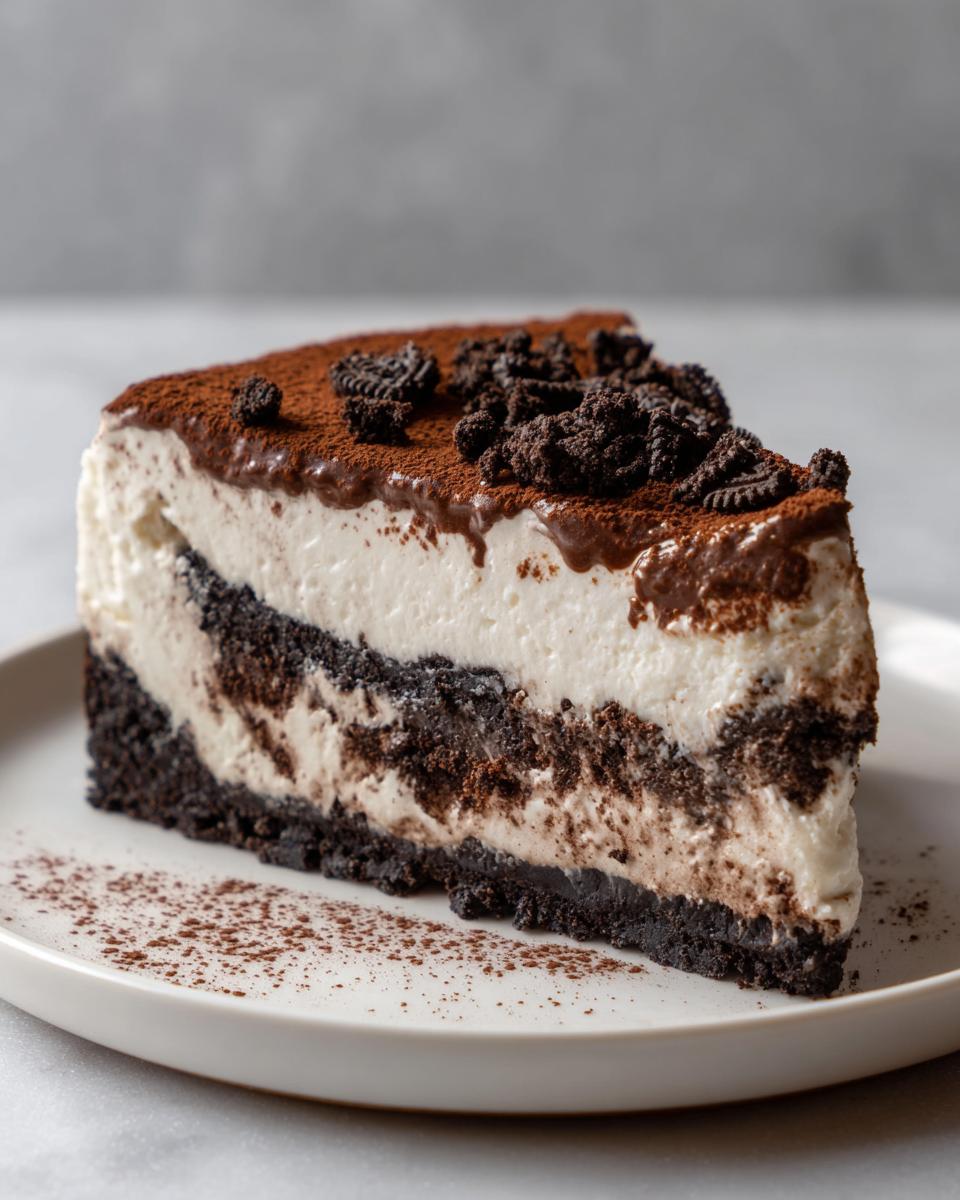
And if you snapped a picture of your finished, layered masterpiece—which I know you did because this is ridiculously photogenic—tag me on social media! Seeing my recipes come to life in your homes is why I opened this site in the first place. You can reach out with any final questions or ideas over on my contact page too. Happy baking, friends!
PrintNo-Bake Tiramisu Cheesecake with Oreo Crust
This recipe combines the creamy texture of cheesecake with the classic coffee and mascarpone flavors of tiramisu, featuring a simple no-bake method and a layer of coffee-soaked ladyfingers.
- Prep Time: 30 min
- Cook Time: 0 min
- Total Time: 6 hours 30 min
- Yield: 10 servings 1x
- Category: Dessert
- Method: No-Bake
- Cuisine: Italian Fusion
- Diet: Vegetarian
Ingredients
- 1 3/4 cups Oreo cookie crumbs
- 6 tablespoons unsalted butter, melted
- 1 pound cream cheese, softened
- 8 ounces mascarpone cheese, softened
- 1 1/2 cups powdered sugar
- 1 teaspoon vanilla extract
- 1/4 cup strong brewed espresso or coffee, cooled
- 1/4 cup coffee liqueur (optional)
- 1 package (7 ounces) ladyfingers
- 1/2 cup strong brewed espresso or coffee, cooled, for soaking
- 1 cup heavy whipping cream
- 2 tablespoons granulated sugar
- Cocoa powder, for dusting
Instructions
- Prepare the crust: Mix the Oreo crumbs and melted butter until combined. Press the mixture firmly into the bottom of a 9-inch springform pan. Chill the crust for 20 minutes.
- Prepare the coffee soak: In a shallow dish, combine the 1/2 cup cooled espresso/coffee and coffee liqueur, if using. Quickly dip each ladyfinger into the mixture, ensuring they are moist but not soggy. Arrange a single layer of soaked ladyfingers over the chilled crust.
- Make the cheesecake filling: In a large bowl, beat the softened cream cheese and mascarpone cheese until smooth. Gradually beat in the powdered sugar and vanilla extract until fully incorporated.
- Mix in the liquid: Slowly mix in the 1/4 cup cooled espresso/coffee until the filling is smooth and uniform. Do not overmix.
- Assemble the cheesecake: Spread half of the cheesecake filling evenly over the layer of soaked ladyfingers. Top with a second layer of dipped ladyfingers. Spread the remaining cheesecake filling over the top layer.
- Chill: Cover the pan loosely with plastic wrap and refrigerate for at least 6 hours, or preferably overnight, until the cheesecake is firm.
- Prepare the topping: In a separate bowl, beat the heavy whipping cream and granulated sugar until stiff peaks form.
- Finish and serve: Once the cheesecake is set, carefully remove the springform ring. Spread the whipped cream evenly over the top. Dust generously with cocoa powder before slicing and serving.
Notes
- If you skip the coffee liqueur, add 1 tablespoon of strong brewed coffee to the filling mixture for flavor.
- For a more stable crust, you can bake the Oreo crust at 350°F for 10 minutes before cooling and adding the ladyfingers.
- This dessert pairs well with a meal planning strategy for easy weeknight dinners, leaving weekends free for baking.
Nutrition
- Serving Size: 1 slice
- Calories: 450
- Sugar: 35
- Sodium: 250
- Fat: 30
- Saturated Fat: 18
- Unsaturated Fat: 12
- Trans Fat: 0.5
- Carbohydrates: 40
- Fiber: 1
- Protein: 8
- Cholesterol: 95