
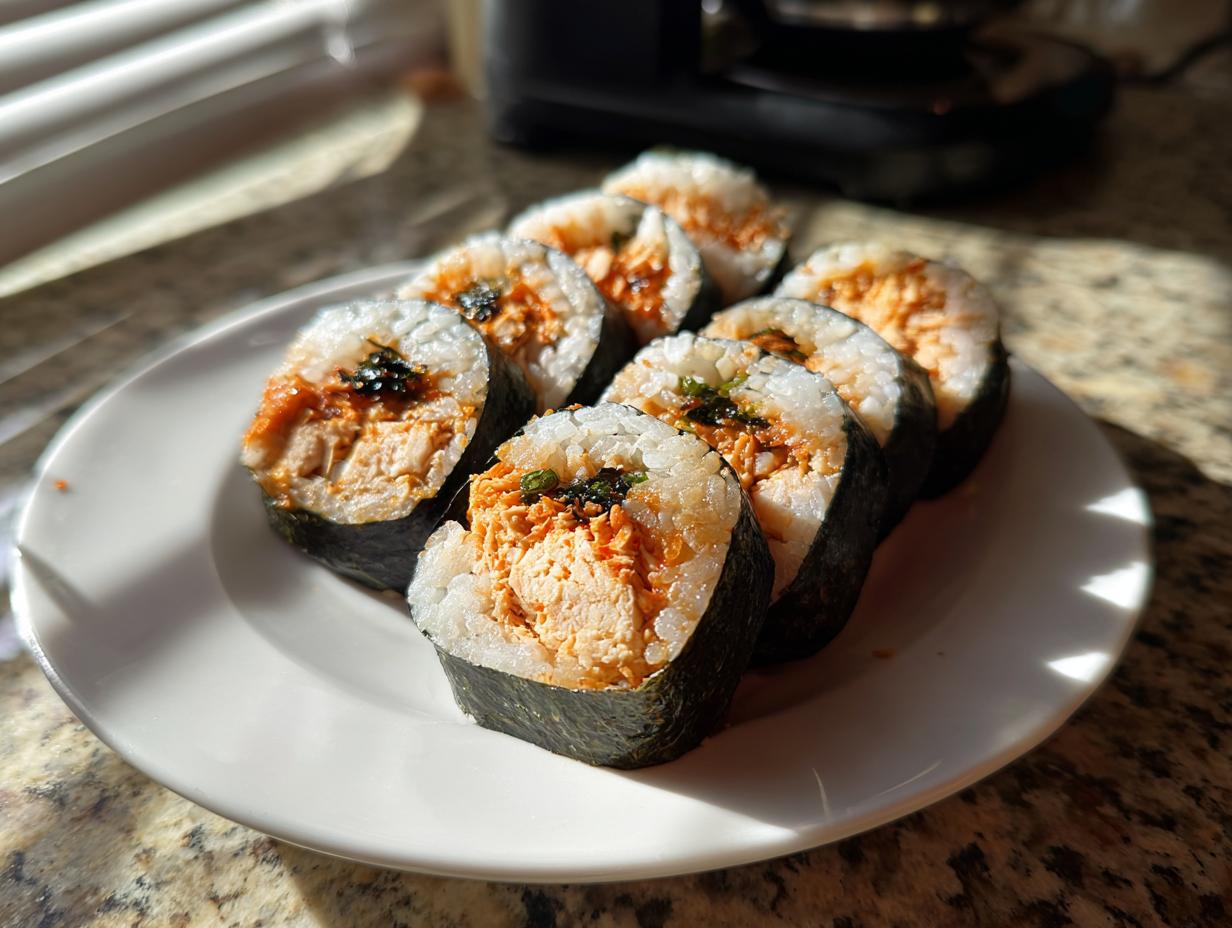

Are you ever hit with that powerful craving for something flavorful, satisfying, and wonderfully cool, but your weeknight schedule just won’t allow for elaborate cooking? I totally get it. That’s exactly why I perfected this recipe for **tuna kimbap**! Forget spending ages trying to source specialty ingredients; this simple seaweed roll is amazing comfort food straight from the pantry.
This is my go-to recipe for ultra-quick **Korean rice rolls**, focusing specifically on the vibrant, slightly fiery kick of the Spicy Tuna Kimbap variation. Trust me, as a busy home cook, I needed something reliable that comes together in under 20 minutes, and this recipe is it. Whether you’re packing **bento box ideas korean** style or just need a fast snack, this one is guaranteed to hit the spot every single time. If you love seeing what else is cooking up here on the blog, feel free to browse my full collection of recipes!
- Why This Spicy Tuna Kimbap Recipe Works for You
- Gathering Ingredients for Your Tuna Kimbap Recipe
- How to Make Kimbap Rolls: Step-by-Step Instructions
- Tips for Perfect Tuna Kimbap (Expert Advice)
- Serving Suggestions for Your Homemade Kimbap
- Storage and Reheating Instructions for Leftover Tuna Kimbap
- Frequently Asked Questions About Making Tuna Kimbap
- Nutritional Estimates for Spicy Tuna Kimbap
- Share Your Tuna Kimbap Creations
Why This Spicy Tuna Kimbap Recipe Works for You
When I say this recipe is easy, I mean it! I developed this because sometimes you just need that delicious Korean flavor without the commitment of prepping five different vegetables. This savory roll is hearty, packed with flavor, and truly comes together startlingly fast. It’s built for real life, which means it’s built for you!
- Quick Korean Food Ready in Minutes: Seriously, we are looking at 15 minutes total time here, provided you have some cooked rice ready to go! That makes this the ultimate weeknight win when you need a fast Asian fix.
- Perfect Kimbap for Lunch Box Packing: These rolls hold up beautifully overnight! They are already portioned perfectly, travel well, and don’t get soggy quickly, making them ideal for work lunches or fueling a weekend picnic.
Quick Korean Food Ready in Minutes
The beauty of using canned tuna is that almost zero cooking is involved besides seasoning the rice. From opening the can to taking your first bite of finished, sliced kimbap, you’re looking at about 15 minutes. It’s seriously impressive how quick Korean food can be!
Perfect Kimbap for Lunch Box Packing
If you’ve struggled with finding satisfying make-ahead lunch options, this **tuna kimbap** is your answer. They stay wonderfully intact when wrapped tightly. I found that these are the best leftovers because the rice absorbs the flavor of the spicy tuna mix as it rests in the fridge.
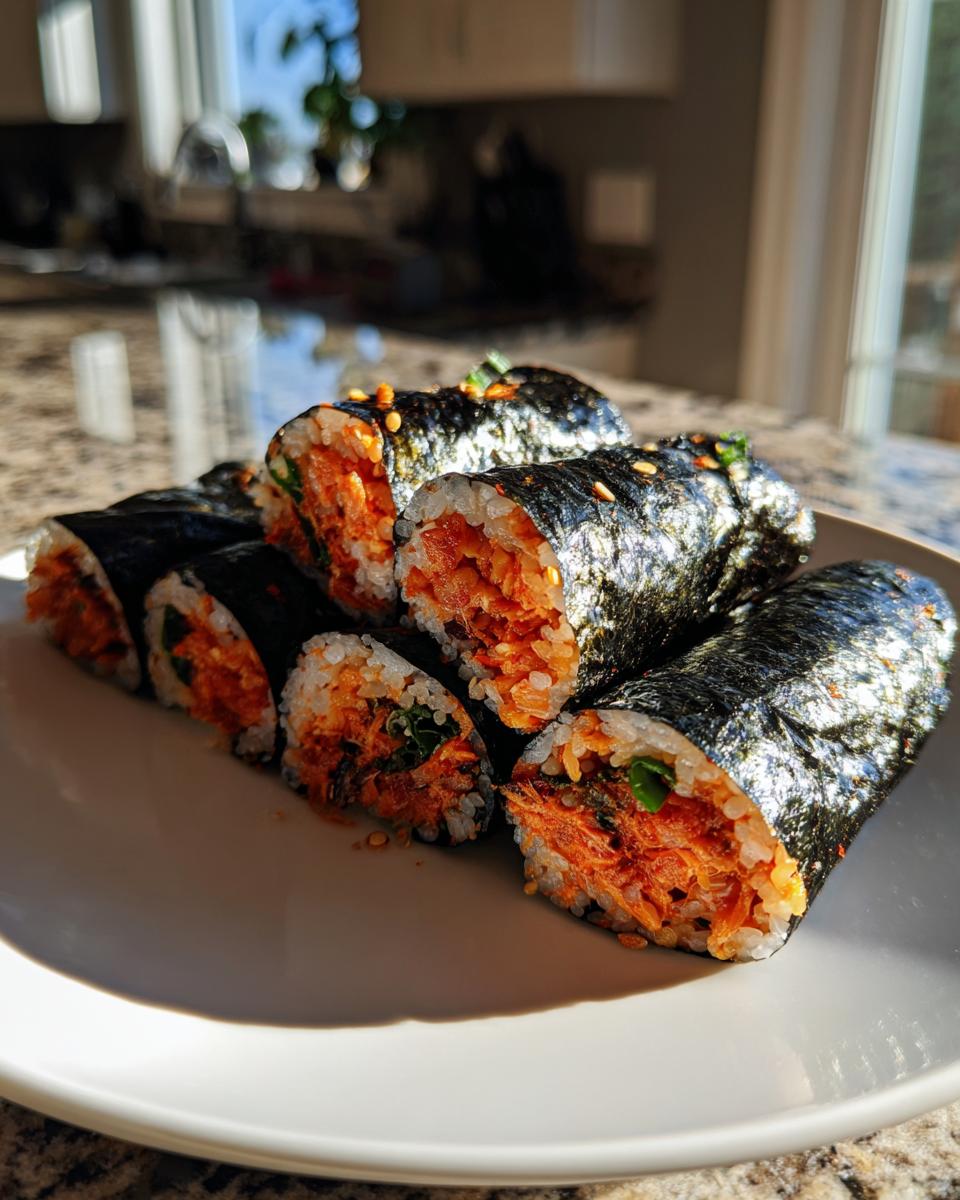
Gathering Ingredients for Your Tuna Kimbap Recipe
Okay, let’s talk about the shopping list! The beauty of this **tuna kimbap recipe** is that most of what you need is probably already hanging out in your pantry. We aren’t making complicated fillings here; we are focusing on speed and maximum flavor. I always lay *everything* out before I start rolling, which I call my ‘mise en place’ moment. It saves so much hassle later!
You’ll need your nori sheets, short-grain rice, and the magic happens in the seasoning. If you want to dive really deep into rice prep, you can check out my rice mastery guide, but honestly, for this quick version, just use cooked rice and season it well.
Seasoning the Rice for Authentic Chamchi Kimbap
This step is non-negotiable if you want proper flavor! We aren’t just using plain rice here. You simply mix your cooked short-grain rice with a little sesame oil, a sprinkle of sesame seeds, and salt. That little bit of oil makes the rice easier to spread and gives it that signature nutty flavor that makes **chamchi kimbap** so wonderfully scented.
Creating the Spicy Tuna Filling
This filling is where we bring the heat! You absolutely must drain that canned tuna well—we don’t want watery kimbap, trust me. Mix that tuna with Japanese mayonnaise (that creamy Kewpie stuff is the best if you can find it, but regular mayo works too!), a nice kick of Sriracha sauce, and some finely chopped green onion. Remember, this is your chance to tailor it: add more Sriracha for true spice lovers or keep it light for the kids. It needs to be a nice, thick mixture so it doesn’t squish out when you roll that perfect **spicy tuna kimbap**.
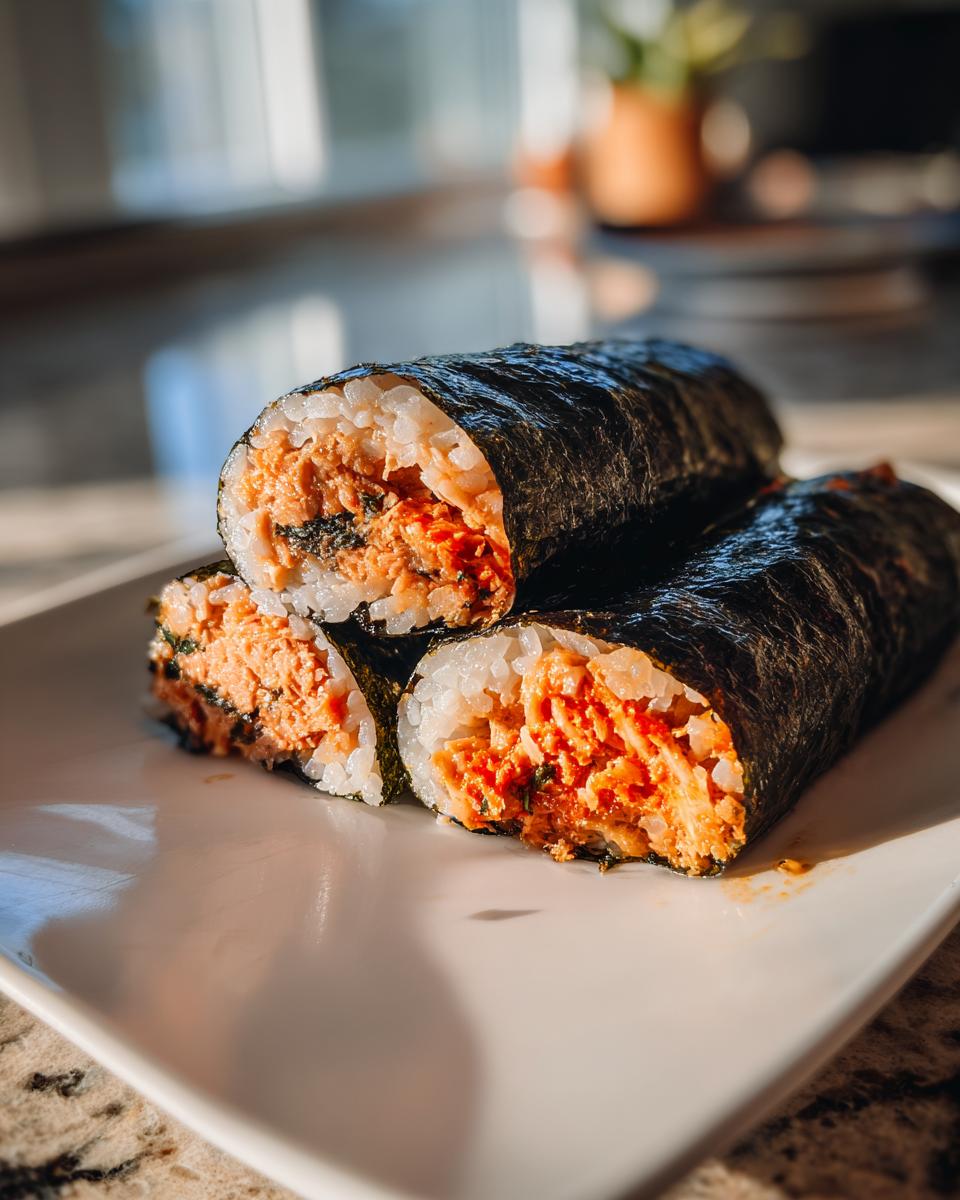
How to Make Kimbap Rolls: Step-by-Step Instructions
Alright, deep breaths! This part, the rolling, is where people sometimes get nervous, but I promise you, once you see how easy it is with a bamboo mat, you’ll feel like a pro. This is where our lovely, seasoned rice meets that bright, spicy tuna filling. Remember, making **tuna kimbap** is all about assembly, not cooking time!
If you’re looking for more ways to use that spicy tuna, check out my recipe for a spicy tuna bowl, but for now, let’s get rolling!
Rice Spreading and Filling Placement for Great Tuna Kimbap
Lay your sheet of nori down shiny-side down on your bamboo mat—this helps the rice stick nicely! Now, take about a quarter of your seasoned rice and spread it evenly over the nori. The key here, and I mean *key*, is to leave about an inch of seaweed bare at the top edge. This bare strip is what seals the roll later. Don’t let the rice get too thick; you want a thin, even blanket. Next, lay a generous line of your spicy tuna filling horizontally across the center of the rice. Don’t pile it too high, or it will just squirt out the sides when you squeeze.
The Rolling Technique for Korean Rice Rolls
Now for the fun part! Grab the edge of the mat closest to you, bringing it up and over the filling, tucking the edge of the nori right under the filling line. Pull the mat tight over the roll as you tuck. Roll forward slowly, continuously applying light, even pressure with the mat to keep everything compact. As you get near that empty 1-inch strip you left at the top, dab a tiny bit of water along the edge of the seaweed—this acts as your glue! Finish rolling it up completely. You want that roll totally sealed and tight. For more inspiration on getting things rolled up nicely, check out how others tackle their beautiful rolls!
Tips for Perfect Tuna Kimbap (Expert Advice)
So, you’ve rolled your first few kimbap, but maybe they look a little… chunky? Or maybe you’re just wondering how to make them look like the ones you see in the prettiest bento boxes. That’s where a little bit of real-world home cook wisdom comes in handy! I’ve picked up a few tricks over the years that elevate this simple assembly project into something truly special. This isn’t fine dining, but presentation matters when you’re making food you look forward to eating!
If you’re looking for a comforting soup to pair with your fresh rolls, you should definitely try my easy potato cheese soup recipe—it’s surprisingly rich!
Ingredient Swaps for Chamchi Kimbap Variations
While this recipe is designed to be fast using canned tuna, you have total freedom to customize it! If you want to add some crunch because you’re packing these for a picnic later that day, go for it. Thin, matchstick cuts of cucumber or even some quick-pickled carrots work wonderfully to balance the creaminess of the spicy tuna filling.
Also, don’t feel locked into the Sriracha amount! If you taste the tuna mixture and it’s just a little too spicy for your liking after mixing, don’t panic. You can easily temper that heat by stirring in another small spoonful of mayonnaise. Or, if you want to mimic the experience I saw when looking up other tips, like those shared by folks over at Jecca Chantilly, feel free to add a bit of avocado for creaminess without adding more heat. It’s all about making it *your* perfect **chamchi kimbap**!
And speaking of slicing—this little detail saves me so much cleanup! Always keep a damp cloth nearby when you cut your finished rolls. Wipe the knife blade clean and slightly wet between every two or three cuts. This stops the sticky rice from dragging and smashing your beautiful rolls. Seriously, try this one trick; it makes all the difference between a neat slice and a messy blob!
Serving Suggestions for Your Homemade Kimbap
Now that you’ve mastered rolling these beautiful **homemade kimbap**, the next big question is: what do I eat them with? Since this is a versatile, snappy snack that travels well, you want pairings that complement the savory rice and the zesty kick from the spicy tuna filling. These rolls taste fantastic completely on their own, but a little something extra on the side just elevates the whole experience!
When I serve these at home, especially if I’ve made a big batch for a game day snack, I always keep it simple. Think less complex main dish and more tasty condiments that bring out the best in the nori and the tuna.
My absolute favorite way to serve **tuna kimbap** is with a small side of quick kimchi or a drizzle of sauce. You are making **korean street food at home**, so you get to control the dipping situation!
- Simple Dipping Sauce: You can’t go wrong with basic soy sauce mixed with a few drops of rice vinegar and maybe a tiny dash of sesame oil. It enhances the savory notes without overpowering our spicy filling.
- A Little Something Tangy: If you have any pickled radish (danmuji) left over, serve a few sticks alongside. The bright, vinegary crunch is the perfect palate cleanser between those rich, spicy bites.
- For a Flavorful Drizzle: If you’re feeling a bit more adventurous and want something slightly sweet and tangy, I often whip up a quick maple mustard dressing! It sounds wild, but hear me out—the sweetness works surprisingly well with the salty tuna. You can find the very simple recipe for my maple mustard dressing here if you’re feeling adventurous.
Remember, the goal here is quick assembly, so don’t feel like you need to commit to a whole side dish. Even just having a small bowl of extra sesame seeds mixed with salt nearby for dipping your slices is a game-changer!
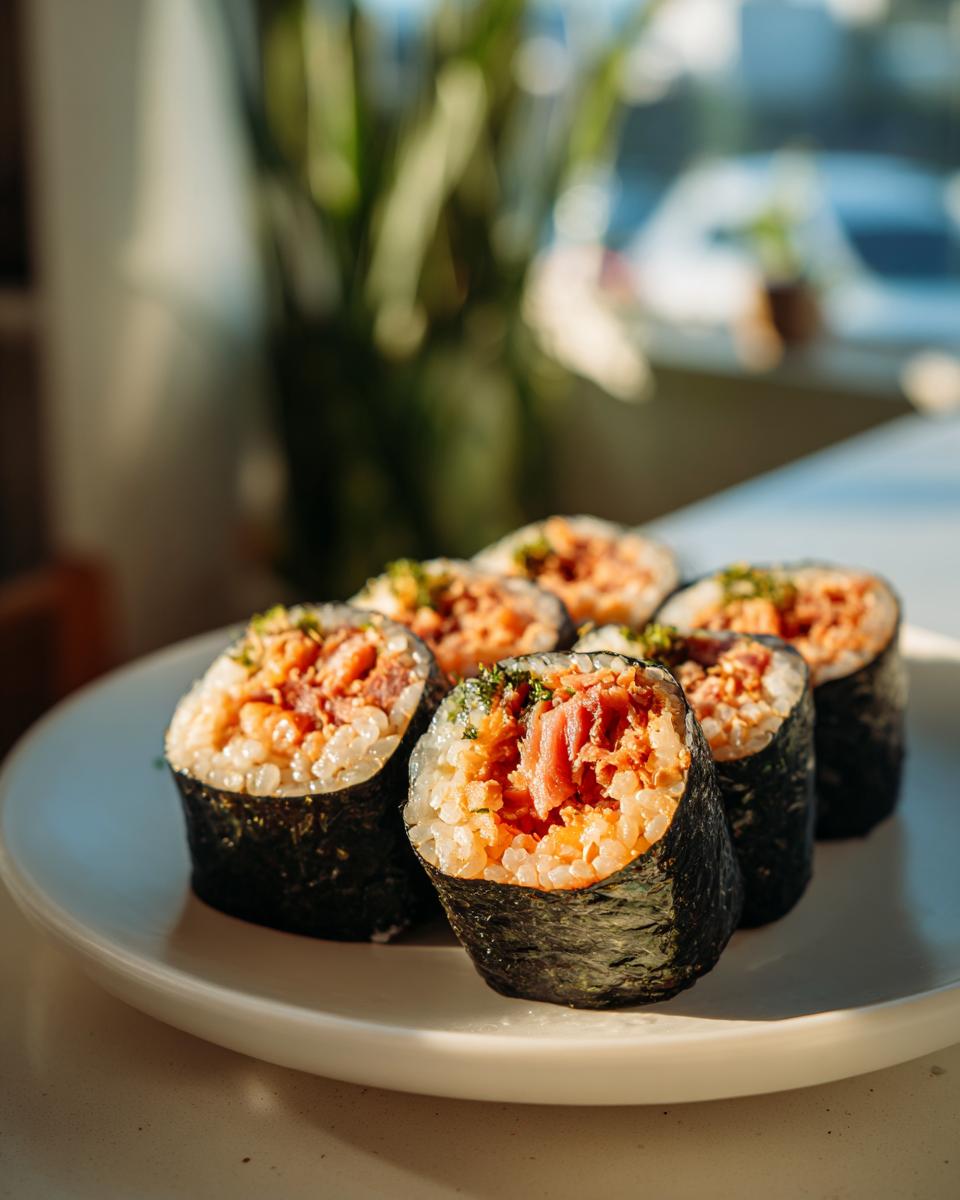
Storage and Reheating Instructions for Leftover Tuna Kimbap
This is a crucial part of the preparation, especially since we are making these fantastic **tuna kimbap** rolls specifically for packing up! The great news is that dried seaweed rolls like these are superstars when it comes to leftovers. They are practically *designed* to be great **kimbap for lunch box** meals the next day, but you do need to treat them right so that rice stays soft and the nori doesn’t get rubbery.
My biggest rule for storage? Keep them wrapped tightly! Once you slice the rolls, the exposed rice dries out incredibly fast. I often skip slicing them entirely if I know I’m making them ahead for lunch the next day. Seriously, leave them whole until right before you pack them or eat them.
If you do need to store leftovers, wrap the uncut log tightly in plastic wrap first. Then, place that tightly wrapped log into an airtight container. This double-layer protection keeps essential moisture in and fridge smells out. They are generally best eaten within 24 hours, but they will usually keep safely in the refrigerator for up to two days. Any longer than that, and the rice texture starts to get just a little too hard, even for my liking!
Now, reheating? Skip it! You really shouldn’t try to microwave or reheat kimbap. The nori will turn immediately soggy and gummy, and no one wants that texture. You want these straight from the fridge, perhaps with a quick wipe of sesame oil on the outside if they seem dry, but they are really intended to be enjoyed cold or at room temperature. For another great grab-and-go idea, check out my recipe for fluffy banana pancakes—they are shockingly good cold, too!
Frequently Asked Questions About Making Tuna Kimbap
I always get questions when I post photos of this **tuna kimbap** because people are curious about the specific techniques for perfect rolls. It’s totally normal to have questions when you’re trying out something new, especially when tackling rolling for the first time! I’ve gathered up the ones I hear most often from readers who are excited to make their own **homemade kimbap** or need help troubleshooting.
If you have a totally different question that I haven’t covered, drop it in the comments below! I try my best to get back to everyone. In the meantime, these answers should help you nail that authentic texture. If you’re looking for another quick meal idea while you’re here, maybe give my chicken tortilla soup a try!
Can I use rice other than short-grain rice for korean seaweed rolls?
That’s such a great question about the rice foundation for your **korean seaweed rolls**! While the recipe works best with short-grain rice (often labeled sushi rice), that’s only because it releases the right amount of starch to make the grains stick together perfectly once they cool slightly. If you absolutely must substitute, medium-grain rice is the closest second. Please, please try to avoid long-grain rice like Basmati or Jasmine if you can help it—they just don’t have the necessary stickiness and you’ll end up with crumbly, uncooperative rolls.
How do I prevent my easy asian rolls from unrolling?
This is usually the biggest hurdle for beginners trying to make **easy asian rolls**, but the fix is super simple! It all comes down to two things: initial tightness and the seal. When you start rolling, you need to use your bamboo mat to pull the bottom section up and over the filling, creating a firm, even squeeze across the entire width of the roll *before* you roll forward. That firm tuck creates the tension needed to hold everything together.
The final secret is that tiny amount of water you use to seal that last edge of nori. Just dip your finger in plain water and run it lightly along the top bare edge of the seaweed sheet before you complete the final rotation. That moisture activates the seaweed glue, and you’ll end up with a roll that stays perfectly sealed, just like the ones you see featured on blogs like Korean Bapsang!
Nutritional Estimates for Spicy Tuna Kimbap
I always like to address the numbers because while we cook from the heart here at Cut Cook Taste, knowing roughly what’s in our food is just smart home cooking, right? Now, remember I am not a certified nutritionist baking in a lab; I’m Sarah in my kitchen! These numbers are strictly estimates based on the ingredients listed, especially using oil-packed tuna and standard Japanese mayo amounts. Ingredients change slightly based on brand, so take this as a helpful guideline rather than a hard guarantee.
When I look at this breakdown, I’m thrilled because, for a main course that fills you up and tastes this great—especially if you’re prepping these as a healthy snack or healthy breakfast option—the macros look really balanced. We get good protein from the tuna and simple carbs from the rice.
Here’s the approximate breakdown per serving size (which I set at one roll, cut into about 8 slices):
- Serving Size: 1 roll (approx. 8 slices)
- Calories: 350
- Fat: 14g (with 3g saturated fat)
- Carbohydrates: 40g
- Protein: 18g
- Sodium: 450mg
- Sugar: 2g
See? That’s fantastic for a quick meal! Just be mindful of that sodium count, especially if you plan on drizzling extra soy sauce on top when you serve up your delicious **tuna kimbap**!
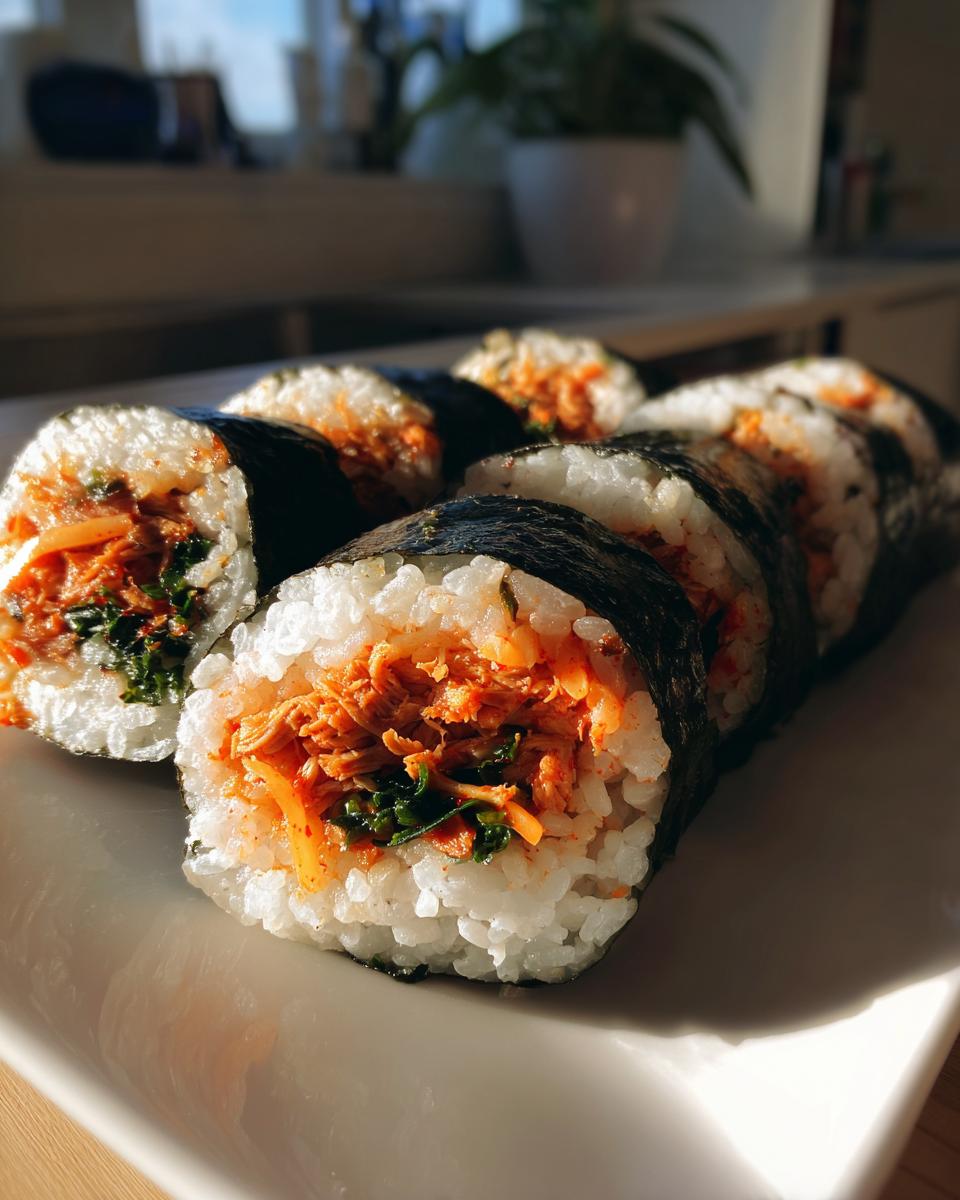
Share Your Tuna Kimbap Creations
And just like that, you’ve made gorgeous, satisfying **tuna kimbap**! I sure hope you enjoyed this super quick dive into making incredible Korean rolls right on your own countertop. Now comes the part I love most—seeing what you all cook up in your kitchens!
This is where you, dear reader, become part of the Cut Cook Taste family. Sharing your results and your small tweaks is how we all learn and inspire each other. Whether you decided to go heavy on the Sriracha to make it wickedly spicy, or maybe you added a secret vegetable I didn’t think of, I want to hear all about it!
Please, jump down to the comments section below and leave a rating for the recipe. Tell me: How did your rolling go? Did you add an extra drizzle of sesame oil to the outside? I get so much joy out of seeing your twists on these basics. And if you’re sharing photos on social media—tag me! I love saving these pictures to my profile. If you are looking for ideas on how others have styled their rolls, you can always check out the amazing inspiration from posts like Spicy Tuna Kimbap on Christie At Home.
If you have any burning questions that didn’t get covered in the FAQ, or if you need help troubleshooting for your next batch of **homemade kimbap**, don’t hesitate to reach out through my contact page. Happy rolling, everyone, and I can’t wait to hear how you enjoyed this quick Korean treat!
PrintEasy Spicy Tuna Kimbap (Chamchi Kimbap)
Make quick, flavorful Korean rice rolls at home. This easy spicy tuna kimbap recipe is perfect for lunch boxes, picnics, or a fast weeknight meal.
- Prep Time: 15 min
- Cook Time: 0 min
- Total Time: 15 min
- Yield: 4 servings 1x
- Category: Main Course
- Method: Rolling
- Cuisine: Korean
- Diet: Vegetarian
Ingredients
- 2 cups cooked short grain rice
- 1 teaspoon sesame oil (for rice)
- 1 teaspoon sesame seeds (for rice)
- 1 teaspoon salt (for rice)
- 1 can (5.3 oz) tuna packed in oil, drained
- 2 tablespoons Japanese mayonnaise (Kewpie or regular substitute)
- 1 tablespoon Sriracha sauce (adjust for spice level)
- 2 tablespoons green onion, finely chopped
- 4 sheets nori (roasted seaweed)
- 4 perilla leaves, washed and dried (optional)
- 1 teaspoon sesame oil (for coating rolls)
- 1 teaspoon sesame seeds (for sprinkling)
Instructions
- Prepare the seasoned rice: In a bowl, combine the cooked short grain rice, 1 teaspoon sesame oil, 1 teaspoon sesame seeds, and 1 teaspoon salt. Mix gently until combined.
- Make the spicy tuna filling: In a separate bowl, combine the drained canned tuna, mayonnaise, Sriracha sauce, and finely chopped green onion. Mix well until you have a cohesive filling.
- Assemble the kimbap: Place one sheet of nori, shiny side down, on a bamboo rolling mat. If using perilla leaves, place one leaf on top of the nori.
- Spread a thin, even layer of the seasoned rice over the nori, leaving about a 1-inch border clear at the top edge.
- Arrange a line of the spicy tuna filling horizontally across the center of the rice.
- Roll the kimbap tightly using the mat, starting from the bottom edge. Moisten the top edge of the nori with a little water to seal the roll.
- Brush the outside of the finished roll lightly with the remaining 1 teaspoon of sesame oil and sprinkle with sesame seeds.
- Slice the roll into bite-sized pieces using a sharp knife. Serve immediately or pack for your lunch box.
Notes
- For best results when slicing, wipe your knife blade with a damp cloth between cuts.
- If you prefer a milder flavor, reduce the Sriracha or omit it entirely for classic tuna kimbap.
- You can add other fillings like shredded carrots, cucumber strips, or pickled radish for extra texture.
Nutrition
- Serving Size: 1 roll (approx. 8 slices)
- Calories: 350
- Sugar: 2
- Sodium: 450
- Fat: 14
- Saturated Fat: 3
- Unsaturated Fat: 11
- Trans Fat: 0
- Carbohydrates: 40
- Fiber: 1
- Protein: 18
- Cholesterol: 30