
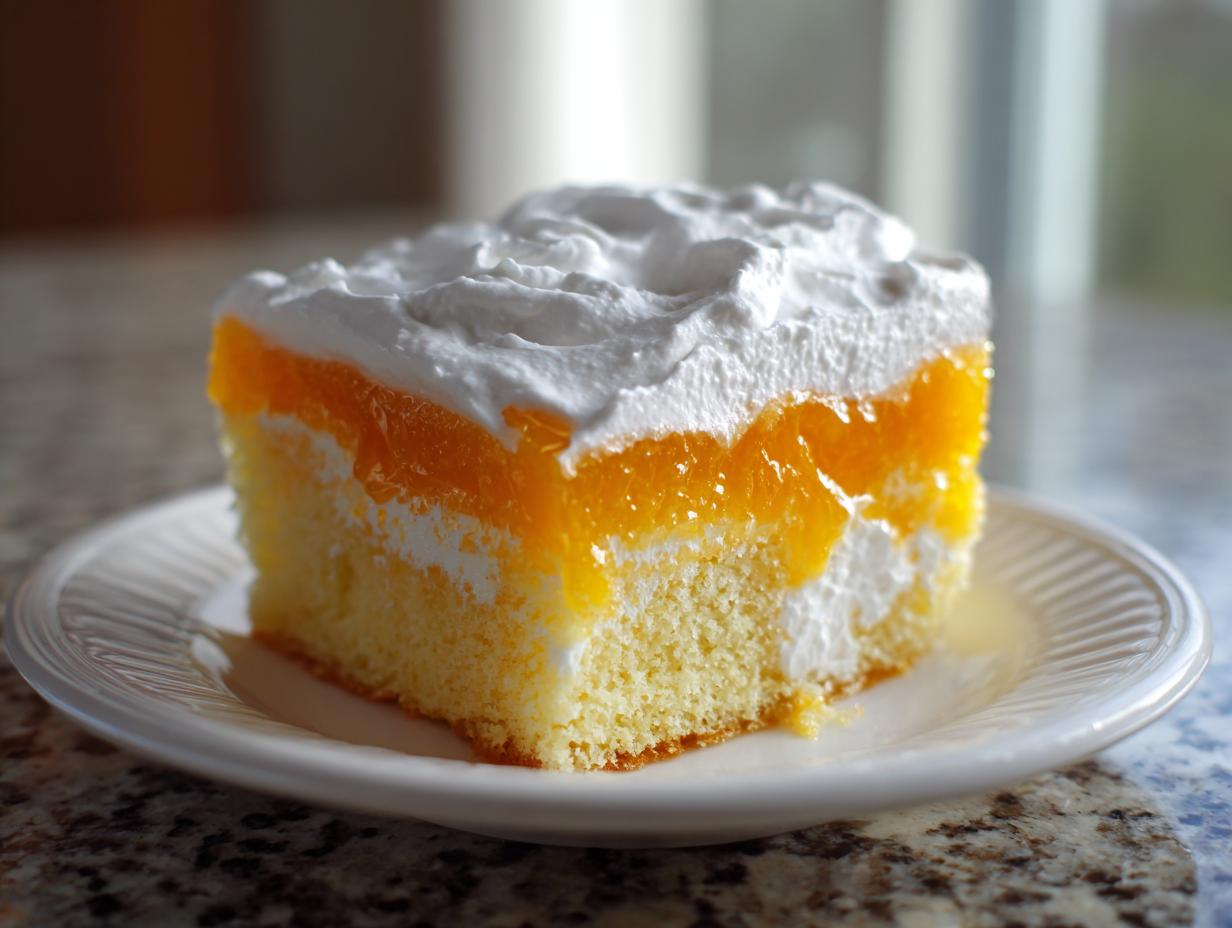

Oh, if I could bottle up the feeling of a perfectly hot summer day ending with the cool, bright flavor of an Orange Creamsicle, I totally would! That nostalgic taste of creamy vanilla mixing with zesty orange is one of my favorite childhood memories, and trust me, we are recreating that magic today. Forget fussy layers; we’re making the ultimate Creamsicle Cake, but we’re taking the easy route with a poke cake style. This method locks in so much moisture that every bite practically melts! It’s easy, it’s refreshing, and it tastes exactly like sunshine in a 9×13 pan. I think this recipe is a perfect example of how simple ingredients, when treated right, become incredible family desserts. If you want to know more about my approach to reliable home cooking, check out my story over on the About Page!
- Why This Orange Creamsicle Cake is Your New Summer Favorite
- Gathering Ingredients for Your Creamsicle Cake
- Step-by-Step Instructions for the Moist Poke Creamsicle Cake
- Tips for the Best Ever Creamsicle Cake
- Serving Suggestions for Your Party Ready Citrus Cake
- Storage and Reheating Instructions for Leftover Creamsicle Cake
- Frequently Asked Questions About Making a Creamsicle Cake
- Nutritional Estimate for This Orange Creamsicle Cake
- Share Your Homemade Creamsicle Cake Creations
Why This Orange Creamsicle Cake is Your New Summer Favorite
If you’re looking for a truly refreshing dessert for summer that won’t keep you chained to the oven for hours, this is it! The secret to making this the best Creamsicle Cake isn’t just the flavor—it’s the technique. Because we’re using the poke cake method, we manually add liquid right into the base. This ensures your cake gets wonderfully saturated, guaranteeing a ridiculously moist slice every single time. It’s honestly become my go-to crowd pleasing cake for BBQs because it holds up well, travels easily, and tastes like pure nostalgia! If you’re diving deeper into my sweet treats, be sure to browse all my Dessert recipes here!
Achieving the Perfect Creamsicle Cake Texture
That amazing mouthfeel is what sets this recipe apart from a regular orange cake. The orange gelatin soaks deep into the crumb, giving it that signature citrus burst. Then, we layer on the vanilla pudding, which smooths everything out into that lovely, creamy texture everyone associates with the classic ice cream bar. This combination results in an unbelievably creamy orange vanilla cake that is both light and satisfying. It’s truly dessert alchemy!
Gathering Ingredients for Your Creamsicle Cake
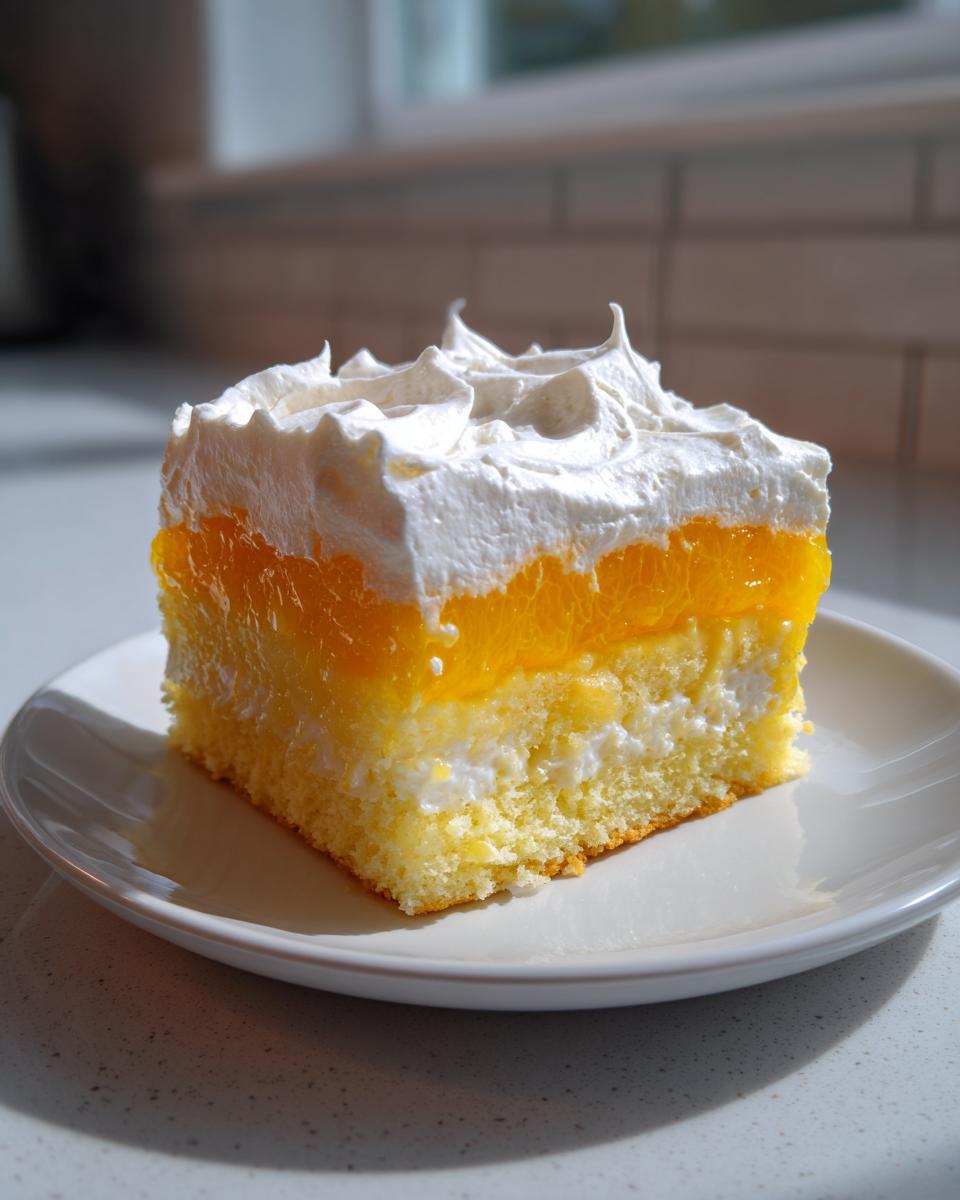
Okay, let’s talk about what you need for this amazing dessert! I purposely designed this to be an Easy Orange Creamsicle Cake, which means we rely on a few simple, accessible ingredients, mostly starting with a yellow cake mix. Don’t shy away from the boxed stuff here; it already has the right structure to absorb all that wonderful liquid we’re about to pour in! I’ve listed everything out below, but the key is making sure your vanilla pudding is the *instant* kind—that makes all the difference when we get to the layering stage!
Ingredient Notes and Substitutions for Your Creamsicle Cake
Because this cake relies on that bright, fresh flavor, grabbing a fresh orange for the zest is a must if you can! A little sprinkle of zest mixed into the pudding gives you that extra punch, officially making it a Citrus Bursting Cake. If you aren’t a fan of frozen whipped topping, you can absolutely whip up your own stabilized whipped cream. Just be sure to chill the topping really well before spreading it on gently over the pudding layer. This ensures you keep that light texture going all the way to the top!
Step-by-Step Instructions for the Moist Poke Creamsicle Cake
Now for the fun part—watching this cake transform! While I love a fancy layer cake, there’s something incredibly satisfying about this poke cake process. It feels a little mischievous, like you’re ensuring every single corner gets soaking wet. We start simple: get your oven preheated to 350°F (175°C). Mix up your yellow cake mix per the box directions and bake it in that 9×13 pan. The most important early tip? You must let that cake cool down completely before you grab your weapon of choice! Trust me, hot cake equals a spongy, melted mess when you start poking. If you need a good savory break after all this sweet stuff, I have a fantastic recipe for Easy 30-Minute Pepper Steak Stir-Fry!
Baking and Soaking the Orange Gelatin Cake Base
Once that cake is totally cool—and I mean cool to the touch—you grab the handle of a wooden spoon or maybe a big sturdy fork. This is where the magic happens! Poke holes all over the surface; I like mine deep, almost touching the bottom of the pan. Next, whisk up the orange gelatin with boiling water until it dissolves, then stir in the cold water. You need to let this Orange Gelatin Cake soak cool down for just about five minutes before pouring. If it’s too hot, it will just melt the cake structure instead of seeping in nicely. Pour it evenly over all those little holes!
Creating the Creamy Vanilla Pudding Layer for Your Creamsicle Cake
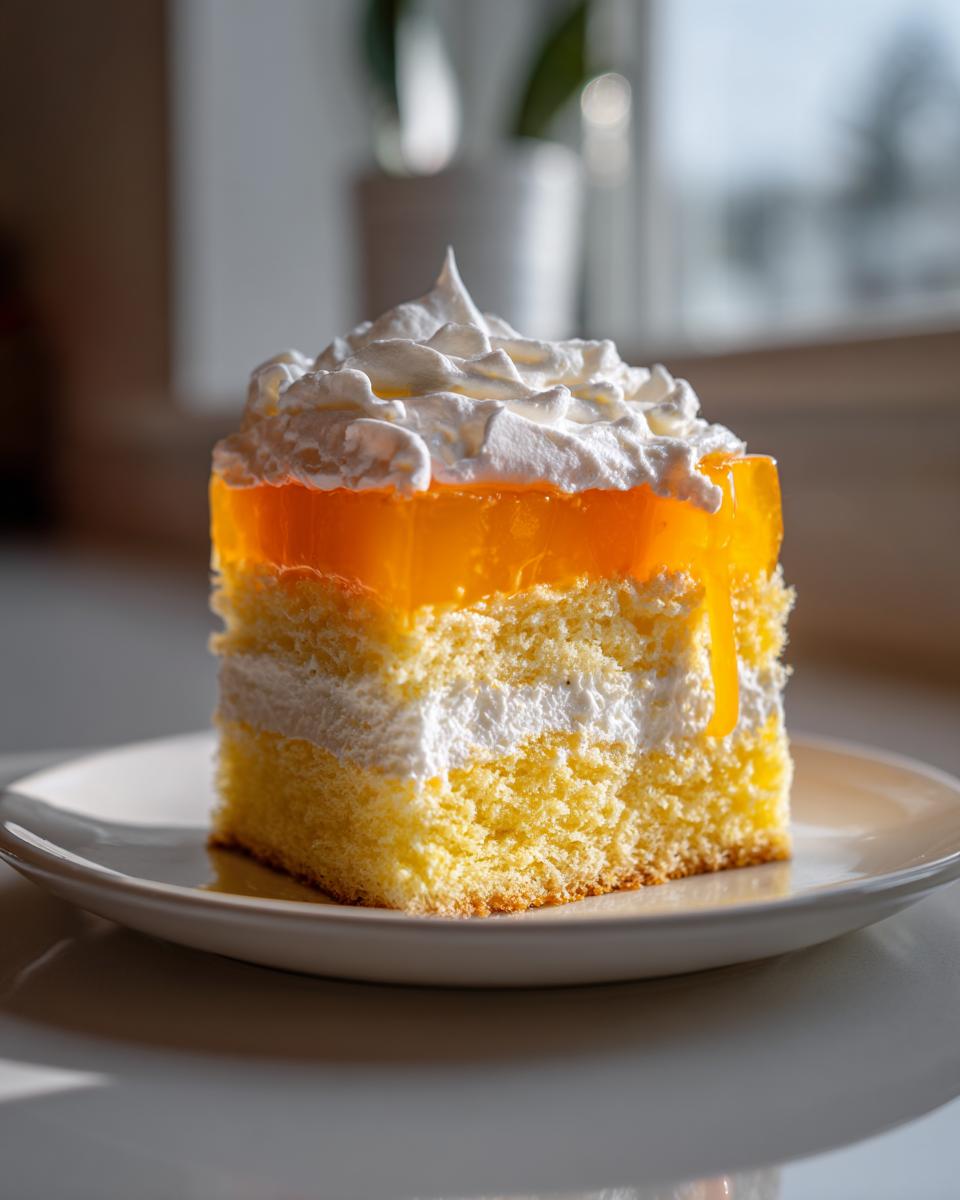
While that orange layer is chilling in the fridge (give it an hour or two so it sets up a bit!), it’s pudding time. You’ll whisk the instant vanilla pudding mix right into the cold milk—it thickens up so fast, it’s wild! I usually give it a minute or two, maybe stir in that optional orange zest right here if I’m feeling citrusy. Once the gelatin layer feels firm to the touch, spread that vanilla pudding gently across the top. Be careful not to disturb the orange layer underneath! After that, a quick dollop of thawed whipped topping goes on, and then back into the cold it goes until it’s perfectly set.
Tips for the Best Ever Creamsicle Cake
Now that you have the basic steps down, let me share a few little secrets that elevate this from a good cake to the Best Orange Cake Recipe you’ll ever make. Remember, since this is a poke cake, moisture retention is key! The biggest tip I have for getting that super moist poke cake experience is patience during chilling. Don’t rush that first hour of gelatin setting or the final two hours of chilling after the topping goes on. If you slice it too early, everything gets messy and runny.

For the best presentation, let the cake sit in the fridge for at least four hours if you can manage it; it becomes firmer and cleaner to slice. We always serve this straight from the fridge, too—it tastes so much better when it is truly cold and refreshing. If I’m serving this outdoors in the heat, I sometimes use a cream cheese frosting instead of whipped topping just to hold up better, but for pure nostalgia, the fresh, cold topping wins every time! For more of my tested baking insights, make sure you check out my main Blog page regularly!
Serving Suggestions for Your Party Ready Citrus Cake
This vibrant Creamsicle Cake is already a showstopper, but a little garnish goes a long way, especially when you’re taking it to a potluck! Since the top is already creamy, I love to contrast that smooth texture with something bright. Try a sprinkle of fresh orange zest right before serving for an incredible aroma boost. Or, if you want it to look super elegant, a light dusting of powdered sugar over the top really makes the orange color pop.
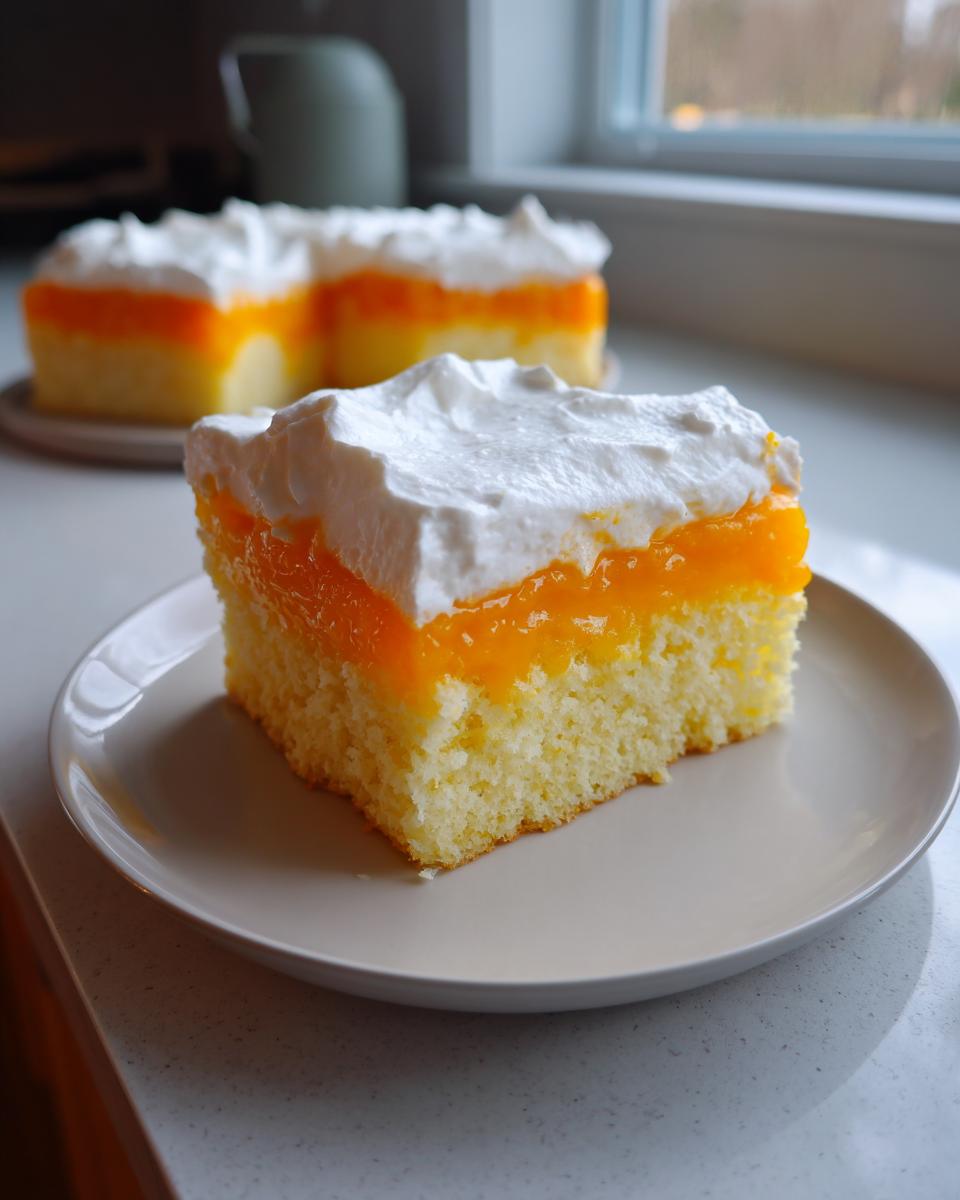
If you’re pairing this with something else on the dessert table, keep it light! Think fresh strawberries or raspberries. Nothing too heavy, since this cake is so rich already. It’s honestly one of the easiest Potluck Dessert Ideas because it travels well and tastes fantastic once it’s served cold. If you’re looking for a savory dish to round out the menu, you should check out my recipe for the Best Creamy Spinach Artichoke Dip!
Storage and Reheating Instructions for Leftover Creamsicle Cake
Because this cake is loaded up with vanilla pudding and whipped topping, we absolutely have to keep this bad boy chilled. You’ll want to store any leftovers covered tightly in the refrigerator. This ensures that the pudding layer stays firm and the cake base stays moist from that lovely orange soak. Seriously, do not even think about trying to reheat this one! Microwaving will just turn your creamy topping into a melted, disappointing puddle. Just keep it cold, and it’s perfect the next day!
Frequently Asked Questions About Making a Creamsicle Cake
I get so many wonderful questions about this Creamsicle Cake once folks start baking it! It’s such a fun recipe, but because we are layering liquids and pudding, sometimes people have little timing questions. Don’t worry, that’s what I’m here for! I’ve gathered some of the most common things readers ask me when they are aiming for that perfect, nostalgic citrus flavor.
Can I make this Creamsicle Cake without using gelatin?
That’s a good question, but honestly, for this specific poke cake, the orange gelatin is non-negotiable. The liquid from the gelatin is what soaks into the cake base and keeps it impossibly moist and flavorful! If you skip it, you just end up with a plain yellow cake that has pudding on top. If you absolutely can’t use gelatin, you’d need a slurry made from cornstarch and orange juice, but it won’t give you that signature burst of flavor we’re going for.
What is the best way to get a fluffy Creamsicle Frosting?
Since the recipe calls for thawed whipped topping, sometimes folks want something homemade! If you want that true Fluffy Creamsicle Frosting feel, skip the store-bought tub and use heavy whipping cream instead. Make sure your cream is ice cold, and whip it using a stand mixer fitted with the whisk attachment until you get stiff, gorgeous peaks. Fold in a touch of powdered sugar and a tiny splash of vanilla extract!
If you need to reach out with any other specific baking trouble, feel free to drop me a line on my Contact Page. Happy baking!
Nutritional Estimate for This Orange Creamsicle Cake
I always try to keep things real around here, and part of that is knowing what we’re digging into! Because this Creamsicle Cake uses standard cake mix, pudding, and whipped topping, the numbers are going to be what you’d expect from a lovely, rich dessert. Remember, these numbers are just an estimate based on the basic ingredients listed, so if you substitute with full-fat dairy or extra sugar in your toppings, your counts will shift a bit!
Here is the general estimate for one generous slice of this moist, chilled cake:
- Calories: Around 350
- Total Fat: About 15g (Be mindful of saturated fat from butter/shortening in mixes!)
- Carbohydrates: Roughly 55g (That’s where that sugar comes from, folks!)
- Protein: A modest 4g
- Sugar: Approximately 45g
- Sodium: Closer to 300mg
It’s certainly a treat, but what a joyful, refreshing treat it is! Enjoy it knowing you made something truly special that tastes just like childhood summers.
Share Your Homemade Creamsicle Cake Creations
Okay, now that you’ve whipped up this unbelievably refreshing Creamsicle Cake, I desperately want to know how it turned out! Seriously, nothing makes me happier than seeing your kitchen creations. Did you add extra orange zest? Did your family devour it in ten minutes flat? Let me know!
Please, please take a moment to leave a star rating right down at the bottom of this post. Those ratings help other home bakers know this recipe is reliable and worth their time. And if you snapped a picture of your dessert glistening cold from the fridge, tag me on social media! Seeing your version helps keep that wonderful, happy nostalgia alive for everyone who misses those classic summer treats.
If you haven’t jumped right into baking yet, make sure you’ve read through my policies, especially regarding usage, over on the Terms of Use page. Now go enjoy that citrus burst of sunshine, and happy sharing!
PrintEasy Orange Creamsicle Poke Cake with Vanilla Pudding
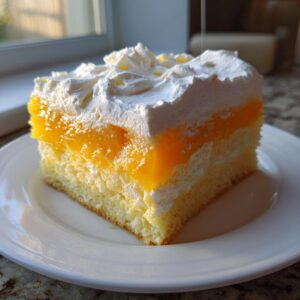
You will make a moist, citrusy dessert that tastes like a childhood frozen treat. This easy orange creamsicle poke cake uses simple ingredients and combines orange gelatin with vanilla pudding for a creamy, refreshing finish perfect for summer gatherings.
- Prep Time: 20 min
- Cook Time: 35 min
- Total Time: 2 hours 55 min
- Yield: 12 servings 1x
- Category: Dessert
- Method: Baking and Chilling
- Cuisine: American
- Diet: Vegetarian
Ingredients
- 1 box (15.25 ounces) yellow cake mix
- Ingredients required for cake mix (usually eggs, oil, water)
- 1 package (3 ounces) orange gelatin
- 1 cup boiling water
- 1/2 cup cold water
- 1 package (3.4 ounces) instant vanilla pudding mix
- 1 1/2 cups cold milk
- 1 container (8 ounces) frozen whipped topping, thawed (or homemade whipped cream)
- 1 teaspoon orange zest (optional, for extra flavor)
Instructions
- Prepare the cake: Preheat your oven to 350°F (175°C). Prepare and bake the yellow cake mix according to package directions in a 9×13 inch baking pan. Let the cake cool completely in the pan.
- Poke the cake: Once the cake is cool, use the handle of a wooden spoon or a large fork to poke holes all over the surface of the cake. Make the holes deep, going almost to the bottom of the pan.
- Prepare the orange soak: In a medium bowl, dissolve the orange gelatin completely in the boiling water. Stir in the cold water. Let this mixture sit for about 5 minutes to cool slightly, but do not let it set.
- Pour the soak: Slowly pour the orange gelatin mixture evenly over the entire surface of the poked cake, allowing the liquid to soak into the holes. Place the cake in the refrigerator to chill and set the gelatin, about 1 to 2 hours.
- Prepare the vanilla pudding layer: In a separate bowl, whisk together the instant vanilla pudding mix and cold milk until the mixture thickens, about 2 minutes. Stir in the orange zest, if using.
- Top the cake: Spread the thickened vanilla pudding mixture evenly over the set orange gelatin layer.
- Add the topping: Gently spread the thawed whipped topping over the pudding layer.
- Chill and serve: Return the cake to the refrigerator for at least 2 hours, or until completely chilled, before slicing and serving this crowd pleasing cake.
Notes
- For a richer orange flavor, you can substitute 1/2 cup of the cold water in the gelatin step with fresh orange juice.
- If you prefer a firmer topping, you can use a stabilized whipped cream recipe instead of frozen whipped topping.
- This cake is best served cold, making it a refreshing dessert for summer events.
Nutrition
- Serving Size: 1 slice
- Calories: 350
- Sugar: 45g
- Sodium: 300mg
- Fat: 15g
- Saturated Fat: 7g
- Unsaturated Fat: 8g
- Trans Fat: 0g
- Carbohydrates: 55g
- Fiber: 1g
- Protein: 4g
- Cholesterol: 30mg