


Oh, I have to tell you about this recipe! Sometimes, you just get a craving for that perfect chocolate bar—you know the one, right? Coconut, a satisfying crunch of almond, all wrapped in sweet chocolate. Forget running to the vending machine, though! My mission in the kitchen is always to recreate that nostalgic magic, but better, fresher, and totally homemade. That’s why I’ve spent time perfecting these amazing almond joy truffles. They taste exactly like the classic candy, but because we’re making them in my kitchen, we get that incredible, creamy coconut filling texture that simply can’t be beaten. Trust me, these no-bake bites are going to be your new favorite way to snack!

- Why You Will Love These Easy Almond Joy Truffles
- Essential Ingredients for Your Almond Joy Truffles
- Step-by-Step Instructions for Perfect Almond Joy Truffles
- Tips for Success When Making Your Copycat Candy Bar Recipe
- Storage and Make-Ahead Tips for Your Homemade Almond Joy
- Serving Suggestions for These Quick Dessert Bites
- Frequently Asked Questions About Almond Joy Truffles
- Estimated Nutrition for Chocolate Covered Coconut Balls
- Share Your Homemade Almond Joy Truffles Experience
Why You Will Love These Easy Almond Joy Truffles
I know you have a million recipes vying for your time, but I promise these almond joy truffles are worth clearing space in your freezer for. Seriously, what’s not to love? They take almost no time, and you don’t even need to turn the oven on! Here are the reasons I keep coming back to this recipe time and time again:
- They are genuinely 4 ingredient truffles for the base, which keeps things super simple.
- It’s a completely no bake truffles solution—perfect for when the weather is too hot or when you need a dessert fast.
- These deliver that true, tropical flavor you crave from the iconic candy bar.
- They look so fancy when they’re dipped and set, making them absolutely ideal for holiday chocolate treats or gifting.
- The process is fun! Kids love helping roll the creamy coconut filling.
- You get that satisfying, crisp chocolate shell breaking away to the chewy, sweet center. It’s the perfect texture combo!
Quick Preparation for Perfect Almond Joy Truffles
When I say quick, I mean it! With only 20 minutes of true prep time, these are faster than running to the store for a candy bar. If you suddenly realize you need a quick dessert bites offering for unexpected guests, these save the day every time. You mix, roll, freeze briefly, dip, and chill. That’s it! It’s the easiest easy candy recipes trick up my sleeve.
The Best Almond Joy Recipe Copycat Taste
This is where we talk about perfection. My goal was never just to make *a* coconut chocolate candy; it had to taste like the real deal. We achieve that distinctive taste by keeping the elements true to form. You get that sweet, dense coconut core, and the crucial part—a whole almond nestled right in the center! When that snaps against the dark chocolate shell, you know you’ve made a truly superior homemade almond joy.
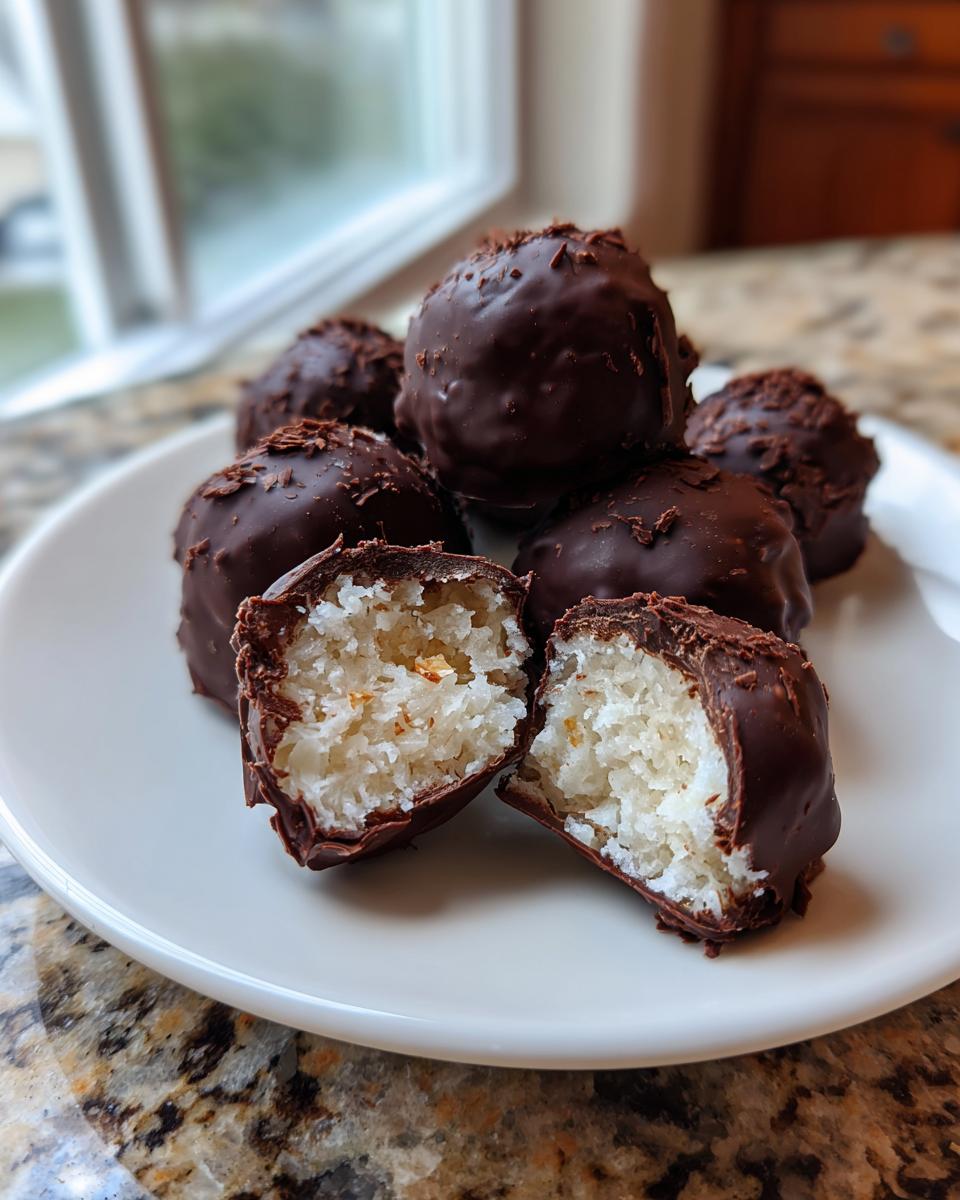
Essential Ingredients for Your Almond Joy Truffles
The beauty of these copycat candy bar recipe treats is how few things you actually need! We’re skipping the weird stabilizers and preservatives you find in store-bought bars. Every ingredient here plays a massive role, especially in getting that soft, sticky texture without baking. Here is what we need:
- 2 cups unsweetened shredded coconut
- 1/2 cup almond butter
- 3 tablespoons maple syrup
- 1 cup dark chocolate chips
- 1/2 cup whole almonds (for topping)
That’s our entire list! Simple, right? This is what I love about my approach—using real food to mimic confection perfection. It’s honestly one of the best easy candy recipes because the ingredient list is so short.
Ingredient Notes and Substitutions for Creamy Coconut Filling
When you are working with so few components, the quality of what you use really shines through. Here are my must-know notes for ingredient success:
Coconut: Make sure you use unsweetened shredded coconut. The sweetness comes entirely from the maple syrup, and using sweetened coconut throws off the balance and makes the final truffle too sweet for my taste. You want that distinct tropical flavor without the sugary overload.
Almond Butter: This is our binder, folks! It holds the coconut together so we don’t have to rely on powdered sugar or sweetened condensed milk. Use a natural, creamy almond butter, and make sure it’s stirred well first so the oil is incorporated. If you don’t have almond butter for some reason, you could try cashew butter in a pinch, but I think the flavor profile of the almond butter just makes it taste more like the original coconut chocolate almond candy.
Maple Syrup: Maple syrup adds sweetness and moisture. If you absolutely must substitute, you could use honey, but it has a stronger flavor. Avoid artificial sweeteners here; we need the viscosity of the syrup to help form that perfect creamy coconut filling.
Chocolate: I insist on dark chocolate chips because the slight bitterness contrasts beautifully with the rich coconut. If you grew up loving the milk chocolate version, go ahead and swap these for milk chocolate chips—it works just as well for a sweeter experience!
Step-by-Step Instructions for Perfect Almond Joy Truffles
Alright, now for the fun part! Since these are no bake truffles, the process is wonderfully straightforward. We are going from a bowl of ingredients to chilled, chocolate-covered goodness in under 30 minutes of active work. It’s pure magic, and honestly, it makes for the best quick dessert bites when you are in a hurry.
We’ve listed the full steps below, but I want to walk you through the two most crucial moments, because getting these right guarantees you a textbook result every time. If you want a fantastic recipe for chocolate-covered goodness for gifting, check out my guide on foolproof toffee recipe while you wait for your chocolate to melt!
Mixing and Forming the Coconut Base for Almond Joy Truffles
First things first: grab your biggest bowl! We need to combine that shredded coconut, the smooth almond butter, and the maple syrup. Just mix it all up. You are looking for a mixture that feels sticky and holds together when you squeeze a handful. Don’t overmix, but make sure there are no dry pockets of coconut left over, okay? Then, you’re going to roll these into little balls, about an inch across. Before they hit the freezer, this is your moment to embed that whole almond right on top. Press it in firmly—that almond needs to stay put through the whole dipping process! Pop them onto parchment paper and into the freezer for at least thirty minutes.
Melting Chocolate and Coating the No Bake Truffles
The chocolate coating is where these almond joy truffles truly shine. Melt your dark chocolate chips in short bursts in the microwave—I aim for 30 seconds at a time, stirring well in between. This prevents your chocolate from seizing up. Speaking of smooth chocolate, if you want that absolutely glossy, professional look, stir in just a teaspoon of coconut oil when it’s mostly melted. Now that your coconut centers are rock hard from the freezer, dip them in! Use a fork to gently lower them in and lift them out, letting the excess drip back into the bowl. If they aren’t frozen, the coconut ball will just fall apart or melt into the chocolate. Return them to the parchment and let that shell set up nicely in the fridge for an hour. You’ve done it!
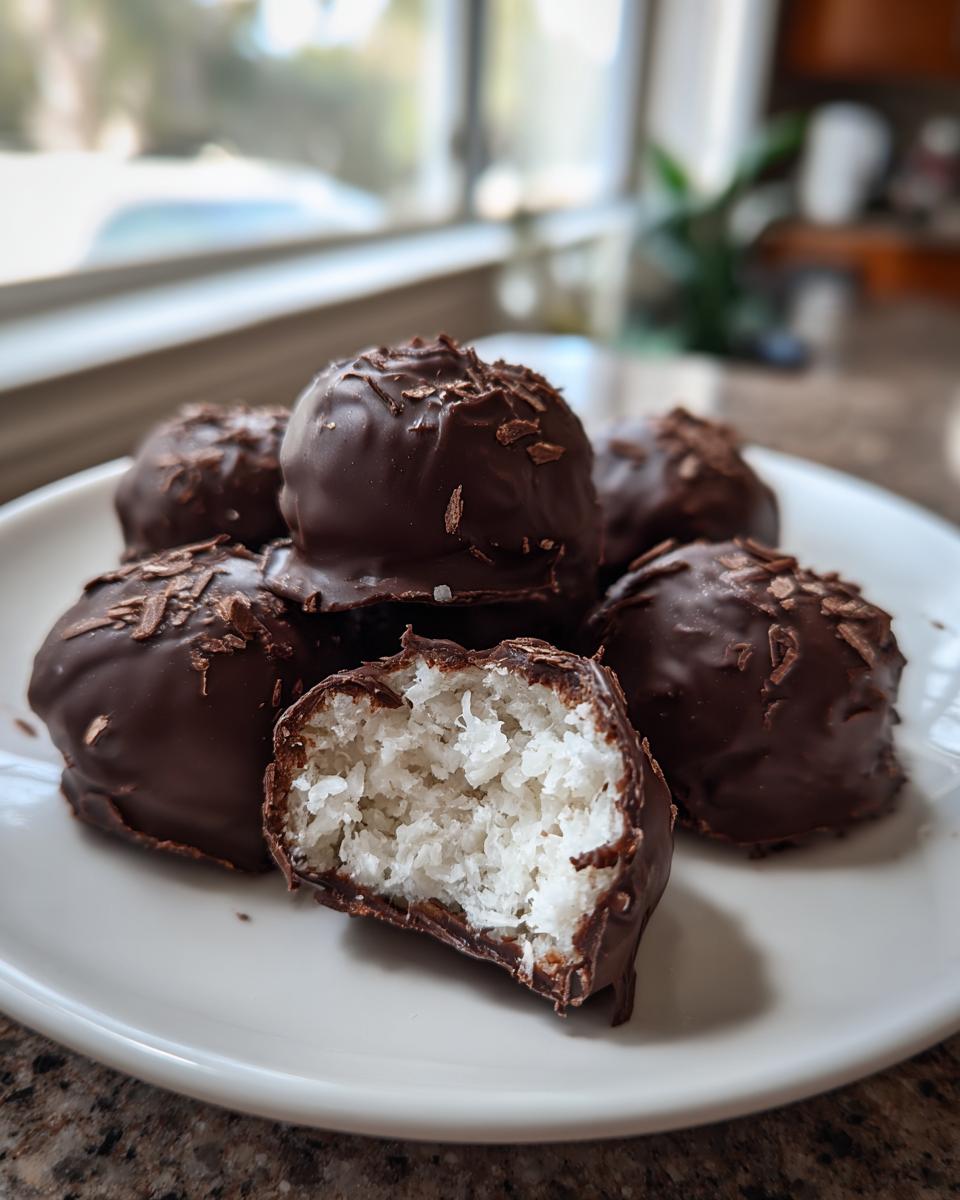
Tips for Success When Making Your Copycat Candy Bar Recipe
Making great almond joy truffles means paying attention to a couple of key spots where things can go slightly sideways. Since these are no-bake, the structure relies entirely on getting the consistency right and managing temperature. I learned these little tricks the hard way so you don’t have to! If you are looking for more foolproof candy tricks, checking out my guide on easy candy recipes might help you out!
Troubleshooting the Coconut Base:
- Too Dry? If your mixture won’t clump, it means you need a little more binder. Add another splash—maybe a teaspoon—of maple syrup, or even a tiny bit more almond butter. Just add it slowly, mixing well after each addition until you can roll a ball without it crumbling apart in your hands.
- Too Wet? This is trickier, but usually happens if your almond butter was very oily. Sprinkle in just a tablespoon of extra unsweetened shredded coconut at a time. The coconut will absorb that excess moisture and help firm things up enough to roll.
Handling the Chocolate Dip:
The absolute number one mistake people make with chocolate coatings is letting the chocolate get too hot. If your chocolate seizes, meaning it gets grainy and stiff instead of smooth, it’s usually because a drop of water sneaked in, or you overheated it. If that happens, don’t panic! Stir in about 1 teaspoon of solid coconut oil and keep stirring gently off the heat. That little bit of fat often smooths things right out. Remember, dipping those rock-hard, frozen coconut centers is non-negotiable. They need to stay frozen solid for at least 30 minutes so they don’t squash when you dunk them into the warm chocolate!
If you follow those two steps—getting the base consistency right and keeping your centers frozen—I promise you’ll end up with crisp, perfectly coated almond joy truffles every single time.
Storage and Make-Ahead Tips for Your Homemade Almond Joy
One of the best things about these almond joy truffles is that they are fantastic for planning ahead! Since they are no-bake and coated in chocolate, they actually hold up really well, which makes them perfect for stashing away before a big party or using as last-minute holiday chocolate treats.
The trick here is moisture control and temperature. Because the center is made of coconut and bound with almond butter, it stays soft and fresh if kept cool. We use dark chocolate, which is generally more stable than milk chocolate, but refrigeration is still the gold standard for longevity here.
If you want to prepare them a bit ahead of time, you can definitely make the coconut centers (Step 1 and 2 without the chocolate dip) and store those rolled balls in an airtight container in the fridge for up to three days. They freeze beautifully too! Pop them in the freezer for up to a month. Just know that if you freeze them, they need that mandatory 30-minute pre-dip freeze again before you try to coat them!
Once they are fully dipped and set, I strongly recommend keeping all your finished homemade almond joy treats refrigerated. An airtight container works best. They usually stay delightfully fresh and delicious for about two weeks when kept chilled. I find they are actually better on day two, once the flavors have fully married in the cold!
If you are working on your holiday baking schedule, these are great candidates to make about a week out. You can dip them, store them in the fridge, and then pull them out about 15 minutes before serving. If you want some more ideas for making desserts well ahead of time, check out my favorite tips for holiday chocolate treats!
Serving Suggestions for These Quick Dessert Bites
Once you’ve perfected these almond joy truffles, the next step is showing them off! Since they are small, gorgeous, and basically a bite of tropical vacation, they shine in so many settings. They are certainly delicious enough to be a main event, but they also play really well with other treats.
If you are serving these as part of a larger dessert spread, I always suggest pairing them with something tangy or clean to cut through the richness of the chocolate and coconut. Think fresh raspberries, maybe a small tart lemon cookie, or even just a mound of fresh strawberries nearby. They make such beautiful additions to any platter of quick dessert bites.
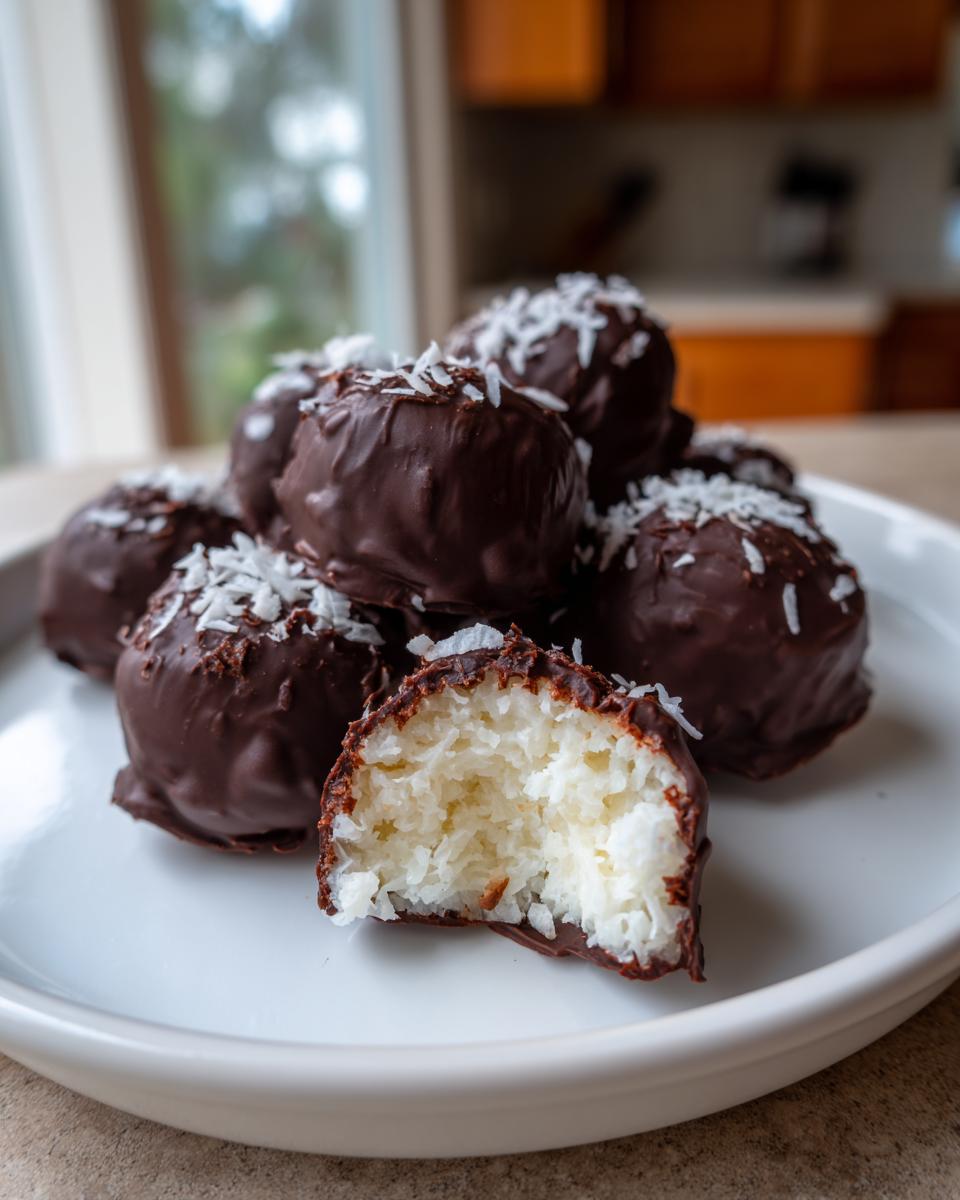
Now, let’s talk gifting, because these are genuinely one of the prettiest things you can make with so little effort. They look incredible bundled up! Forget plain plastic bags. I love using clear cellophane bags tied with a fancy ribbon—maybe something silver or turquoise to lean into that seaside, tropical vibe. You can even layer them in little paper cupcake liners inside a decorative tin. If you’re making a big batch for neighbors or teachers, definitely check out my thoughts on how to wrap homemade candy for gifts to make them look truly professional.
Presentation Tip: Because the whole almond is sitting right on top, make sure you have a little space between them on the serving tray so people can easily grab one without smudging the chocolate coating. They are just too pretty to handle roughly!
Frequently Asked Questions About Almond Joy Truffles
When I first started making these almond joy truffles, I had a million questions bubbling up, just like you probably do now! It’s important to get these little details right so your coconut chocolate almond candy turns out perfect every single time. Here are a few things people ask me most often. If you’re looking for more great ideas, swing by my favorite list of 4 ingredient truffles later!
Can I use sweetened coconut instead of unsweetened?
Oh, I strongly, strongly advise against it, honey! The recipe is carefully balanced between the fat from the almond butter, the wetness of the syrup, and the coconut. If you use sweetened coconut flakes, the whole mixture gets gummy and way too sweet. We want the maple syrup to control the sweetness, not compete with it! Stick to unsweetened shredded coconut for the best texture in your creamy coconut filling.
Is skipping the 30-minute freeze step really a big deal?
Yes, yes, it is! Think of it this way: you’re dealing with a soft, sticky dough, and you’re dipping it into warm, melted chocolate. If that coconut ball isn’t rock solid, the heat from the chocolate will cause it to melt, break down, and you’ll end up with a chocolate puddle with coconut islands floating around instead of proper no bake truffles. Freeze them hard until they feel like little stones; that’s the secret to a great shell!
How long do these homemade Almond Joy truffles last?
Since these are homemade candy for gifts, shelf life is important! As I mentioned before, they happily live in the refrigerator. In an airtight container, they stay incredibly fresh for about two weeks. They rarely last that long in our house, though! If you need them for an event next month, you can freeze the finished, coated truffles for up to two months. Just let them thaw in the fridge for an hour before serving.
Can I use peanut butter instead of almond butter?
You absolutely *can*, and it turns into a delicious peanut butter chocolate coconut ball! However, if you are aiming for that true, classic candy bar flavor—the signature taste of the copycat candy bar recipe—you should stick with almond butter. Peanut butter has a much bolder flavor profile that can easily overpower the subtle sweetness of the coconut.
For even more delicious candy ideas, I always love seeing what others are making! I remember seeing a great variation on these over at High Heels and Grills that was super well-received.
Estimated Nutrition for Chocolate Covered Coconut Balls
Now, I know many of us home cooks try not to obsess too much over the numbers when we are baking joy into a treat, but sometimes it’s good to know what you’re enjoying! Since these chocolate covered coconut balls are made with simple ingredients, the nutrition is pretty straightforward. I always want to be transparent about what goes into my food, and these numbers reflect the recipe exactly as written above.
Please remember that these figures are estimates! I’m a cook, not a registered dietitian, so your actual counts might vary slightly depending on the exact brand of dark chocolate or coconut you grab off the shelf. But for a rich, satisfying treat, the numbers look pretty kind!
- Serving Size: 1 truffle
- Calories: 150
- Sugar: 12g
- Sodium: 10mg
- Fat: 10g
- Saturated Fat: 6g
- Unsaturated Fat: 4g
- Trans Fat: 0g (Hooray for no weird fats!)
- Carbohydrates: 15g
- Fiber: 2g
- Protein: 3g
- Cholesterol: 0mg
See? Not too bad for something that tastes like a dream! You get a little bit of fiber and protein in there, too. That’s what happens when you use real, identifiable ingredients instead of mystery fillers. Enjoy one (or two!) guilt-free!
Share Your Homemade Almond Joy Truffles Experience
Well, we did it! We took a simple candy craving and turned it into the most decadent, easy-to-make almond joy truffles you can imagine. Honestly, seeing your recreations in my inbox or on social media is the absolute best part of my week. It reminds me that cooking really is about connection, even when we’re whipping up something that tastes like childhood nostalgia.
I really hope you loved the process of making these coconut chocolate almond candy treats. Now that they’re cooling on the counter or chilling in the fridge, I’d be so grateful if you’d take two little minutes to let me know how they turned out for you!
Did the chocolate coating get nice and shiny? Did your coconut mixture hold together perfectly? Did your kids immediately snatch up all the quick dessert bites before you could wrap them for gifting?
Please, leave a rating and hop down into the comments section below to tell me everything! I read every single note you leave, and your feedback helps me keep these recipes reliable for everyone else coming to Cut Cook Taste looking for the best homemade almond joy.
If you snapped a picture of your beautiful finished batch, please tag me on Instagram or share it on Pinterest so I can see your amazing work! You can find me over at my main blog page, or check out other amazing bakers who tackled these very same no bake truffles over at The Novice Chef Blog for even more inspiration.
Thank you so much for cooking with me today. It means the world to me that you chose my kitchen as a stop on your baking journey. Keep cutting, keep cooking, and definitely keep tasting!
Warmly,
Sarah Peterson
PrintEasy 4-Ingredient Almond Joy Truffles (No-Bake Copycat Recipe)
Make homemade Almond Joy truffles that taste just like the candy bar. This easy, no-bake recipe features a creamy coconut center, a whole almond, and a rich chocolate coating. Perfect for quick holiday treats or gifting.
- Prep Time: 20 min
- Cook Time: 5 min
- Total Time: 25 min
- Yield: About 20 truffles 1x
- Category: Dessert
- Method: No-Bake
- Cuisine: American
- Diet: Vegetarian
Ingredients
- 2 cups unsweetened shredded coconut
- 1/2 cup almond butter
- 3 tablespoons maple syrup
- 1 cup dark chocolate chips
- 1/2 cup whole almonds (for topping)
Instructions
- Combine the shredded coconut, almond butter, and maple syrup in a medium bowl. Mix until a sticky dough forms.
- Roll the coconut mixture into small balls, about 1 inch in diameter. Press one whole almond into the top center of each ball.
- Place the coconut balls on a baking sheet lined with parchment paper. Freeze for 30 minutes until firm.
- Melt the dark chocolate chips in a microwave-safe bowl in 30-second intervals, stirring until smooth.
- Dip each frozen coconut ball into the melted chocolate, ensuring it is fully coated. Return the truffles to the parchment-lined sheet.
- Refrigerate the Almond Joy truffles for at least 1 hour, or until the chocolate coating is set.
Notes
- For a smoother coating, add 1 teaspoon of coconut oil to the melted chocolate.
- If you prefer milk chocolate, substitute the dark chocolate chips with milk chocolate chips.
- Store these homemade candy bar treats in an airtight container in the refrigerator.
Nutrition
- Serving Size: 1 truffle
- Calories: 150
- Sugar: 12g
- Sodium: 10mg
- Fat: 10g
- Saturated Fat: 6g
- Unsaturated Fat: 4g
- Trans Fat: 0g
- Carbohydrates: 15g
- Fiber: 2g
- Protein: 3g
- Cholesterol: 0mg