
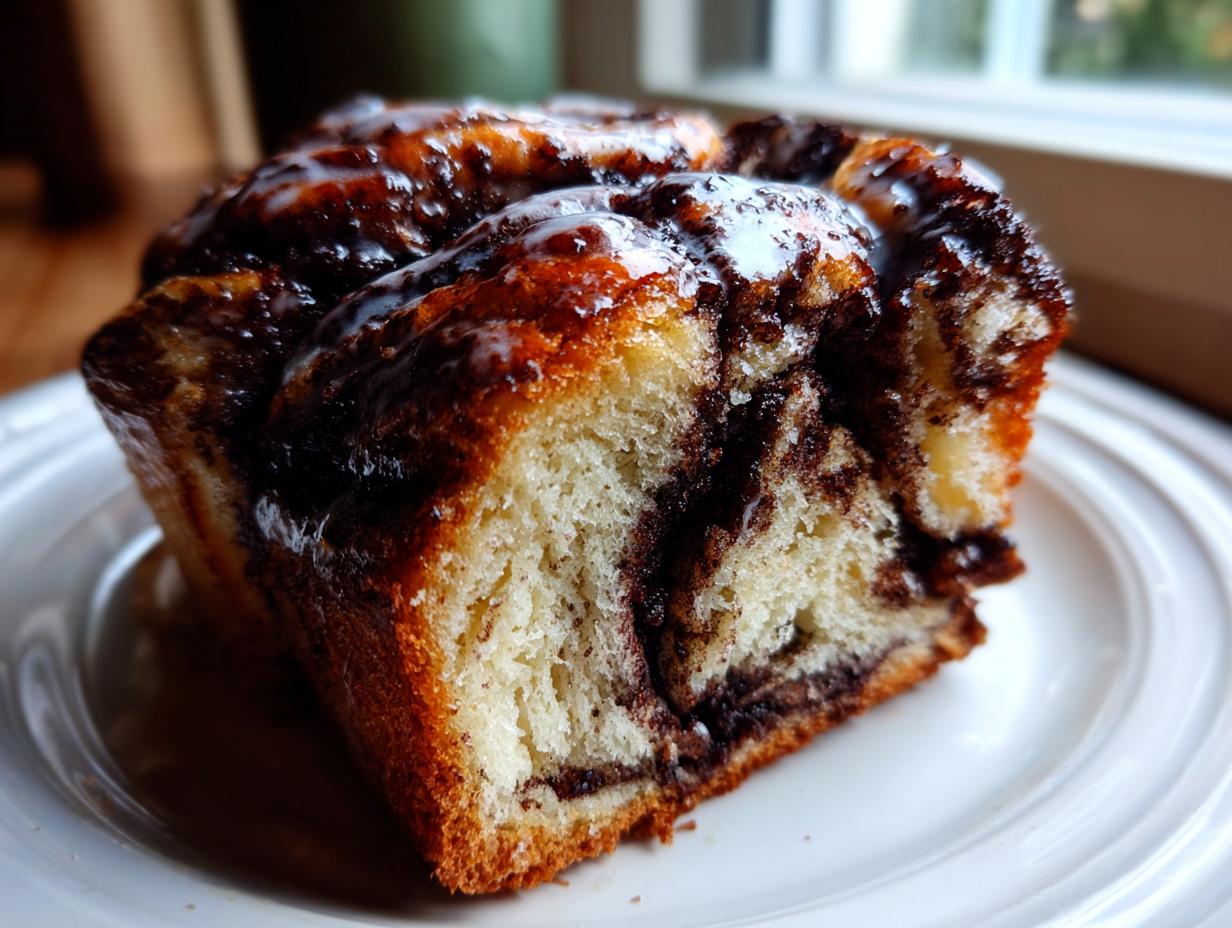

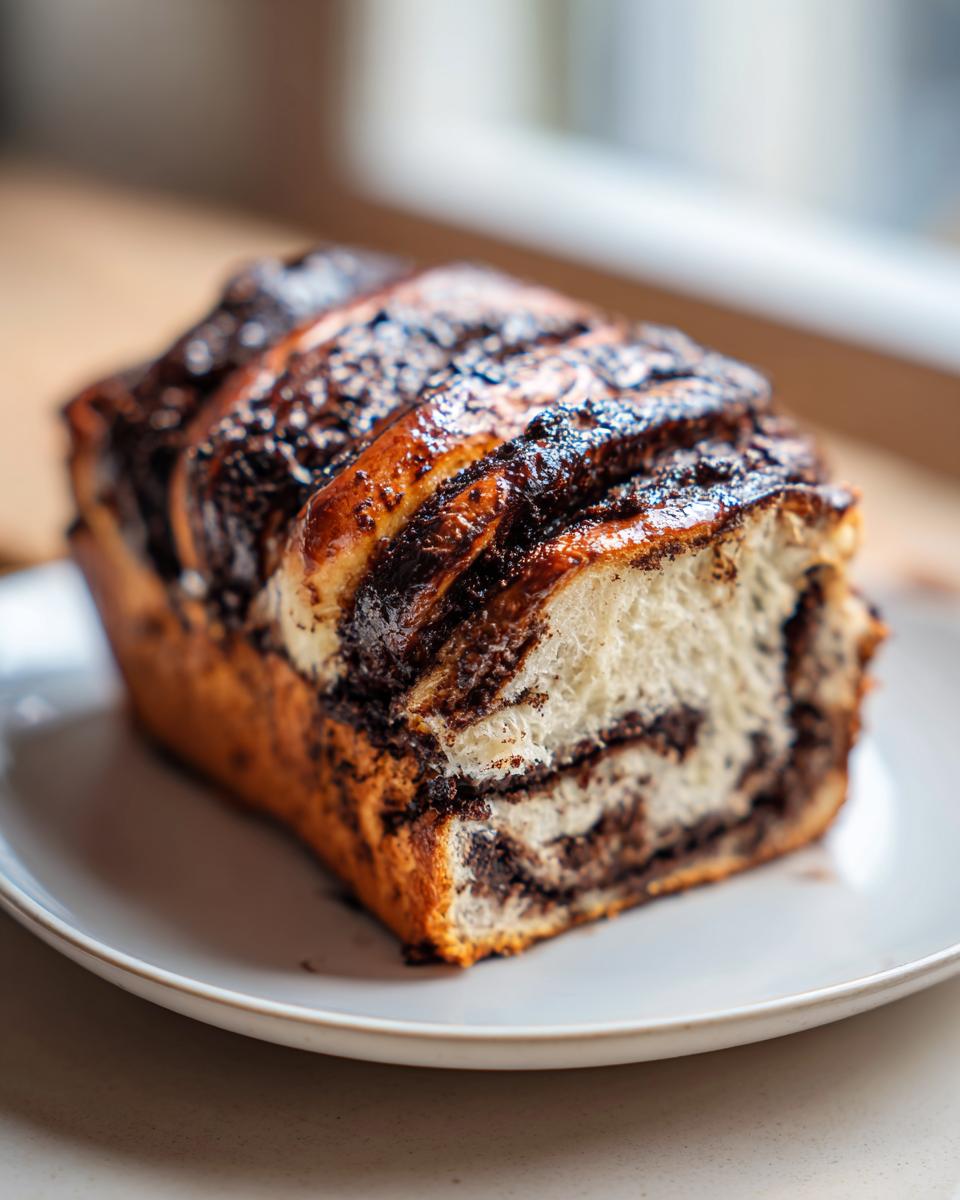
Oh, friends, when you see that perfect loaf of chocolate babka—all glossy from syrup, showcasing those incredible dark chocolate ribbons spiraling out from the golden crust—it just takes your breath away, right? I always thought making something that looks like it came straight from a famous New York bakery was way out of my league. I remember wrestling with my first few yeast bread recipes; they were either too tough or totally deflated!
But trust me when I say, this homemade chocolate babka recipe changed everything for me. This is the ultimate guide to achieving that bakery-style texture—it’s soft, unbelievably buttery, and just gooey enough in the center. We’re making a beautiful, swirled sweet bread that’s perfect for impressing everyone at brunch. Forget dense, dry loaves; we are chasing that soft, tender pastry dream!
It takes a little patience because it is a real brioche, but every step is worth it, and I’ll walk you through the tricky twisting part until you feel like a pro. If you’re ready to master the magic of a great **yeast bread recipe**, let’s start here. For another foundational loaf, check out my tips for my easy milk bread recipe!
- Why This Homemade Chocolate Babka Recipe Delivers Bakery-Style Results
- Essential Ingredients for Your Chocolate Babka
- Step-by-Step Instructions: How to Make Chocolate Babka
- Tips for the Best Chocolate Babka Success
- Serving Suggestions for Your Chocolate Babka
- Storing and Reheating Your Homemade Chocolate Babka
- Common Questions About Making Chocolate Babka
- Estimated Nutrition for This Chocolate Babka
- Share Your Bakery Style Babka Creation
- Estimated Nutrition for This Chocolate Babka
- Share Your Bakery Style Babka Creation
Why This Homemade Chocolate Babka Recipe Delivers Bakery-Style Results
What makes this chocolate babka shine? It all comes down to the dough—we are making a true chocolate brioche here! That means loads of rich butter and eggs, which gives us that incredible, pillowy softness that melts in your mouth. We aren’t cutting corners on flavor, either. The contrast between the buttery dough and the dark, slightly bittersweet chocolate filling is what makes this a true bakery-style babka.
It’s definitely a recipe that asks for a bit of your time, but since this is a **weekend baking project** for me, I don’t mind giving it what it needs. The results are a gorgeous, **tender pastry** that tastes miles beyond anything store-bought.
Achieving the Perfect Brioche Swirl and Texture
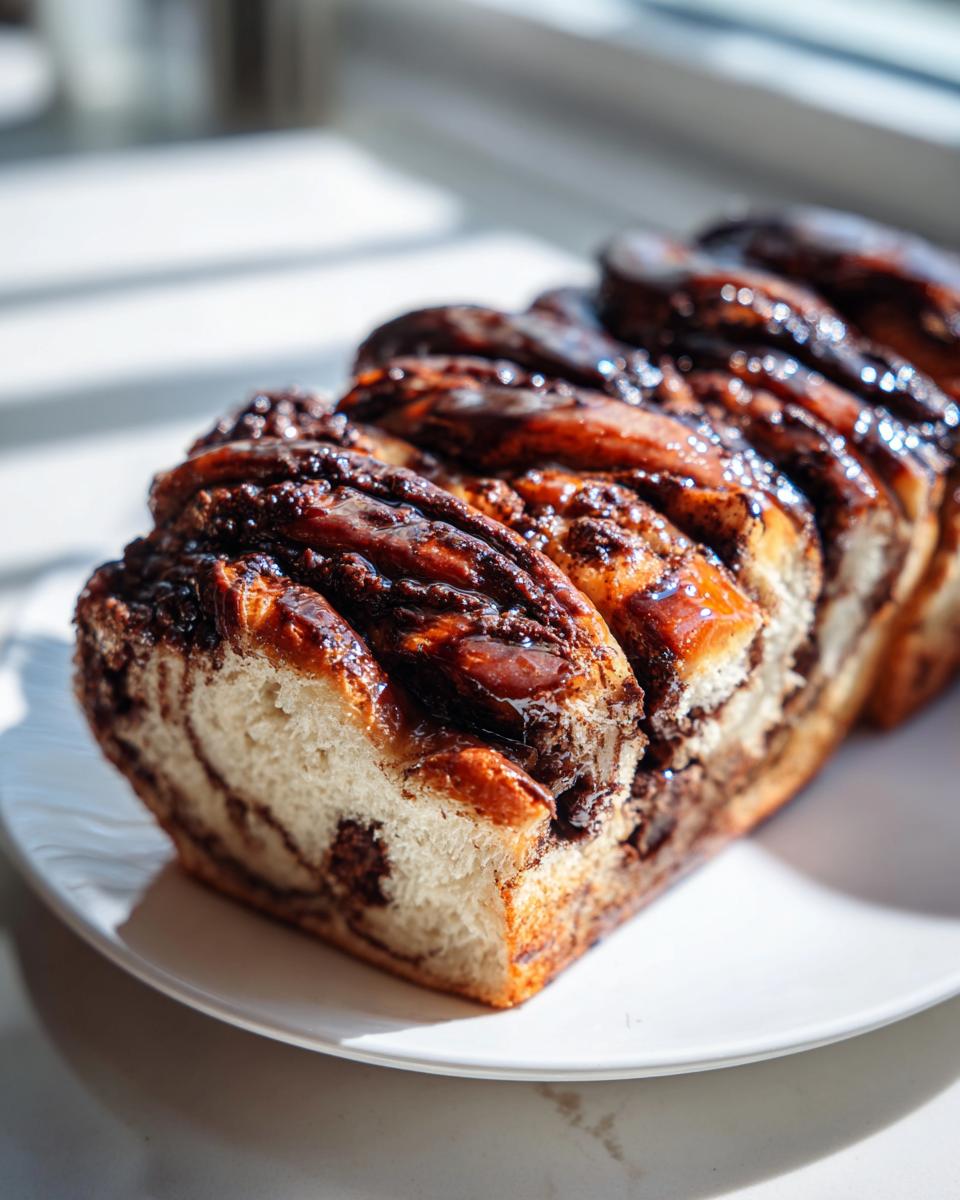
The visual appeal of this braided chocolate loaf is half the fun. That dramatic, ribboned look isn’t just for show, though! It’s a direct result of carefully rolling out the dough, generously slathering on the filling, and then twisting it just right. That twisting motion traps the filling perfectly within the layers.
When you get the handling right—and I show you exactly how we do that later on—you create little pockets of chocolate throughout the loaf. This means every single slice of your chocolate babka gets that perfect ratio of soft, rich dough to gooey, fragrant chocolate. It truly is stunning!
Essential Ingredients for Your Chocolate Babka
Okay, now we get down to the heart of it: what you actually need! With any good yeast bread recipe, especially one as rich as this chocolate babka, precision matters. We aren’t just mixing things in a bowl here; we are building structure, flavor, and that signature buttery texture. Don’t worry, I’ve written out the list so clearly you won’t miss a thing. Think of these lists like your treasure map to the best loaf ever.
If you’ve loved the moisture in my moist pumpkin bread recipe, you’ll appreciate why we treat this dough with such care!
For the Moist Babka Dough
The dough is where the brioche magic begins, so pay attention to the temperatures here! We need happy yeast, and happy yeast means warm, but absolutely not hot, milk. If your milk is too hot, you’ll kill your yeast before it even gets started!
- 1 cup whole milk, warmed to 105-115°F (This is the sweet spot for waking up the yeast!)
- 2 1/4 teaspoons active dry yeast
- 1/2 cup granulated sugar
- 4 large eggs, room temperature (This is super important so they blend smoothly!)
- 1 teaspoon vanilla extract
- 4 1/2 cups all-purpose flour, plus more for dusting
- 1 teaspoon salt
- 1 cup (2 sticks) unsalted butter, softened and cut into pieces (Make sure it is *truly* softened, not melted!)
Crafting the Decadent Chocolate Filling
This is where we load in the dark flavor! We want bold chocolate here to stand up to that rich brioche dough. Don’t skimp on the quality of your cocoa powder; it makes a huge difference in that final gorgeous swirl. This is truly what makes the filling so decadent chocolate filling.
- 1 cup (2 sticks) unsalted butter, softened
- 1 cup packed light brown sugar (For that hint of molasses flavor!)
- 3/4 cup unsweetened cocoa powder
- 1 teaspoon ground cinnamon
- 1/2 teaspoon salt
- 8 ounces bittersweet chocolate, finely chopped (I use at least 60% cacao for the best taste!)
Simple Syrup Components
Don’t skip this part! I know it seems like an extra step when the babka is already baked, but this step is crucial for keeping your chocolate babka soft and glossy for days. It soaks right in and locks in moisture.
- 1/2 cup granulated sugar
- 1/2 cup water
Step-by-Step Instructions: How to Make Chocolate Babka
Alright, deep breath! We are tackling the actual assembly now. Learning how to make babka feels intimidating, but trust me, once you see the dough come together—that rich, buttery chocolate babka—it just takes your breath away, right? I always thought making something that looks like it came straight from a famous New York bakery was way out of my league. I remember wrestling with my first few yeast bread recipes; they were either too tough or totally deflated!
But trust me when I say, this homemade chocolate babka recipe changed everything for me. This is the ultimate guide to achieving that bakery-style texture—it’s soft, unbelievably buttery, and just gooey enough in the center. We’re making a beautiful, swirled sweet bread that’s perfect for impressing everyone at brunch. Forget dense, dry loaves; we are chasing that soft, tender pastry dream!
It takes a little patience because it is a true chocolate brioche, but every step is worth it, and I’ll walk you through the tricky twisting part until you feel like a pro. Many people look for the best techniques out there, and I always refer back to that incredible recipe from Naomi Elberg over at The Kitchn when I need a refresher on perfection. If you’re ready to master the magic of a great **yeast bread recipe**, let’s start here. For another foundational loaf, check out my tips for my easy milk bread recipe!
Preparing the Brioche Dough Base
First things first, we need to wake up that yeast! Combine your warm milk, yeast, and just a tiny bit of sugar in a small bowl. Let it sit for about ten minutes until it gets foamy on top. If it’s not foamy, your milk was probably too hot, and we need to start that part over. Don’t skip this check!
In your mixer bowl, combine your room temperature eggs, vanilla, and the rest of your sugar. Mix that until it’s pale and a little thickened, which takes about three minutes on medium speed.
Now, we start adding the dry stuff—whisk your flour and salt together before slowly adding it to the wet mixture on low speed. Once it’s *just* combined—I mean, barely mixed—it’s time for the butter. Add the softened butter pieces one by one, waiting about 30 seconds between each addition. We need to let that butter incorporate fully. Keep mixing on medium-low for a full 8 to 10 minutes until the whole thing is smooth, elastic, and pulls away cleanly from the sides of the bowl. That long mix develops the gluten we need for that airy-yet-structured dough.
Oil your bowl lightly, pop the dough in, give it a flip so it’s coated, cover it up, and let it hang out somewhere warm for 1.5 to 2 hours until it’s totally doubled in size. If you’ve loved the moisture in my homemade apple pie recipe, you’ll appreciate why we treat this dough with such care!
Mixing the Decadent Chocolate Filling
While that beautiful dough is having its nap, we make the filling! This needs to be spreadable, so grab another container of softened butter.
- Beat the softened butter until it’s looking creamy.
- Mix in your brown sugar, cocoa powder, cinnamon, and salt until everything is perfectly blended. This is where all the deep flavor for your final chocolate babka is hiding—we call this our decadent chocolate filling for a reason!
- Finally, stir in the chopped bittersweet chocolate. That’s it! Set this aside.
Rolling, Spreading, and Creating the Swirled Sweet Bread
Punch down the risen dough gently—it’s going to smell amazing! Turn it out onto a floured surface. We need to roll this out into a big rectangle, about 12 inches by 18 inches. Try to keep the edges as neat as possible, even though we are roughing it up next! You want a nice, even sheet for that stunning brioche swirl bread effect.
Take your glorious filling and spread it everywhere, totally covering the dough, but leave about one inch bare along one of the long edges. This border is going to seal our loaf shut later.
Now, the fun part: starting from the long edge *opposite* that border, roll it up tightly into a log, just like you would a big jelly roll. Make sure the seam lands right next to that 1-inch border you left.
Here’s the secret to that amazing interior. Using a sharp knife—and be careful here!—slice that log right down the center, lengthwise. You are cutting through all those gorgeous layers! Turn the two cut halves so that the chocolate layers are facing upward. Now, just gently twist the two strands around each other, keeping those cut sides facing up so the swirl shows! Pinch the ends together firmly and carefully transfer your braided chocolate loaf masterpiece into a greased 9×5 inch loaf pan. Be gentle so you don’t squish the air out!
The Final Rise and Baking the Chocolate Babka Loaf
Cover the pan loosely and let it rest in a warm spot for another 45 to 60 minutes. It should look puffy and nearly doubled again. About 15 minutes before the rise finishes, go ahead and preheat your oven to 350°F (175°C).
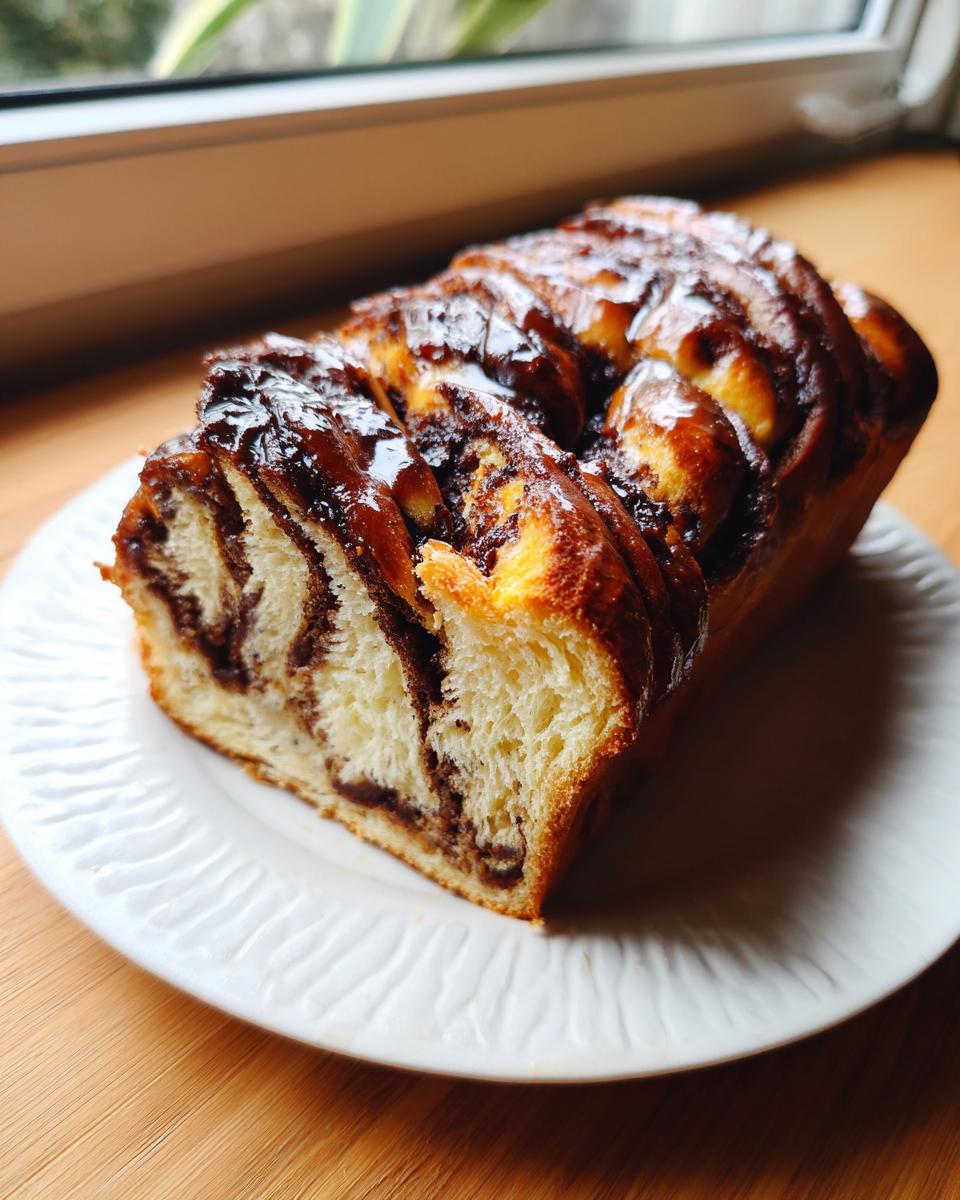
Bake that beautiful **chocolate babka loaf** for 35 to 45 minutes. Keep an eye on it! If the top gets dark brown before the center is cooked—and this happens a lot with rich dough—just loosely tent some aluminum foil over the top. We want golden brown, not burnt!
The Essential Simple Syrup Glaze
This syrup is non-negotiable for a “soft and gooey” result when you try this chocolate babka recipe! As soon as that babka comes out of the oven—and I mean immediately—you need to brush that entire top liberally with the simple syrup. It soaks right in and locks in moisture, which is why this loaf stays so soft!
To make the syrup, just boil the water and sugar together until the sugar dissolves, then pull it off the heat. Brush it on, let the babka cool in the pan for about 15 minutes so it can firm up slightly, and *then* transfer it to a wire rack to cool completely. Never skip this step if you want that signature moist crumb!
Tips for the Best Chocolate Babka Success
You’ve got the skill now, but baking any rich dough, especially one as lovely as this chocolate brioche, sometimes needs just a little nudge in the right direction. I’ve learned a few tricks over the years, mostly by making mistakes myself, that help guarantee you get that soft, melt-in-your-mouth, tender pastry feeling every time you slice into this loaf.
These little tweaks are what turn a good loaf into a *great* one, the kind people ask you to bring to every gathering! If you want more tips on getting that perfect tender texture, check out my thoughts on making butter pecan cookies super soft!
Dough Temperature and Yeast Activation Tips
Remember how I talked about yeast activation earlier? That’s the foundation for this whole yeast bread recipe, seriously. I know it probably sounds obsessive, but microwave your milk, put a thermometer in it, and check it *before* you add the yeast. If it dips below 100°F, that yeast gets lazy. If it hits 130°F, it’s dead! You want that sweet spot between 105°F and 115°F.
My personal rule when handling the dough itself is: don’t rush the kneading, and don’t add extra flour unless the recipe specifically tells you to. This **chocolate babka** dough is designed to be sticky when you first start adding the butter—that’s normal because it’s so rich! Resist the urge to dust the bowl with an extra cup of flour just to make it look less messy. Patience during that long 8 to 10-minute knead is what develops the strength for the final braid. If you’re baking something else that needs soft handling, I have great tips for easy lemon scones too!
Making Your Chocolate Babka Ahead of Time
This right here is my secret weapon for making any big **weekend baking project** feel manageable: the cold-proof! You do not have to bake this all in one day, and honestly, I think it tastes even better the next day because those buttery flavors really get to mingle.
Once you’ve mixed the dough and it’s smooth (Step 4 in the instructions), instead of letting it rise on the counter for 2 hours, cover it tightly and stick that whole bowl right into the refrigerator. Let it cold-proof for at least 8 hours, or even overnight! The slow, cool rise develops tons of deep, complex flavor that you just can’t rush.
When you’re ready to bake the next day, pull the dough out and let it warm up on the counter for about an hour until it’s soft enough to still be manageable before rolling it out with the filling. It gets rid of that daytime pressure! For more ideas on recipes that benefit from overnight resting, you might enjoy looking into why some bakers swear by overnight resting for their loaves; you can see some inspirational ideas over at Sugar, Love, Spices.
Serving Suggestions for Your Chocolate Babka
Now that you have this magnificent, glossy, bakery-style loaf cooling, you might be wondering the best way to serve it! Honestly, the best advice I can ever give you about a slice of perfect chocolate babka is this: serve it slightly warm or at room temperature. If you wait too long, the syrup can sometimes make the bottom a little too moist, so while it’s good cold later, it’s just magical when it’s fresh.
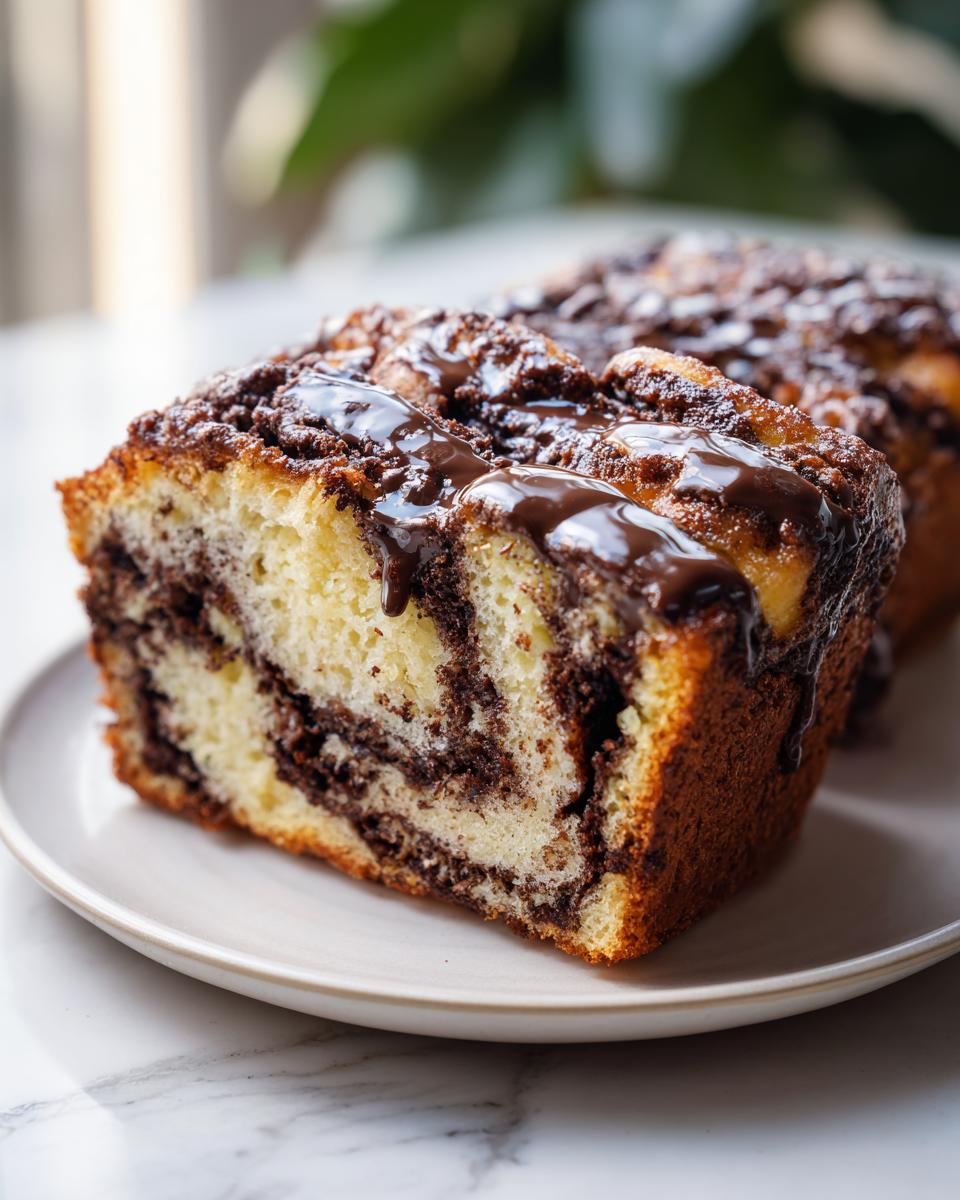
This chocolate sweet bread is truly versatile. It shines just as brightly as a special occasion showstopper as it does paired with your morning routine. For me, the absolute classic way to enjoy a slice is next to a hot, strong cup of coffee. I love that slightly bitter coffee cutting through the sweet richness of the butter and dark chocolate. It’s the perfect pairing for those quiet mornings when you want to treat yourself!
But let’s talk about when to pull this out. Don’t save this only for holidays! This makes incredible **babka for brunch**. Imagine slicing this beautiful **brioche swirl bread** next to fresh fruit or maybe even some slightly salty prosciutto if you feel adventurous. It elevates a simple Saturday brunch instantly. If you are looking for other amazing brunch items that are just as satisfying but maybe easier to whip up, you have to try my best bakery-style blueberry muffins!
Of course, it’s a spectacular dessert too. A thin slice after dinner is heavenly. If you want to dress it up for company, a little dollop of fresh, unsweetened whipped cream on the side balances the richness perfectly. Enjoy every single swirl!
Storing and Reheating Your Homemade Chocolate Babka
This is one of those recipes—a true homemade chocolate babka—that actually tastes *better* the next day once everything has settled, but we need to make sure we store it correctly so it doesn’t dry out. Remember that glorious simple syrup we brushed all over the top when it came out of the oven? That stuff does a lot of the heavy lifting in keeping this **chocolate babka recipe** moist, but it still needs protection from the air!
If you plan on eating the loaf within two days, just wrap it tightly! I like to use plastic wrap first—get it snug around the whole loaf—and then wrap it again in foil. This double layer is fantastic for keeping out refrigerator odors and preventing that crust from going stale too fast. Keep it on the counter at room temperature. Seriously, avoid the fridge if you can, as cold temperatures really do dry out bread doughs, even rich ones like this chocolate brioche.
If you need to keep it longer, freezing is absolutely the way to go. Freezing stops the aging process completely, and when you want a slice later, you just thaw it out! I actually prefer freezing it in slices rather than the whole loaf, because who really wants to thaw a giant loaf just for one morning coffee?
If you are looking for great ways to use up any berries you might have lying around, I highly recommend checking out my recipe for strawberry freezer jam—it’s perfect for toast alongside your babka!
Here is how I manage the long-term storage:
- Slicing for the Freezer: Once the babka is completely cool (and I mean *completely*) slice it into thick pieces—at least an inch thick.
- Wrapping Individual Slices: Wrap each individual piece tightly in plastic wrap first, pressing out as much air as possible. Then, add a second layer of protection, maybe a small zip-top freezer bag or another layer of foil, especially if you plan to store it for more than a month.
- Thawing Magic: When you’re craving your chocolate fix, just pull out a slice or two. Let it sit on the counter, still wrapped, for about an hour or two at room temperature. That moisture trapped inside will redistribute perfectly.
As a little tip, if the slice seems a *tiny* bit less soft after thawing than when it was fresh, pop that slice (still unwrapped) in the microwave for about 10 to 15 seconds. That brief zap of heat wakes up the butter and makes it taste freshly baked again. It’s a trick I learned to revive leftovers!
For more amazing tips on keeping baked goods tasting fresh, I always love seeing what other bakers recommend over at Tastes Better From Scratch. They have great wisdom for those of us who bake too much!
Common Questions About Making Chocolate Babka
Baking is all about practice, and when you’re tackling something as wonderful and rich as this **chocolate babka**, you’re bound to have questions! I was certainly nervous when I first tried to get that perfect brioche swirl bread look. I want this recipe to feel totally achievable, not like some impossible culinary feat. So let’s tackle the usual suspects that pop up when people make this for the first time. If you have other general cooking questions, you can always browse my whole archive of posts!
Can I skip the braiding step in this chocolate babka recipe?
That braiding and twisting step feels like the most complicated bit, I know! It’s what creates those beautiful, flaky layers and ensures the chocolate filling spreads throughout the entirety of the loaf. Visually, it’s stunning, and structurally, it helps hold the rich dough together while baking. So, if you can manage it, please try the twist!
However, if you are really struggling with the twisting (it takes practice!), you definitely have a simpler backup plan. After you’ve spread the filling over the 12×18 rectangle and rolled it into a tight log, you can skip the slice-down-the-middle part. Just place the whole log seam-side down into your pan. You won’t get the dramatic, layered look, but you will still have an incredibly moist, chocolate-filled sweet bread inside! It’s cheating a little, but it still tastes fantastic.
Why is my chocolate babka dough sticky?
If your **chocolate babka dough** feels sticky, DON’T PANIC! This is probably the number one reason people give up on brioche and similar rich yeast bread recipes. Remember, we added an entire cup of butter in four separate stages! That’s a lot of fat interacting with the flour, and it takes time for the gluten structure to form around all that richness. When you first start adding the butter, the dough will look separated and messy—it looks like it’s ruining itself, but it isn’t!
The key here is patience. You absolutely must let that mixer run for the full 8 to 10 minutes until the dough dramatically changes texture. It goes from a sticky mess to smooth and elastic. Resist the urge to dump in extra flour, which will just lead to a dry, less luscious final product. Keep mixing; the butter eventually gets fully absorbed, and you’ll be rewarded with that perfect consistency. If you’re looking for recipes that demand a little patience on the kneading front, I highly recommend checking out the detailed instructions over at Recipes by Eloise for similar bread doughs.
Is this the best chocolate babka for beginners?
That’s a great question! While this isn’t technically an “easy babka recipe” in the way a quick bread is easy, I have written these instructions specifically to be as clear as possible for a dedicated beginner. Why? Because I want everyone to experience this incredible flavor!
It is a yeast bread, which always requires a bit more mindfulness than mixing cake batter, and the braiding takes a minute to learn. However, my step-by-step approach—especially the clear separation of the three phases (dough, filling, syrup)—makes the process manageable. If you use a stand mixer and follow the temperature cues religiously, I truly believe you can nail this and call it your first successful chocolate brioche!
Estimated Nutrition for This Chocolate Babka
I always like to give you a general idea of what you’re diving into when you bake something this wonderfully rich. Please remember that these numbers are just estimates! The actual nutrition will depend on the exact brands of butter, the type of chocolate you choose, and, let’s be honest, how thick you slice your piece!
This is a decadent loaf, and the high butter and sugar content means it is best enjoyed as a small treat alongside your morning coffee or as a luxurious dessert after dinner. Enjoy it responsibly!
- Serving Size: 1 slice
- Calories: 450
- Sugar: 35g
- Sodium: 250mg
- Fat: 28g
- Saturated Fat: 17g
- Unsaturated Fat: 11g
- Trans Fat: 0.5g
- Carbohydrates: 45g
- Fiber: 3g
- Protein: 7g
- Cholesterol: 100mg
Share Your Bakery Style Babka Creation
I absolutely love hearing from you all when you try one of my family heirloom recipes! Seriously, when you tackle this beautiful chocolate babka, I need to see it! Did the swirls look perfect? Did your whole house smell like chocolate heaven?
Please take a picture, leave a star rating down below, and tell me what you thought. Your feedback helps other bakers feel more confident trying this amazing recipe. I’m always tweaking things, and your comments help me refine these instructions for everyone else. If you loved this one, you might also enjoy diving into my recipe for my chocolate caramel toffee crunch cake next time you need a showstopper!
Estimated Nutrition for This Chocolate Babka
I always like to give you a general idea of what you’re diving into when you bake something this wonderfully rich. Please remember that these numbers are just estimates! The actual nutrition will depend on the exact brands of butter, the type of chocolate you choose, and, let’s be honest, how thick you slice your piece!
This is a decadent loaf, and the high butter and sugar content means it is best enjoyed as a small treat alongside your morning coffee or as a luxurious dessert after dinner. Enjoy it responsibly!
- Serving Size: 1 slice
- Calories: 450
- Sugar: 35g
- Sodium: 250mg
- Fat: 28g
- Saturated Fat: 17g
- Unsaturated Fat: 11g
- Trans Fat: 0.5g
- Carbohydrates: 45g
- Fiber: 3g
- Protein: 7g
- Cholesterol: 100mg
Share Your Bakery Style Babka Creation
I absolutely love hearing from you all when you try one of my family heirloom recipes! Seriously, when you tackle this beautiful chocolate babka, I need to see it! Did the swirls look perfect? Did your whole house smell like chocolate heaven?
Did you find that twisting process easier than you thought? Or maybe you discovered your own trick for getting that perfect, glistening top? Don’t keep those victory moments to yourself! Head down below and leave me a star rating. That helps other home bakers feel brave enough to take on this wonderful yeast bread recipe.
Sharing your experience makes this whole community stronger, and I genuinely read every single comment you leave. If you loved diving into this rich, sweet bread, be sure to check out my recipe for my chocolate caramel toffee crunch cake next time you need a showstopper!
Happy baking, my friends, and I cannot wait to see your stunningly swirled sweet bread creations!
PrintThe Ultimate Soft & Gooey Chocolate Babka Recipe: Bakery-Style Brioche at Home
Bake this homemade chocolate babka for a soft, buttery, and tender sweet bread with rich, decadent chocolate swirls. This bakery-style brioche loaf is perfect for brunch or dessert.
- Prep Time: 45 min
- Cook Time: 45 min
- Total Time: 3 hours 30 min
- Yield: 1 loaf (8-10 servings) 1x
- Category: Dessert
- Method: Baking
- Cuisine: Eastern European
- Diet: Vegetarian
Ingredients
- For the Dough:
- 1 cup whole milk, warmed to 105-115°F
- 2 1/4 teaspoons active dry yeast
- 1/2 cup granulated sugar
- 4 large eggs, room temperature
- 1 teaspoon vanilla extract
- 4 1/2 cups all-purpose flour, plus more for dusting
- 1 teaspoon salt
- 1 cup (2 sticks) unsalted butter, softened and cut into pieces
- For the Chocolate Filling:
- 1 cup (2 sticks) unsalted butter, softened
- 1 cup packed light brown sugar
- 3/4 cup unsweetened cocoa powder
- 1 teaspoon ground cinnamon
- 1/2 teaspoon salt
- 8 ounces bittersweet chocolate, finely chopped
- For the Simple Syrup:
- 1/2 cup granulated sugar
- 1/2 cup water
Instructions
- Activate the Yeast: In a small bowl, combine the warm milk, yeast, and 1 teaspoon of the granulated sugar. Let stand for 5 to 10 minutes until foamy.
- Mix the Dough: In the bowl of a stand mixer fitted with the dough hook, combine the remaining sugar, eggs, and vanilla extract. Mix on medium speed until pale and slightly thickened, about 3 minutes.
- Combine Dry Ingredients: In a separate bowl, whisk together the flour and salt. Gradually add the flour mixture to the wet ingredients, mixing on low speed until just combined.
- Add Butter: With the mixer running on low, add the softened butter, one piece at a time, waiting about 30 seconds between additions. Once all the butter is incorporated, increase the speed to medium-low and mix for 8 to 10 minutes until the dough is smooth, elastic, and pulls away from the sides of the bowl.
- First Rise: Place the dough in a lightly oiled bowl, turning to coat. Cover the bowl and let it rise in a warm place for 1.5 to 2 hours, or until doubled in size.
- Prepare the Filling: While the dough rises, make the decadent chocolate filling. In a medium bowl, beat the softened butter until creamy. Add the brown sugar, cocoa powder, cinnamon, and salt. Beat until smooth. Stir in the chopped bittersweet chocolate.
- Shape the Dough: Gently punch down the risen dough. Turn it out onto a lightly floured surface. Roll the dough into a large rectangle, about 12 by 18 inches.
- Spread and Roll: Spread the chocolate filling evenly over the dough, leaving a 1-inch border on one long edge. Starting from the long edge opposite the border, tightly roll the dough into a log.
- Braid the Loaf: Using a sharp knife, slice the log lengthwise down the center, exposing the layers. Turn the cut sides up. Twist the two strands around each other, keeping the cut sides facing up to show the swirl. Pinch the ends together and carefully transfer the braided loaf to a greased 9×5 inch loaf pan.
- Second Rise: Cover the loaf pan loosely and let the babka rise again in a warm spot for 45 to 60 minutes, or until it has nearly doubled. Preheat your oven to 350°F (175°C) during the last 15 minutes of the rise.
- Bake: Bake for 35 to 45 minutes, or until the top is deep golden brown and cooked through. If the top browns too quickly, loosely tent it with foil.
- Make Syrup: While the babka bakes, make the simple syrup. Combine the sugar and water in a small saucepan. Bring to a boil, stirring until the sugar dissolves. Remove from heat.
- Glaze: As soon as the babka comes out of the oven, brush the entire top generously with the simple syrup. Let the babka cool in the pan for 15 minutes before transferring it to a wire rack to cool completely.
Notes
- For the softest crumb, ensure your butter for the dough is truly softened, not melted.
- You can make the dough a day ahead and let it cold-proof in the refrigerator overnight for better flavor development.
- This recipe works well for weekend baking projects when you have time for the two rises.
Nutrition
- Serving Size: 1 slice
- Calories: 450
- Sugar: 35g
- Sodium: 250mg
- Fat: 28g
- Saturated Fat: 17g
- Unsaturated Fat: 11g
- Trans Fat: 0.5g
- Carbohydrates: 45g
- Fiber: 3g
- Protein: 7g
- Cholesterol: 100mg