


You know those desserts that just scream fun? The ones that instantly take you back to childhood parties or those big family potlucks where everyone circled the dessert table? Well, I’ve got the ultimate keeper for you today. We are diving headfirst into the Oreo Dirt Cake. Forget baking—this is pure, decadent, no-fuss magic, and honestly, it’s my favorite recipe when I need guaranteed applause with minimal effort.
If you’ve followed Cut Cook Taste for a while, you know I treasure those simple, reliable recipes—the ones my grandmother or dad would have made to bring everyone together. This Oreo Dirt Cake Recipe fits perfectly into that tradition. It’s creamy, it’s crunchy, and trust me, it disappears fast. Let’s get started on this no-bake Oreo dessert!
- Why This Creamy No-Bake Oreo Dirt Cake is a Family Favorite Dessert
- Gathering Ingredients for Your Oreo Dirt Cake Recipe
- Mastering the Layers: How to Prepare the Oreo Dirt Cake
- Tips for Success with Your Dirt Dessert Recipe
- Serving Suggestions for Your Oreo Dirt Cake
- Storage & Reheating Instructions for Oreo Dirt Cake
- Frequently Asked Questions About Oreo Dirt Cake
- Understanding Nutrition in This Decadent Chocolate Dessert
- Share Your Creamy Oreo Dirt Cake Creations
Why This Creamy No-Bake Oreo Dirt Cake is a Family Favorite Dessert
There’s something truly special about a Family Favorite Dessert that needs zero oven time, right? This Oreo Dirt Cake hits that sweet spot perfectly. It’s truly a Creamy Oreo Delight that works for absolutely everyone—from my nieces who argue over who gets the most gummy worms to my friends who just want a big slice of rich, nostalgic chocolate.
I’ve tested this recipe more times than I can count for everything from last-minute birthday parties to big summer barbecues. It never fails to impress! Why? Because the texture is just unbeatable when you get those layers right. It’s decadent without being heavy, and the way those crushed Oreos mix into the creamy filling is just pure genius. If you love other easy winners like my no-bake haystack cookies, you absolutely need this on your rotation.
Quick Desserts No Bake: Speed and Simplicity
If you are having a spontaneous event or just need a dessert fast after a long week, this is your hero. Seriously, the active prep time is only about 25 minutes! That’s less time than it takes to decide what to watch on TV. Because we skip the oven entirely, we skip all the preheating fuss and worrying about whether it’s baked through—it just chills and sets up beautifully. It’s the definition of a high-impact, low-effort win.
Gathering Ingredients for Your Oreo Dirt Cake Recipe
Okay, getting ready for assembly is almost as fun as eating it! Since this is a No Bake Oreo Dessert, the ingredients really do all the heavy lifting. Don’t stress, you probably have half this stuff already. The key here is temperature—make sure things like your butter and cream cheese aren’t rock hard straight from the fridge, or you’ll end up with lumps. We only want smooth creaminess here, trust me!
Here’s what you need to grab before we start crushing cookies and whipping everything together for this perfect Oreo Dirt Cake Recipe:
- 1 package (14.3 ounces) Oreo cookies (The whole package! We use them all.)
- 1 package (8 ounces) cream cheese, softened
- 1 cup unsalted butter, softened
- 1 cup powdered sugar
- 1 container (12 ounces) frozen whipped topping, thawed
- 2 packages (3.9 ounces each) instant chocolate pudding mix
- 3 cups cold milk
- Optional: Gummy worms for decoration (If you skip these, you’re missing out on the fun!)
Ingredient Notes and Substitutions for Oreo Dirt Cake
A little tip from my kitchen world: when it comes to the Oreos, stick to the classic kind if you can. Those creamy centers help the filling bind up perfectly later on. If you use a generic brand, the cookie part can sometimes be drier, which means your glorious ‘dirt’ layers might crumble a bit too easily.
Also, for that signature smooth texture that makes this a Simple Pudding Cake, that cream cheese and butter absolutely must be soft. I usually leave mine sitting on the counter for at least an hour before I even think about mixing. Don’t try to microwave them unless you want oily pockets of fat! And finally, that decoration step—the gummy worms! They are totally optional, but for me, they are a required ingredient for making truly great Dirt Cake for Kids (and the kids-at-heart).
Mastering the Layers: How to Prepare the Oreo Dirt Cake
Alright, this is where the fun really starts—building this amazing oreo dirt cake! Since it’s a no-bake Oreo dessert, we focus entirely on texture layering. If you want that incredible visual appeal and that perfect contrast between the creamy filling and the crunchy cookie bits, the process matters a lot. We want to keep the crushed cookies distinct so you get that lovely crunch in every bite of your layered Oreo dessert. Grab your biggest mixing bowls and let’s get this spectacular dirt dessert recipe built! If you love other simple chocolate treats, you should definitely check out my chocolate pudding cake recipe while you’re waiting for this to chill!
Preparing the Crushed Oreo Treats
First things first: we destroy those cookies! Take that whole package of Oreos and pop them into your food processor. Run it until they look like fine, dark soil. Don’t be tempted to use a small blender if you can help it; you want a consistent fine grind here. Once they are ground up, the most important thing is to carefully scoop out about one cup of those fine crumbs and set them aside in a separate bowl. That reserved cup is going to be the beautiful, ‘dusty’ topping that makes the final presentation pop!
Creating the Creamy Oreo Delight Filling
Now for the part that makes this a Creamy Oreo Delight. In your largest bowl, beat that softened cream cheese and butter until it looks smooth—we’re aiming for fluffy, not lumpy! Once that’s perfect, slowly beat in the powdered sugar. Next, gently fold in your thawed whipped topping—and I mean gently, we are trying to keep the air in there! In a separate bowl (don’t waste time washing it!), whisk your chocolate pudding mixes with the cold milk until it just starts to get thick. Then, here’s the crucial part: fold the pudding into the cream cheese mixture. Go easy! Overmixing at this stage deflates your filling, and we want it light and airy!
Assembling the Layered Oreo Dessert
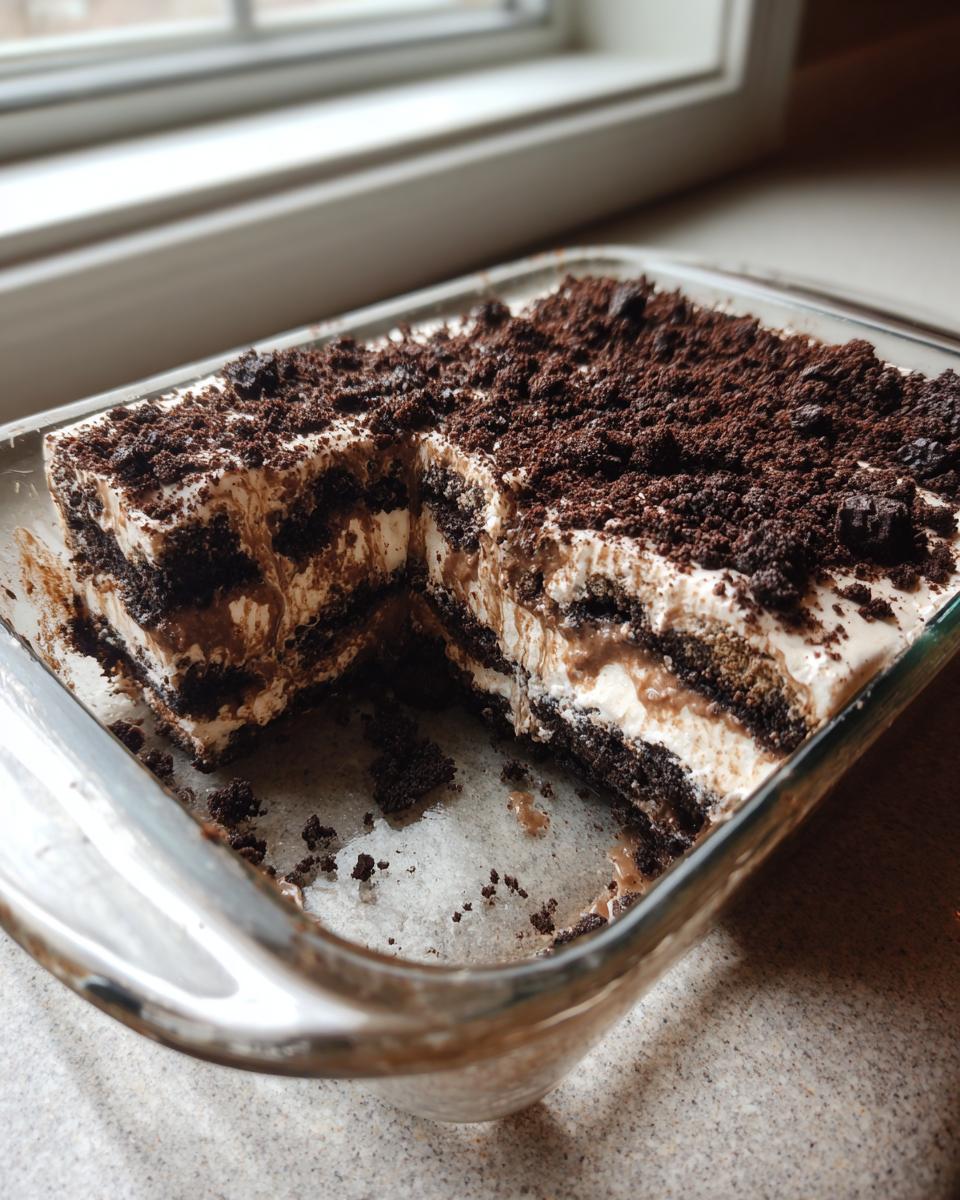
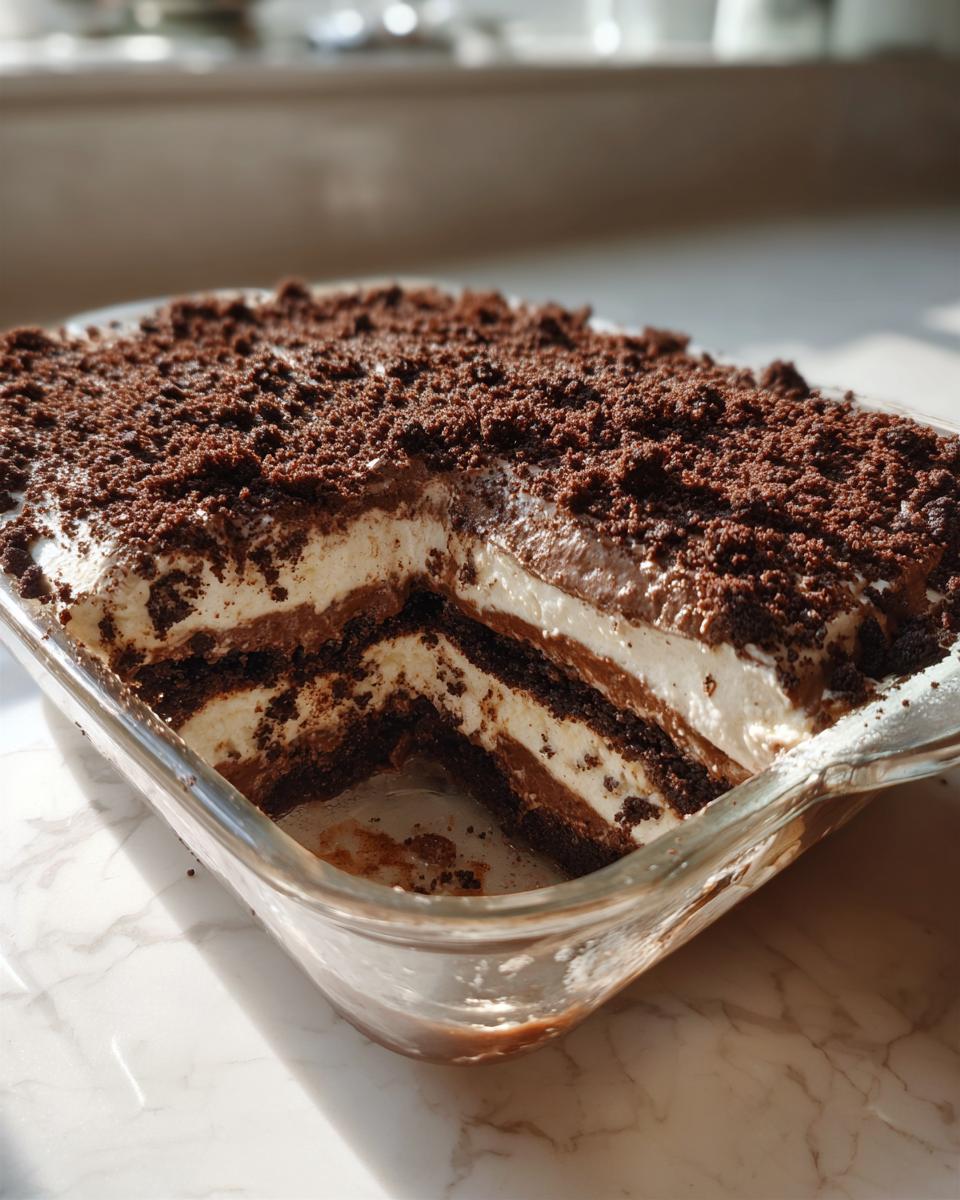
Time to build your tower of joy, usually in a pretty trifle dish or a 9×13 pan. Start by sprinkling about one-third of your main batch of crushed Oreos onto the bottom of the dish. Spread half of that amazing creamy pudding mixture evenly over those cookies. Then, add another layer using another third of your crushed cookies. Follow that up with the rest of the creamy filling. You are almost there! Sprinkle that reserved cup of fine crumbs over the very top layer. That’s it for the active work! Now, cover the whole thing up tightly and make sure it goes into the fridge. Seriously, you must chill this for a minimum of four hours, but for the absolute best oreo dirt cake experience, let it sit overnight so those layers really marry together.
Tips for Success with Your Dirt Dessert Recipe
Even though this is a super quick desserts no bake recipe, a few little tricks can take your oreo dirt cake from good to legendary! My number one non-negotiable tip, which I learned the hard way after an incident involving store-bought whipped topping straight from the freezer, is that everything needs to be properly prepped.
First, using a mix of fine crumbs for the layers and slightly coarser ones for that top ‘dirt’ layer really ups the experience. It gives you that textural pop! Second, and listen closely here: don’t rush the chill time. This isn’t like a sauce you can rush; the pudding needs time to firm up against the cream cheese base. If you serve it too early, it’s just sloppy pudding soup, not a proper dirt dessert recipe. At least four hours, honey, but overnight is when the magic truly happens. Speaking of easy creamy fixes, if you need a dip instead of a layered dessert, you have to try my brownie batter dip recipe!
Serving Suggestions for Your Oreo Dirt Cake
So, you followed the steps, your oreo dirt cake has chilled perfectly, and now it’s time to show off your work! Presentation really matters with this dessert, even though it’s supposed to look like dirt! Trust me, the vessel you serve it in makes a huge difference.
The classic way—and my personal favorite—is serving this in a big, clear trifle dish. Why? Because you get to see those beautiful, distinct layers you worked so hard to create! The dark cookie layers contrasting with the pale, creamy pudding is just gorgeous. If you aren’t feeling that whole ‘look at all the layers’ vibe, a standard 9×13 dish works fantastic too. It makes serving massive squares much easier, which is perfect for satisfying lots of hungry folks at a large event.
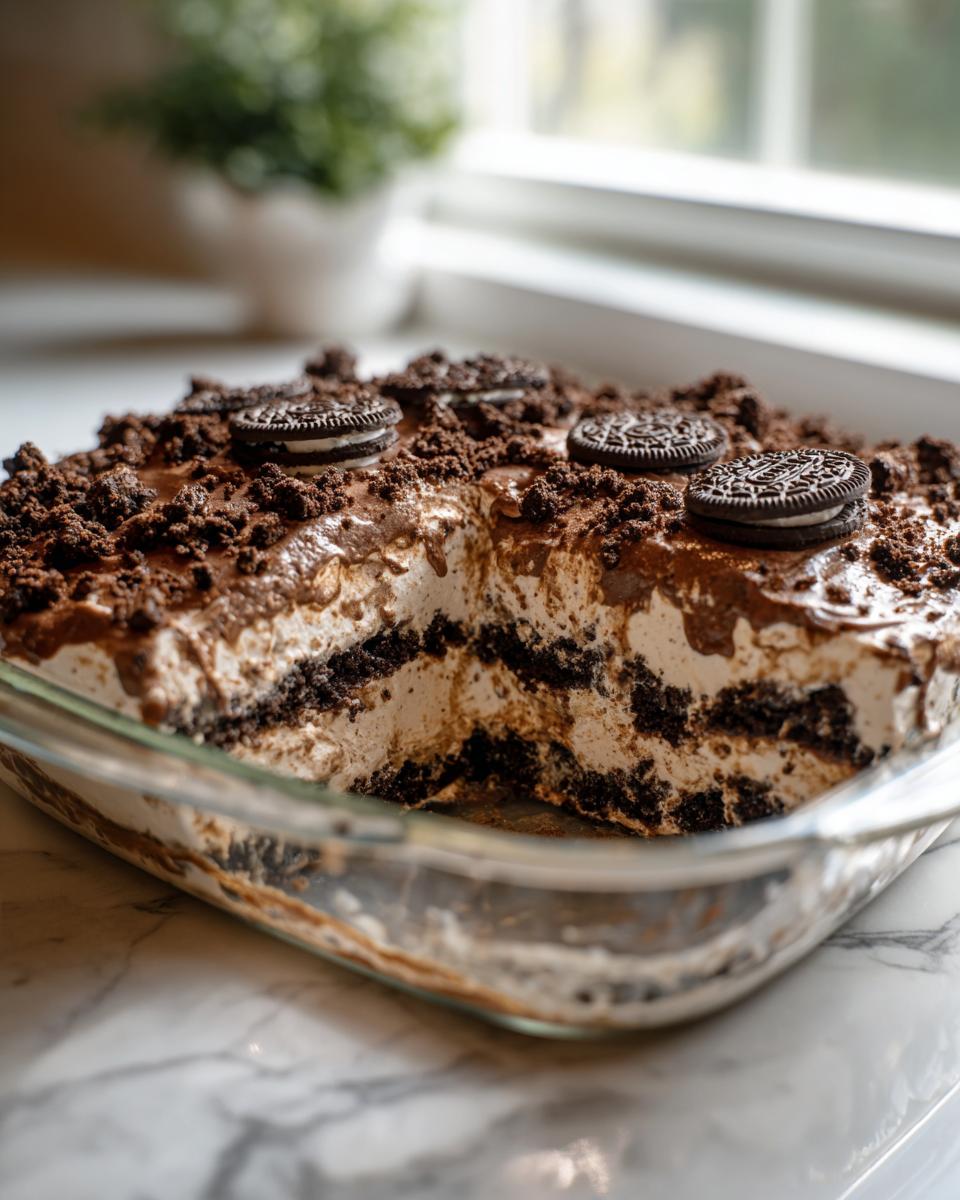
This is truly one of those standout potluck desserts easy to transport and serve. I often bring it directly to gatherings this way. If you’re serving it after dinner, a small scoop goes great alongside a strong cup of coffee—the bitterness really cuts through the sweetness of all that chocolate and cream. If you are looking for other easy things to round out your party spread, I have a fantastic classic pea salad recipe that always disappears just as fast.
Storage & Reheating Instructions for Oreo Dirt Cake
Okay, so you have leftovers—which is a victory in itself, because trust me, sometimes that doesn’t happen! Storing your glorious oreo dirt cake is super straightforward, but you have to treat it right because it’s loaded with dairy and whipped topping.
The absolute most important thing is covering it up! You need a tight lid or plastic wrap pressed right up against the surface of the top cookie layer. You want to keep all that wonderful moisture locked in and prevent the poor thing from absorbing any weird fridge smells. Pop the entire covered dish right into the refrigerator. Since this is a no bake Oreo dessert, chilling isn’t just recommended; it’s mandatory for texture stability, remember?
It holds up really well, too! You can count on this dessert being fantastic for about three to four days when stored properly in the cold. If you try to keep it longer, the cookies at the bottom might get a little too soft, kind of mushy, and we don’t want that—we want that perfect soft-but-still-a-bit-crunchy texture!
Now, about reheating: forget about it! Since there’s no actual cake batter or anything that needs cooking, heating this up would just melt all the hard work we put into that creamy filling. It would turn into a slightly warm, sad chocolate puddle. So, zero ovens, zero microwaves allowed. If you take it out to serve a piece, let it sit on the counter for maybe 10 to 15 minutes—just long enough to take the intense chill off—and that’s it. Enjoy it cold, just like it should be!
Frequently Asked Questions About Oreo Dirt Cake
I get so many great questions every time I post this oreo dirt cake, and that’s awesome! It just proves how many people love this simple treat. I want to make sure you get that perfect result every time, so here are the main things people ask me about when tackling this no-bake Oreo dessert. For even more tips and tricks on getting the best out of my recipes, you can always browse through my main recipe blog!
Can I use a different cookie besides Oreos in this Dirt Dessert Recipe?
That’s a fair question! You totally can use other chocolate sandwich cookies—like Nabisco Famous Wafers or similar brands. They work just fine in the recipe steps. However, I will say this: Oreos are my tried-and-true choice for a reason. The texture of the Oreo cookie part, especially with that little bit of creamy filling mixed in, creates the richest ‘dirt’ look and holds up best against the moisture of the pudding. If you swap them, just watch your texture; sometimes generic cookies turn soggy faster, so you might need to bump up that chilling time just a touch.
What is the best way to make this a Dirt Cake for Kids?
Oh, making this a true Dirt Cake for Kids is my favorite part! The standard 9×13 pan is fun, but for little hands or smaller gatherings, give individual cups a try! Just layer everything in small clear plastic cups or mason jars—it makes portion control easy and super cute. The key, as everyone knows, is decoration. Don’t just stick to the gummy worms, though they are mandatory! Try adding some crushed, colored yellow M&M’s mixed into the top layer to look like little candy rocks, or even some chocolate-covered malt balls placed strategically. It turns the dish into a real science project they get to eat!
How long does the Oreo Dirt Cake need to chill before serving?
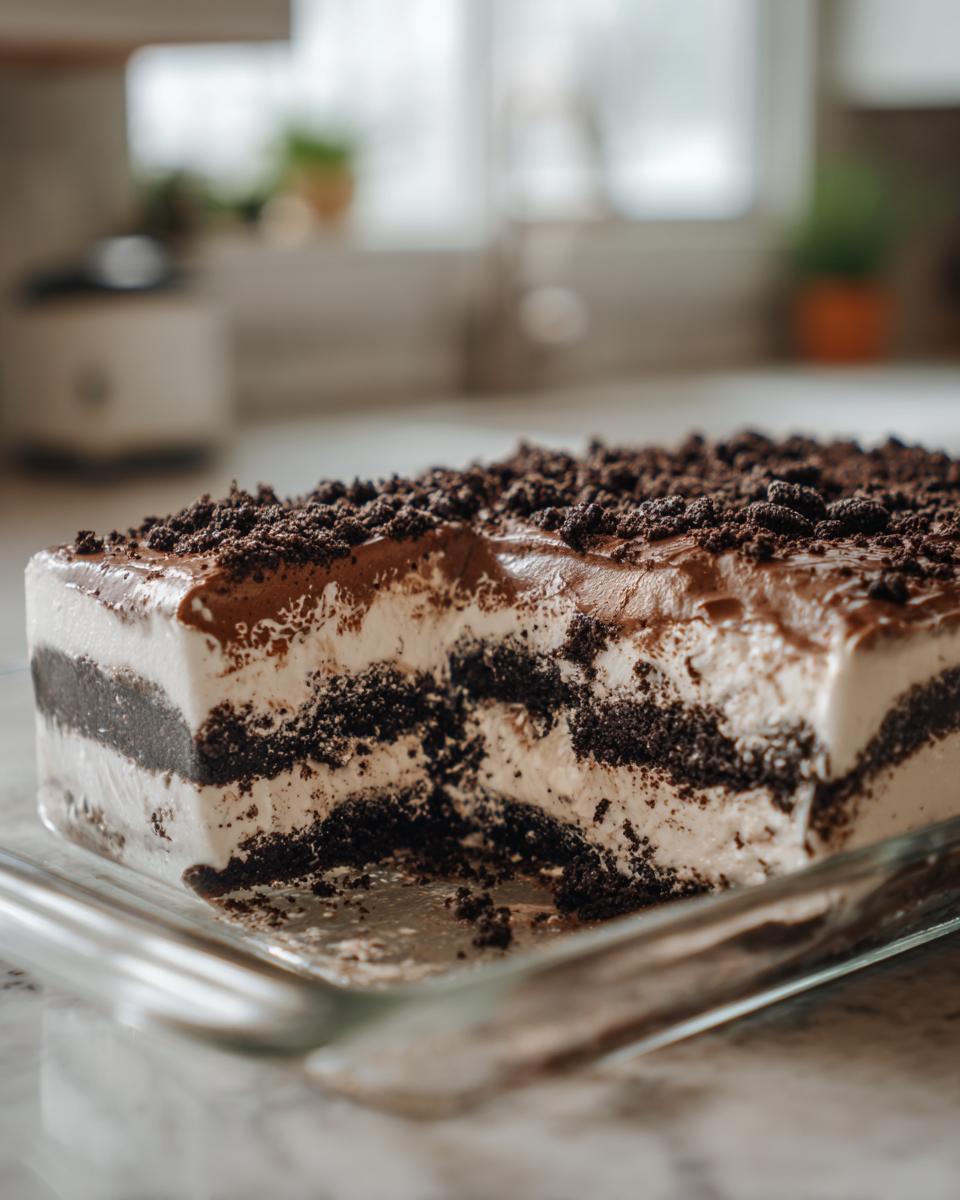
Okay, let’s talk patience here, because chilling is as important as mixing in this recipe! You absolutely must chill it for at least four hours. That’s the minimum time required for the instant pudding to set properly against the cream cheese base so it doesn’t just slide around when you scoop it. But if you want the *best* version of this Layered Oreo Dessert—the one where the cookies soften just enough to blend beautifully with the cream but still have integrity—you have to go overnight. I usually make mine the day before a party. Trust me, waiting that extra few hours makes all the difference in achieving that perfect, creamy, scoopable slice.
Understanding Nutrition in This Decadent Chocolate Dessert
Now, let’s talk real talk for a second. I’m Sarah, not a nutritionist, and this Oreo Dirt Cake is definitely built for celebration, not daily consumption! We’re dealing with butter, cream cheese, powdered sugar, and a whole lot of Oreos here, so it’s rich, just as it should be!
Because this recipe is so wonderfully flexible—maybe you use reduced-fat cream cheese, or maybe you decide to go all out with the full-fat version—the final nutritional content can vary quite a bit between batches. What I’m sharing here today is a fantastic, decadent chocolate dessert designed to bring joy, not to be meticulously tracked.
So, consider this your official disclaimer: any nutritional information I might calculate or see online should only be treated as an estimate. The real goodness is in the memories you make while eating it. If you’re focusing on easier weeknight meals while skipping out on treats like this, I highly recommend looking into some structured meal planning to keep things streamlined!
Share Your Creamy Oreo Dirt Cake Creations
And that’s it! You’ve made the best oreo dirt cake on the block—it’s ready for the table! I sincerely hope this dessert brings as much joy to your gathering as it does to mine. Taking that first bite of that perfectly chilled, creamy goodness layered with those crunchy cookie crumbs is seriously satisfying.
I absolutely love hearing from all of you! Once you’ve made this creamy Oreo delight, whether you stuck to the big dish or portioned it out, please come back here and let me know how it went! Did the kids go crazy for the gummy worms? Did you chill it overnight like I begged you to?
Leave me a rating and a comment below—it really means the world to me and helps other readers know this simple, no bake Oreo dessert is a guaranteed winner. If you are looking for easier weeknight options after enjoying this tremendous treat, check out our advice on meal planning to keep things streamlined during the busy days.
If you manage to snap a photo of your finished creation, I would love to see it! You can always reach out to me with questions or just to show off your work at my contact page. I’d love to see your spin on this! And hey, if you want to see what other folks are saying about their batch—or you need more inspiration—this version from Joy Food Sunshine is always a popular one!
PrintThe Best Creamy No-Bake Oreo Dirt Cake
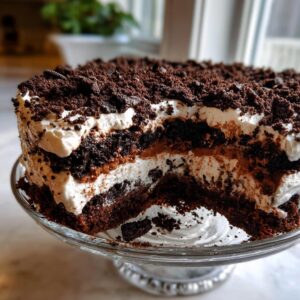
Make this easy Oreo Dirt Cake, a no-bake layered dessert featuring crushed Oreos, creamy pudding, and whipped topping. It is a family favorite perfect for parties.
- Prep Time: 25 min
- Cook Time: 0 min
- Total Time: 4 hr 25 min
- Yield: 12 servings 1x
- Category: Dessert
- Method: No-Bake
- Cuisine: American
- Diet: Vegetarian
Ingredients
- 1 package (14.3 ounces) Oreo cookies
- 1 package (8 ounces) cream cheese, softened
- 1 cup unsalted butter, softened
- 1 cup powdered sugar
- 1 container (12 ounces) frozen whipped topping, thawed
- 2 packages (3.9 ounces each) instant chocolate pudding mix
- 3 cups cold milk
- Optional: Gummy worms for decoration
Instructions
- Crush all Oreo cookies in a food processor or by placing them in a zip-top bag and crushing them with a rolling pin. Set aside about 1 cup of the crushed cookies for the top layer.
- In a large bowl, beat the softened cream cheese and butter together until smooth. Gradually add the powdered sugar and mix until fully combined.
- Fold in the thawed whipped topping until the mixture is uniform.
- In a separate bowl, whisk together the instant chocolate pudding mix and cold milk for about 2 minutes until the mixture begins to thicken.
- Gently fold the pudding mixture into the cream cheese and whipped topping mixture until just combined. Do not overmix.
- In a large trifle dish or 9×13 inch pan, begin layering the dessert. Start with a layer of crushed Oreos (about one-third of the total).
- Spread half of the creamy pudding mixture evenly over the Oreo layer.
- Add another layer of crushed Oreos (about one-third).
- Spread the remaining half of the creamy pudding mixture over the second Oreo layer.
- Top the entire dessert with the remaining crushed Oreos to resemble dirt.
- Cover the dish and chill in the refrigerator for at least 4 hours, or preferably overnight, to allow the layers to set.
- Before serving, press gummy worms into the top layer if desired.
Notes
- For the best texture, use a mix of finely crushed Oreos for the filling layers and slightly coarser crumbs for the top ‘dirt’ layer.
- If you are planning ahead, this dessert tastes best when chilled for 8 hours or overnight.
- This recipe is simple enough that you do not need complex meal planning; it is a great last-minute option.
Nutrition
- Serving Size: 1 serving
- Calories: 450
- Sugar: 38g
- Sodium: 350mg
- Fat: 28g
- Saturated Fat: 15g
- Unsaturated Fat: 13g
- Trans Fat: 0.5g
- Carbohydrates: 45g
- Fiber: 1g
- Protein: 5g
- Cholesterol: 45mg