
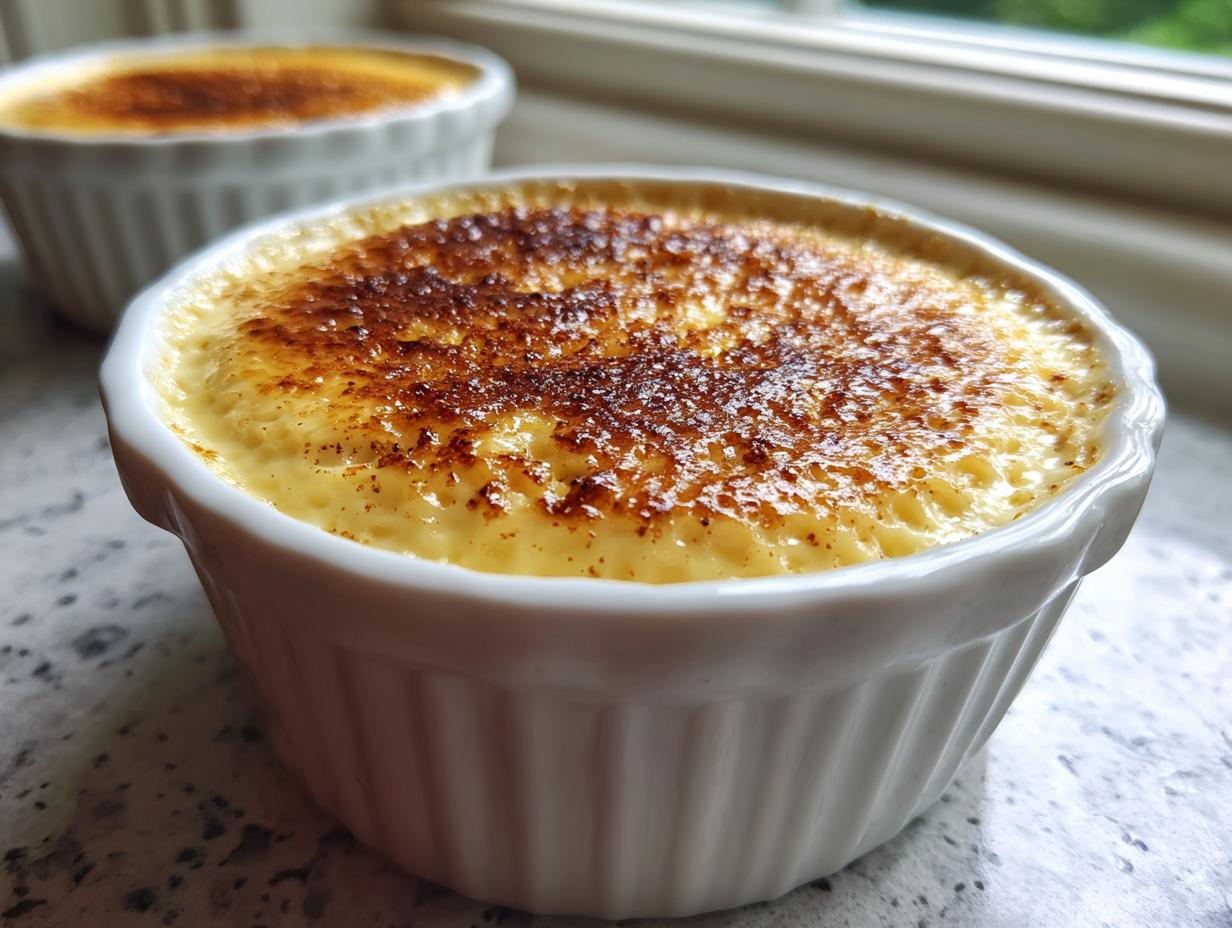

There’s nothing quite like pulling a still-warm, creamy dessert out of the oven after a long week. It just feels like home, doesn’t it? If you’ve ever tried making a baked egg custard and ended up with something that tasted suspiciously like scrambled eggs, you are absolutely in the right place. My grandmother knew all the secrets to making those old-fashioned comfort foods turn out perfectly every single time, and her traditional recipe for a silky-smooth baked custard is one I treasure. You can read a little more about my baking journey and philosophy over on my About Page.
I’ve taken her wisdom and turned it into what I wholeheartedly call my “Fail-Proof Creamy Baked Egg Custard.” Why do I call it fail-proof? Because we are locking in that creamy texture with simple techniques that guarantee a luxurious result, whether you’re serving it warm or chilling it overnight. This recipe isn’t just about milk and eggs; it’s like getting a little piece of my family’s kitchen history right on your table. I’m excited for you to try this classic!

- Why This Fail-Proof Egg Custard Recipe Works
- Basic Ingredients for Classic Egg Custard
- Step-by-Step Instructions for Your Simple Egg Custard Recipe
- Variations: Making an Old Fashioned Custard Pie
- Tips for Success with Homemade Vanilla Custard
- Storage and Reheating Instructions for Egg Custard
- Serving Suggestions and Custard Topping Ideas
- Frequently Asked Questions About Egg Custard
- Next Steps After Making Your Perfect Egg Custard
Why This Fail-Proof Egg Custard Recipe Works
If you’ve ever been scared off by trying to make a baked custard because you fear curdling, trust me, this is the No Fail Custard Recipe you need. The elegance of this dessert comes from its simplicity, but the success comes from just two key actions we take during prep. We’re aiming for that dreamy, velvety mouthfeel that makes this a true comfort food.
Achieving Silky Smooth Custard Texture
You absolutely cannot rush the whisking! We whisk just enough to combine the eggs and sugar—too much air means bubbles, and bubbles mean a porous surface instead of a Silky Smooth Custard. Then, the most crucial step for that bakery-quality finish? We strain everything. Running that liquid through a fine-mesh sieve is non-negotiable; it catches any bits of egg whites that might scramble during cooking. It might sound fussy, but it’s so quick!
The Importance of the Water Bath for Perfect Egg Custard
Baking the egg custard directly in the oven is just asking for trouble—the dry heat cooks the outside too fast, and boom, you’ve got cracks or a weird rubbery texture. That’s why we always use a water bath, sometimes called a bain-marie. It’s just hot water surrounding the dish while it bakes. It creates a wonderfully steamy environment that cooks the custard gently and evenly, guaranteeing that incredibly creamy egg custard dessert every time. It’s the best insurance policy for a perfect bake!
Basic Ingredients for Classic Egg Custard
You’ll love how little you need to make this wonderful dessert! This recipe relies on just a few pantry staples, proving that a truly decadent treat doesn’t need complicated additions. We are focusing on those Basic Custard Ingredients here: eggs, sugar, salt, vanilla, and milk. That’s practically it! The beauty of this Classic Egg Custard is how these simple players come together to create something deeply comforting. Before we even start cooking, make sure you have your setup ready.
Ingredient Substitutions and Notes
For the richest flavor and the silkiest texture, please use whole milk. Lower-fat milks will work in a pinch, but you’ll sacrifice some of that wonderful creamy texture we talked about. This recipe is naturally a wonderful Dessert with Eggs and Milk, so those two items are key!
I’ve given the ground nutmeg as optional for the topping—and you should absolutely use it if you like that traditional spice note! If you’re serving this to little ones, you might skip the nutmeg entirely on top. But truly, the backbone of this recipe is just four large eggs and two cups of whole milk. Keep those ratios right, and you’re golden!
Step-by-Step Instructions for Your Simple Egg Custard Recipe
Okay, let’s get baking! This is where my dad’s lesson on patience comes in handy. When he taught me how to grill the perfect steak, he always said you can rush the fire, but not the flavor. The same goes here. We are building something delicate, so take your time following these steps for your Simple Egg Custard Recipe.
Preparing the Oven and Dishes
First things first: get that oven warmed up! We need it at 325 degrees Fahrenheit. While it’s heating, grab a larger roasting pan—this will hold our water bath later. Place your 1.5-quart baking dish, or if you are making individual portions, pop four small ramekins directly into that big roasting pan. You want the final water level to come halfway up the sides of whatever dish you use, so setting them up now saves splashes later.
Tempering the Eggs for Creamy Custard Dessert
In a medium bowl, gently whisk your four eggs. And I mean *gently*! We are not making meringue here; we want to avoid whipping in tons of air because air equals bubbles, and we are only aiming for a Silky Smooth Custard. Once they are just barely combined, whisk in the sugar and that pinch of salt until you can’t feel any sugar graininess anymore. Then toss in your vanilla.
Next, we gently warm up the milk on the stovetop until you start seeing tiny bubbles forming around the edges—don’t let it boil, please! Now comes the most important part of tempering: slowly, I mean *slowly*, start drizzling that warm milk into your egg mixture while you whisk constantly. Think of it as tempting the eggs into accepting the milk so they don’t shock and cook prematurely.
Once that’s all incorporated, we strain! Find the finest mesh sieve you own and pour the entire liquid mixture through it into a clean bowl or a large measuring cup. This step is honestly the biggest secret weapon for a no-fuss, guaranteed smooth finish. If you have any lumps or those stringy bits of egg whites, the sieve catches them. Trust me on this one!

Baking and Cooling the Egg Custard
Carefully pour the strained mixture into your prepared baking dish or ramekins sitting in the roasting pan. If you’re using nutmeg, give the top the lightest dusting now. Now, carefully pour hot water into the roasting pan to start that water bath, making sure the water comes way up the sides. This ensures slow cooking and a tender Creamy Custard Dessert.
Bake this beauty for about 40 to 50 minutes. How do you know it’s done? Don’t rely only on a toothpick! Watch the edges—they should look set and firm. If you gently nudge the pan, the very center should still have a little wiggle to it, like Jell-O. That’s perfection! Once they are gently jiggly, carefully pull them out of the water bath and let them cool completely on a wire rack. They firm up a lot as they chill. You must let this set in the fridge for at least four hours, though honestly, overnight is so much better for developing that full, classic flavor. You can see more of my favorite baking tips on the blog!
Variations: Making an Old Fashioned Custard Pie
While I absolutely adore serving this baked egg custard straight up in a dish—it’s the easiest, quickest comfort food—I know so many of you crave that nostalgic slice of pie! If you are ready to turn this base recipe into a proper Old Fashioned Custard Pie, it’s super simple. You just need a good crust to cradle all that creamy goodness.
This recipe makes enough mixture for about four ramekins, which works perfectly for a standard 9-inch pie shell. If you’re making a pie, remember that you’ll be adding more filling volume than in the individual dishes, so keep an eye on that baking time. Speaking of pies, if you love those old-school desserts, you should check out my recipe for Old Fashioned Bread Pudding—it uses similar homey flavors!
Tips for a Buttery Crust Custard Pie
When I make an Egg Custard Pie Recipe, I usually cheat a little and use a store-bought crust if I’m in a hurry, but if you make your own it just takes it to the next level! The big question is whether or not to blind bake the crust first. Since this custard filling is relatively delicate and cooks mostly by gentle heat from the water bath, I find that an unbaked crust works just fine as long as you bake it low and slow, just like we are doing here.

However, if you use a crust made with a lot of butter that you want to stay super flaky, you might want to give it a quick 10-minute pre-bake before you add any filling. This helps prevent the dreaded soggy bottom! If you want to see a fantastic recipe specifically for that crust component, I always recommend checking out what my friends over at Ricoloranz are doing for their Buttery Crust Custard Pie—it’s lovely!
Remember, whether you opt for a crust or stick to the crustless version, the key is still that slow bake in the water bath. We aren’t trying to rush the process; we just want that perfect, wobbly, melt-in-your-mouth texture.
Tips for Success with Homemade Vanilla Custard
Even following the best instructions, sometimes things go a little wonky in the oven, right? Don’t you worry! Because we stuck to the gentle tempering and the water bath, your homemade vanilla custard should be perfect. But just in case you run into one of those classic baking hiccups, here are a few things I’ve learned over the years to rescue a batch or prevent issues next time.
If you see tiny pinpricks forming on the surface—that’s the first sign you might have cooked it a tiny bit too quickly. Often, this means the oven temperature was slightly high, or you poured the hot milk in too fast when tempering. Next time, just turn your oven down by 10 degrees and take an extra minute warming that milk. If I want to see what other people do to get a perfect bake, I often look at great resources like the one from Nodashofgluten for their fail-proof ideas!
What if your custard seems a little watery or separates after chilling? That’s weepiness, and it usually comes down to one thing: overcooking. When the custard is overcooked, the proteins tighten too much and squeeze out moisture. You want that jiggle in the center when you take it out; that means the residual heat is going to finish the job perfectly as it cools. If your surface looks glossy but the edges look dry when you pull it out, you’re probably right on time.

Ultimately, this is why we always strain, and why we use the water bath. They’re your secret weapons for ensuring this egg custard stays smooth and never curdles. If you’re looking for other foolproof sweet treats, you should check out my steps for Snickerdoodle Cookies—they are just as reliable!
Storage and Reheating Instructions for Egg Custard
Once your beautiful, set egg custard comes out of the oven, the waiting game begins—and honestly, this is the hardest part! You have to let it cool down slowly on a rack first, just to let those delicate proteins settle outside of the intense heat. Don’t peek too often; let it do its thing!
Now, for the important part: Chilling time. You absolutely, positively must chill this dessert for a minimum of four hours. I usually plan baking this the day before I want to serve it because overnight in the fridge is truly the magic ticket to the best texture. When it’s cold, the egg custard firms up beautifully, making it easier to scoop and enhancing that classic, creamy flavor.
You can certainly eat it chilled straight from the fridge—it becomes delightfully dense and refreshing, which is perfect for a summer evening or after a hearty meal. If you prefer it closer to room temperature, just pull the dish out of the refrigerator about 30 minutes before serving time. That little bit of time on the counter softens it just slightly without making it lose its shape.
As for leftovers? This keeps wonderfully! Because we used milk and eggs, you want to treat it like any dairy-based dessert. Stored tightly covered in the refrigerator, my creamy custard usually lasts a good four to five days. That means you get multiple chances to enjoy that homemade treat throughout the week! If you’re looking for other make-ahead desserts, my recipe for Chocolate Chip Protein Muffins is wonderful for quick grab-and-go breakfasts or snacks!
Reheating isn’t usually necessary—we intend for this to be a cold dessert—but if you are determined to have a warm slice, the microwave isn’t your friend here; it will turn that beautiful smooth texture grainy fast. If you must warm it slightly, just place a small serving in a microwave-safe bowl and use the lowest power setting for 10-second bursts, stirring gently between each burst. But honestly, give the chilled version a try first; it’s usually the big winner!
Serving Suggestions and Custard Topping Ideas
Now that you have this perfectly smooth, tender dessert fresh from the fridge, the fun part begins: deciding how to dress it up! This Comfort Food Dessert sings all on its own, seasoned with just a whisper of nutmeg, but a little flourish on top never hurt anyone, right? Sometimes the simplest additions make the biggest impact.
When I pull this out after chilling, my kids always run to grab the fresh fruit bowl. A handful of slightly tart raspberries or maybe some halved strawberries really cuts through the sweetness of the baked custard beautifully. The juice from the berries mixes with any leftover moisture on the custard surface, creating a delicious little sauce right in the bowl. It’s so fresh!
If you’re looking for something a bit richer than fruit, definitely consider a sprinkle of something warm. A light dusting of extra cinnamon or a tiny grating of fresh, dark chocolate takes the flavor profile up a notch. We aren’t trying to hide the custard; we are just giving it a little hug!
And speaking of warmth, if you happen to still have some leftover pie crust scraps from when you made the optional pie version, chop them up, toss them with a little cinnamon sugar, and bake them until crisp. These little crunchy bits are amazing sprinkled over a chilled bowl of this creamy egg custard for texture contrast. It’s like making your own little crunchy topping!
If you’re serving this after a holiday meal—maybe after finishing a big Sunday roast or a heavy comfort meal—sometimes simpler is better. For those nights, I stick to just serving it cold with maybe a tiny spoon of vanilla whipped cream on the side. Nothing fancy, just pure, unadulterated creamy goodness that tastes just like the best memories. If you enjoy deeply comforting bakes like this, you have to check out my recipe for my famous Apple Crumb Cake; it’s another one that always disappears fast!
Frequently Asked Questions About Egg Custard
It’s so common to have questions when you dive into a classic like this! Even though I made sure this is a No Fail Custard Recipe, people still worry about those little details that can turn a silky dessert into a bumpy mess. I get it, and I want you to feel totally confident making this Classic Egg Custard. Here are the things I hear most often when folks are baking my recipe.
Can I make this egg custard recipe without a water bath?
Oh, I wish I could say yes, but truly, you’ll want to stick with the water bath for this one. The primary goal when making a baked egg custard is to cook it very gently, and you just can’t achieve that consistent, slow heat in a regular oven environment. Baking it directly will almost certainly create hot spots that scramble the edges before the center is set. That water bath is the secret for that heavenly, smooth texture, whether you want a crustless treat or a full pie. It’s the only way to guarantee that beautifully smooth, almost pudding-like result!
How long does it take to chill the egg custard?
This is another area where patience really pays off, just like watching those low-and-slow baked goods my dad loved tending on the grill! While you might be tempted to dig in as soon as it comes out of the water bath, you really need to let the custard set up completely. I always stress a minimum of four hours of chilling time. Honestly, think of it as mandatory resting time. When it’s cold, the texture firms up perfectly, and the vanilla flavor really deepens. If you plan ahead, making it the day before serving is ideal for the absolute best texture in your delicious homemade custard!
If you’ve tried making other Easy Baked Desserts and struggled with timing, this recipe is designed to be mostly hands-off once it’s in the oven and chilling! If you’re interested in other make-ahead sweets, check out my recipe for Pumpkin Cheesecake Bars—they also need serious chilling time, but they are worth every minute!
Next Steps After Making Your Perfect Egg Custard
Now that you’ve mastered the water bath and have that perfectly creamy, beautiful egg custard chilling in the fridge, I really want to know how it turned out for you! Sharing food is what this whole adventure is about—it’s my foundational belief here at Cut Cook Taste, just like watching my grandmother share her famous pies with the neighbors.
Did you stick to the ramekins, or did you build a glorious pie shell for an Old Fashioned Custard? Whatever you decided, please let me know how the texture was! When you make one of these timeless classics, I always love seeing the results.
If you have a moment after you’ve enjoyed your first bite, drop a rating right on the recipe card. It helps other bakers feel confident about trying this foolproof recipe! And if you took a picture—maybe of your silky smooth custard right before you dug in—I’d love for you to share it! You can always reach out to me directly through my Contact Page. Knowing these recipes are making their way onto your tables, bringing those happy, comforting moments, is truly the best part of my day. Happy baking, friends!
PrintFail-Proof Creamy Baked Egg Custard
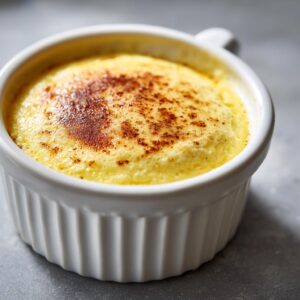
Make a classic, silky smooth baked egg custard using simple ingredients. This recipe focuses on clear steps to prevent curdling for a consistently delicious, old-fashioned dessert.
- Prep Time: 15 min
- Cook Time: 50 min
- Total Time: 1 hour 5 min
- Yield: 4 servings 1x
- Category: Dessert
- Method: Baking (Water Bath)
- Cuisine: American
- Diet: Vegetarian
Ingredients
- 4 large eggs
- 1/2 cup granulated sugar
- 1/4 teaspoon salt
- 1 teaspoon vanilla extract
- 1/4 teaspoon ground nutmeg (optional, for topping)
- 2 cups whole milk
Instructions
- Preheat your oven to 325 degrees Fahrenheit. Place a 1.5-quart baking dish or four 6-ounce ramekins inside a larger roasting pan.
- In a medium bowl, whisk the eggs lightly until just combined. Do not over-whisk; you want to avoid incorporating too much air.
- Whisk in the sugar and salt until dissolved. Stir in the vanilla extract.
- Gently warm the milk in a saucepan over medium heat until small bubbles form around the edges, but do not let it boil.
- Slowly pour the warm milk into the egg mixture while continuously whisking. This slow addition helps temper the eggs.
- Strain the custard mixture through a fine-mesh sieve into a clean bowl or measuring cup to remove any chalazae or unmixed egg bits, which helps achieve a silky texture.
- Pour the strained mixture into the prepared baking dish or ramekins.
- Carefully pour hot water into the roasting pan until the water reaches halfway up the sides of the custard dish or ramekins. This water bath prevents the custard from overcooking or curdling.
- Sprinkle the top lightly with nutmeg, if using.
- Bake for 40 to 50 minutes, or until the edges are set but the center still jiggles slightly when gently nudged. For a 9-inch pie dish, baking time may be closer to 55-65 minutes.
- Carefully remove the custard from the water bath. Let it cool on a rack before chilling completely in the refrigerator for at least 4 hours before serving.
Notes
- For a truly fail-proof result, use whole milk for the richest flavor and texture.
- If you are planning your weekly meals, this custard is a great make-ahead dessert that pairs well with meal planning.
- To check for doneness, insert a thin knife near the edge; it should come out clean.
- If you prefer an Egg Custard Pie, pour the mixture into a single 9-inch unbaked pie crust before placing it in the water bath.
Nutrition
- Serving Size: 1 serving
- Calories: 210
- Sugar: 22
- Sodium: 150
- Fat: 8
- Saturated Fat: 4
- Unsaturated Fat: 4
- Trans Fat: 0
- Carbohydrates: 23
- Fiber: 0
- Protein: 11
- Cholesterol: 150