


Oh, I just have to tell you about the recipe that immediately takes me back to those warm, bustling gatherings at my grandma’s house! Sometimes, you just need a dessert that requires zero oven time, minimal fuss, and delivers maximum joy. Well, buckle up, because this Easy No-Bake Oreo Dirt Cake is my long-time secret weapon for holidays and casual weekends alike.
This isn’t just any layered dessert; this is the ultimate dirt cake experience. It’s heavy on the crushed Oreos—seriously, we use them everywhere—and swimming in this outrageously creamy chocolate base. Growing up in the Midwest, I learned from my folks that the best recipes are the ones that bring everyone to the table, and this wonderfully nostalgic, completely reliable treat always does the trick. If you love simple, crowd-pleasing classics, you are going to love this, and you can find tons of other sweet ideas over in my main desserts section!
- Why This No Bake Dirt Cake Recipe is a Crowd Favorite
- Gathering Ingredients for Your Oreo Dirt Cake
- Step-by-Step Instructions for Layered Oreo Dirt Cake
- Tips for Perfect Dirt Cups with Gummy Worms Presentation
- Make Ahead Dessert Strategy for Your Dirt Cake
- Storage and Serving Instructions for This Easy Oreo Dessert
- Frequently Asked Questions About Making Dirt Cake
- Nutritional Estimate for This Dessert
- Share Your Nostalgic Dessert Creations
Why This No Bake Dirt Cake Recipe is a Crowd Favorite
Honestly, I keep this recipe in my back pocket for emergencies because it never, ever fails to make people stop and ask for seconds. It’s the definition of simple, delicious fun. This is truly one of the best potluck desserts easy to transport!
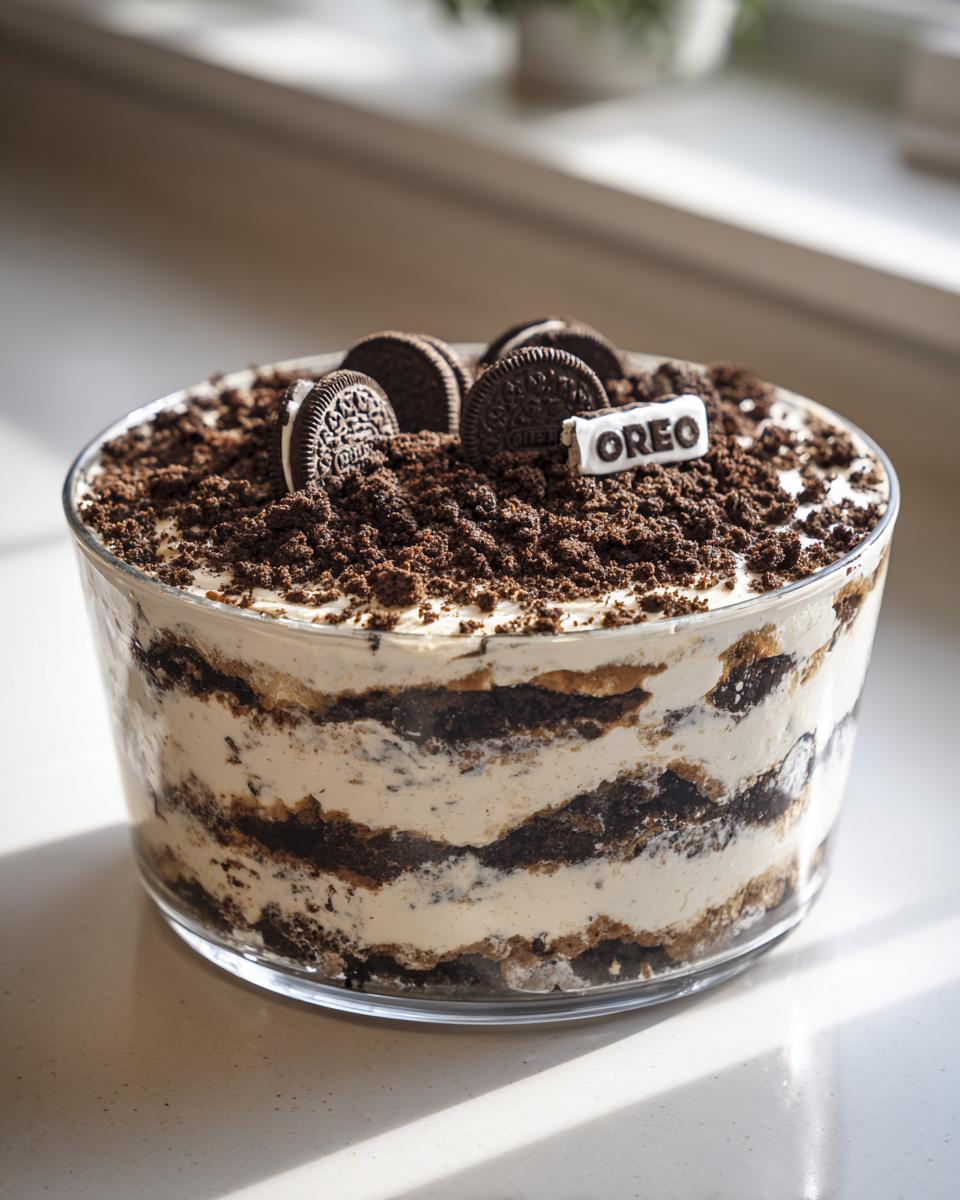
- It’s totally no-bake, meaning no stress about oven timing or worrying if the center is baked just right.
- It’s rich, cold, and satisfying—the perfect contrast to heavy main courses.
- It looks fantastic, whether you serve it layered in a big dish or individually.
Simple Assembly for Maximum Fun
You can pull this together faster than you can decide which spatula to use! Since there’s no baking involved, you skip all the preheating and cooling time you usually deal with. This makes it a perfect, quick project when the kids are wanting to help. It’s such a fantastic kid friendly dessert that they can actually help assemble the layers without the danger of hot surfaces.
The Ultimate Creamy Pudding Dessert Texture
Forget dry, crumbly store-bought desserts. The magic here is that incredible filling. When you mix that cream cheese, butter, and that rich chocolate pudding, you get this uniquely fluffy, yet dense, texture. It’s why everyone calls it a creamy pudding dessert—it just melts in your mouth and pairs perfectly with those crunchy cookie bits.
Gathering Ingredients for Your Oreo Dirt Cake
Okay, the beauty of this dirt cake is that you probably have most of this stuff in your pantry right now! We aren’t getting fancy here; this is about reliable, delicious comfort. I’ve listed exactly what I use below to get that perfect rich flavor and sturdy texture that holds up so wonderfully in the fridge.
- 1 package (8 ounces) cream cheese, softened
- 1 cup unsalted butter, softened
- 1 cup powdered sugar
- 1 container (12 ounces) frozen whipped topping, thawed
- 2 packages (3.9 ounces each) instant chocolate pudding mix
- 3 cups cold milk
- 1 package (14.3 ounces) Oreo cookies, crushed (about 3 cups crumbs)
- Gummy worms for decoration (optional)
Ingredient Notes and Substitutions for Dirt Cake
I want you to have success the first time you try this, so pay close attention to the condition of your ingredients! First off, the cream cheese and butter *must* be truly softened. If they are too hard, you get little chunks of cold butter, and that ruins the smooth creaminess we are aiming for. I usually leave mine out on the counter for a good hour before starting.
Also, make absolutely sure you grab the **instant** chocolate pudding mix, not the cook-and-serve kind. The mixing time is important for achieving that nice, thick base! As for the cookies, I always use the classic Oreo cookies. They provide that perfect dark color and slightly bitter crunch that works so well. Don’t stress about the brand for the **crushed Oreo dessert** layer; whatever black sandwich cookie you have on hand will do the trick!
Step-by-Step Instructions for Layered Oreo Dirt Cake
Now we get to the fun part—putting it all together! Since this has no bake time, the physical effort is minimal, but the layering is where you make it look like a masterpiece. Remember, this is the recipe that proves you don’t need a fancy degree to create a show-stopping layered Oreo dessert. We’re building something incredible here, so take your time when mixing those layers.
If you want to see another easy, fail-proof make-ahead treat, you absolutely have to check out my recipe for No-Bake Pecan Pie Lasagna—it uses a similar philosophy of creating creamy layers without the oven!
Preparing the Cream Cheese Base for Your Dirt Cake
Our success here hinges on having a completely smooth base before we add the whipped topping and pudding. Start with that softened butter and cream cheese in your biggest bowl. You have to beat these two until they are just perfectly lightened and creamy. Don’t rush this first step—a few good minutes with the mixer makes all the difference!
Once that looks great, slowly stream in the powdered sugar while the mixer is running on low. We want it incorporated, not thrown everywhere! After the sugar is mixed in, gently fold in your thawed whipped topping. I mean gently. You want to keep all the air we just whipped into the mixture. This combination creates that rich, sturdy foundation for our magnificent Chocolate Dirt Cake.
While that creamy mixture is resting, tackle the pudding. Whisk the instant chocolate pudding mix with the cold milk. It thickens up fast, but you have to let it sit for about five minutes to fully set up before you combine it with the cream cheese mixture. Then, it’s time for the big fold! Mix the pudding gently into the cream base. Stop as soon as everything is uniform in color. Overmixing pudding always leads to a thinner texture, and we want ours thick and scoopable!
Assembling the Creamy Pudding Dessert Layers
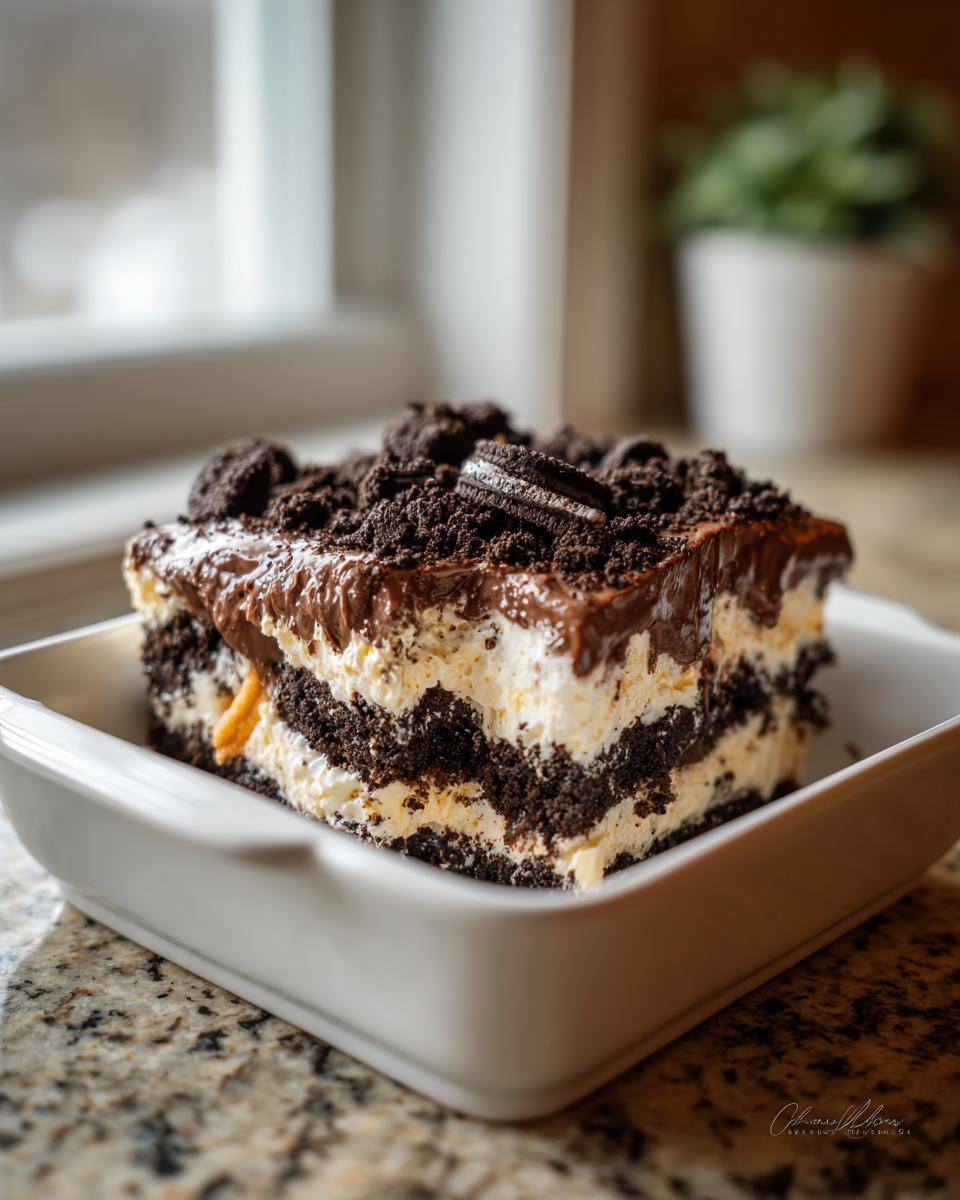
Time to bring out that trifle dish or your individual cups! We’re going for contrast here, so don’t worry about perfection—it’s called dirt cake for a reason, right? Crush your Oreos until you have crumbs that are mostly fine, like good, dark soil. Make sure to save about a cup of those crumbs for the very top layer.
First, press half of the remaining Oreo crumbs onto the bottom of your dish. That’s layer one! Then, spread half of that wonderful, thick chocolate cream mixture right over the top. Try to make a nice even layer. Repeat that process exactly: add the rest of your crumbs, and top it with the remaining creamy mixture. For the grand finale, sprinkle that reserved cup of crumbs all over the top surface to give it that authentic, freshly tilled-soil look. This layering technique is what makes it such an impressive creamy pudding dessert.
You can check out tips on another great chilled dessert, the Boston Cream Pie Fudge, if you’re loving the no-bake vibe! And for more inspiration on how people are making this fun dessert, take a peek at what my friends over at The Bite Stuff are doing with their dirt cake.
Tips for Perfect Dirt Cups with Gummy Worms Presentation
Honestly, this dirt cake isn’t just about taste; it’s a real showpiece, especially when you serve it up for a crowd! My favorite way to do this dessert, hands down, is by making individual servings. I grab clear plastic cups—you know, the inexpensive ones from the dollar store—and layer the dessert inside them. It lets everyone admire those gorgeous layers of cream and cookie dirt before they dive in. Plus, cleanup is a breeze, which is always a win in my book!
If you’re thinking about individual servings, check out these great ideas for making dirt cake cups over at Easy Dessert Recipes; they have some fun styling suggestions!
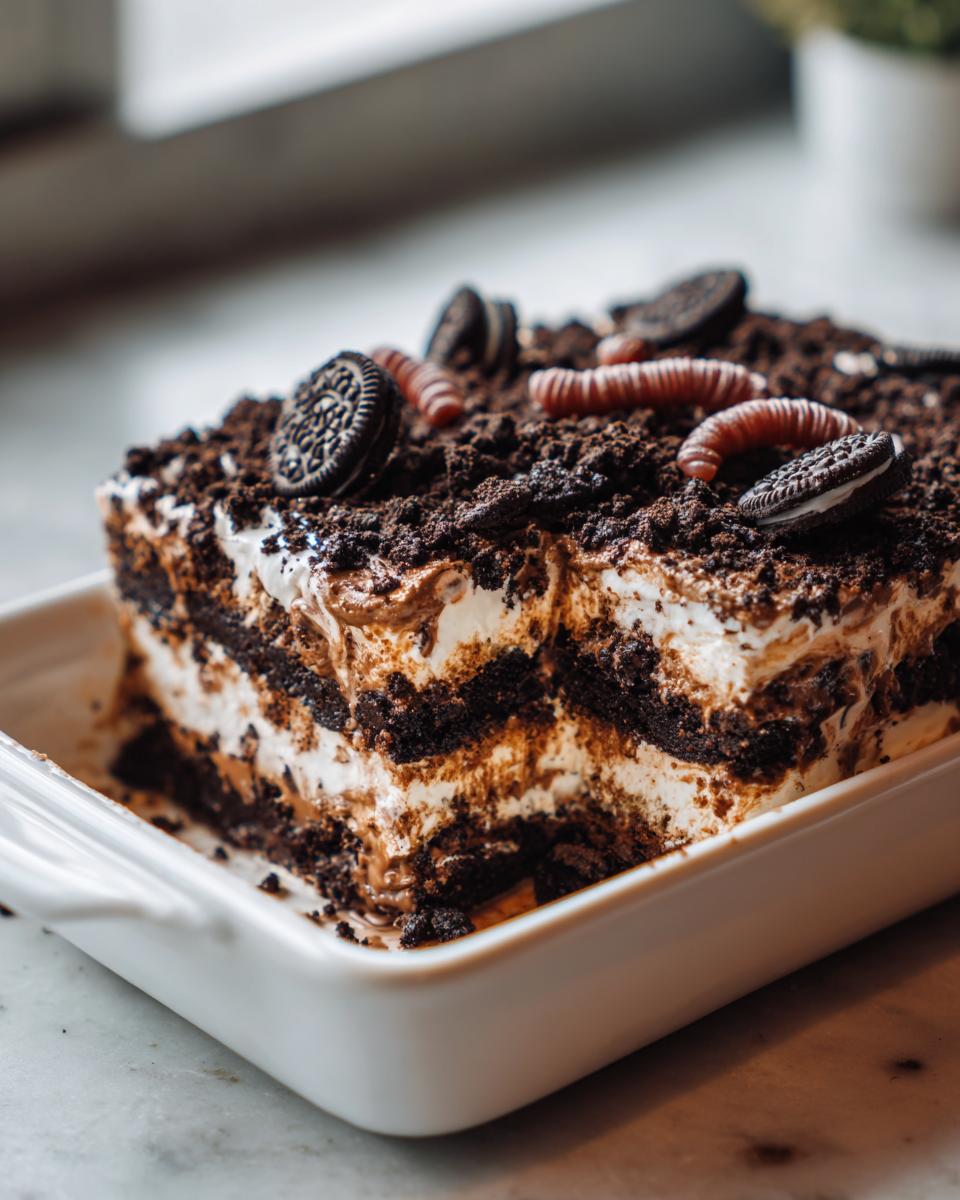
Now, let’s talk about the best part of serving dirt cups with gummy worms: making it look like they are actually crawling out of the earth! You need sturdy worms for this, not the floppy kind.
Here’s my insider trick for anchoring those worms:
- Wait for the Chill: Don’t try embedding the worms immediately after you layer everything. Once the dessert has chilled for at least an hour or two, the cream layer firms up enough to support them.
- The Shallow Dig: Take your gummy worm and gently push its head or tail down just slightly into the top layer of the crumb ‘dirt.’ You don’t want to push it all the way down to the creamy middle part yet, just enough so it looks like it’s peeking through the surface.
- The Look Ahead: Place some worms so they look like they are crawling *out* of the cup edge, and others so they look like they’re just coming up from the center. It makes the whole experience interactive and so much more fun for the kids.
If you are making a big trifle dish version, just stick the worms right into the top layer before you chill it. They might sink a little, but they’ll still look great! If you love other fun, chilled treats that look amazing, you should scroll through my Boston Cream Pie Fudge ideas, too!
Make Ahead Dessert Strategy for Your Dirt Cake
This is truly one of my favorite qualities of this recipe: it is designed to be a wonderful make ahead dessert! Since there is no baking, the only thing you need to worry about is chilling time, and trust me, you cannot rush this part if you want that perfect scoopable texture.
The recipe calls for at least four hours of chilling, and you should definitely respect that minimum time. If you cut it short, the pudding won’t have enough time to fully integrate and set up against the cream cheese mixture. It will feel a little too loose, and when you try to scoop it, you might end up with a soupy mess instead of a firm layer.
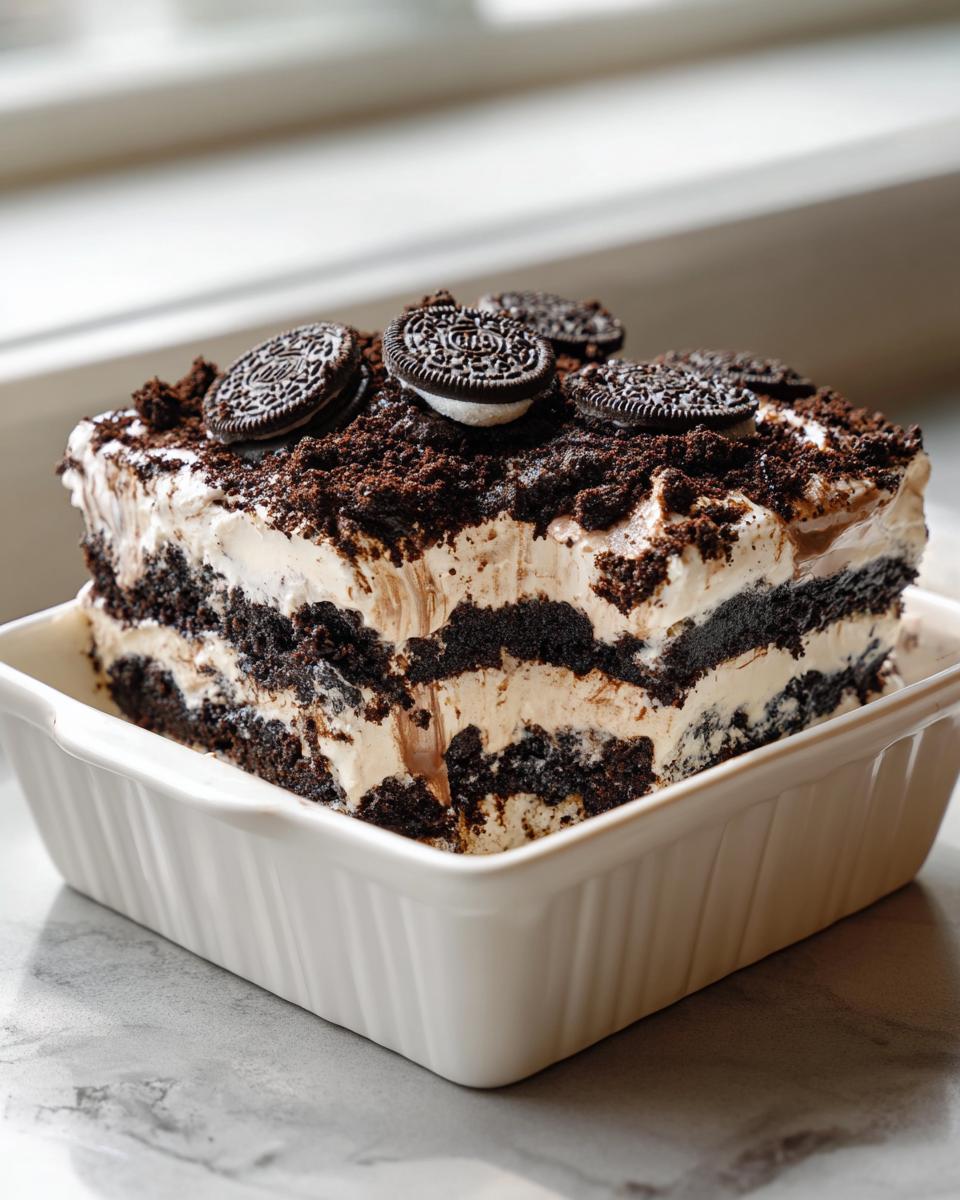
But here is the real secret to making this the best dirt cake you’ve ever tasted: let it sit overnight! Seriously, leave it covered in the fridge for 8 to 12 hours. Why? Because when it chills overnight, those crunchy crumbs start to soften just a tiny bit where they touch the cream, integrating their flavor right into the filling. The whole structure firms up beautifully, and the chocolate flavor deepens. It’s incredible! This is the key to making sure your dessert is absolutely perfect when it’s time to serve it at a party the next day.
If you’re interested in other no-chill recipes that are lightning-fast, you might enjoy my guide on Snickerdoodle Cookies, which are perfect for when you need cookies ready now, but for this luxurious layered treat, patience really pays off!
Storage and Serving Instructions for This Easy Oreo Dessert
Once you finally get this beauty chilled—and trust me, you waited long enough for it to set—you’ll want to know how to keep it perfect until party time. Since this is a chilled, no-bake recipe, storage is straightforward, but we need to protect those layers!
Keep your dirt cake, whether it’s in that big trifle dish or in individual cups, covered tightly in the refrigerator. Plastic wrap works, but if you have a good lid for your container, use that! We want to keep out any fridge smells, though honestly, this dessert smells too good for that to be much of an issue.
How long does it last? Well, it’s designed to be amazing the day after you make it. It stays perfectly good for up to three or four days in the fridge. The texture changes a little bit as the days go by—the cookie crumbs soften more and more—but for most people, that just means it tastes even more decadent and flavorful! If you’re serving leftovers, they taste best within the first two days.
When it comes to serving this easy Oreo dessert, keep in mind how you assembled it. If you used individual cups, just pull them out about 10 minutes before serving so they aren’t ice-cold right out of the fridge. If you used a large dish, use a large serving spoon and make sure you dig down to the bottom so everyone gets a proper mix of that creamy chocolate layer and the soft, earthy top layer.
And for the worms? If you waited until the last minute to add them before chilling, they are perfect sitting right there on top. If you are serving it a day later, you can always stick a fresh gummy worm right into each serving just before you hand it out. It adds that little bit of extra whimsy that everyone loves!
Frequently Asked Questions About Making Dirt Cake
Even though this no bake dirt cake recipe is super straightforward, I always get asked the same few things when people try it out for the first time or want to make minor adjustments. It’s smart to ask! Here are a few common questions I hear all the time about getting that perfect chocolatey, creamy result.
Can I use a different cookie besides Oreos in this dirt cake recipe?
You totally *could* use chocolate wafers or even something like chocolate graham crackers, but honestly, why would you want to? The OREO cookie base is essential! It’s not just the chocolate flavor; it’s the texture of that crunchy, slightly drier wafer combined with the creamy filling that gives you that true ‘dirt’ experience. The cream filling inside the OREO softens just the right amount during chilling. If you use other cookies, you risk it becoming too soft or not providing enough contrast to the pudding layers. Stick with the classic OREO—trust me on this one!
How do I make this dessert lighter or use less fat?
I get this question a lot from folks who are trying to cut back on the richness, but you have to remember, this is comfort food! The fat content—from the butter and the cream cheese—is what makes the texture so luxurious and sturdy. If you absolutely need to lighten it up, the best swap I’ve found is replacing half of the cream cheese with plain, full-fat Greek yogurt. Make sure it’s thick Greek yogurt!
Now, I must give you a heads-up: it will change the vibe. The texture won’t be quite as rich or quite as firm as the classic cream cheese dirt cake. It gets a little tangier, which some people like, but you lose some of that wonderfully decadent quality. If you skip the butter altogether and swap it all for yogurt, well, you might end up with a pudding in a cup, not the classic dessert we crave!
For more baking wisdom and tips, you can always browse through my general recipe archive!
If you want to see how other bakers handle this treat, take a look at this version from Joy Filled Sunshine—they have some really fun ideas too!
Nutritional Estimate for This Dessert
Now, I know we are here for the joy and the flavor, not the spreadsheets, right? But since this is such a rich and satisfying layered Oreo dessert, some of you want to know what you’re diving into. Remember, since this is a pure home-cooked recipe using ingredients that vary slightly by brand (like the exact type of whipped topping or amount of sugar we use), these numbers are my best estimate based on standard calculations for a 12-serving yield.
If you’re using this recipe to plan out your week, especially if you are looking at things like meal planning, keep in mind that this is definitely a celebratory treat! We need to be honest that this doesn’t fall under any strict weight loss programs, but gosh, it’s worth every single bite. Here is the general nutritional breakdown per serving, assuming 12 servings:
- Calories: About 380
- Total Fat: Around 23g
- Carbohydrates: Roughly 42g
- Protein: About 4g
- Sugar: Approximately 35g
See? It’s rich! That comes from the butter, the cream cheese, and all those lovely chocolate wafers we crush up. When you’re making something this delicious, especially a beloved nostalgic dessert like this, you always have to budget for indulgence. Just know you are feeding your soul as much as your stomach with this one, and that’s always a win in my book!
Share Your Nostalgic Dessert Creations
Look, I poured all my best tips and family secrets into this Easy No-Bake Oreo Dirt Cake so you can have the easiest, most delicious time making it. Now that you’ve mastered this incredible layered Oreo dessert, I really want to see what you whip up!
When you make this for your next BBQ, potluck, or just a Tuesday night when you need a pick-me-up, please snap a photo! Tag me on social media so I can see your beautiful layers and—most importantly—your magnificent gummy worm placement. Did you make Dirt Cups? Are the worms truly escaping? I need to know!
And if you loved how easy and rewarding this dessert turned out, please do me a huge favor and leave a quick rating right here on the page. Five stars is always appreciated, but an honest review helps me know what other comforting classics I should share with you next. If you loved the richness of this but maybe want to try something baked next time, you should totally look at my Pumpkin Cheesecake Bars—they hit all the comfort notes!
Happy scooping, everyone! Let’s keep making memories one delicious, creamy layer at a time.
PrintEasy No-Bake Oreo Dirt Cake
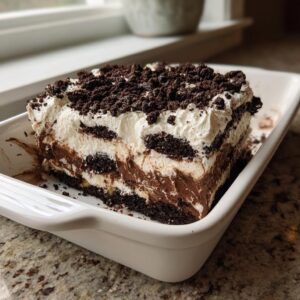
Make this simple, creamy Oreo Dirt Cake, a nostalgic no-bake dessert perfect for parties, potlucks, or family gatherings. Layer crushed Oreos with a rich pudding and cream cheese mixture.
- Prep Time: 20 min
- Cook Time: 0 min
- Total Time: 4 hr 20 min
- Yield: 12 servings 1x
- Category: Dessert
- Method: No-Bake
- Cuisine: American
- Diet: Vegetarian
Ingredients
- 1 package (8 ounces) cream cheese, softened
- 1 cup unsalted butter, softened
- 1 cup powdered sugar
- 1 container (12 ounces) frozen whipped topping, thawed
- 2 packages (3.9 ounces each) instant chocolate pudding mix
- 3 cups cold milk
- 1 package (14.3 ounces) Oreo cookies, crushed (about 3 cups crumbs)
- Gummy worms for decoration (optional)
Instructions
- In a large bowl, beat the softened cream cheese and butter together until smooth.
- Gradually beat in the powdered sugar until the mixture is fully combined. Fold in the thawed whipped topping gently. Set this mixture aside.
- In a separate bowl, whisk together the instant chocolate pudding mix and cold milk for two minutes until it begins to thicken. Let it stand for five minutes.
- Gently fold the pudding mixture into the cream cheese mixture until just combined. Do not overmix.
- Crush the Oreo cookies until they resemble fine dirt. Reserve about 1 cup of the crumbs for the top layer.
- To assemble, use a large trifle dish or individual cups. Place half of the remaining Oreo crumbs in the bottom layer.
- Spread half of the creamy chocolate mixture over the cookie crumbs.
- Repeat the layers: add the remaining Oreo crumbs, followed by the remaining cream mixture.
- Sprinkle the reserved 1 cup of Oreo crumbs over the top layer to create the ‘dirt’ look.
- If using, press gummy worms into the top layer.
- Cover the dish or cups and chill in the refrigerator for at least four hours, or preferably overnight, to allow the dessert to set.
Notes
- For individual servings, use clear plastic cups to show off the layers. This is a great make ahead dessert.
- If you are planning meals for the week, this dessert is simple enough to prepare ahead of time without needing complex meal planning.
- If you prefer a richer chocolate flavor, you can substitute some of the milk with cold brewed coffee when making the pudding.
Nutrition
- Serving Size: 1 serving
- Calories: 380
- Sugar: 35
- Sodium: 310
- Fat: 23
- Saturated Fat: 12
- Unsaturated Fat: 11
- Trans Fat: 0.5
- Carbohydrates: 42
- Fiber: 1
- Protein: 4
- Cholesterol: 35