
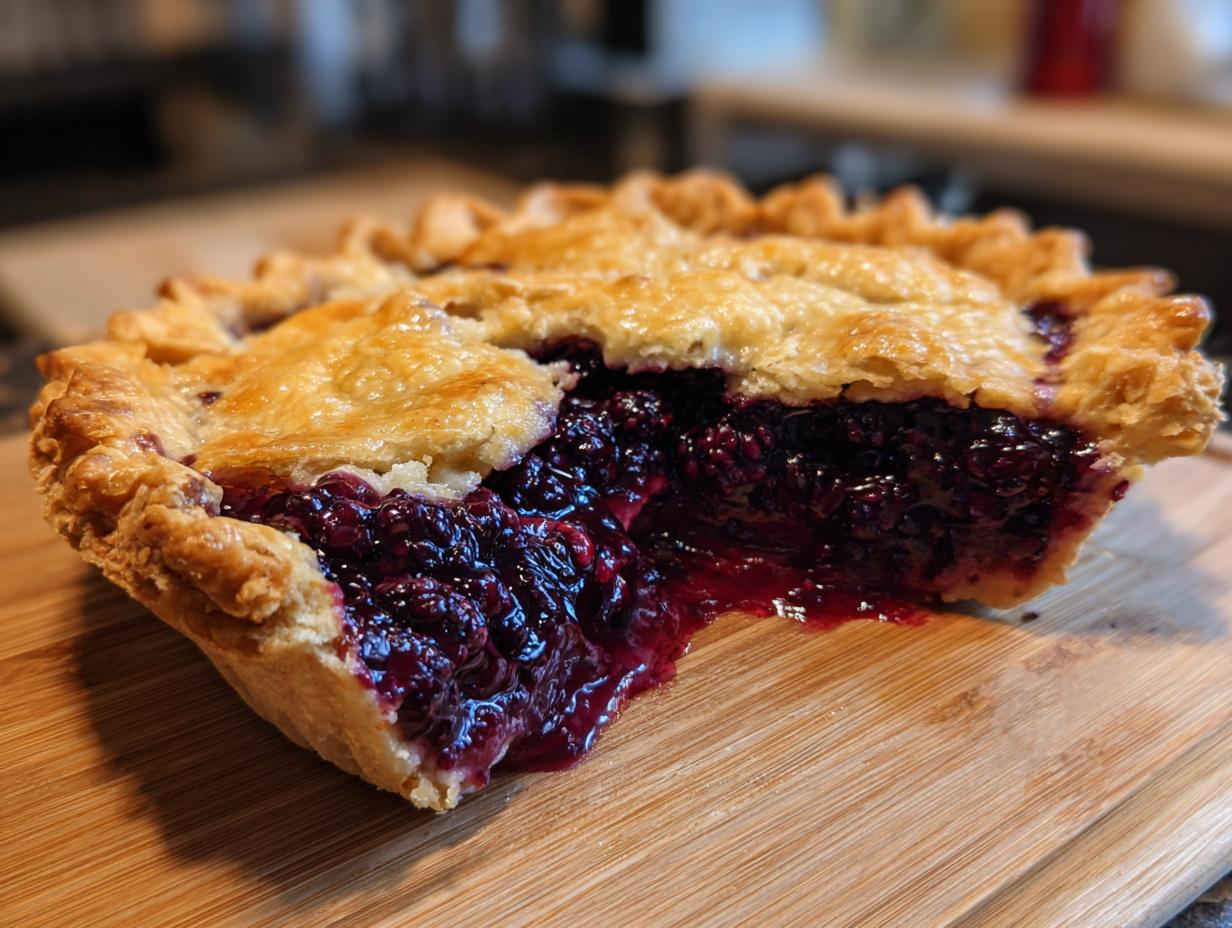

Oh, summer baking, there is just nothing better, is there? When those gorgeous, plump blackberries are calling your name at the market, you know exactly what time it is: time for pie! Making a truly fantastic **blackberry pie** from scratch used to feel intimidating, especially if you’ve suffered through a sad, soggy bottom crust before. But trust me, that struggle is over now. I learned the hard way years ago, standing on a wobbly stool in my grandmother’s kitchen, that pie-making is all about tradition and technique. We’re going to conquer that crust and get you a deep, sweet-tart filling that sets perfectly every single time. Get ready for the best homemade blackberry pie you’ve ever tasted!
- Why This Classic Homemade Blackberry Pie Recipe Works
- Gathering Ingredients for Your Blackberry Pie
- Step-by-Step Instructions for Blackberry Pie
- Tips for the Best Blackberry Pie Success
- Variations on the Classic Blackberry Pie Recipe
- Serving Blackberry Pie: The Perfect Finish
- Storing Your Homemade Blackberry Pie
- Frequently Asked Questions About Blackberry Pie
- Share Your Blackberry Pie Creations
Why This Classic Homemade Blackberry Pie Recipe Works
When you’re building something truly classic, like this old-fashioned blackberry pie, you need confidence in your foundation. This isn’t some quick weeknight bake; this is a showstopper meant to bring everyone to the table. My focus here, based on years of tinkering, is delivering that perfect balance: a shatteringly flaky crust and a filling that is juicy but never runny. Forget the watery results of the past; we’re aiming for perfection here.
- Butter, Butter, Butter: We rely completely on the richness of real butter for that essential flaky texture.
- The Setting Agent: Cornstarch is non-negotiable; it locks in all that lovely berry moisture.
- Flavor Balance: The combination of sugar and lemon juice keeps that deep blackberry flavor bright and complex.
If you love this deep-dish style, wait until you try making my apple pie recipe next, but for now, let’s focus on these berries!
Achieving the Perfect Flaky Pie Crust Tutorial
The trick to a flaky pie crust tutorial that actually works isn’t luck, darling, it’s temperature! You must keep everything ice cold—your butter cubes, the water, even your hands if your kitchen is warm. Those visible little chunks of butter are what create steam pockets when they hit the hot oven, which then turn into those beautiful, delicate flakes. If your dough gets warm or soft, just stick it back in the fridge for 15 minutes. Seriously, cold dough equals a buttery pie crust that won’t let you down.
The Secret to a Juicy Berry Pie Filling
So many beautiful pies get ruined because the filling decides to escape everywhere when sliced! That’s why we use cornstarch so heavily here. It creates a thick, glossy binder for that juicy berry pie filling. We use plenty of sugar, yes, but balance it with a good splash of lemon juice. That acid is crucial—it wakes up the depth of the blackberry flavor so it tastes like summer, not just sweet syrup. It’s all about setting that filling beautifully so you get that perfect dollop of fruit in every single slice.

Gathering Ingredients for Your Blackberry Pie
Okay, let’s talk supplies! Even the best technique falls flat if the ingredients aren’t up to par. Remember, this is a Classic American Dessert, so we need honest, good quality ingredients. It’s fascinating how simple things like the right flour and wonderfully cold butter can transform a humble berry into something spectacular. I always gather everything I need before I even think about turning on the mixer. It keeps the process flowing smoothly, which is key when you’re working with dough!
Don’t forget, if you’re looking for other staples to build up your baking confidence, check out my guide to making crusty Italian bread—that process relies on similar patience!
Here is exactly what you need for one glorious 9-inch pie:
- For the All-Butter Crust:
- 2 1/2 cups all-purpose flour (Use the one that promises tender results!)
- 1 teaspoon salt
- 1 cup (that’s two full sticks!) unsalted butter, it MUST be very cold and cut into small cubes—I mean, really cold.
- 1/2 cup ice water, plus maybe a splash more if the dough looks dry.
- For the Sweet Tart Blackberry Filling:
- 6 cups fresh or frozen blackberries (Don’t thaw the frozen ones!)
- 1 1/2 cups granulated sugar (Taste your berries first; adjust this based on how tart they are!)
- 1/4 cup cornstarch—this is our MVP for avoiding that dreadful soggy bottom!
- 1 tablespoon fresh lemon juice
- 1/2 teaspoon ground cinnamon (just a hint of warmth)
- For the Finish:
- 1 large egg, beaten with 1 tablespoon milk (for that beautiful golden egg wash)
- 1 tablespoon coarse sugar for sprinkling on top, just for that professional sparkle.
Step-by-Step Instructions for Blackberry Pie
Alright, buckle up! This is where the fun starts, and where we lock in all that potential flavor. We need to work quickly but gently, especially when we’re handling that buttery pie crust. Remember what I said about keeping everything cold? That applies right now! Follow these steps perfectly, and you’ll have a stunning blackberry pie that everyone will rave about.
Making the Buttery Pie Crust Dough
First things first: we make that gorgeous dough. Toss your flour and salt into a big bowl. Now, take those cubes of super cold butter and use a pastry blender—or honestly, just your fingers if you work fast—to cut it into the flour. Stop when you still see butter pieces about the size of small peas. That’s crucial! Next, drizzle in that ice water, tablespoon by tablespoon. You’re mixing just until it clumps together; stop immediately, I mean it! Divide the whole mess into two disks, wrap ‘em tight, and let them chill for at least an hour. No cheating!
Assembling the Sweet Tart Blackberry Filling
While your dough is getting happy in the fridge, let’s prep the inside. In a separate bowl, take those lovely blackberries—fresh or frozen, it doesn’t matter if you’re baking with fresh blackberries or coming straight from the freezer, just don’t thaw them! Gently fold them together with the sugar, that amazing cornstarch, the lemon juice, and that little whisper of cinnamon. Mix until everything is just coated. Don’t crush the berries, though! We want them mostly whole so they burst satisfyingly when baked.
Baking the Blackberry Lattice Pie
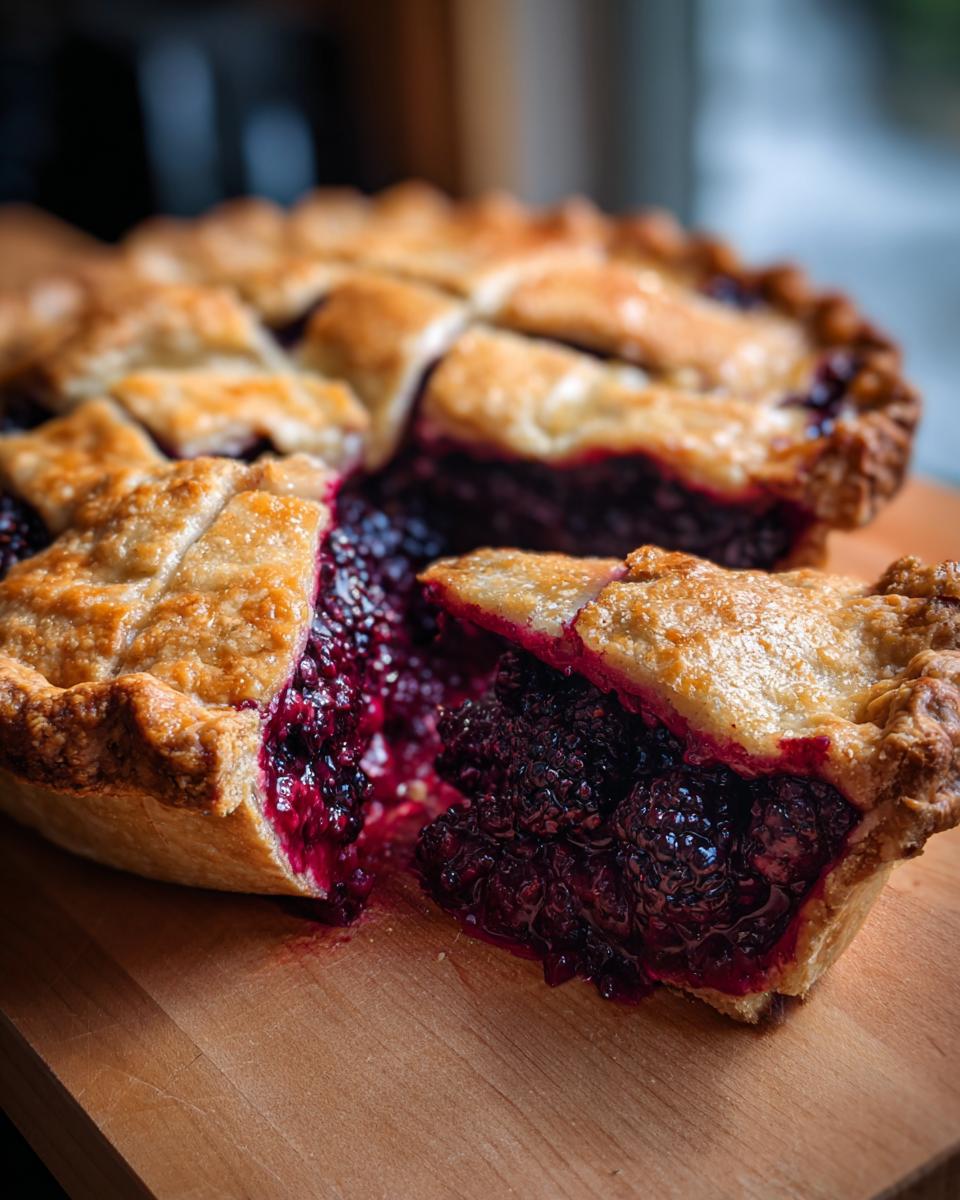
Time to roll! Preheat your oven to 400°F. Roll out one disk and lay it right into your pie plate. Pour in that glorious blackberry filling. Now you can either weave that beautiful Blackberry Lattice Pie top (which just screams impressive!) or just lay the second sheet over the top. Crimp those edges tight to seal the deal—we want no leaks! Brush the top with your egg wash and give it a shower of coarse sugar.
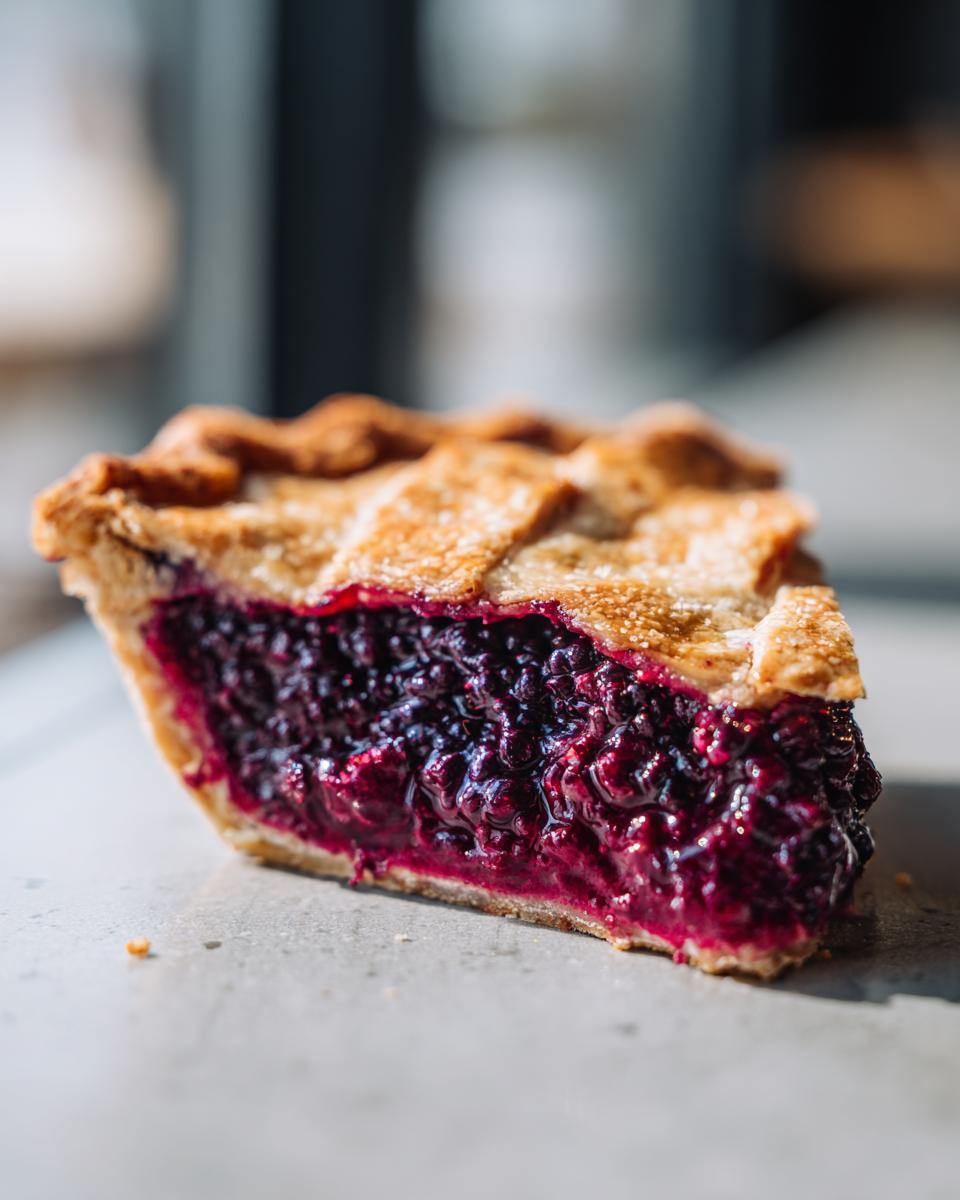
Here’s the trick for that golden-brown exterior: Start baking at 400°F for 20 minutes to set the crust. Then, without opening the door if you can help it, drop the heat down to 375°F and bake for another 35 to 45 minutes. If the edges look like they are getting too dark, make a little ring of foil and tuck it around the rim to shield them. Keep watching until that filling is thick and bubbling madly in the center!
Tips for the Best Blackberry Pie Success
Baking this incredible dessert takes a little patience right at the very end, but I promise, it’s worth holding off! If you slice this pie too early, you’ll end up with a watery mess, and that’s a tragedy we simply cannot allow. That cornstarch only works its magic if you give it time to cool down and set properly.
My number one rule for guaranteeing a No Soggy Bottom Pie is two-fold: use the cornstarch amount listed, but also, do not touch the pie for at least four hours after it comes out of the oven. Yes, four hours! Let it cool completely on a wire rack. This resting period firms up that gorgeous filling so it holds its shape when you cut it. It’s the hardest part of the whole process, but it makes the world of difference.
Also, if you happen to make extra pastry scraps, don’t toss them! Roll out those trimmings, brush them with the egg wash, and bake them alongside the pie to create little pastry ‘cookies’ for snacking while you wait for your main event to cool. It helps pass the time!
Variations on the Classic Blackberry Pie Recipe
This Old Fashioned Blackberry Pie is perfect as is, but you know me—I love an excuse to experiment, especially when it comes to showcasing all the best seasonal fruit baking has to offer! If you’ve got a mix of berries kicking around, don’t hesitate to combine them. A true mixed berry pie using blueberries or tart raspberries alongside the blackberries makes for a stunning dessert. It’s still an easy fruit pie recipe, just with a little more excitement inside!
You can also play around with the spices. While cinnamon is classic, sometimes I add a tiny pinch of ground cardamom right into the filling mix. It doesn’t make it taste distinctly like cardamom; it just adds this subtle, warm background note that pairs unbelievably well with the dark fruit. It elevates the whole dessert for a potluck contribution!
Serving Blackberry Pie: The Perfect Finish
Now for the best part, right? You’ve done the hard work, you’ve waited patiently for it to cool, and it’s time to take that first bite of your glorious, Homemade Blackberry Pie. While this Classic American Dessert stands perfectly on its own, I have to tell you, it sings when paired with something cold and creamy.
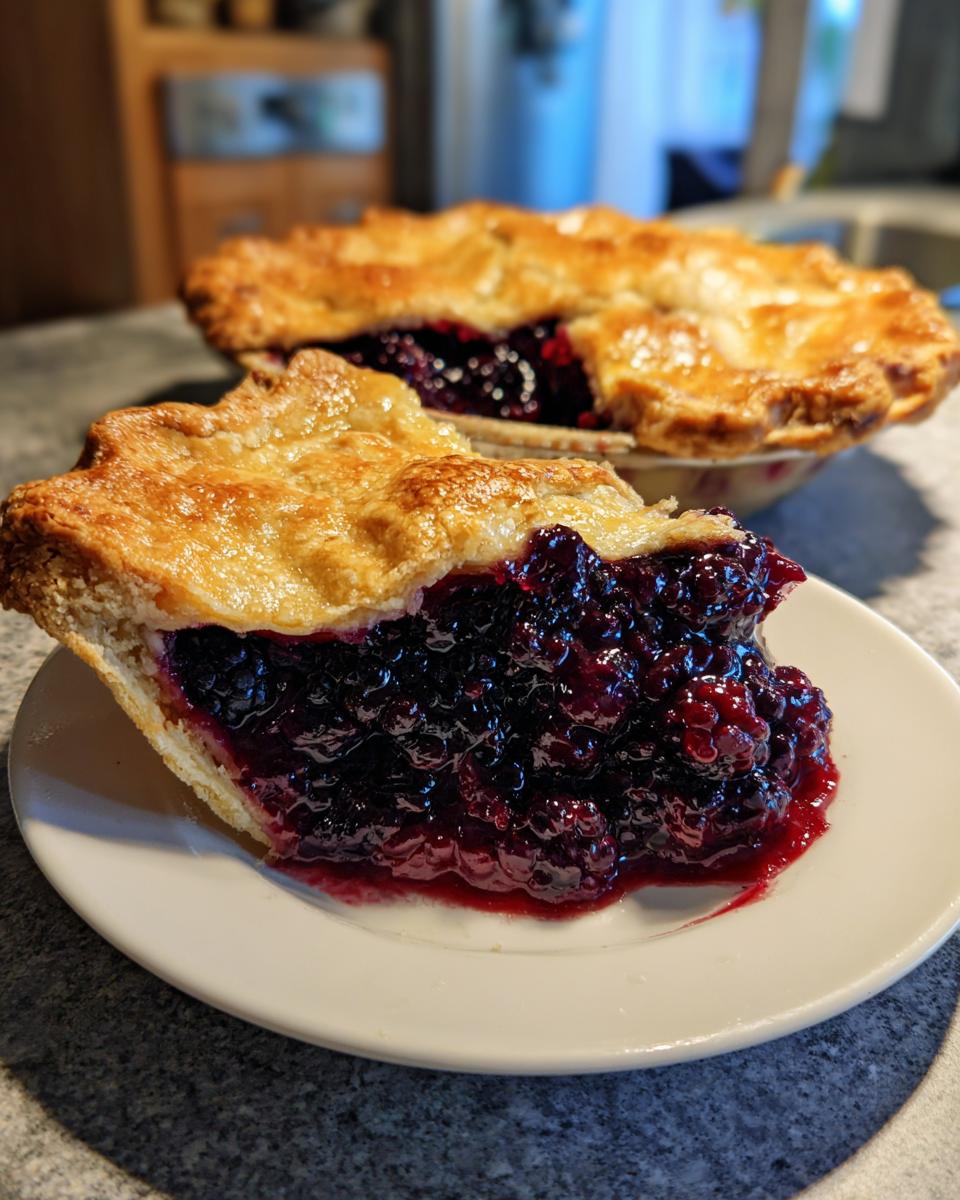
Seriously, you absolutely have to try it warm—not hot, but slightly warm—with a big scoop of good quality vanilla ice cream melting down the sides. The contrast between the warm, tart berries and the cold, sweet vanilla is pure magic. If something creamy but lighter is what you’re after, a dollop of fresh, lightly sweetened whipped cream works beautifully, too. It’s the perfect way to finish any summer dinner or special celebration. If you need a savory main dish inspiration before you dive in, maybe check out my easy chicken chili recipe!
For another serving idea, I once saw someone top theirs with a drizzle of honey—a fun little twist! You can read about their experience here: The Hidden Magic of Blackberry Pie.
Storing Your Homemade Blackberry Pie
So, unless you manage to eat the entire thing in one sitting (hey, I don’t judge!), you’ll likely have leftovers of your gorgeous blackberry pie. Because this filling is so jammy and thick, it handles storage really well. You can absolutely leave a partially eaten pie covered on the counter for the first day. Just make sure it’s somewhere cool and away from the dog!
For anything longer than 24 hours, trust me and cover that pie tightly (plastic wrap or foil is fine) and pop it in the fridge. It’ll keep well for maybe three or four days.
When you go to reheat a slice, here’s my non-negotiable tip for keeping the crust flaky: Don’t use the microwave! It steams the bottom crust right into rubber. Instead, pop the slice on a baking sheet and warm it in a toaster oven or regular oven at about 350°F for about 10 minutes until it’s warm through. It brings back that fresh-from-the-oven texture beautifully! If you need a great savory side dish idea for later, check out my roasted potatoes and carrots.
Frequently Asked Questions About Blackberry Pie
I know sometimes you have questions floating around even after reading through all my baking insights! That’s totally normal when you’re making something this special. Here are a few things I get asked all the time when people are trying to master our blackberry pie recipe.
Can I really use frozen blackberries instead of fresh ones?
Yes, absolutely! Like I mentioned in the instructions, this recipe works perfectly well with frozen berries, which is great news for whipping up an easy fruit pie recipe any time of year. The most important thing is *not* to thaw them first. Toss them straight from the freezer into the sugar mixture. They will release extra liquid, but that’s why we are generous with the cornstarch—it handles the moisture blast!
Is the lattice crust required for a good pie?
Oh, gosh no! The lattice crust is just beautiful on a homemade blackberry pie, isn’t it? It lets the steam escape and shows off that gorgeous filling. But if you’re short on time, or maybe you’re still mastering your weaving skills, just use a full top crust. If you go that route, make sure you cut at least five or six good, generous slits right in the center so the pie can breathe while it bakes.
What is the ultimate way to ensure a no soggy bottom?
This is the million-dollar question for any fruit pie maker! Beyond using that four tablespoons of cornstarch I listed, make sure your bottom crust is cold when it goes into the oven, and bake on the lowest rack of your oven possible to give that base maximum direct heat. Some people even pre-bake the bottom crust for about 10 minutes before filling it, but honestly, if you keep your butter cold and let the finished old fashioned blackberry pie cool completely (that four-hour chill!), you shouldn’t have any issue at all.
Share Your Blackberry Pie Creations
Oh, I sincerely hope you loved making this dessert as much as I love sharing it with you! Now that you’ve got your magnificent, flaky, bubbling blackberry pie cooling on the counter, I need to know everything about it!
Please, after you finally dig in and decide it’s the best thing you’ve eaten all summer, jump back here and leave a rating. Five stars is always wonderful, but even if you had a smudge of flour on your lattice, I want to hear how it went. Honest feedback helps me keep testing and tweaking these recipes so that the next time you bake, it’s even better!
And I absolutely live for seeing your creations! If you shared a picture of your juicy filling or your beautiful lattice work on social media, tag me! It brings me so much genuine joy to think of my recipes ending up on your family tables.
If you’re already thinking about what to bake next now that this one is done, don’t forget to browse my main recipe index for more comforting classics and fun weekend bakes!
PrintClassic Homemade Blackberry Pie with Flaky All-Butter Crust
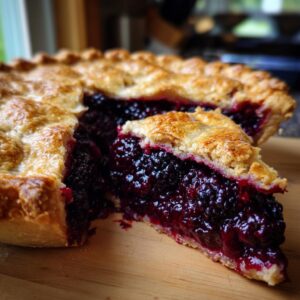
Make an old-fashioned blackberry pie featuring a sweet-tart berry filling and a perfectly flaky, buttery double crust. This recipe focuses on achieving a non-soggy bottom.
- Prep Time: 45 min
- Cook Time: 65 min
- Total Time: 110 min
- Yield: 8 servings 1x
- Category: Dessert
- Method: Baking
- Cuisine: American
- Diet: Vegetarian
Ingredients
- 2 1/2 cups all-purpose flour
- 1 teaspoon salt
- 1 cup (2 sticks) unsalted butter, very cold and cubed
- 1/2 cup ice water (plus more if needed)
- 6 cups fresh or frozen blackberries
- 1 1/2 cups granulated sugar (adjust based on berry sweetness)
- 1/4 cup cornstarch (the secret to avoiding a soggy bottom)
- 1 tablespoon lemon juice
- 1/2 teaspoon ground cinnamon
- 1 large egg, beaten with 1 tablespoon milk (for egg wash)
- 1 tablespoon coarse sugar, for sprinkling
Instructions
- Prepare the all-butter pie crust: In a large bowl, whisk together the flour and salt. Cut in the cold, cubed butter using a pastry blender or your fingers until the mixture resembles coarse crumbs with some pea-sized pieces of butter remaining.
- Gradually add the ice water, one tablespoon at a time, mixing until the dough just comes together. Do not overmix. Divide the dough in half, form each half into a disk, wrap in plastic, and chill for at least 1 hour.
- Prepare the filling: In a separate bowl, gently combine the blackberries, granulated sugar, cornstarch, lemon juice, and cinnamon. Set aside while you roll out the bottom crust.
- Preheat your oven to 400°F (200°C). If you are using frozen berries, do not thaw them first.
- Roll out one disk of dough and carefully place it into a 9-inch pie plate. Trim the edges, leaving a 1-inch overhang.
- Pour the blackberry filling into the bottom crust.
- Roll out the second disk of dough. Cut strips to create a lattice top, or place the whole sheet over the filling. Crimp the edges of the top and bottom crusts together to seal. Cut a few slits in the top crust if you did not make a lattice.
- Brush the top crust lightly with the egg wash (egg mixed with milk) and sprinkle evenly with coarse sugar.
- Bake the pie at 400°F (200°C) for 20 minutes. Reduce the oven temperature to 375°F (190°C) and continue baking for another 35 to 45 minutes, or until the crust is golden brown and the filling is bubbling thickly. If the edges brown too quickly, cover them loosely with foil.
- Cool the pie completely on a wire rack for at least 4 hours before slicing. This cooling time allows the filling to set properly.
Notes
- For the flakiest crust, keep all butter and water extremely cold throughout the mixing process.
- Serve this classic American dessert warm with a scoop of vanilla ice cream or fresh whipped cream.
- If you are focused on meal planning for healthy eating, consider this pie a special occasion treat rather than part of a strict weight loss programs regimen.
Nutrition
- Serving Size: 1 slice
- Calories: 450
- Sugar: 35g
- Sodium: 250mg
- Fat: 25g
- Saturated Fat: 15g
- Unsaturated Fat: 10g
- Trans Fat: 0g
- Carbohydrates: 58g
- Fiber: 5g
- Protein: 5g
- Cholesterol: 60mg