
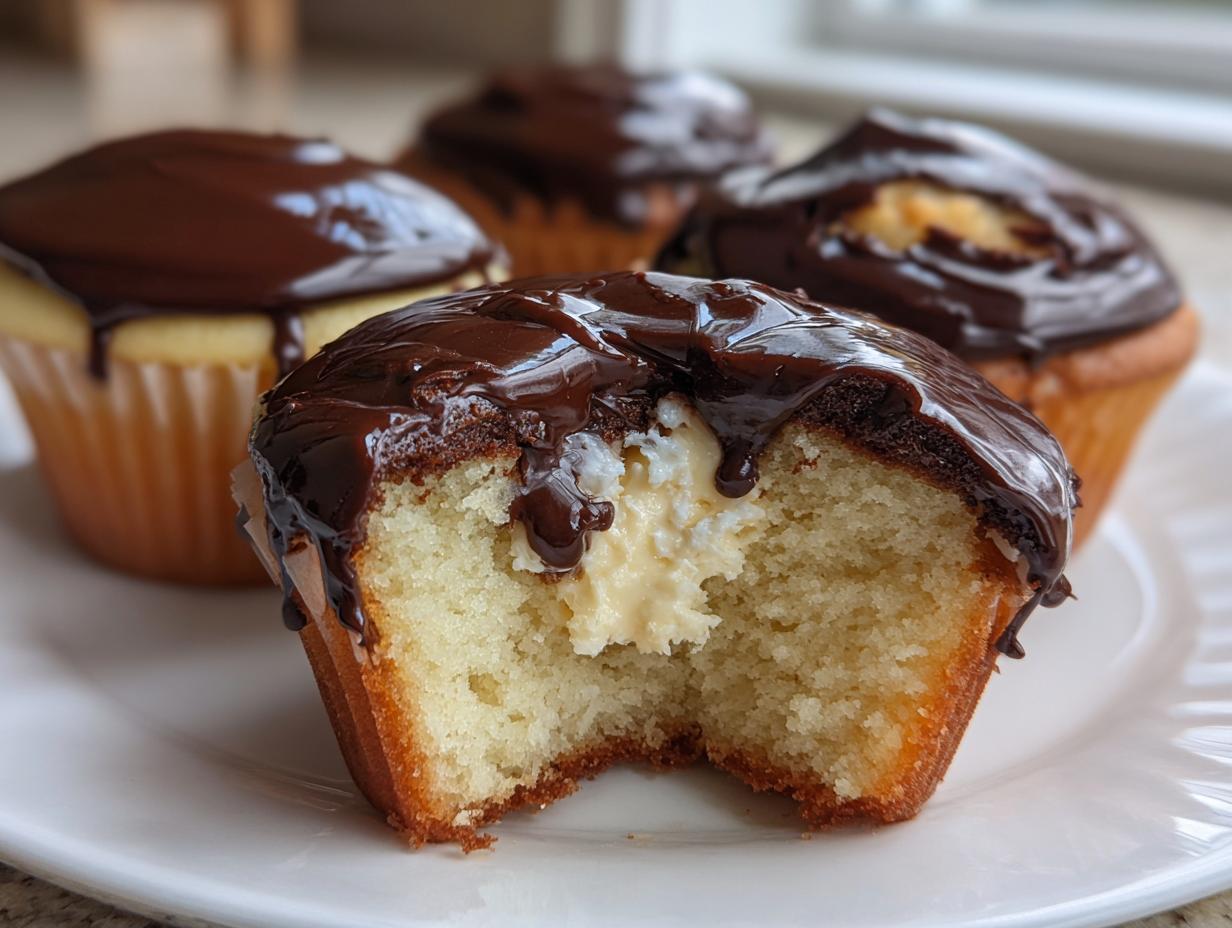

Oh my goodness, you know I love taking those big, gorgeous, slightly intimidating classic desserts and shrinking them down into something perfectly personal, right? Well, hold onto your spatulas, because my take on boston cream pie cupcakes is pure magic! We’re transforming that beloved, rich flavor experience—fluffy cake, creamy center, shiny chocolate top—into a handheld dream. I spent ages perfecting this recipe, just like I learned from my family, to make sure every component works beautifully together. Trust me, these are guaranteed to be your new favorite copycat bakery treats, ready in one afternoon! You can read more about my cooking journey over on my About Page, but for now, let’s get baking!
- Why You Will Love These Boston Cream Pie Cupcakes
- Essential Ingredients for Perfect Boston Cream Pie Cupcakes
- Step-by-Step Instructions for Boston Cream Pie Cupcakes
- Expert Tips for Perfect Boston Cream Pie Cupcakes
- Ingredient Substitutions for Boston Cream Pie Cupcakes
- Storage and Make Ahead Tips for These Cream Filled Cupcakes
- Serving Suggestions for Your Showstopping Dessert Recipes
- Frequently Asked Questions About Boston Cream Cupcakes
- Nutritional Estimates for Boston Cream Pie Cupcakes
- Share Your Homemade Boston Cream Pie Cupcakes Creations
Why You Will Love These Boston Cream Pie Cupcakes
Honestly, these boston cream pie cupcakes are everything good about that classic dessert, just miniaturized and way easier to handle. I just know you’re going to love them!
- They are the perfect handheld pie desserts—no slicing or heavy plates needed!
- You get that incredible, rich vanilla cake texture, light as air, which contrasts perfectly with the filling.
- The homemade pastry cream is silky smooth; it’s way better than any store-bought canned stuff, I promise!
- They look absolutely stunning, making them elegant cupcakes for parties or any celebration where you want to impress.
- You get the satisfaction of a classic American dessert flavor profile in a fun, individual portion.
- The deep, glossy chocolate ganache topping melts perfectly in your mouth along with the cool cream inside.
- These are fantastic make ahead party desserts since you can prep the components separately.
See? So many reasons to bake these beauties right now!
Essential Ingredients for Perfect Boston Cream Pie Cupcakes
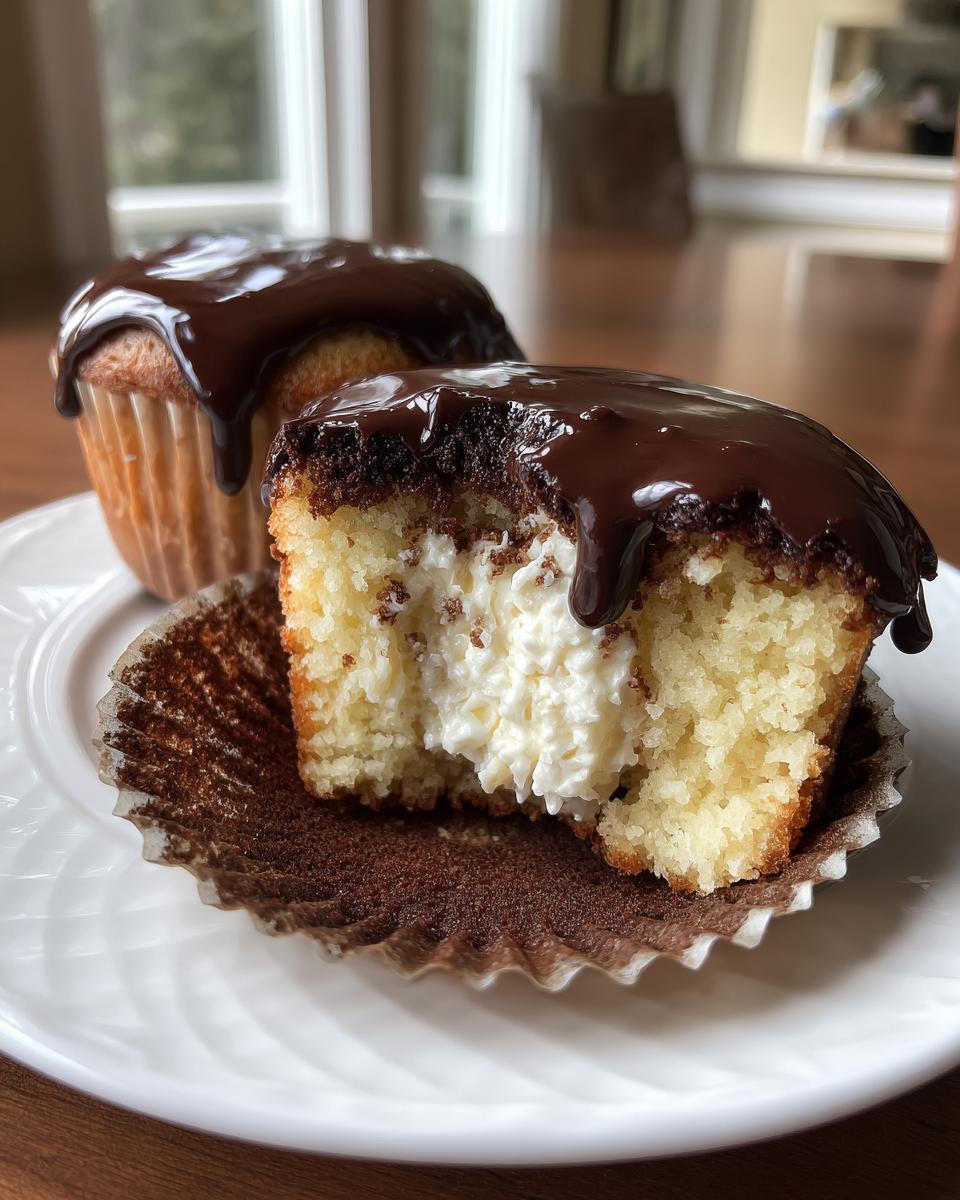
Okay, since these boston cream pie cupcakes have three very distinct layers—the cake, the filling, and the chocolate top—we need to treat each one like its own little recipe. To get that authentic, copycat bakery cupcakes flavor, you absolutely can’t skimp on the quality or the specifics of these items. When I say softened butter, I mean truly soft, not melted! And when the recipe calls for egg yolks, don’t just use whole eggs, or that lovely custard won’t set right. Paying attention to these details is how we nail this from scratch cupcake recipe! For more on my baseline cake techniques, check out my go-to recipe for vanilla cupcakes.
For the Fluffy Vanilla Cupcake Base
This is the foundation, so we want it light and tender. You’ll need:
- 1 1/2 cups all-purpose flour
- 1 1/2 teaspoons baking powder
- 1/2 teaspoon salt
- 1/2 cup unsalted butter, softened
- 1 cup granulated sugar
- 2 large eggs
- 1 teaspoon vanilla extract
- 1/2 cup milk
For the Homemade Pastry Cream Filling
This is what earns us the title of custard filled cupcakes recipe! Don’t be intimidated; just be ready to whisk constantly. We need:
- 1/2 cup heavy cream
- 1/4 cup granulated sugar
- 2 large egg yolks
- 2 tablespoons cornstarch
- 1/2 cup milk
- 1 teaspoon vanilla extract
For the Glossy Chocolate Ganache Topping
This is where we bring that stunning shine for our chocolate ganache topping. Keep the chocolate quality in mind here!
- 4 ounces semi-sweet chocolate
- 1/2 cup heavy cream
Step-by-Step Instructions for Boston Cream Pie Cupcakes
Now for the fun part! Don’t let the three components scare you; we tackle them one at a time, just like I learned to tackle big baking projects bit by bit. Remember, patience is key, especially when we are aiming for those gorgeous showstopping dessert recipes! I have a great fail-proof creamy custard recipe if you want to see how serious I am about smooth fillings, but here are the steps for these specific boston cream pie cupcakes.
Baking the Vanilla Cupcakes
First things first, hit that oven to 350°F (175°C) and get those liners ready in your standard 12-cup tin. You want those fluffy cake cupcakes to have the right air structure, so make sure you cream that butter and sugar until it looks genuinely pale and cloud-like. That’s crucial!
Once you mix the batter, you have to alternate the dry flour mixture with the milk, always starting and stopping with the dry stuff. This keeps everything happy and prevents you from overmixing it into something tough. Fill those cups about two-thirds full and let them bake for 18 to 20 minutes. When an inserted toothpick comes out clean, they are done! Cool them completely—and I mean completely—before you even think about touching them with a filling tool.
Making the Creamy Custard Filling Recipe
This is where we make the magic happen for our easy custard filling recipe! Grab a saucepan and whisk together the heavy cream, sugar, egg yolks, cornstarch, and milk until it’s totally smooth. Seriously, whisk out those lumps before they even think about forming!
Heat this over medium heat, but you have to whisk constantly. I mean it! It will start to thicken up beautifully. Once it boils, give it one minute more while whisking hard, then pull it off the heat and stir in that last bit of milk and vanilla. Transfer it to a bowl immediately and press plastic wrap right onto the surface—if you skip that step, you get skin, and nobody wants custard skin! Chill this for at least two hours; skipping the chill time guarantees a watery center later.
Preparing the Chocolate Ganache Topping
This is where we bring that stunning shine for our chocolate ganache topping. Keep the chocolate quality in mind here! Just chop up your semi-sweet chocolate into a heat-safe bowl. Heat that 1/2 cup of heavy cream on the stove until it starts to simmer around the edges, then immediately pour that hot cream right over the chocolate.
Let it sit there for five whole minutes—don’t touch it! Then, gently whisk it starting from the middle until it smooths out into a gorgeous, shiny glaze. You can check out my favorite technique over at my post on fudgy cookies which uses a similar method. You need to let this ganache cool just a bit so it’s thick enough to stay on top but still pourable!
Assembling Your Boston Cream Pie Cupcakes
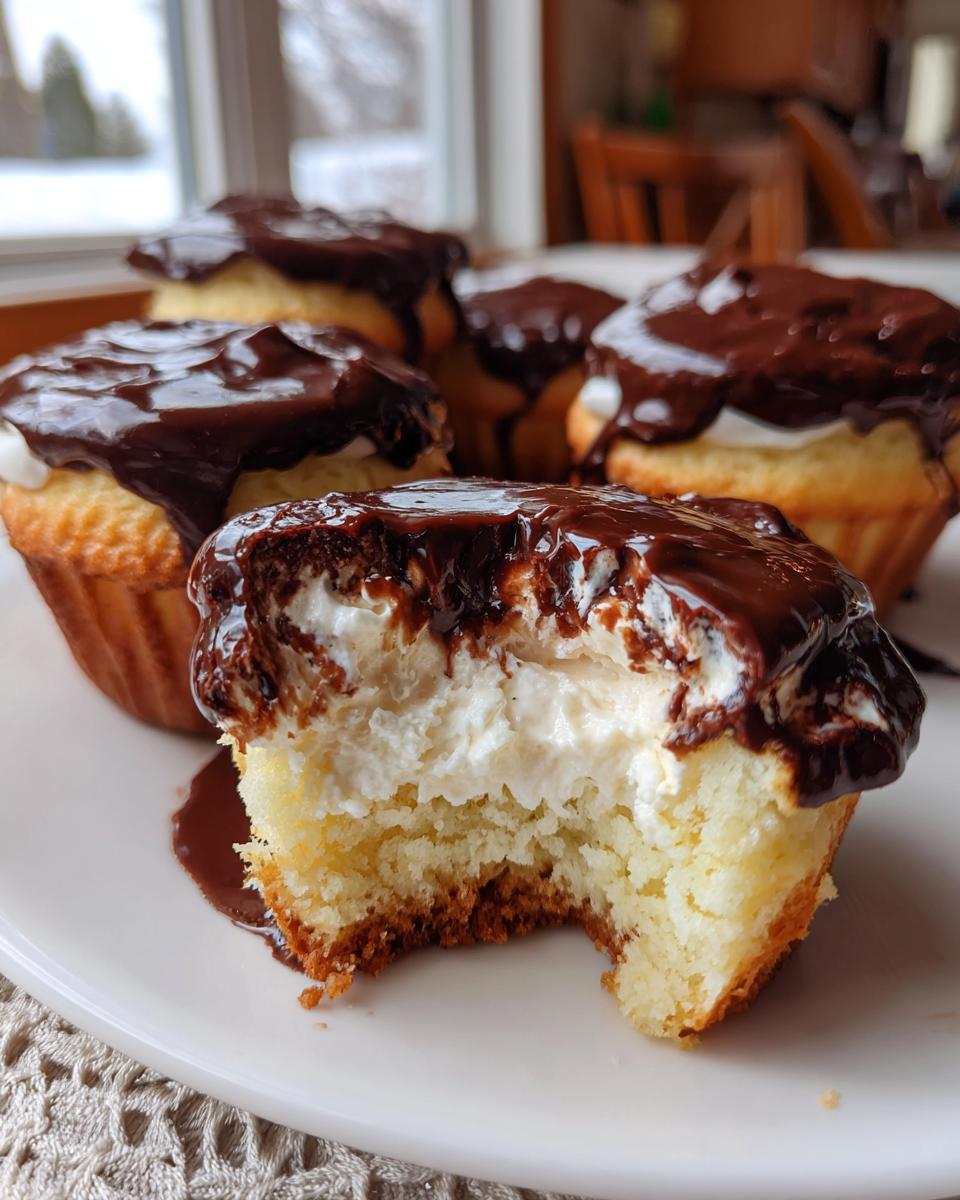
Time to make these into true Bite Sized Boston Cream treats! Take your completely cool cupcakes and use a small knife or an apple corer—my favorite tool for this, honestly—to scoop out a cone-shaped center from each one. Keep those little cake plugs! Next, load your chilled pastry cream into a piping bag with a round tip and squeeze that delicious filling right into the hole until it’s heaping a little bit. Place the cake plug right back on top like a little hat.
Finally, top each cupcake generously with the slightly cooled ganache, letting it drip down the sides just a little bit for that authentic bakery look. Let that chocolate set up, and you’re done! Aren’t they something?
Expert Tips for Perfect Boston Cream Pie Cupcakes
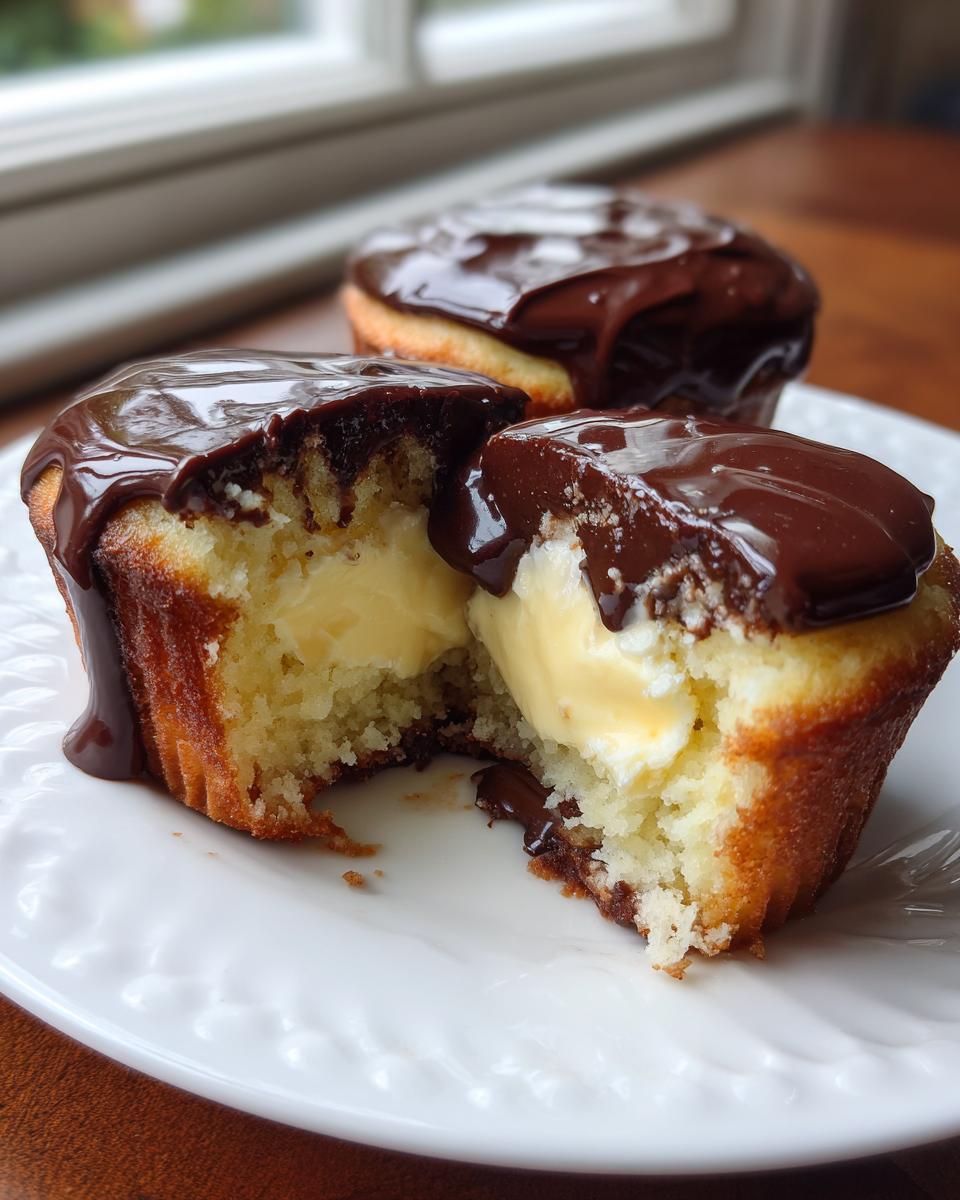
You know I’m all about making sure you taste success when you try my recipes! While the steps above are solid, a couple of little tricks will take these boston cream pie cupcakes from great to legendary. This is the stuff I learned from years of tweaking recipes!
To get that pastry cream filling absolutely silky, the secret is cooling it down fast after cooking. Once you take it off the heat, get it into a bowl and press that plastic wrap right onto the surface as I mentioned. If you let it sit uncovered while it cools on the counter, you get that rubbery skin—yuck! Chilling it quickly helps set the structure beautifully.
When it comes to the chocolate topping, nobody wants cracked chocolate, especially on a treat as fancy as these. The ganache cracks if you pour it on when it’s too hot, or if the cupcakes underneath are cold. Let the ganache cool down until it’s spreadable, kind of like thick pudding, and make sure your filled cupcakes are sitting at room temperature for about 15 minutes before you dip or drizzle that chocolate on top.
If you’re planning these for a big event, remember my tip about prep! You can absolutely tackle the cake baking and the pastry cream making a day ahead. This is perfect for simplifying things, as I talk about in my guide to make ahead party desserts. Just keep the cooled cakes wrapped loosely, store the chilled cream covered, and then assemble everything the morning you plan to serve them. The ganache can be made an hour ahead and kept warm in a slightly warm spot while you fill!
Lastly, when you are coring out the center for the filling, be gentle! You want to maintain as much of that fluffy vanilla cake integrity as possible. It saves you from having too many cake crumbs and gives you a nice, sturdy little well for that creamy goodness.
Ingredient Substitutions for Boston Cream Pie Cupcakes
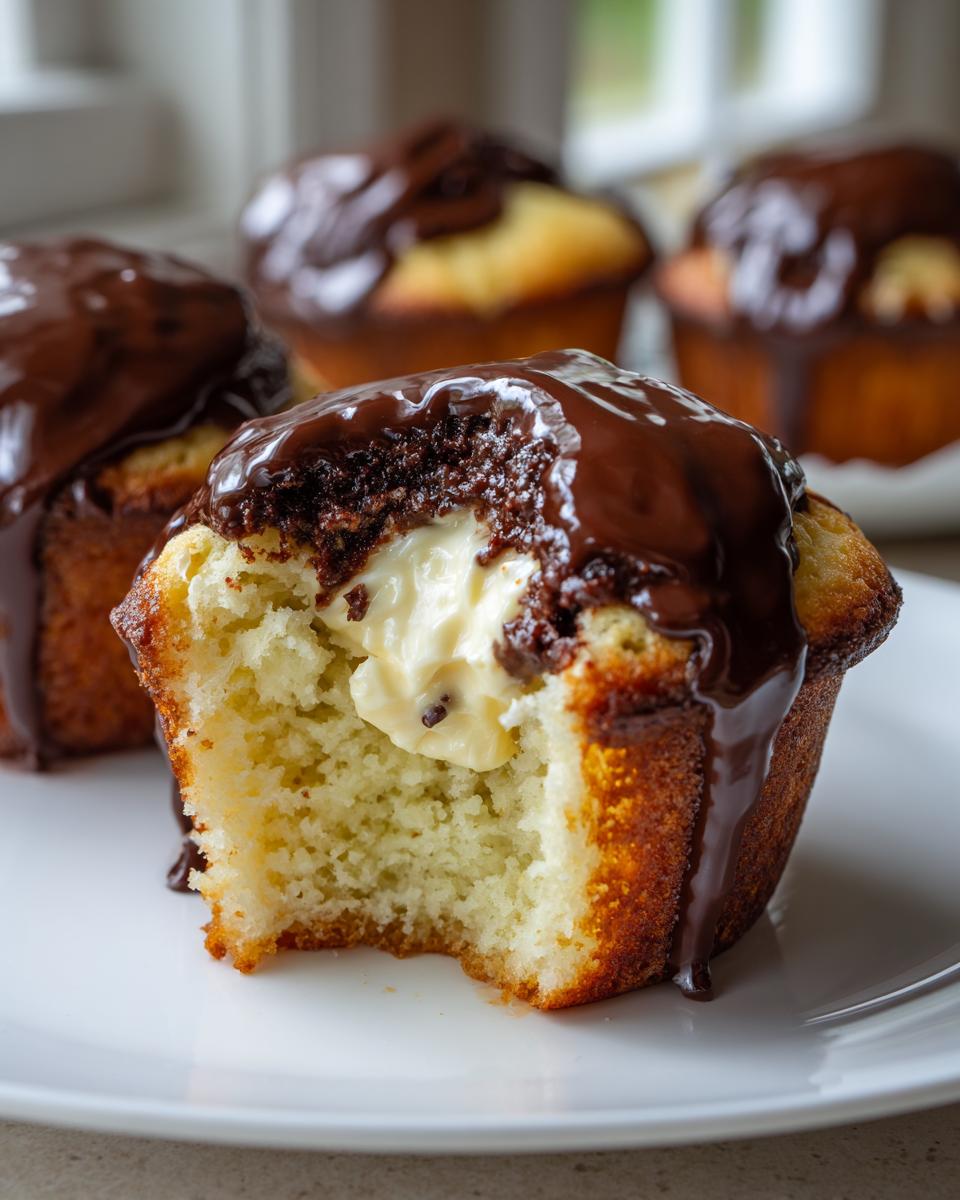
I totally get it—sometimes you’re mid-recipe, open the fridge, and realize you’re missing one crucial item! It happens to the best of us, even seasoned home bakers. For these boston cream pie cupcakes, the goal is always maximum flavor, but sometimes we need a little flexibility. Let’s talk swaps so you don’t have to run to the store!
The biggest question is usually about the heavy cream situation, since it features in both the filling and the ganache. If you don’t have heavy cream for the Chocolate Ganache Topping, you can usually substitute it safely with whole milk, but you have to rethink how you approach it. If you use whole milk instead of cream for the chocolate melting, you’re going to end up with a thinner glaze, not a true ganache. If this happens, don’t panic! Just let it sit longer to cool and thicken up, or stir in a tiny bit more chopped chocolate to stabilize it.
When it comes to the pastry cream, that heavy cream is thickening things up nicely along with your egg yolks, but if you are completely out, you can use all whole milk, but I’d highly recommend increasing the cornstarch by just a half teaspoon. That extra starch will compensate for the lack of fat content from the cream. It won’t be *quite* as rich, but you will still end up with a lovely, sturdy cream filled cupcakes center!
Now, if you look at the original notes, you know I mentioned my Grandma often preferred a simple dusting of sugar. If making the whole ganache feels like too much effort, skip it! Once the cupcakes are filled and the cake top is replaced, just dust the entire top generously with powdered sugar. It gives you a look closer to a classic donut finish while still delivering on that rich custard interior. It’s a perfectly acceptable shortcut for decadent cupcake ideas when you’re short on time!
Also, sometimes people ask about using instant pudding mix instead of making the whole Custard Filled Cupcakes Recipe from scratch. You certainly *can*—just follow the package directions on the mix, but use the milk and heavy cream amounts listed in my recipe for the best result. Remember, the homemade version tastes better, but the instant mix is a lifesaver when you need birthday cupcakes recipe inspo in a pinch!
Storage and Make Ahead Tips for These Cream Filled Cupcakes
When you’re planning a big shindig, knowing how to prep ahead of time means you aren’t stuck in the kitchen frosting until the last minute! These cream filled cupcakes are fantastic for prepping in stages, which is why they fit right into my guide on make ahead party desserts. But since we have that beautiful, rich pastry cream, storage is everything. We want that custard to stay fresh and firm!
If you are prepping everything in advance, please keep the three components totally separate until the very last possible moment—ideally within two hours of serving. The cake parts, the filling, and the ganache all have different storage needs, and combining them too soon can lead to soggy cake bases or weeping chocolate!
The Cakes: Once baked and completely cool, wrap your vanilla cupcake bases tightly in plastic wrap, two or three together, and keep them at room temperature. They do great like this for a couple of days! Don’t chill the cake part unless your kitchen is blazing hot, because chilling can strangely dry out an already baked cake.
Storing the Pastry Cream Filling
This is the most critical part for freshness. Since this is a dairy-heavy, egg-yolk-based custard filled cupcakes recipe, it really needs refrigeration. After you chill the pastry cream until it’s super firm (remember, we talked about that 2-hour minimum?), transfer it to an airtight container. It will stay perfect in the fridge for up to three days.
When you’re ready to assemble, whip that chilled cream for just a minute or two right before piping it into the cupcakes; this wakes up the texture and makes it super smooth and pipeable again. If it seems too stiff, add just a tiny splash of cold milk to loosen it up slightly.
The Ganache and Final Assembly
The chocolate ganache is quite forgiving! If you make it too early, just let it sit on the counter at a cool room temperature. If it gets too firm, gently warm the bowl over a pan of hot water (don’t let the water touch the chocolate!) until it reaches that perfect drizzling consistency again. It stays good at room temp for several hours.
Once you’ve filled the cupcakes and poured that stunning chocolate ganache topping on, that’s when they become somewhat vulnerable. For the best experience, especially if you want that perfect, snappy chocolate layer over the soft cream, try to serve boston cream pie cupcakes the same day you assemble them. Refrigerator time after glazing isn’t ideal because the chocolate can get dull, and any condensation that forms can make the cake edges look wet. If you must refrigerate assembled ones, let them sit on the counter for at least 30 minutes before serving so the cake can soften back up!
Serving Suggestions for Your Showstopping Dessert Recipes
When you put this much love into making boston cream pie cupcakes—truly showstopping dessert recipes—you want to serve them up right! Because these little guys pack a punch thanks to the pastry cream and rich chocolate, I actually like pairing them with something that cuts through that richness a bit. You don’t want to overpower the delicate balance we worked so hard to achieve, you know?
These aren’t cookies; they’re decadent, creamy, and deserve a moment to shine. That’s why I think they are the ultimate in elegant cupcakes for parties. They look fancy but taste exactly like that wonderful, slightly retro dessert we all adore!
If you are serving these during a brunch event or a spring gathering, forget the heavy coffee! My favorite pairing is actually something bright and tart. Think about serving them alongside a big beautiful pitcher of my classic homemade lemonade. The slight tanginess of the lemon cuts through the sweetness of the ganache perfectly, making you ready for the next bite!
For evening parties or a dessert showcase, I keep the drink pairings simple. A really good, strong cup of black coffee—nothing sweetened—is just marvelous alongside the chocolate and vanilla. If you are serving an adult crowd, a tiny glass of chilled Prosecco or even just plain sparkling water with a lime wedge works wonders to cleanse the palate between these rich cream filled cupcakes.
Honestly, though, the best serving suggestion is presentation! Use a crisp white linen tablecloth or a dedicated dessert stand. Let the reflection off that chocolate top do all the talking. They look so perfect sitting there waiting for guests to grab them!
Frequently Asked Questions About Boston Cream Cupcakes
I know you guys have questions! Whenever I share a recipe that has multiple components, like these amazing boston cream pie cupcakes, the questions always roll in. That’s why Sarah’s here—to give you the inside scoop on making these the best copycat bakery cupcakes possible. Here are a few things I hear most often!
Can I use instant pudding instead of making the pastry cream from scratch?
Oh, that’s a classic shortcut question! Yes, you absolutely *can* use instant vanilla pudding mix if you are in a real pinch for time. It definitely saves you the whisking time involved in making the homemade pastry cream.
However, here’s my honest take: making it from scratch—which is really just mixing egg yolks, cornstarch, and milk—gives you that authentic, silky texture that you crave in true custard filled cupcakes recipe. Instant pudding tends to be a bit thicker and sometimes tastes more artificial. If you must substitute, follow the box directions but try to incorporate a bit of the heavy cream listed in my recipe instead of only using milk; it helps bump up the richness a tiny bit!
How far in advance can I fill the cupcakes?
This is a big one, especially if you are planning these for a party! For the absolute best texture, you want to postpone filling the cupcakes as long as possible. The moisture from the pastry cream will inevitably start to soften the vanilla cake base if they sit together too long.
If you want to get ahead, I recommend baking the vanilla cupcakes one or two days before, storing them wrapped at room temperature. Make the pastry cream and chill it completely on the day before, then assemble everything—filling and topping—no more than 4 to 6 hours before you plan to serve them. That keeps them perfect and prevents that soggy bottom problem we all hate when dealing with cream filled cupcakes!
What makes these feel like they came from a fancy bakery?
It really comes down to the quality of the components and the final presentation! What makes these stand out as copycat bakery cupcakes isn’t just the flavor; it’s the textural contrast. A store-bought cupcake is usually just cake and frosting. Ours has that soft vanilla cake, the cool, rich, slightly unset texture of the pastry cream interior, and the crisp snap of the chocolate topping.
Plus, when you pipe that filling in just right, and the Chocolate Ganache Topping shines perfectly on top, they look professionally finished. For more tips on elevated desserts, you should check out this great article on Boston Cream Pie Cupcakes. It really is that triple layer of perfection that makes you say, “Wow, these aren’t just simple birthday cupcakes recipe treats; these are fancy!”
Can I skip the chocolate ganache and just use frosting?
Sure, you can! But I wouldn’t recommend it if you want that authentic Boston Cream experience. If you just put regular buttercream on top, you lose the signature element, which is the rich, slightly dense chocolate covering that contrasts with the cream. That chocolate layer is what really seals the deal for these Bite Sized Boston Cream treats.
If the ganache instructions seem intimidating, remember that it’s just melted chocolate and cream! If you absolutely won’t make ganache, use a simple chocolate glaze instead—thin it out with a teaspoon of vegetable oil or milk until it pours easily, but know you lose some of that deep chocolate richness. Let me know how it goes on my blog!
Nutritional Estimates for Boston Cream Pie Cupcakes
I always try to give you guys a heads-up on what you’re diving into, especially with a treat as rich as these boston cream pie cupcakes. Remember, cooking at home means the nutrition can shift slightly depending on the brands of butter or chocolate you grab. These numbers are just my best estimates based on the ingredient components we used, so take them as a gentle guide, not gospel!
We are making 12 servings, and while these are certainly decadent, they aren’t meant to be an everyday thing—they are special occasion retro dessert cupcakes, after all!
Based on the ingredients listed, here is the approximate breakdown per single cupcake:
- Calories: Around 350
- Fat: About 18g (that’s where the butter and cream shine!)
- Carbohydrates: Roughly 42g
- Protein: Approximately 5g
- Sugar: Around 30g
That sugar content looks high, and it is, folks! We’re dealing with granulated sugar in the cake, more in the homemade pastry cream, and then the chocolate topping. That’s why these taste so spectacularly sweet and satisfying!
We also see about 180mg of Sodium and 90mg of Cholesterol per serving. Since we used real butter and quality chocolate, we are getting some great saturated fats in there (about 10g), which really helps carry all that vanilla and chocolate flavor through. Remember, these are rich, satisfying, and meant to be enjoyed responsibly—you earned these classic dessert cupcakes!
This transparency is just part of how I run my kitchen here at Cut Cook Taste. I want you to feel totally confident about what you’re serving!
Share Your Homemade Boston Cream Pie Cupcakes Creations
And there you have it! We’ve done the baking, we’ve done the filling, and we’ve drizzled that incredibly shiny chocolate ganache. These boston cream pie cupcakes deserve a moment in the spotlight, don’t you think? I hope you feel super proud of what you made, especially tackling that custard filling!
I truly, deeply want to see how your handheld versions of this classic turned out. Are your chocolate tops shiny? Was your pastry cream smooth as silk? Did you manage to keep them cool long enough before that final drizzle?
Please, head down to the comment section below and leave me a rating! A star rating helps others know if these retro dessert cupcakes worked well for them, and I absolutely live for reading your success stories. Tell me if you tried any little tweaks or if the kids loved their individual slices of fun!
If you’re sharing photos on social media (and you totally should be!), snap a picture and tag me. Seeing you bring these wonderful, decadent ideas right into your home kitchen is the best part of my job here. It means my stories are becoming a part of yours!
Thank you so much for baking with me today. If you need any reminders on the fine print before you sign off, you can always check out my information on terms of use, but otherwise, go show off those amazing boston cream pie cupcakes!
PrintBoston Cream Pie Cupcakes
Make individual servings of the classic dessert with these Boston Cream Pie Cupcakes, featuring moist vanilla cake, creamy pastry cream filling, and a rich chocolate ganache topping.
- Prep Time: 40 min
- Cook Time: 20 min
- Total Time: 180 min
- Yield: 12 servings 1x
- Category: Dessert
- Method: Baking
- Cuisine: American
- Diet: Vegetarian
Ingredients
- 1 1/2 cups all-purpose flour
- 1 1/2 teaspoons baking powder
- 1/2 teaspoon salt
- 1/2 cup unsalted butter, softened
- 1 cup granulated sugar
- 2 large eggs
- 1 teaspoon vanilla extract
- 1/2 cup milk
- 1/2 cup heavy cream (for pastry cream)
- 1/4 cup granulated sugar (for pastry cream)
- 2 large egg yolks (for pastry cream)
- 2 tablespoons cornstarch (for pastry cream)
- 1/2 cup milk (for pastry cream)
- 1 teaspoon vanilla extract (for pastry cream)
- 4 ounces semi-sweet chocolate (for ganache)
- 1/2 cup heavy cream (for ganache)
Instructions
- Prepare the vanilla cupcakes: Preheat your oven to 350°F (175°C). Line a standard 12-cup muffin tin with paper liners.
- Whisk together the flour, baking powder, and salt in a medium bowl. Set aside.
- In a large bowl, cream the softened butter and sugar until light and fluffy. Beat in the eggs one at a time, then mix in the vanilla extract.
- Gradually add the dry ingredients to the wet ingredients, alternating with the milk, beginning and ending with the dry mixture. Mix until just combined. Do not overmix.
- Fill each cupcake liner about two-thirds full. Bake for 18 to 20 minutes, or until a toothpick inserted into the center comes out clean. Let the cupcakes cool completely in the pan for 10 minutes before transferring them to a wire rack to cool fully.
- Make the pastry cream filling: In a small saucepan, whisk together the heavy cream, 1/4 cup sugar, egg yolks, and cornstarch until smooth.
- Cook the mixture over medium heat, whisking constantly, until it thickens significantly and comes to a gentle boil. Boil for one minute while continuing to whisk. Remove from heat and stir in the 1/2 cup milk and 1 teaspoon vanilla extract.
- Transfer the pastry cream to a bowl, press plastic wrap directly onto the surface to prevent a skin from forming, and chill in the refrigerator for at least 2 hours.
- Prepare the chocolate ganache: Place the chopped chocolate in a heatproof bowl. Heat the 1/2 cup heavy cream in a small saucepan until it just simmers. Pour the hot cream over the chocolate. Let it sit for 5 minutes, then whisk until smooth and glossy. Let the ganache cool slightly until it is thick enough to spread but still pourable.
- Assemble the cupcakes: Once the cupcakes are cool, use an apple corer or small knife to remove a cone-shaped center from each cupcake. Save the removed cake pieces.
- Transfer the chilled pastry cream to a piping bag fitted with a round tip. Fill the hollowed-out center of each cupcake with the pastry cream. Replace the cake piece on top.
- Top each filled cupcake with a spoonful of the chocolate ganache, allowing it to drip slightly down the sides. Allow the ganache to set before serving.
Notes
- For easier filling, you can use a simple meal planning approach: make the pastry cream the day before and store it in the refrigerator.
- If you prefer a simpler topping, you can use a store-bought chocolate frosting instead of making ganache.
- These cupcakes are best assembled the day you plan to serve them for the freshest texture.
Nutrition
- Serving Size: 1 cupcake
- Calories: 350
- Sugar: 30g
- Sodium: 180mg
- Fat: 18g
- Saturated Fat: 10g
- Unsaturated Fat: 8g
- Trans Fat: 0.5g
- Carbohydrates: 42g
- Fiber: 1g
- Protein: 5g
- Cholesterol: 90mg