
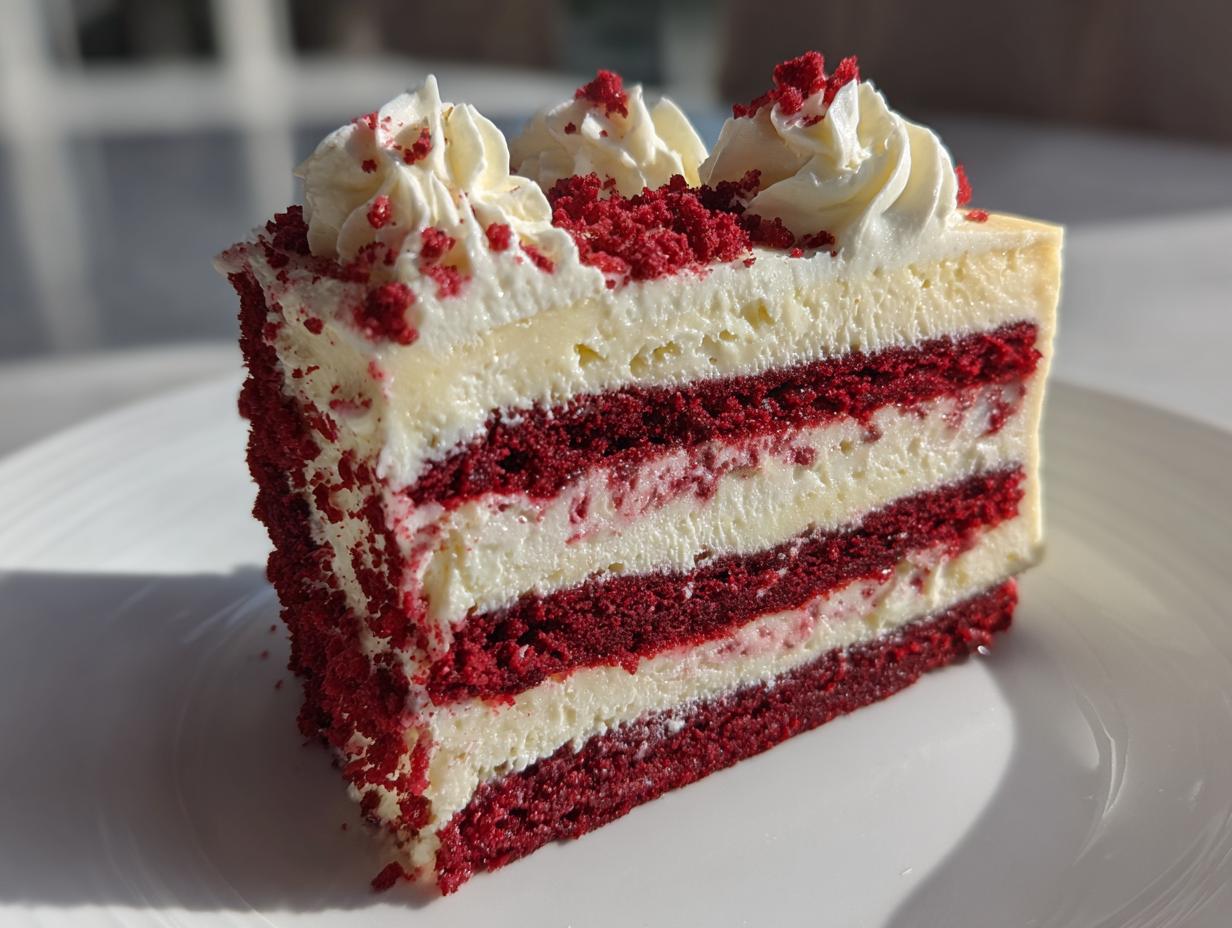

Oh, stop what you’re doing right now! If you’re looking for a dessert that screams celebration, romance, or just “I deserve the best thing ever,” you’ve landed in the right spot. Seriously, nothing beats a showstopper baking project, and our red velvet cheesecake is the one that always knocks everyone over. I spent ages perfecting the balance here—we need that deep, vibrant red velvet flavor hugging the silkiest, creamiest cheesecake filling imaginable. This layered masterpiece is pure American comfort food elevated. If you love diving into rich combinations like decadent layered desserts, you absolutely have to check out my recipe for German Chocolate Cheesecake, too! Trust me, if you want that ‘wow’ factor at your next party, get out your springform pan; we’re making magic.
- Why This Decadent Red Velvet Cheesecake is Your Next Showstopper Baking Project
- Ingredients for Your Layered Red Velvet Cheesecake
- Step-by-Step Instructions: How to Make Red Velvet Cheesecake
- Tips for Achieving the Best Red Velvet Cheesecake
- Storage & Reheating Instructions for Your Red Velvet Cheesecake
- Variations: Beyond the Classic Red Velvet Cheesecake
- Serving Suggestions for This Festive Dessert Creations
- Frequently Asked Questions About Making Red Velvet Cheesecake
- Estimated Nutritional Data for Red Velvet Cheesecake
- Share Your Red Velvet Cheesecake Creations
Why This Decadent Red Velvet Cheesecake is Your Next Showstopper Baking Project
When I first tested the idea of combining two titans—classic cake and rich cheesecake—I knew I was onto something special. This red velvet cheesecake isn’t just dessert; it’s the centerpiece your table has been begging for. We need that visual punch, right? That deep red color next to the pale, luscious filling just screams ‘special occasion.’
This recipe is truly designed for real life. You get the best of both worlds without needing three days to bake. Here’s what I love most about this combination:
- It gives you that stunning layered cake ideas structure without forcing you to bake two completely different recipes from scratch.
- We level it up by using a standard cake mix for that gorgeous red velvet base. It makes the whole process an easy cheesecake variation without sacrificing that deep, cocoa-y flavor.
- The secret is that cheesecake layer—it’s undeniably creamy cheesecake recipe smooth, which beautifully cuts through the slight tang of the red velvet.
- This is tailor-made for your next big gathering! Whether it’s Christmas or Valentine’s Day desserts, this screams festive cheer. If you’re looking for other amazing party food, you should peek at my recipe for amazing homemade white pizza—it’s another crowd-pleaser!
This recipe is what I call showstopper baking, done right, without the fuss. You can see more beautiful examples of layered desserts over at Treat Savvy.
Ingredients for Your Layered Red Velvet Cheesecake
Okay, this is where the fun really starts—gathering the troops! Since we’re doing a layered red velvet cheesecake, we have a few different component lists to run through. Don’t worry; it just means more amazing flavors mingling together. If you are nervous about the cheesecake layer getting lumpy, make sure your dairy ingredients are fully room temperature before you ever touch the mixer. Also, if you want a super easy, decadent side dip later, you have to check out my recipe for brownie batter dip!
For the Crust Options (Choose Traditional or Oreo Crust)
You have to choose your adventure upfront! Do you want that classic, slightly sandy graham cracker base, or are we going straight for dark, chocolatey goodness with the Oreo Crust Cheesecake option? Both are fantastic foundations for our vibrant red desserts.
- Traditional Crust: 1 ½ cups graham cracker crumbs, 6 tablespoons melted butter, ¼ cup sugar
- Oreo Crust: 24 Oreo cookies, finely crushed, 6 tablespoons melted butter
For the Red Velvet Cake Layer
We are keeping this part simple because this is an *easy* showstopper recipe, remember? We rely on the box mix magic here, but we’re going to doctor it slightly during mixing.
- 1 box red velvet cake mix
- The ingredients listed on the cake box for preparation (usually eggs, oil, and water)
For the Creamy Cheesecake Layer
This is the part that needs your absolute attention to get that velvety smooth texture. Everything needs to be soft—I mean *soft*!
- 16 oz cream cheese, fully softened (this is key!)
- ⅔ cup granulated sugar
- 2 large eggs (room temperature is best, I promise!)
- 1 teaspoon pure vanilla extract
- 1 cup sour cream
For the Whipped Topping and Garnish
Nothing tops a cheesecake better than homemade whipped cream. It’s lighter than store-bought frosting and just tastes cleaner!
- 2 cups heavy whipping cream, very cold
- 4 tablespoons powdered sugar
- Extra red velvet cake crumbs for sprinkling on top for garnish
Step-by-Step Instructions: How to Make Red Velvet Cheesecake
Alright, deep breath! This is where the actual assembly happens, and trust me, it flows so much better than you might think. We’re layering flavor right into that nine-inch springform pan. If you’re worried about lumps in that creamy filling, remember what I said: room temperature dairy is your best friend for getting that beautiful, velvety smooth texture. For even more baking inspiration, take a peek at my super fun crème brûlée cheesecake recipe!
Preparing the Crust and First Red Velvet Layer
First things first, get that pan ready. Grease it up well! Whether you chose the sturdy graham cracker base or the dark, satisfying Oreo crust cheesecake option, mix it up with the melted butter and press it down firmly into the bottom. You want it packed tight so it holds up to the layers coming next. Pop that chilled crust into the fridge while you handle the cake. Now, mix up your red velvet cake mix, but here’s a crucial tip for layering: use a little less liquid than the box calls for. We want a thick batter, not a runny one, so it sits nicely on top of the crust. Pour half that thick batter over the crust and bake it for just 10 to 12 minutes. Yep, that’s all! We just want it set. Pull it out and let it cool down a tiny bit while we make the star of the show.
Creating the Velvety Smooth Texture Cheesecake Filling
Time for the creamiest part! Using your stand mixer or a hand mixer, beat that softened cream cheese until it is absolutely lump-free and looking light and fluffy. Then, slowly sprinkle in the sugar while the mixer is running. Once that’s incorporated, add your eggs one at a time. Seriously, wait until the first one is blended before you add the second. This builds structure! Finish by stirring in the vanilla and the sour cream until it’s just combined. Stop mixing before you even think about adding too much air—overmixing is the enemy of a velvety smooth texture!
Layering and Swirling the Red Velvet Cheesecake
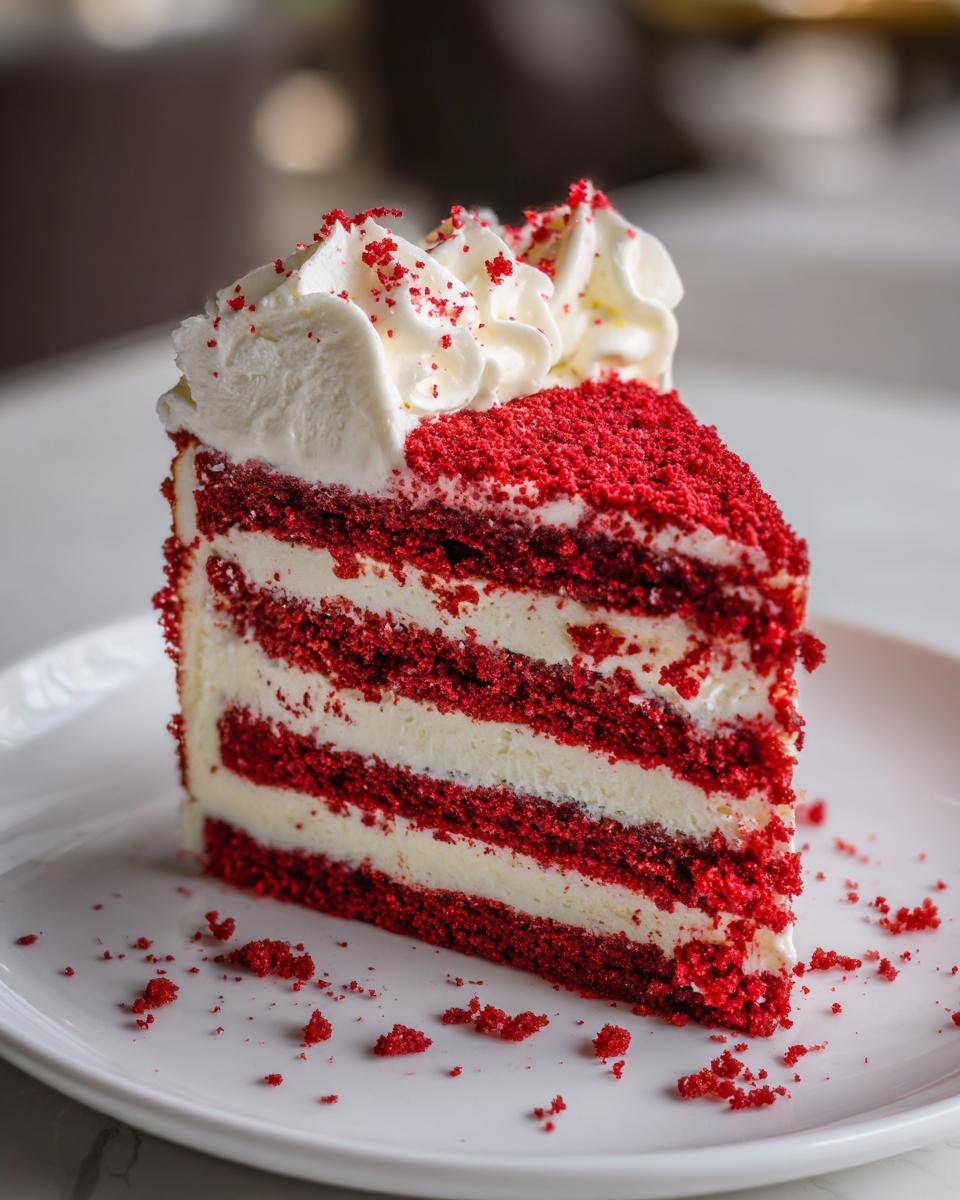
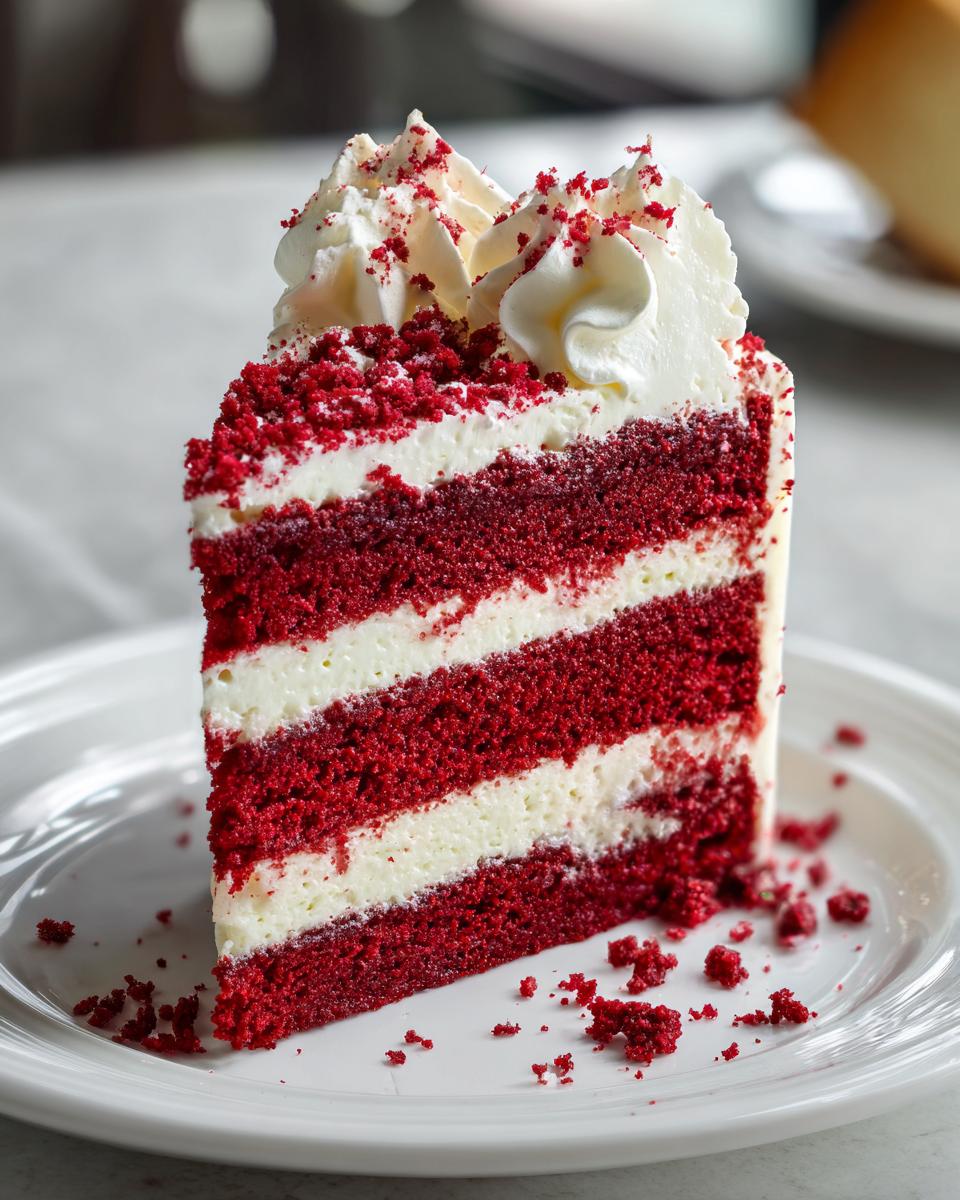
Pour that glorious cheesecake mixture evenly right over your warm, partially baked red velvet base. Take a moment to smooth out the top. Now, remember that remaining thick cake batter? Don’t pour it all in one spot! Gently spoon dollops of the extra batter across the top of the cheesecake layer. This is where you create that gorgeous marble effect. Grab a skewer or a thin knife and gently swirl the colors together. Be gentle! I usually only swirl about an inch deep; we want distinct layers, not a uniform pink mush. It’s amazing where you can find baking inspiration; check out this stunning example of layering over at Kinsley Recipes!

Baking and Cooling for Crack-Free Red Velvet Cheesecake
Set your oven to 325°F (160°C). Bake the whole beautiful creation for about 55 to 65 minutes. You’ll know it’s ready when the edges look set, but the very center still has a small wiggle—that’s a good thing! Now for the secret to avoiding cracks: patience! Turn the oven off completely, prop the door open just a crack—I use a wooden spoon handle—and let it sit in the residual heat for a solid hour. That slow cool-down is essential for that perfect look. After cooling on the counter, get it into the fridge for a minimum of six hours, but honestly, overnight is how you get the best flavor and structure for your red velvet cheesecake.

Tips for Achieving the Best Red Velvet Cheesecake
Listen, making a truly fantastic red velvet cheesecake isn’t just about following steps; it’s about understanding the ingredients. I’ve learned this the hard way over the years—burnt cookies, sunken cakes, the works! But you don’t have to make my mistakes. When aiming for that famous smooth texture, temperature control is everything in the kitchen.
If you want that picture-perfect result, especially since this is such a decadent baked good, you have to respect the dairy. Pull your cream cheese and your eggs out onto the counter at least an hour before you plan to start mixing. Cold cream cheese results in lumps, and lumps ruin everything! You can read all about my other favorite creamy classics, like my New York Cheesecake recipe, where I talk even more about this temperature trick.
Another thing I cannot stress enough for a crack-free top is that slow cooling I mentioned earlier. It feels counterintuitive when you’re ready to eat it right away! You absolutely have to let it transition slowly from the heat of the oven to room temperature, and then into the cold fridge. Chilling isn’t optional; it’s part of the cooking process for cheesecake! It firms up that creamy filling so when you slice into it, you get a clean cut, not a puddle. If you want to see how other bakers handle getting that gorgeous velvety result, check out the tips over at Cookie Dough and Oven Mitt. Making this recipe is similar to my sweet potato cheesecake because the chilling time is crucial for structure, too!
Storage & Reheating Instructions for Your Red Velvet Cheesecake
Now that you’ve created this masterpiece—this truly decadent slice of heaven—you have to treat it right! The storage period determines how long you get to enjoy this beautiful red velvet cheesecake, so let’s make sure we handle it properly.
Because we have the creamy cheesecake layer mixed with the slight richness of cocoa from the cake, refrigeration is the only way to go. You should never try to reheat cheesecake at all; the texture just breaks down completely, and you end up with a soupy mess, which is the opposite of the creamy cheesecake recipe we worked so hard to achieve!
If you need to save leftovers, make sure the cheesecake is completely chilled first. Cover the springform pan tightly with plastic wrap—I usually put a layer over the topping and then wrap the whole thing securely. It will keep beautifully in the fridge for about four to five days. The flavor often deepens a bit on day two, which is fantastic!
But what if you made this for a huge party and still have half a cake left next week? Freezer storage is your backup plan! You can absolutely freeze this red velvet cheesecake. Just be sure to slice it first, because trying to slice a frozen cheesecake is a workout nobody needs after a big meal. Wrap individual slices tightly in plastic wrap, and then foil, so they don’t absorb any freezer smells. They’ll stay good frozen for up to two months. When you’re ready to eat one? Just pull a slice out the night before and let it thaw slowly in the fridge. It comes back to life perfectly.
Speaking of sweet finishing touches, if you want an extra drizzle on top of your thawed slice, I have a fantastic, quick recipe for easy chocolate sauce recipe that pairs wonderfully!
Variations: Beyond the Classic Red Velvet Cheesecake
I totally get it—sometimes you’ve made the baked superstar, and now you’re thinking, “What else can I do with this flavor profile?” Or maybe you need something faster because company is showing up sooner than expected! While our main red velvet cheesecake recipe is the bomb, there are some really fun directions you can take this dessert. It’s all about those easy cheesecake variations!
First off, we already talked about the crust, but let’s re-emphasize one of my favorites: the full-on Oreo Crust Cheesecake. If you skip the graham crackers entirely and just double down on the Oreos for the base, you get a chocolate layer that really complements the red velvet cake layer. That crunch against the smooth filling is to die for! If you love that nutty textural contrast, you might also enjoy my recipe for pecan pie cheesecake, which uses a similar crust concept!
Now, for those days when you just can’t wait for the oven to preheat, we absolutely need to talk about the no-bake option. If you are seeking a no bake cheesecake recipe that captures that signature flavor, you can definitely adapt this! The easiest cheat is ditching the cake layer entirely for the first layer, chilling a simple cookie crust, and then mixing the cheesecake filling with just a little bit of red velvet cake mix powder (not the whole thing) or a good quality red velvet flavor paste. You still get the color and the tang, but it sets up quick in the fridge—no baking anxiety required!
And if you really want to go wild, think about the cheesecake brownies fusion everyone loves. You could try making a layer of dense, fudgy brownies instead of the traditional cake on the bottom, then topping it with the cheesecake batter. It’s richer, fudgier, and honestly, totally over the top. You can read about another cool layered dessert idea over at Medium if you’re feeling adventurous about combining layers!
Serving Suggestions for This Festive Dessert Creations
You’ve done the hard work, you’ve chilled it perfectly, and now you get to the best part: serving! This Decadent Layered Red Velvet Cheesecake is definitely designed to be a party dessert centerpiece, but what you serve alongside it can really take it from great to unforgettable. Since this cake is so rich and decadent—hello, cream cheese and butter—I always aim for something that cuts through that richness nicely.
When I plan my Christmas baking ideas or set up a table for, say, Valentine’s Day desserts, I usually keep the drinks simple but elegant. A high-quality, strong cup of coffee is a must. It pulls out the slight cocoa notes in the red velvet beautifully. If you’re hosting brunch or an afternoon gathering, I highly recommend serving it alongside my recipe for the best creamy homemade hot chocolate. It sounds like overkill, I know, but trust me, the slightly bitter chocolate makes the sweet cheesecake filling pop!
If you prefer something cold, avoid overly sweet sides. Think tart. A small bowl of fresh raspberries or pomegranate seeds sprinkled around the plate is gorgeous against that deep red color. The acidity really balances out the fat content of the cheesecake, making every bite feel lighter. Don’t be afraid to keep the plate simple, though—this beauty really doesn’t need much distracting from it!
Frequently Asked Questions About Making Red Velvet Cheesecake
I totally get it—when you put this much love into a showstopper baking project, you want zero surprises! Cheesecake can be moody, but trust me, once you know the little tricks, fixing common issues becomes a breeze. We’ve covered a lot of ground, but here are the final little nuggets of wisdom for tackling your amazing red velvet cheesecake.
How do I stop my red velvet cheesecake from cracking?
Ah, the dreaded crack! This is truly the biggest source of anxiety when making any creamy cheesecake recipe. The main culprit is temperature shock. I mentioned the slow cooling process in the steps, but let’s reiterate: don’t rush it! Keep the eggs and cream cheese room temperature before mixing—cold ingredients force you to overmix to combine them, which builds air bubbles that expand and then contract too fast during cooling. Also, when it’s done baking, turn the oven off and leave the door cracked for a full hour. That gentle transition is key to keeping the surface smooth as velvet!
Can I make this creamy cheesecake recipe ahead of time?
Yes, please! This is actually one of the best things about making a red velvet dessert like this. For the absolute best flavor and firmness, you should plan to let this chill for at least 6 hours, but overnight is truly magic. When you chill it overnight, the red velvet cake layer soaks up just the right amount of moisture from the cheesecake filling, and everything firms up beautifully. You can absolutely make this a day before your party or holiday event—it’s perfect for stress-free holiday cheesecake baking!
If you are looking for other make-ahead sweet treasures, my general post on the best cheesecake recipes has tons of great tips for advanced prep, so you can get ahead of your hosting duties!
Estimated Nutritional Data for Red Velvet Cheesecake
I want to be upfront with you guys—when you are making something this rich, decadent, and truly celebratory, you probably aren’t tracking every single calorie! But since I promised to give you the full recipe details, here is what you can generally expect per slice of this amazing red velvet cheesecake. Remember, every slice is different depending on how generously you top it with cream cheese frosting or dessert crumbs!
Think of this breakdown as an educated guess based on the standard mix and my ingredient amounts. If you’re trying to stay on track with meal planning, knowing ballpark figures helps! For me, this is a special occasion treat, not an everyday thing, but that doesn’t mean we can’t look at the numbers!
Here are the estimates for one generous slice, based on the recipe yielding 12 servings:
- Serving Size: 1 slice
- Calories: Roughly 450 (Wow, that’s rich!)
- Sugar: 35g (That’s owing largely to the cake mix and cheesecake sugars!)
- Fat: 30g (It’s butter and cream cheese, baby—worth every bite!)
- Protein: 7g
Just to give you the full picture, the standard values for fat break down a bit further: Saturated Fat comes in around 18g, which is expected with all that lovely cream cheese. The carbs are sitting around 40g. Again, this is a decadent baked goods situation, so enjoy it! This isn’t the kind of treat you eat daily, but it’s perfect for making holidays or birthdays extra special. If you’re looking for other ways to manage your diet while still enjoying treats, I sometimes look at resources for easy meal planning, to balance out these indulgent bakes!
Share Your Red Velvet Cheesecake Creations
Whew, we made it! You’ve followed every step, you’ve waited patiently through the chilling process, and now you have the most beautiful, decadent red velvet cheesecake sitting pretty in your kitchen. I truly feel like I’ve shared such a special piece of my baking heart with you today, and honestly, that’s the whole point of this blog!
But the story doesn’t end here for me. I want to see what you created! Did you use the Oreo crust? Did you swirl those colors just perfectly? Did your family gather around when you brought out this spectacular festive dessert creation?
Please, please, please don’t be shy! Head down to the comments section below and tell me how it went. Tell me your secrets, share your tips, and please, take a picture and tag me on social media! Seeing your beautiful bakes is what keeps me buzzing in the kitchen every single day.
If this recipe made your celebration better, or if it just made a regular Tuesday feel like a holiday, I’d be so grateful if you could give it a quick 5-star rating right below the recipe card. That really helps other bakers find reliable recipes like this one. I hope you all enjoyed making this luscious dessert as much as I love sharing it with you. Happy baking, friends! And don’t forget to browse the rest of the kitchen fun over on my main blog page at Cut Cook Taste!
PrintDecadent Layered Red Velvet Cheesecake
Prepare a showstopper dessert combining rich red velvet cake layers with a smooth, creamy cheesecake filling. This recipe uses a cake mix for ease, making it perfect for celebrations.
- Prep Time: 30 min
- Cook Time: 70 min
- Total Time: 8 hours 40 min (includes chilling)
- Yield: 12 servings 1x
- Category: Dessert
- Method: Baking
- Cuisine: American
- Diet: Vegetarian
Ingredients
- 1 box red velvet cake mix (plus ingredients listed on box for cake)
- 16 oz cream cheese, softened
- ⅔ cup granulated sugar
- 2 large eggs
- 1 teaspoon vanilla extract
- 1 cup sour cream
- For Crust Option 1 (Traditional): 1 ½ cups graham cracker crumbs, 6 tablespoons melted butter, ¼ cup sugar
- For Crust Option 2 (Oreo): 24 Oreo cookies, finely crushed, 6 tablespoons melted butter
- For Topping: 2 cups heavy whipping cream, 4 tablespoons powdered sugar, red velvet cake crumbs for garnish
Instructions
- Prepare the springform pan: Grease a 9-inch springform pan. If using the traditional crust, mix graham cracker crumbs, melted butter, and sugar. Press mixture firmly into the bottom of the pan. If using the Oreo crust, mix crushed Oreos and melted butter, then press into the pan bottom. Chill the crust while preparing the cake layer.
- Prepare the red velvet cake layer: Mix the red velvet cake according to the box directions, but use slightly less liquid if necessary to create a thick batter. Pour half of the cake batter over the chilled crust. Bake according to cake mix directions for a thin layer (usually 10-12 minutes). Remove from oven and let cool slightly.
- Prepare the cheesecake layer: Beat the softened cream cheese and granulated sugar until smooth. Add eggs one at a time, beating well after each addition. Mix in vanilla extract and sour cream until just combined. Do not overmix.
- Assemble the layers: Pour the cheesecake mixture evenly over the partially baked red velvet crust layer.
- Prepare the second cake layer: Mix the remaining red velvet cake batter. Gently spoon dollops of the remaining batter over the cheesecake layer. Use a knife or skewer to gently swirl the red velvet batter into the cheesecake layer for a marbled effect. Do not swirl too deeply.
- Bake: Bake at 325°F (160°C) for 55 to 65 minutes, or until the edges are set and the center has only a slight jiggle.
- Cool: Turn off the oven, prop the door open slightly, and let the cheesecake cool in the oven for 1 hour. Remove and cool completely on a wire rack. Chill in the refrigerator for at least 6 hours, or preferably overnight.
- Prepare the topping: In a cold bowl, whip the heavy whipping cream and powdered sugar until stiff peaks form. Spread or pipe over the chilled cheesecake. Garnish with reserved red velvet cake crumbs.
Notes
- For a truly smooth texture, ensure your cream cheese and eggs are at room temperature before mixing.
- If you are looking for alternatives to traditional baking, consider researching keto meal plan delivery options for lighter fare, though this recipe is decadent.
- To prevent cracking, do not open the oven door during the first 45 minutes of baking.
Nutrition
- Serving Size: 1 slice
- Calories: 450
- Sugar: 35g
- Sodium: 300mg
- Fat: 30g
- Saturated Fat: 18g
- Unsaturated Fat: 12g
- Trans Fat: 0.5g
- Carbohydrates: 40g
- Fiber: 1g
- Protein: 7g
- Cholesterol: 95mg