
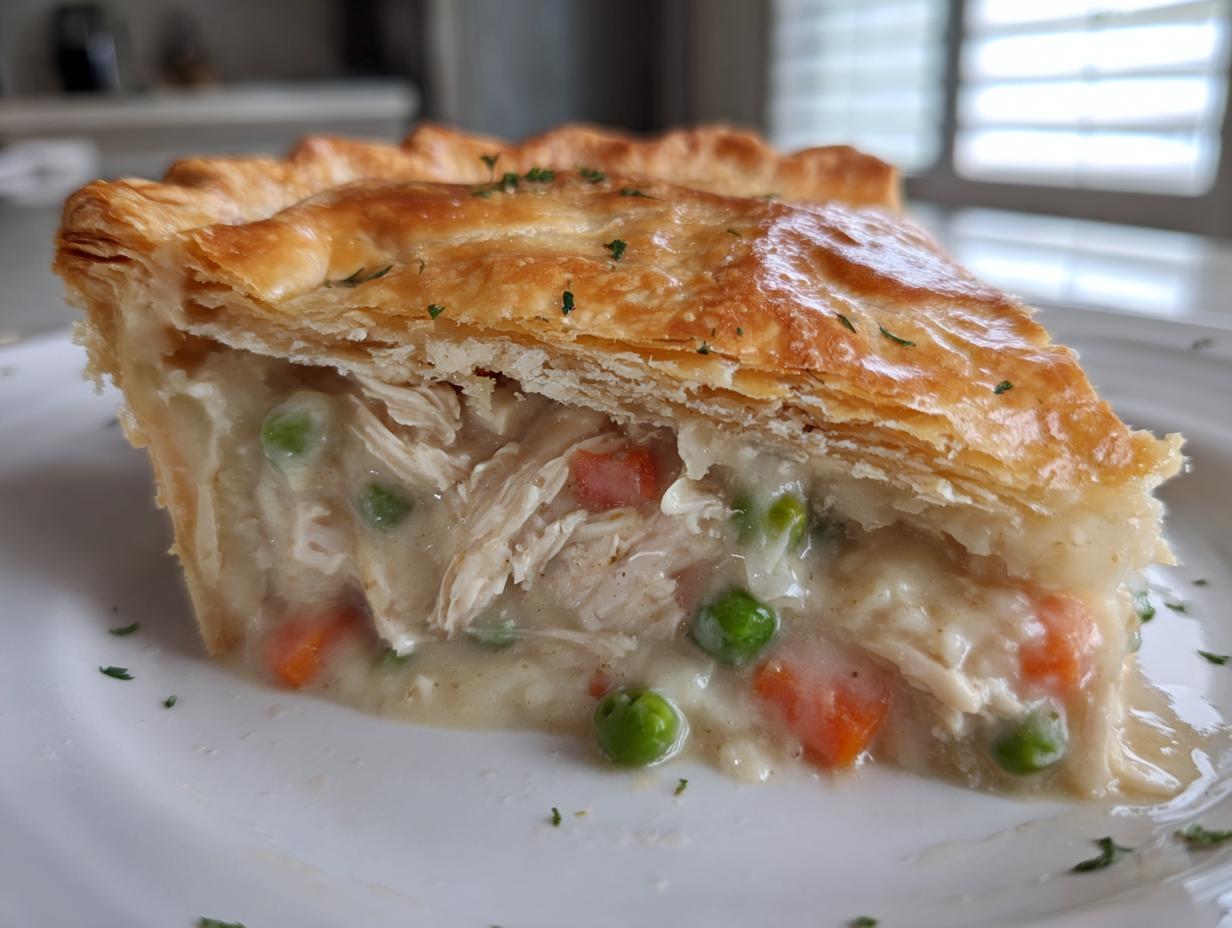

Oh my gosh, if you’re looking for the coziest, most satisfying hug in a dish, you have landed in the absolute right place! Nothing says homemade comfort quite like a bubbling-hot, savory pie, and right now, I’m obsessed with making my classic turkey pot pie recipe. My grandmother always said that the best meals were the ones that felt like they took all day, even if they didn’t. This recipe is my answer to those chilly nights when you just need something truly hearty. It’s the ultimate way I transform those glorious holiday leftovers into a fantastic, creamy centerpiece for dinner. I promise, making this from scratch will make your whole house smell like the best kind of nostalgia.
I learned so much about feeding a family well from my upbringing, and this savory pie is truly a reflection of that foundation. It’s practical, it’s delicious, and it turns what was once just “leftovers” into a brand-new, much-anticipated dinner event. Trust me, your family is going to love this!
- Why This Classic Turkey Pot Pie Recipe Works So Well
- Gathering Ingredients for Your Turkey Pot Pie Recipe
- Step-by-Step Instructions for the Turkey Pot Pie Recipe
- Tips for Success with Your Flaky Crust Recipe
- Variations on the Classic Turkey Pot Pie Recipe
- Serving Suggestions for This Homemade Main Dish
- Storage and Reheating Instructions for Leftover Turkey Pot Pie
- Frequently Asked Questions About the Turkey Pot Pie Recipe
- Share Your Classic Dinner Experience
Why This Classic Turkey Pot Pie Recipe Works So Well
When I set out to perfect this turkey pot pie recipe, I wasn’t just making dinner; I was building a tradition. People always ask me what’s so special about this one compared to the quick skillet versions they see online. Honestly, it comes down to three things: texture, richness, and that deep sense of satisfaction you only get from a great, homemade main dish.
It’s a powerhouse of flavor, especially when you’re working with those fantastic holiday scraps. My favorite part is seeing all those rich ingredients come together under that golden top.
Transforming Leftover Turkey Ideas into a Hearty Winter Dinner
Look, we all have that mountain of leftover turkey after Thanksgiving or Christmas, right? Instead of just slicing it up again, we deserve better! This dish takes those flavorful bits and turns them into something entirely new and exciting. This is exactly why I put together my leftover turkey ideas list, and this pot pie is always number one. It’s the ultimate hearty winter dinner that feels celebratory but comes together surprisingly fast.
You get that beautiful, satisfying result that proves a simple, from-scratch savory pie beats takeout any day of the week.
Achieving the Perfect Creamy Pot Pie Filling
This is where attention to detail pays off! We aren’t using canned soup here; we’re building a real foundation for our sauce. That silky, velvety layer—the kind that clings perfectly to every vegetable and chunk of turkey—comes directly from creating a proper roux with butter and flour first. Once you get that roux whisked with hot broth, you’re basically guaranteed a rich, lump-free, and truly luxurious creamy pot pie filling. It’s the secret sauce, literally!
Gathering Ingredients for Your Turkey Pot Pie Recipe
Alright, let’s talk about getting everything ready because, as always on Cut Cook Taste, preparation is half the battle! If you want that perfectly flaky crust recipe to come out right, we need to be precise about what goes into our filling. When you gather these items, make sure everything is ready to go—this keeps the cooking process smooth and helps us achieve the best texture possible. If you need something fantastic to serve alongside this, maybe try my homemade French bread recipe for dipping into that sauce!
I’ve broken down what you need below. Remember, using quality ingredients is what makes this classic dinner shine.
For the Savory Filling: Turkey, Vegetables, and Creamy Base
First up: the stars of the show! You absolutely, positively must measure out 2 cups of cooked, shredded turkey. Don’t try to sneak in raw turkey here; we are just heating everything through at the end. For the veggies, we’re keeping it classic: 1 cup chopped carrots, 1 cup frozen peas (don’t thaw them!), 1 cup chopped celery, and about half a cup of chopped onion. These need to sauté until they are nice and soft!
Now for that rich base—you’re going to need half a cup of unsalted butter and the same amount—half a cup—of all-purpose flour to build that glorious thickening agent. For liquid, grab 1 and 3/4 cups of chicken broth and half a cup of heavy cream for that ultimate creamy texture. Finally, don’t skip the seasoning: be sure you have 1 teaspoon of dried thyme, half a teaspoon of salt, and just a dash of black pepper (about a quarter teaspoon).
The Flaky Crust Recipe Components
This is where you get to decide how much elbow grease you want to put in tonight! You will need two refrigerated pie crusts if you’re keeping this recipe quick for a weeknight. However, if you use your own homemade pastry—and trust me, it’s worth it for *that* flaky crust—you’ll want to ensure it’s nicely chilled before you start assembling everything later on.
One last non-negotiable item for a beautiful finish: 1 egg, beaten well for the egg wash. That wash is what gives you that beautiful, deep golden brown color on top—nobody wants a pale pot pie, right?
Step-by-Step Instructions for the Turkey Pot Pie Recipe
Okay, deep breath! We’ve got our ingredients ready, and now we get to the fun part: bringing this beautiful, creamy pot pie together. Making sure we follow these steps in order is key to getting that luxurious sauce that makes this turkey pot pie recipe so famous. Don’t rush the thickening part—that’s where the magic is! If you’re looking for game-day snacks later, pop over and check out my appetizer roundup, but for now, focus on this main dish!
Preparing the Vegetables and Building the Pot Pie Gravy
First things first: get that oven preheated to 400°F (200°C). We want it nice and hot for when we eventually slide this beauty in. Now, back to the saucepan on the stove. Melt that half-cup of butter over medium heat. Toss in your chopped onion, carrots, and celery. Let those cook down until they start getting soft—about five to seven minutes. They shouldn’t be totally mushy, just tender enough to give a little when you press them.
Next comes the crucial step for building our amazing pot pie gravy: the roux! Whisk in your half-cup of flour right over those softening veggies. You need to cook that flour and butter mixture for about a full minute while stirring constantly. Trust me on this; cooking the flour gets rid of that powdery raw taste! Once it’s cooked slightly, start pouring in that chicken broth, but do it gradually! Whisk like you mean it as you pour to break up any lumps. Keep whisking until everything gets smooth, and then let it simmer gently until that sauce thickens up nicely. When it coats the back of a spoon, you’re ready for the next step!
Combining Filling Elements and Assembling the Savory Pie
Once the gravy is thick, turn the heat down to low. Stir in your heavy cream, thyme, salt, and pepper—ah, smell those herbs! Now, gently fold in your 2 cups of shredded turkey and those lovely frozen peas. We don’t want to boil it now; we just want everything heated through evenly for about two minutes. That’s your filling done!
Time to assemble this savory pie! Take one of your pie crusts—refrigerated or homemade—and carefully ease it into your 9-inch pie dish. Spoon that creamy turkey filling evenly over the bottom crust. It’s going to look like a lot, but it cooks down perfectly. Lay that second crust right over the top. Now, this is important: use your fingers or a fork to really press and crimp those edges together so you seal the top and bottom crusts tight. If you don’t seal it, your filling will leak out everywhere! Finally, take a sharp knife and cut several slits right in the center of the top crust. These are the steam vents—they let all that lovely pressure escape so your crust doesn’t explode!
Baking Your Turkey Pot Pie Recipe to Golden Perfection
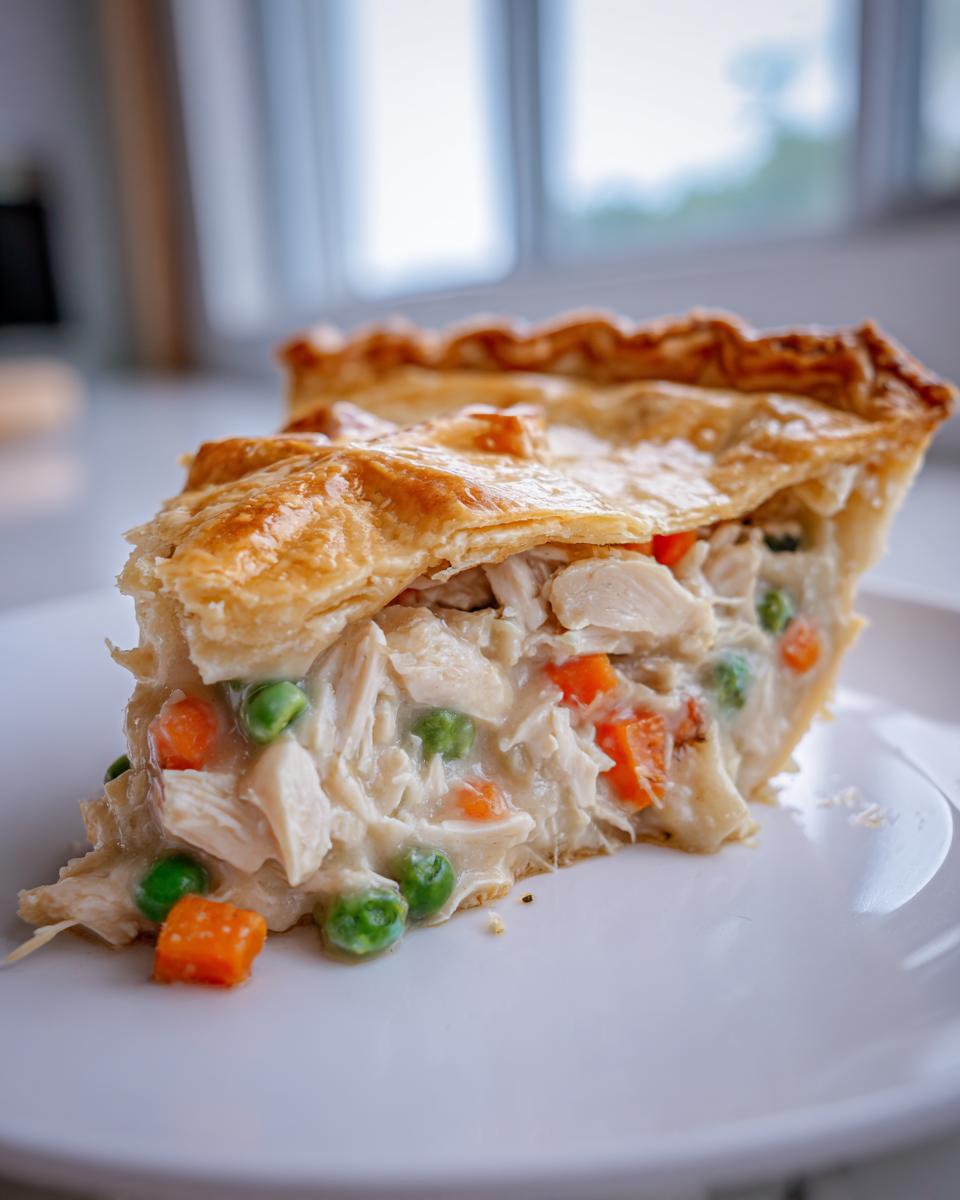
We’re almost there! Take that beaten egg wash we talked about and brush it lightly and evenly over that entire top crust. That egg wash is your golden ticket to a beautiful, bronzed finish! Pop the whole dish into that preheated 400°F (200°C) oven. You’re looking for a bake time between 30 and 35 minutes. You’ll know it’s done when that crust is deep golden brown and you can see the amazing, bubbly filling peeking through the vents you cut. Once it’s out, please, please let it rest for at least 10 minutes before you try to slice into it. If you cut it too soon, all that gorgeous, creamy sauce will run right out. Patience is the final ingredient!
Tips for Success with Your Flaky Crust Recipe
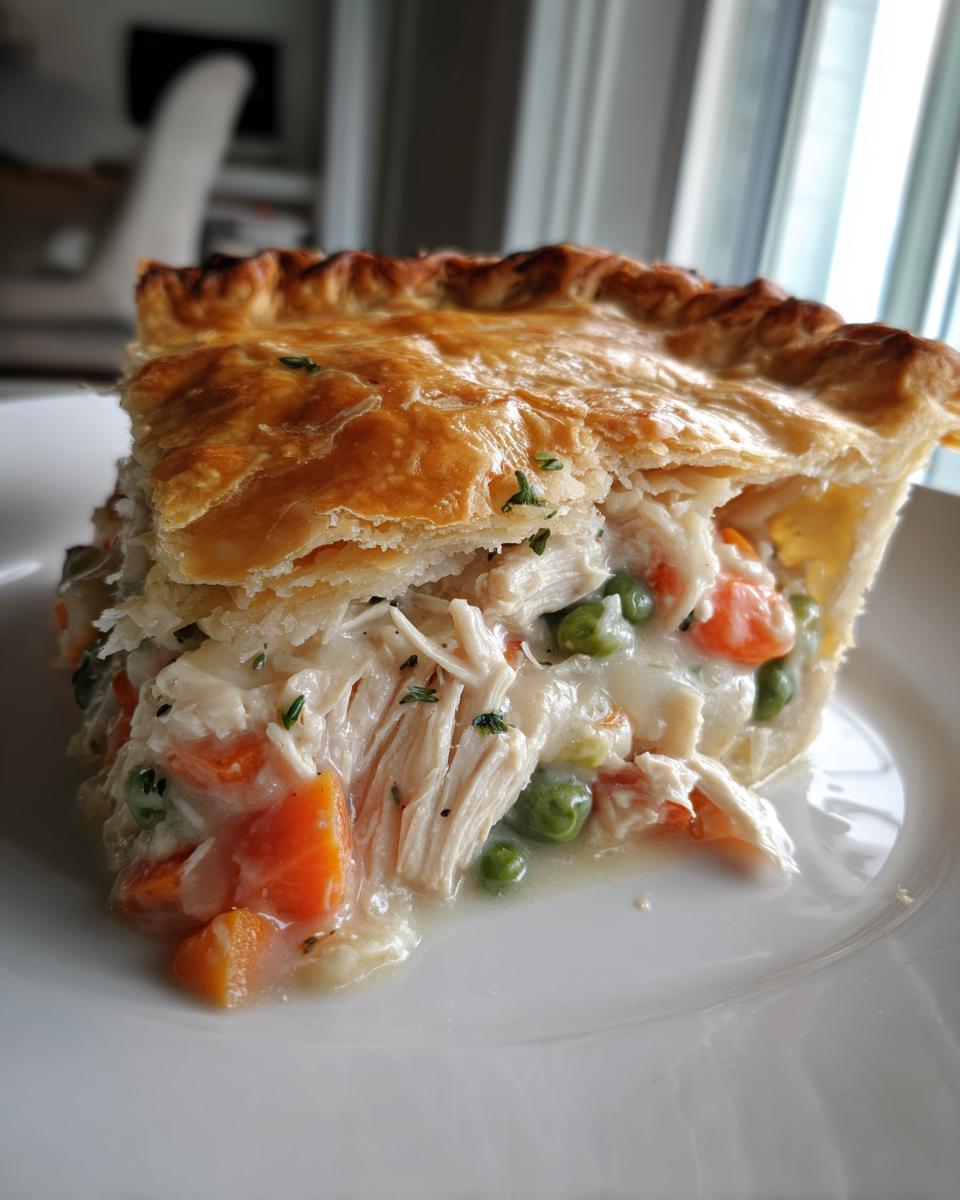
Listen, I know the filling is what everyone talks about—that wonderfully creamy pot pie goodness—but let’s be real for a minute: the crust is the crown jewel here. If the crust isn’t flaky and buttery, what are we even doing? Since you really want that signature texture, I have a couple of hard-won tips from my years of messing up pastry dough until I finally got it right. We want layers that shatter when you cut into them, not something tough or soggy, right?
If you’re using store-bought dough, that’s totally fine! I do it myself when I’m short on time, but a homemade pastry just sings a different song. For either option, managing the temperature is everything. Heat makes the butter melt, and melted butter equals tough crust. Cold butter equals flaky layers. It’s that simple!
Here’s the number one non-negotiable technique I learned: always give your assembled pie a chill break before it goes into that blazing hot oven. I actually slide the whole pie dish, filling and all, back into the refrigerator for about 15 minutes right before I brush it with egg wash. This final chill firms up the butter one last time. When that cold dough hits the 400°F oven, the butter immediately steams, creating those glorious little air pockets that puff up the layers. It’s simple food science, and it makes all the difference in achieving the kind of flaky crust recipe you dream about!

Also, don’t overwork the dough when you crimp the edges. Be gentle! You want it sealed, but too much handling right before baking activates the gluten, and then you’re back to tough pastry. A light touch is key to keeping things tender all the way around.
Variations on the Classic Turkey Pot Pie Recipe
I absolutely adore this classic turkey pot pie recipe, but I know sometimes life gets hectic, or maybe you just ran out of cooked turkey! That’s totally okay. One thing my dad always taught me about cooking is that you must be flexible. Recipes are guidelines, not rigid laws! We can tweak this savory pie base to make it work perfectly for a ground turkey situation or even switch up the cooking method when you don’t have time to fuss with a full pie dish. These little changes help keep these comfort food recipes in rotation all year long.
Making a Ground Turkey Pot Pie Alternative
If you don’t have shredded leftovers but you have a package of ground turkey sitting in the fridge, you are in luck! You can easily pivot this recipe. The main difference is we have to cook that meat first. Instead of just melting the butter and sautéing the onions and veggies, you will brown the ground turkey right there in the pot first until it’s totally cooked through. Then, drain off any excess fat—we want flavor, not grease! Once that’s done, you can proceed exactly as written, adding the flour for the roux and whisking in the broth. It’s a fantastic way to get that hearty texture without waiting for the holidays to roll around.
Quick Weeknight Dinner Comfort: Biscuit Topping Swap
If you’re craving this comfort food magic but looking at the clock and realizing you only have 30 minutes before everyone melts down, ditch the full top crust! Seriously, swap it out. Instead of the second pie crust, just drop spoonfuls of your favorite refrigerated biscuit dough over the very top of the creamy filling in your pie dish. You can still use the egg wash, or skip it. This gives you that glorious, fluffy, buttery vehicle to scoop up all that amazing sauce, and it cuts down on prep time significantly. It’s one of my favorite easy dinner recipes hacks when I need true weeknight dinner comfort fast!
If you’re looking for other easy solutions for meals, you might want to check out my directions for slow cooker chicken noodle soup—sometimes a one-dish dinner just needs a little slow-cooker magic!
Serving Suggestions for This Homemade Main Dish
Now that you’ve got this incredible, bubbling, creamy pot pie staring back at you from the oven, the next question is: what goes well with it? Since this is such a rich and hearty one-dish dinner already, you don’t need a lot of fuss on the side. We want simple accompaniments that complement the savoriness without competing with that flaky crust!
For me, simplicity is best when serving a classic dinner like this. A little something fresh cuts through the richness of the gravy perfectly. Think about serving it alongside a very light, crisp green salad tossed with a simple vinaigrette. That little bit of acidity wakes up your palate!
If you are going all-in on the comfort theme, which I often do, you need something that can really soak up any extra gravy that escapes the plate. You can never go wrong with a side of gorgeous, buttery mashed potatoes, or if you want a slightly sweeter note, try a serving of my creamy mashed sweet potatoes. They pair so beautifully with the thyme and turkey. Keep the sides warm, but definitely keep them light!
Storage and Reheating Instructions for Leftover Turkey Pot Pie
First off, congratulations! You have made a true homemade main dish masterpiece, and now you have leftovers—which is almost as good as making it the first time! The important thing to remember with any pie that has a top and bottom crust is that they need special care so they don’t turn soggy. We worked so hard on that flaky crust recipe; we can’t ruin it in the fridge!
The absolute first rule when storing this amazing Turkey Pot Pie is patience. You have to let it cool down significantly on the counter first. If you seal up that hot pie, steam gets trapped, moisture condenses, and bye-bye, crispy crust! Give it at least an hour on the counter to come down to room temperature.
Cooling and Refrigeration Time
Once it’s cooled down a bit, cover your dish loosely with plastic wrap or foil—don’t wrap it too tightly at this stage, or the condensation will still get trapped. You can keep the whole dish right in the fridge for up to three to four days. If you know you won’t eat it all, I highly recommend slicing the leftovers into individual portions *before* you store them. This way, you only reheat what you need, and you save the integrity of the whole pie in the container.
The Best Way to Reheat for Crispy Crusts
Now, here’s the tip that saves the crust! Please, put the microwave away for this job. Microwaving turns that beautiful, buttery crust into a sad, rubbery blanket. The best method for reheating your savory pie is always the oven. It mimics the original baking process!
Set your oven to a cozy 350°F (175°C). Place your individual slices or the whole pie dish on a baking sheet—this helps circulate the heat evenly underneath. Bake for about 15 to 20 minutes for a slice, or 30 to 40 minutes for the whole pie. You’re looking for the filling to be bubbling hot all the way through, and you should hear a little crunch when you tap the top crust!

If you store leftovers in an airtight container, you can reheat them that way too, but cover the top loosely with foil for the first 15 minutes of heating. This prevents the edges from burning before the center is warm. It’s a little extra effort, but you deserve that flaky texture on day two!
Frequently Asked Questions About the Turkey Pot Pie Recipe
I know we covered a lot of ground getting this delicious Classic Dinner onto the table, but sometimes those tricky little questions pop up once you’re actually standing in the kitchen. That’s totally normal! These are the questions I get most often when friends try my recipe for the first time. Let’s tackle those head-on so you can bake with total confidence.
Can I make the creamy pot pie filling ahead of time?
Oh, yes, absolutely, and this is a great strategy for busy nights! You can definitely make the entire creamy pot pie filling—the veggies sautéed, the roux made, everything mixed together—one or even two days in advance. Just cool it completely, cover it tightly, and stick it in the fridge. When you’re ready to bake, you’ll need to spread the cold filling into your pie shell and top it with the second crust.
Since the filling is already cold, you might need to add about 5 to 10 minutes onto your baking time to ensure it gets hot and bubbly all the way through. It saves so much time when you only have to worry about the crust!
What liquid can I use instead of chicken broth for the pot pie gravy?
The broth is what builds the foundation of our amazing pot pie gravy, so using the right thing matters! If you happen to have leftover turkey carcass or bones, using homemade turkey broth is truly the best choice for flavor depth—it enhances that turkey taste perfectly. If you don’t have that, low-sodium vegetable broth is a great second option; it keeps the vegetables front and center. Make sure whatever you use is warm or hot when you add it to the roux, this helps everything blend smoothly. Never use cold broth, or you risk getting lumps!
Is this recipe suitable for a family meal idea if I don’t have leftover turkey?
Of course! This recipe is designed to be flexible for a great family meal idea any time of year, not just after Thanksgiving. If you don’t have turkey leftovers, you have two easy routes. First, grab a rotisserie chicken! Shredding the meat from one of those works like a charm and is super fast. Second, you can use raw ground turkey, which I detailed in the variations section. Just brown that ground turkey first, drain the fat, and then proceed with the rest of the sauce instructions. Either way, you still get that classic, comforting feel!
Share Your Classic Dinner Experience
Wow, we made it! You’ve got the filling simmering, the crust is perfectly golden brown, and your kitchen smells like pure, unadulterated comfort. That, my friends, is what I live for here at Cut Cook Taste. This turkey pot pie recipe isn’t just food; it’s a memory in the making, a hearty hug you can serve right on a plate.
I truly hope this dish brings that special, cozy feeling to your table, just like it does in my home. I’d be so thrilled if you shared your creation with me! Did you stick to the flaky crust, or did you use that biscuit trick for a quicker night? Did you top it with herbs?
Please leave a rating right here on the page—it helps other cooks know this recipe is a winner. And if you took a picture of your bubbling, beautiful savory pie, I’d love to see it! Tag me or share it on social media. I keep track of all your amazing creations, and there’s nothing I love more than seeing my recipes come to life in your kitchens.
If you’re looking for other comforting inspiration after finishing up your dinner, feel free to browse my full blog archive. For another great crust idea, you might want to check out this puff pastry dinner idea I keep bookmarked! Happy cooking, everyone. Come back soon!
PrintClassic Turkey Pot Pie Recipe with Flaky Crust

This recipe transforms your leftover turkey into the ultimate comfort food: a creamy, savory filling tucked inside a buttery, flaky crust. It is a satisfying homemade main dish perfect for family dinners.
- Prep Time: 20 min
- Cook Time: 35 min
- Total Time: 55 min
- Yield: 6 servings 1x
- Category: Dinner
- Method: Baking
- Cuisine: American
- Diet: Vegetarian
Ingredients
- 2 cups cooked, shredded turkey
- 1 cup chopped carrots
- 1 cup frozen peas
- 1 cup chopped celery
- 1/2 cup chopped onion
- 1/2 cup unsalted butter
- 1/2 cup all-purpose flour
- 1 3/4 cups chicken broth
- 1/2 cup heavy cream
- 1 teaspoon dried thyme
- 1/2 teaspoon salt
- 1/4 teaspoon black pepper
- 2 refrigerated pie crusts (or homemade pastry)
- 1 egg, beaten (for egg wash)
Instructions
- Preheat your oven to 400°F (200°C). If using homemade pastry, prepare it now.
- In a large saucepan, melt the butter over medium heat. Add the chopped onion, carrots, and celery. Cook until the vegetables soften, about 5 to 7 minutes.
- Whisk in the flour to create a roux. Cook for 1 minute, stirring constantly.
- Gradually whisk in the chicken broth until the mixture is smooth. Bring the sauce to a simmer, stirring until it thickens.
- Stir in the heavy cream, dried thyme, salt, and pepper. Reduce the heat to low.
- Fold in the cooked turkey, peas, and any other desired vegetables. Heat through for 2 minutes. This is your creamy pot pie filling.
- Place one pie crust into the bottom of a 9-inch pie dish. Pour the turkey filling evenly into the crust.
- Top the filling with the second pie crust. Crimp the edges to seal the top and bottom crusts together. Cut several slits in the top crust to allow steam to escape.
- Brush the top crust lightly with the beaten egg wash.
- Bake for 30 to 35 minutes, or until the crust is golden brown and the filling is bubbly.
- Let the turkey pot pie cool for at least 10 minutes before slicing and serving.
Notes
- For an extra flaky crust, chill the assembled pie in the refrigerator for 15 minutes before baking.
- You can substitute leftover chicken for turkey if needed.
- If you prefer a richer flavor, use half-and-half instead of heavy cream.
Nutrition
- Serving Size: 1 slice
- Calories: 450
- Sugar: 4
- Sodium: 550
- Fat: 28
- Saturated Fat: 15
- Unsaturated Fat: 13
- Trans Fat: 0.5
- Carbohydrates: 28
- Fiber: 3
- Protein: 22
- Cholesterol: 75