
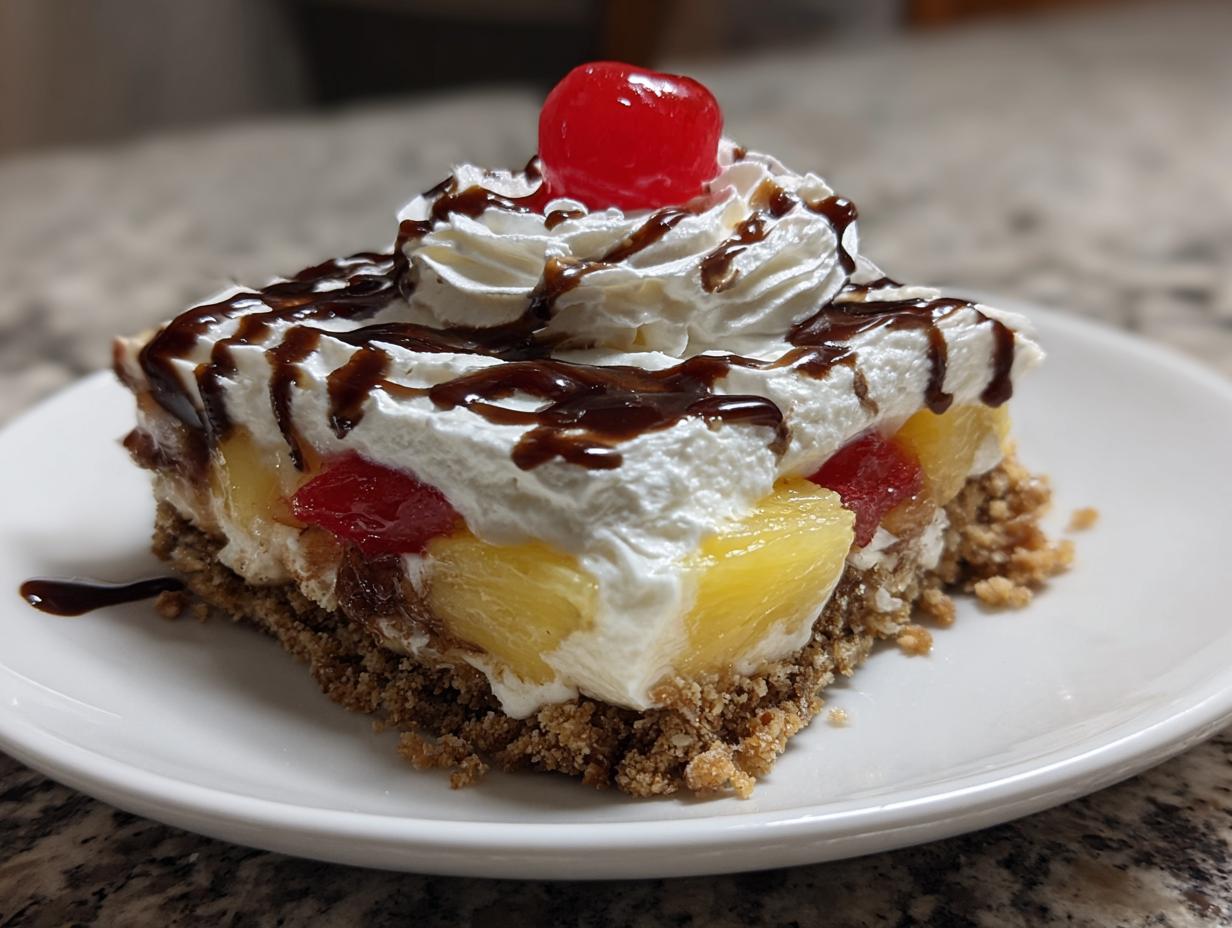

When the summer heat hits, the last thing I want to do is crank up the oven! I want refreshing, easy, and something that tastes like pure nostalgia. That is why I absolutely insist that you need this No Bake Banana Split Cake in your life, right now. My grandmother always made layered desserts that were fuss-free, and this one captures every single flavor from those classic ice cream parlor sundaes.
It’s creamy, it’s packed with fresh fruit, and trust me, it’s the ultimate crowd-pleaser. Seriously, assembling this layered fruit cream cake takes less time than waiting for a pizza delivery, and the payoff is huge. You don’t need a fancy degree to make this work; you just need a good 9×13 dish and a desire for something cool and delicious. Let’s dive into how we get this magic made without turning on a single burner!
- Why This No-Bake Banana Split Cake is Your New Favorite Summer Party Cakes
- Ingredients for the Ultimate No-Bake Banana Split Cake
- How to Prepare Your Simple Layered Dessert: Step-by-Step Instructions
- Making the Banana Split Cake Ahead: Storage and Make Ahead Banana Dessert Tips
- Serving Suggestions for This Potluck Perfect Cakes Recipe
- Troubleshooting Common Issues with No Oven Banana Split Recipe
- Frequently Asked Questions About Banana Split Cake
- Estimated Nutritional Information for Banana Split Cake
- Share Your Creations and Thoughts on This Easy Crowd Pleaser Dessert
Why This No-Bake Banana Split Cake is Your New Favorite Summer Party Cakes
When the sun is blazing, this No Bake Banana Split Cake is my secret weapon! It’s truly the ultimate summer party cakes champion because you get zero heat in your kitchen. I remember one disastrous Fourth of July where my oven broke halfway through making dessert. I whipped this up instead, and honestly, people raved about this Easy Banana Split Dessert more than anything baked that day. It’s a total winner for potlucks because it travels beautifully, chilled and ready to serve.
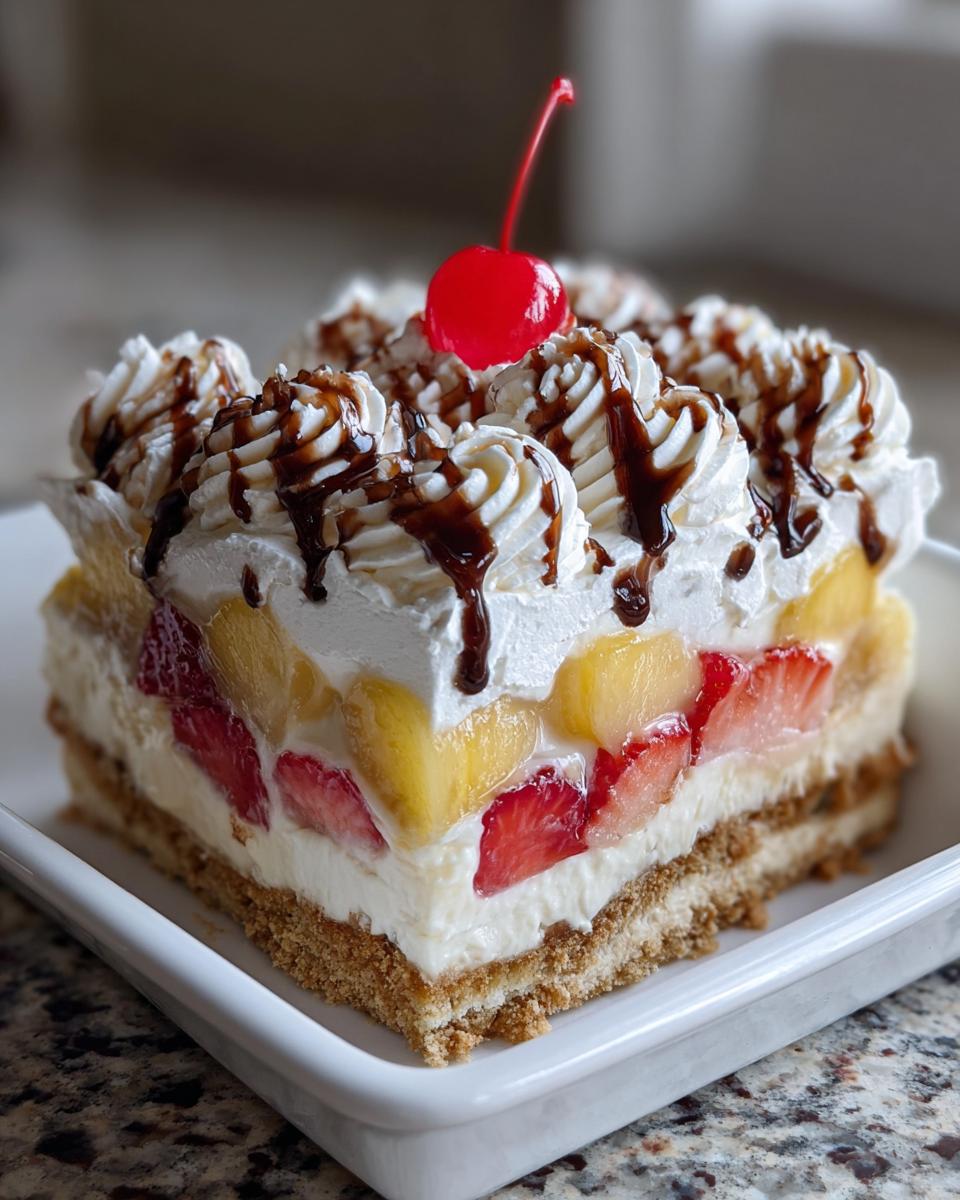
Key Features of Our Easy Banana Split Dessert
- No oven required! We let the refrigerator do all the hard work.
- Assembly is incredibly quick; you’re done before the ice cream truck drives by.
- It perfectly captures that classic, nostalgic ice cream sundae flavor profile.
- It’s ideal for making ahead, which means less stress on party day—a true lifesaver!
Ingredients for the Ultimate No-Bake Banana Split Cake
Alright, let’s talk supplies! Since this is a no-bake game, the quality of our ingredients really shines through. I’ve laid out everything you need below. Getting these prepped is half the battle, and preparation is key to building trust in any recipe, right? It’s all about clear measurements when you’re aiming for that perfect layered fruit cream cake.
- 1 1/2 cups graham cracker crumbs—you can grab the box kind or make your own!
- 1/2 cup unsalted butter, melted—we need that richness for the crust.
- 1/4 cup granulated sugar (for the crust, don’t mix it up!)
- 1 (8 ounce) package cream cheese, softened—make sure it’s good and soft, like room temperature putty.
- 1 cup powdered sugar
- 1/2 cup granulated sugar (for the creamy layer this time)
- 1 teaspoon vanilla extract—the fragrant kind, please!
- 1 (12 ounce) container frozen whipped topping, thawed, divided—we need this in two sections for layering.
- 3 ripe bananas, sliced—not green, not mushy, just perfectly speckled!
- 1 cup crushed pineapple, well drained—I cannot stress this enough.
- 1 cup sliced strawberries, fresh or frozen (thawed and drained)—the drainage here matters too.
- 1/4 cup chocolate syrup—the good stuff for drizzling!
- 1/4 cup chopped nuts (optional)—pecans or walnuts work like a charm if you’re feeling nutty.
- Maraschino cherries for topping—these are non-negotiable for the full sundae effect!
Ingredient Notes and Substitutions for Your Layered Fruit Cream Cake
Since this is a chilled banana dessert, the moisture balance is everything. Let’s tackle a couple of common questions I get about these ingredients.
The Bananas: You absolutely want ripe bananas here. A little brown spotting means they are sweet and soft, which blends beautifully into the cream layer. If they are too firm, they won’t mash slightly and meld with the other flavors.
The Pineapple Problem (Draining): If you skip draining the crushed pineapple really well, your beautiful cake will turn into a soupy mess after chilling. I often press mine between a couple of paper towels after running it through a fine-mesh strainer. Seriously, press it good!
Whipped Topping Talk: That tub of frozen whipped topping is our shortcut, and I love it! If you prefer to go fully homemade, you can substitute it with about 1 ½ cups of heavy cream whipped stiffly with a little powdered sugar and maybe a tiny bit of cornstarch to help stabilize it. But for speed, the thawed topping is where it’s at!
How to Prepare Your Simple Layered Dessert: Step-by-Step Instructions
Okay, putting this gorgeous banana split cake together is genuinely straightforward. Remember, because we’re skipping the oven, we are relying on cold to set everything up just right. Think of this like building a very delicious, edible sandcastle!
Tips for Success Making the Graham Cracker Crust Desserts Base
First things first: that crust needs to be rock solid so it doesn’t crumble when you slice into it later. Mix your crumbs, melted butter, and that tiny bit of sugar until it looks like wet sand. Then, press it into your 9×13 dish. I use the bottom of a measuring cup to really pack it down evenly across the whole bottom. Once it’s packed tight, slide that dish into the freezer while you mix up the creamy part. A cold, firm base is the secret to a clean slice later!
Assembling the Creamy Banana Dream Dessert Layers
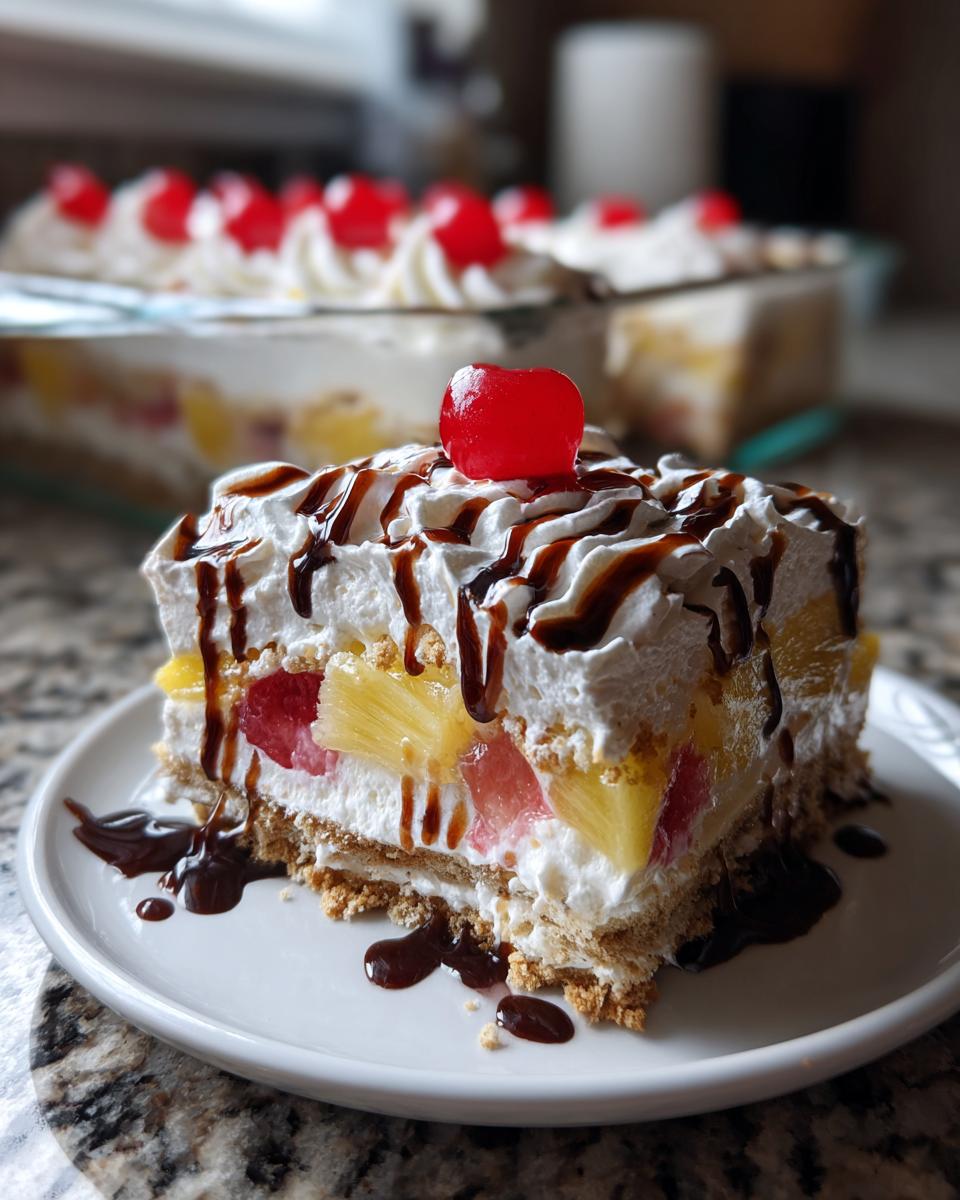
While the crust chills, whip together your cream cheese mixture until it’s utterly smooth—no lumps allowed! Now, this is where you need a light touch. Take half of your thawed whipped topping and gently fold it into the cream cheese mixture. Folding, not stirring! We want to keep all those lovely little air bubbles in there for that fluffy texture that makes this a true Creamy Banana Dream Dessert. Spread that layer over your cold crust. Next, arrange those banana slices neatly over the cream cheese before sprinkling on your well-drained pineapple and strawberries.
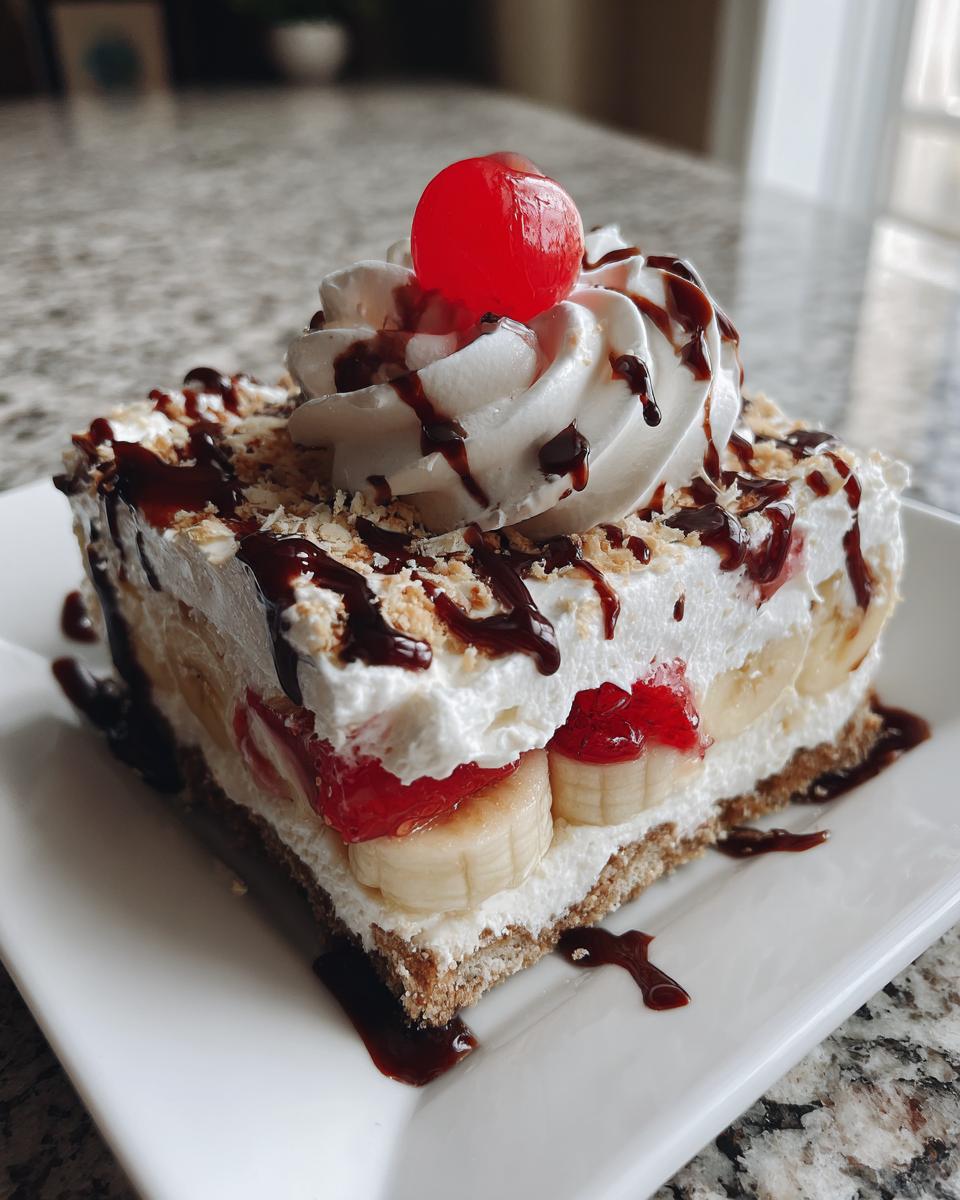
Finish by gently spreading the remaining whipped topping on top. Time to drizzle on that chocolate syrup and sprinkle those nuts if you’re using them. And the cherries go last! Now, the hardest part of all: cover it gently and chill it for at least four hours, but honestly, overnight is when this dessert reaches legendary status. Patience pays off!
Making the Banana Split Cake Ahead: Storage and Make Ahead Banana Dessert Tips
One of the best parts about this No Bake Banana Split Cake is that it’s a total pro for anyone who likes to plan ahead. Because it needs that long chill time to set all those beautiful layers, it naturally becomes a wonderful make ahead banana dessert. It’s seriously the perfect dish to bring to a party because you just grab it from the fridge on the way out the door!
When you are planning for a big crowd, I always suggest aiming to have the cake completely finished and chilling for a full overnight period—I’m talking 8 to 12 hours if you can swing it. That extra time lets the graham cracker crust really firm up against the cream layer, and the fruit flavors just marry together so much better. It stops the whole dessert from wanting to slide when you try to serve it.
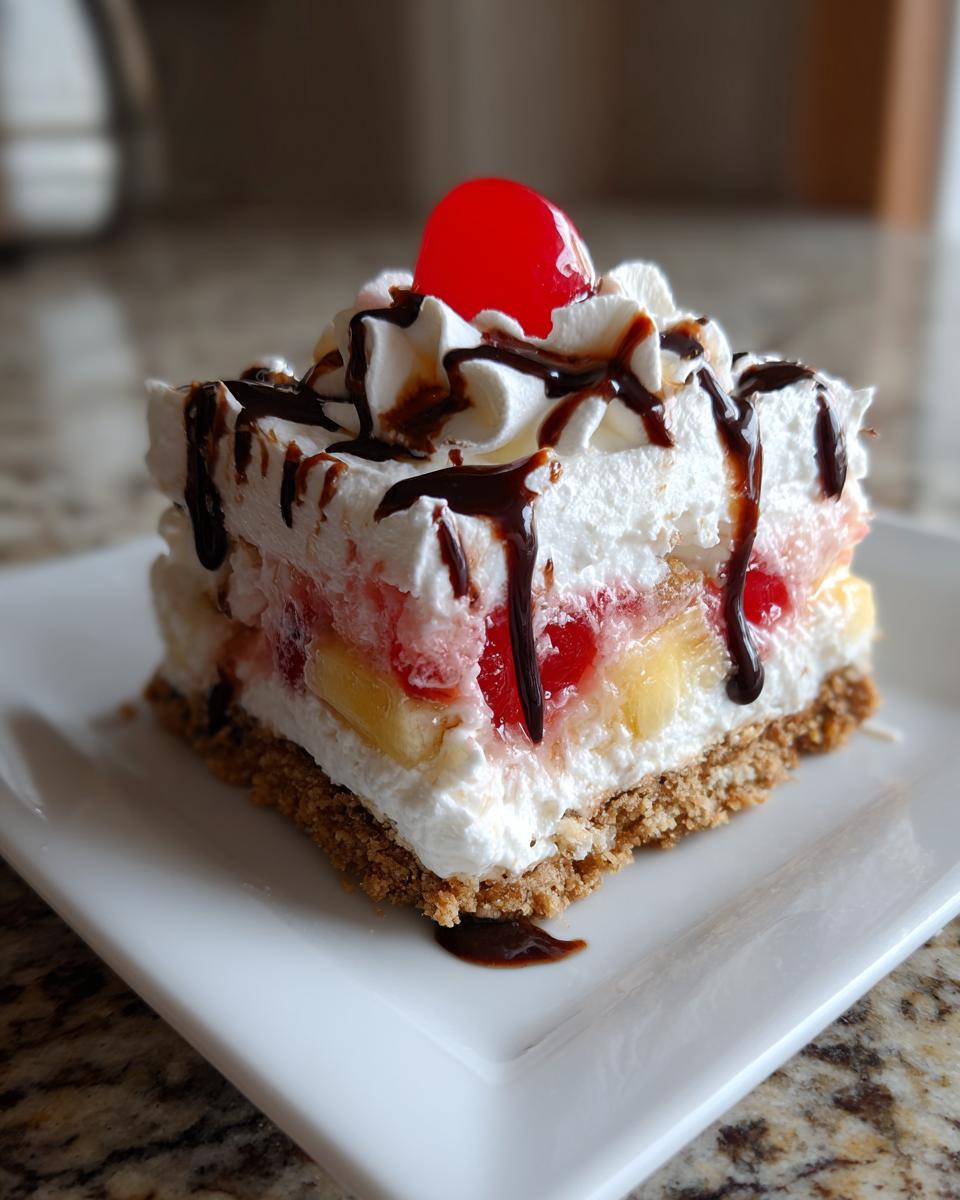
Now, if you have leftovers (which will be a smaller miracle, trust me!), you need to keep it covered tightly in the refrigerator. Because we used fresh bananas and strawberries, we are dealing with a time limit here. For the absolute best texture and flavor—where the fruit hasn’t gotten too soft or watery—I’d say serve this up within 48 hours. After that, the quality really starts to drop off, so make sure you plan for it to be the star of the show quickly!
Serving Suggestions for This Potluck Perfect Cakes Recipe
Since this glorious banana split cake is designed to taste exactly like you just walked out of a 1950s ice cream parlor, we need to finish it off right! This recipe is truly a potluck perfect cakes superstar because it handles being moved around really well, as long as it stays cold. The goal here is maximum refreshment, so serving temperature is nearly as important as the ingredients themselves.
You absolutely must serve this cake right out of the refrigerator. If it sits out on the buffet table for too long, you risk a runny cream layer, and nobody wants that sad sight. Make sure you pull it out just five minutes before you plan to serve it. It should be solidly chilled—that’s when the graham cracker crust has that perfect snap against the soft, fruity filling.
What goes well with something this rich and fruity? Well, think about what you’d add to a sundae!
- Extra Drizzle Power: Keep a little extra chocolate syrup and maybe even some caramel sauce handy on the side. People love loading up their own plate, right?
- Nuts on the Side: If you skipped the nuts on top to keep things allergen-friendly, put a small bowl of toasted pecans or walnuts out so guests can sprinkle them on just before eating—that extra crunch is heavenly with the creamy filling.
- A Simple Sidekick: Because this dessert is so rich, you don’t need much else! If you feel like you need a second item that feels lighter, a plain glass of cold milk or maybe a lightly sweetened iced tea complements the sweetness perfectly without competing with our star, the No Bake Banana Split Cake.
Honestly though, once you set this dish down, people usually just head straight for it. It’s truly a showstopper on its own!
Troubleshooting Common Issues with No Oven Banana Split Recipe
Even with a No Bake Banana Split Cake, things can sometimes go a little sideways! Don’t you worry one bit about that; this is where real home cooking experience comes in handy. I’ve seen every little hiccup you can imagine over the years, and usually, it comes down to one or two simple things. When you take the oven out of the equation, the freezer and the fridge become your main tools, and they sometimes need a little guidance!
If you follow the instructions precisely, you’ll get perfection, but maybe you had a frantic moment rushing through the steps. Or maybe the fruit just held more water than you expected. Let’s look at the two most common problems I see with this creamy banana dream dessert so you can fix them next time!
Problem One: My Banana Split Cake is Watery!
This is almost always related to moisture that sneaks in. The culprit is usually under-drained fruit. When you use strawberries or crushed pineapple that still has excess liquid, that liquid seeps out during the 4+ hours of chilling time, right into your lovely cream cheese layer, making everything slosh around. If you notice this happening, my immediate advice is to pull the cake out of the fridge, gently spoon off any standing liquid from the top (if it’s pooling), and slide it back in uncovered for another hour or two to firm up again. Next time, remember my tip: press that pineapple like you mean it!
Problem Two: My Cream Layer Seems Too Soft or Runny
If your crust is firm but the cream layer is collapsing when you try to spread the fruit, there are two likely reasons, and neither is scary. First, did you overmix the topping? When you fold the thawed whipped topping into the cream cheese mixture, you have to be gentle—like you’re folding laundry, not scrambling eggs. Over-mixing knocks all the air out, and you end up with a heavier, runnier base. Second, did you rush the chill time? If you only waited an hour before adding the fruit, the cream layer didn’t have time to firm up properly. This no-bake banana split dessert relies heavily on cold time to set that cream cheese and topping mixture solid.
If the layer is too soft, don’t panic—just put the whole dish back in the freezer for 30 minutes. That quick blast of cold helps stiffen it up enough for the next layer. Remember, just like my dad taught me about grilling, sometimes the best technique is stepping back and letting the process work.
Frequently Asked Questions About Banana Split Cake
I always get so many questions whenever I post a picture of this dessert! It’s such a fun, retro dessert recipe, and people naturally want to know how to customize it or if it’s too much trouble. Here are some of the things I hear most often about making this easy layered dessert for parties.
Is this dessert very heavy?
That’s a great question, especially if you’re serving it after a big meal! Because we use half thawed whipped topping and fold it into the cream cheese mixture, this ends up being surprisingly light. It’s definitely rich because of the crust, but it isn’t dense like a traditional cheesecake. Think of it as a wonderful, fluffy cloud of fruit and cream. It’s a genuinely light, chilled banana dessert experience, perfect after a summer barbecue.
Can I use different fruits in this Layered Fruit Cream Cake?
You certainly can adapt it! Remember, the traditional banana split relies on banana, strawberry, and pineapple. If you love cherries, absolutely add more! If you wanted to try another combination, you absolutely could, but I would only swap one fruit out at a time. For instance, if you are allergic to pineapple, maybe use finely diced kiwi or even some drained Mandarin oranges. But heed my warning: drainage is key for any fruit you swap in for this no bake banana split cake!
Can I freeze this banana split cake?
This is where we run into some issues! While it’s a fantastic make ahead banana dessert within the fridge, freezing it just isn’t ideal. The large amounts of thawed whipped topping and cream cheese don’t freeze and thaw gracefully. When you defrost it, the texture gets a bit watery and grainy, and the bananas turn mushy instantly. It’s best enjoyed fresh from the refrigerator, ideally within two days.
Can I make a Banana Split Dump Cake variation instead?
Oh, the dump cake craze! Yes, there are wonderful recipes out there for a Banana Split Dump Cake, and they usually involve baking a cake mix over the fruit layers. That is a totally different, comforting, warm dessert experience, which is great, but it doesn’t capture the pure, cool, ice-cream-parlor nostalgia of this no-bake banana split cake. If you’re aiming for a quick summer treat that cuts the heat, stick with freezing and chilling this recipe. If you want something baked and gooey, maybe try a dump cake next time, but for summer refreshment, this no-bake version wins every time!
Where can I find the highest-rated recipes for this?
I’ve tested this recipe against so many others, and I truly believe we have nailed the texture here. But if you want to see what others are doing, sometimes looking at other trusted home cooks helps! You can always check out reviews from other folks who have made similar treats, like this one I found over at Exo Recipes!
Estimated Nutritional Information for Banana Split Cake
When I share my favorite recipes here on Cut Cook Taste, I always try to give you the whole picture. Knowing what’s in your food is just as important as knowing how to make it delicious! Now, you have to remember that because this is a no-bake dessert, and because we all use slightly different sizes of bananas or brands of whipped topping, these numbers are my best *estimation* based on standard ingredient amounts and serving sizes.
This information is intended to give you a general idea of what you are indulging in, especially when bringing this Simple Layered Dessert to a gathering where people are watching their intake. Transparency builds trust, right? Think of this as your guide for enjoying this treat responsibly—but enjoy it you should!
If you are looking for some lighter weeknight meals that balance out those richer desserts, you should absolutely check out my recipe for easy 30-minute pepper steak stir-fry. Sometimes you need a savory palate cleanser!
Here are the general estimates for one standard slice of this fantastic No Bake Banana Split Cake:
- Serving Size: 1 slice
- Calories: 350
- Sugar: 35g
- Fat: 19g
- Saturated Fat: 10g
- Carbohydrates: 45g
- Protein: 4g
- Cholesterol: 45mg
Please take these numbers as a guide. If you use fresh pineapple instead of canned, or swap out the butter for oil in the crust, those numbers will shift slightly! The key for me is always tasting it first—that’s the most important bit of data, I promise!
Share Your Creations and Thoughts on This Easy Crowd Pleaser Dessert
Oh, I absolutely love seeing this No Bake Banana Split Cake grace your tables! This is genuinely my favorite part of sharing recipes, seeing how you all bring these family-style dishes into your own homes. It truly transforms from just a recipe on a screen to a real memory maker when you start serving it!
I really hope you give this a try this summer, whether it’s for a big family reunion or just a quiet Sunday night treat. When you make it, please, please come back here and leave a rating! Five stars is always amazing, of course, but I honestly want to hear what you thought of the texture or if you swapped out the nuts for something else. Your feedback helps me help other home cooks who are just figuring out how to make this easy crowd pleaser dessert.
And if you’re hanging out on social media—I’m over there trying to keep up with everyone!
- Tag me in your photos! I adore seeing my recipes come to life, especially when they are this colorful.
- If you use Instagram or Facebook, tag me so I can cheer you on! I always try to pop over and give you a little high five.
- If you discovered a new trick that made assembling the layers even easier, shout it out in the comments below so the whole community can benefit!
For more easy entertaining ideas, you might want to take a peek at how I do my creamy side dishes; sometimes only a perfect side can complete the perfect party menu. Thank you so much for cooking with me today. Happy chilling, everyone!
PrintNo-Bake Banana Split Cake: An Easy Summer Dessert
This no-bake banana split cake captures all the classic ice cream parlor flavors in a simple, layered dessert. It features a graham cracker crust, creamy filling, fresh bananas, and fruit toppings, perfect for parties without turning on the oven.
- Prep Time: 25 min
- Cook Time: 0 min
- Total Time: 4 hr 25 min
- Yield: 12 servings 1x
- Category: Dessert
- Method: No Bake
- Cuisine: American
- Diet: Vegetarian
Ingredients
- 1 1/2 cups graham cracker crumbs
- 1/2 cup unsalted butter, melted
- 1/4 cup granulated sugar
- 1 (8 ounce) package cream cheese, softened
- 1 cup powdered sugar
- 1/2 cup granulated sugar
- 1 teaspoon vanilla extract
- 1 (12 ounce) container frozen whipped topping, thawed, divided
- 3 ripe bananas, sliced
- 1 cup crushed pineapple, well drained
- 1 cup sliced strawberries, fresh or frozen (thawed and drained)
- 1/4 cup chocolate syrup
- 1/4 cup chopped nuts (optional)
- Maraschino cherries for topping
Instructions
- Prepare the crust: Mix graham cracker crumbs, melted butter, and 1/4 cup granulated sugar in a bowl until combined. Press the mixture firmly into the bottom of a 9×13 inch baking dish. Place the crust in the freezer while you prepare the filling.
- Make the cream cheese layer: In a large bowl, beat the softened cream cheese, powdered sugar, 1/2 cup granulated sugar, and vanilla extract until smooth. Fold in half of the thawed whipped topping until just combined.
- Assemble the layers: Spread the cream cheese mixture evenly over the chilled graham cracker crust. Arrange the sliced bananas over the cream cheese layer.
- Add fruit layers: Sprinkle the well-drained crushed pineapple evenly over the bananas. Arrange the sliced strawberries over the pineapple layer.
- Top the cake: Gently spread the remaining half of the whipped topping over the fruit layers. Drizzle the top with chocolate syrup. Sprinkle with chopped nuts, if using. Place a maraschino cherry on top of each slice area.
- Chill: Cover the dish and refrigerate for at least 4 hours, or preferably overnight, to allow the layers to set. This is a crucial step for this easy summer dessert.
- Serve: Cut into squares and serve cold.
Notes
- Make sure the crushed pineapple is very well drained; excess liquid will make the cake watery.
- You can substitute the whipped topping with a homemade stabilized whipped cream if you prefer.
- This make ahead banana dessert is best served within 2 days for optimal freshness of the fruit.
Nutrition
- Serving Size: 1 slice
- Calories: 350
- Sugar: 35
- Sodium: 210
- Fat: 19
- Saturated Fat: 10
- Unsaturated Fat: 9
- Trans Fat: 0
- Carbohydrates: 45
- Fiber: 2
- Protein: 4
- Cholesterol: 45