
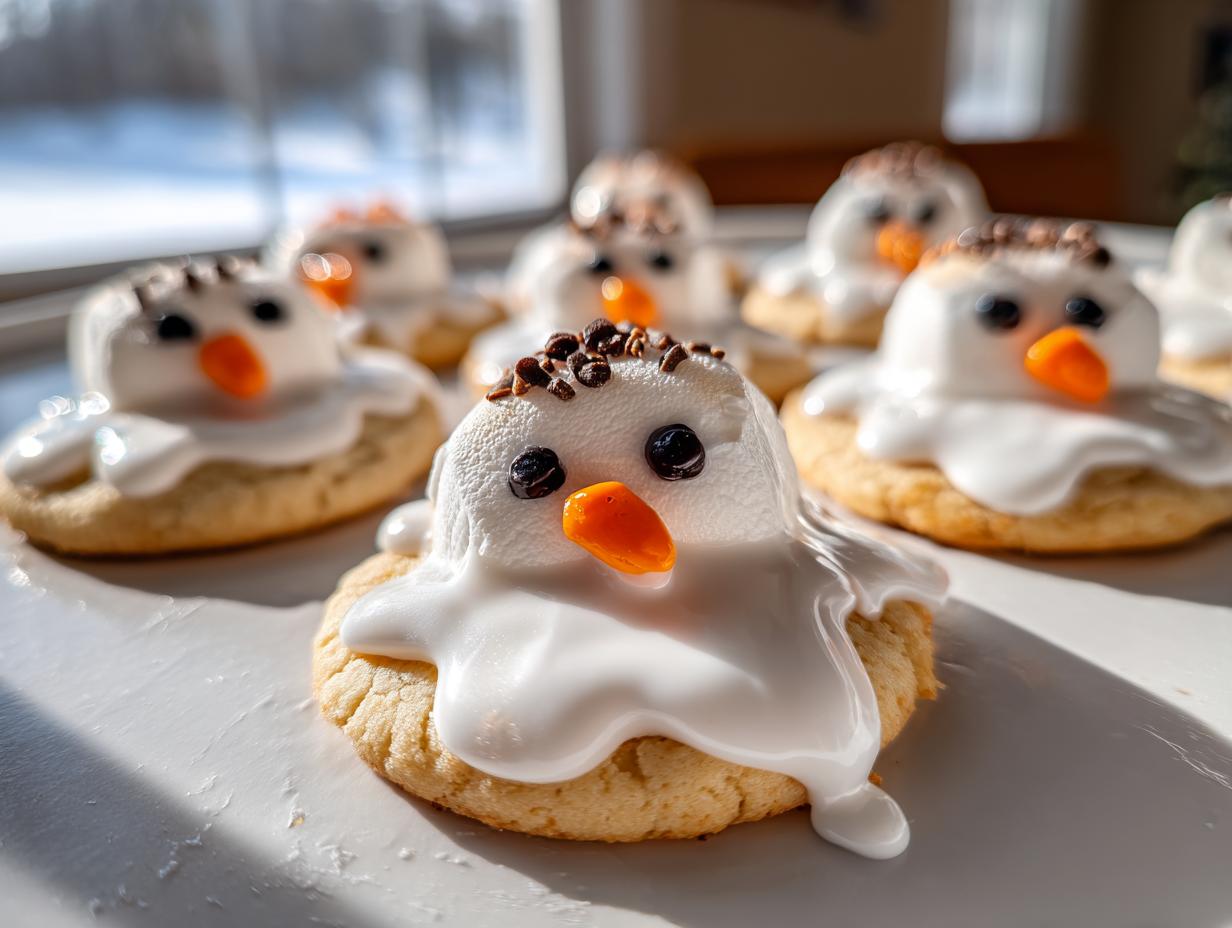

Oh, hello there! I am so thrilled you clicked on this recipe because honestly, when the holiday season rolls around, nothing beats the sheer joy of baking something utterly adorable with the people you love. If you’re looking for the cutest, easiest thing to pull out of your oven this December, you have found it! We are diving headfirst into making **melted snowman cookies**. Seriously, these aren’t just cookies; they are guaranteed smiles, and they use such simple ingredients. My kitchen always smells like vanilla and happy chaos when we make these, proving that the best homemade holiday memories aren’t about perfection—they’re about the fun, messy process of creation.
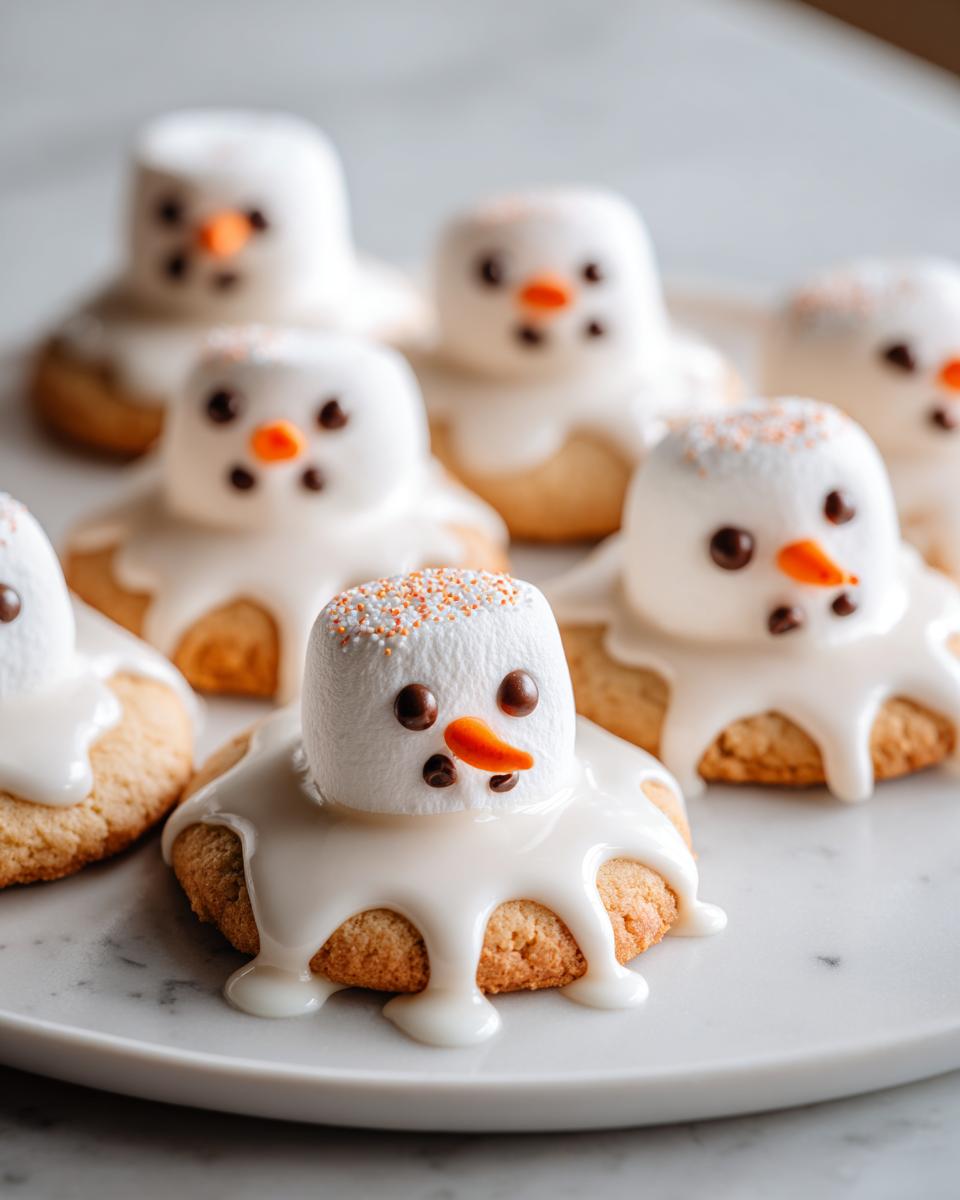
This recipe is my go-to when I want a showstopper without spending all day fussing over royal icing techniques. We take an easy sugar cookie base and turn it into a little whimsical disaster zone where a snowman seems to have taken a very warm nap. It’s the perfect blend of festive baking spirit meeting practical, accessible home cooking, which is exactly what Cut Cook Taste is all about! If you love decorating wildly, you might also want to check out my tips for Christmas Sprinkle Sugar Cookies while you’re here.
- Why You Will Love These Melted Snowman Cookies
- Gathering Ingredients for Your Melted Snowman Cookies
- Step-by-Step Instructions for Perfect Melted Snowman Cookies
- Expert Tips for Successful Melted Snowman Cookies
- Ingredient Notes and Creative Variations for Melted Snowman Cookies
- Serving Suggestions for Festive Holiday Desserts
- Storage and Reheating Instructions for Melted Snowman Cookies
- Frequently Asked Questions About Making Melted Snowman Cookies
- Share Your Cute Christmas Desserts Creations
Why You Will Love These Melted Snowman Cookies
I know you are busy during the holidays, so these cookies are designed to bring maximum fun with minimum fuss. Trust me, I have tested enough fussy Christmas cookie recipes to know the ones that stick around—and these **melted snowman cookies** are definitely keepers!
- They are the ultimate **kid friendly cookie crafts**! Seriously, if your little ones can hold a marshmallow, they can help decorate these. It’s less about precision and more about personality, which I absolutely adore.
- Super Fast Assembly: Because we rely on a simple base and just a few candies for the face, these are fast to decorate. You’ll have a tray full of adorable treats ready for any party in no time. They are fantastic **easy snowman cookies**.
- Perfect for Cookie Swaps: These always get rave reviews because they are unique! They stand out from the standard gingerbread men and look great on any platter of **festive holiday desserts**. Who doesn’t smile when they see a melting snowman?
- Minimal Icing Stress: You don’t need to worry about piping perfect borders. The white icing is intentionally messy! I love recipes like this Christmas Sugar Cookie Bars where technique takes a backseat to flavor and fun.
- Always a Hit: Whether you are baking for a school event or just want a fun weekend activity, these cookies disappear fast. They hit that sweet spot between being cute and being genuinely delicious.
Gathering Ingredients for Your Melted Snowman Cookies
Okay, let’s talk about what you need to make these adorable little puddles of fun. The beauty of these **melted snowman cookies** is that they use basic pantry staples and a few candies. Since we want to keep things simple for **easy holiday baking**, I’m leaning heavily on a good refrigerated dough, but I’ve included a link to my favorite no-chill sugar cookie recipe if you feel like getting your hands a little floury!
Remember, the size matters here! We are cutting circles about 3 inches in diameter so we have enough ‘ground’ for our snowman to melt onto.
For the Cookie Base
The base cookie has to be sturdy enough to hold all that marshmallow weight, which is why a simple sugar cookie works perfectly. If you’re using store-bought dough, you’re already winning the time-saving game!
- 1 package (16.3 ounces) refrigerated sugar cookie dough (or use your favorite no chill sugar cookie dough base—cut these into 3-inch circles!)
For the White Icing and Decorations
This is where the magic happens! The icing needs to be thick enough to look like it’s pooling, but still thin enough to drip naturally around the edges. You’re aiming for a thick but pourable consistency. Don’t forget those little chocolate chips for the eyes and arms; they pull the whole **decorating snowman cookies** look together!
- 1 cup powdered sugar
- 2 tablespoons milk (maybe a tiny bit more, just for thinning!)
- 1/2 teaspoon vanilla extract
- 1 bag large marshmallows (These are the main body part, remember!)
- 1 bag mini marshmallows (These get perched right on top of the big one as the head cap)
- Orange sprinkles or small orange candies (These are the cute little carrot noses!)
- Mini chocolate chips (For the eyes, obviously, and those adorable stick arms)
- Small candy pieces or colored icing (This is crucial for making the tiny colorful scarves!)
Step-by-Step Instructions for Perfect Melted Snowman Cookies
Alright, time to put on our aprons! These instructions are designed to be crystal clear so you can focus on the fun part—the decorating! We need everything cooled down and ready before we start placing the snowman parts, so don’t rush that cooling step. I promise, patience now means perfect, adorable **melted snowman cookies** later.
Baking the Cookie Base
First things first, we need our sturdy cookie foundation. Make sure you preheat your oven exactly as the package or your favorite recipe suggests. This is crucial!
- Get your oven heating up to the temperature specified on your sugar cookie dough package. Then, grab those baking sheets and line them with parchment paper. Trust me, parchment paper is your best friend during the holidays; it saves scrubbing time!
- Prepare the cookies: Roll or, if you’re using pre-made dough, cut your circles. You want them about 3 inches in diameter. Think medium-sized!
- Place the circles onto your lined baking sheets, making sure they have a little space between them to spread just a tiny bit.
- Bake them according to the directions. You’re looking for them to be just lightly golden brown around the edges. Pull them out and let them cool completely on a wire rack. Do NOT try to decorate until they are totally cool, or the icing will run right off!
Preparing the Icing and Creating the Melted Puddle
Now we mix up our white puddle. Remember what I said about consistency being key? We want the icing thick enough to hold its shape as it drips, but thin enough that it flows like molasses when you pour it. If it’s too thick, it won’t look melted; if it’s too thin, it’ll just soak into the cookie!
- In a small bowl, grab your whisk and mix that powdered sugar, milk, and vanilla extract together. Keep mixing until it looks smooth.
- If it seems stiff, add milk a tiny drop at a time until you hit that sweet spot: thick enough to coat the back of a spoon but thin enough to gently pour off the side within a few seconds.
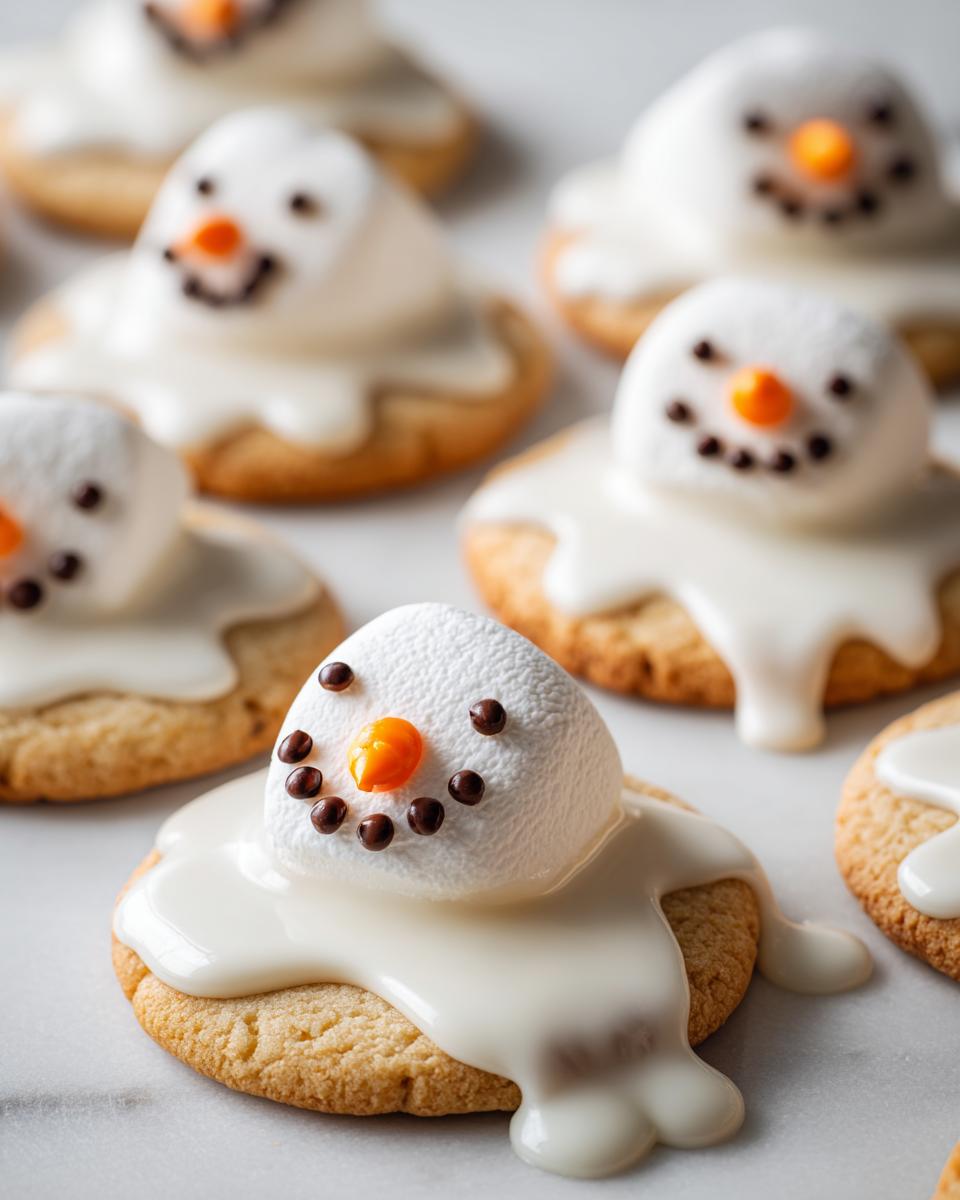
- Once the cookies are stone cold, dip the top of each one into the white icing. Tilt the cookie slightly to let some of that delicious icing drip artfully over the edges—that’s the “melted” part!
- Let that base layer of icing set just slightly. This takes about 5 minutes, but it stops the marshmallows from sinking straight into the wet puddle.
Assembling and Decorating Your Melted Snowman Cookies
This is the best part! Time to build our little melting guys. We are making them look like they just lost their cool on a warm, sunny day! You can find more help on icing consistency in my royal icing guide here.
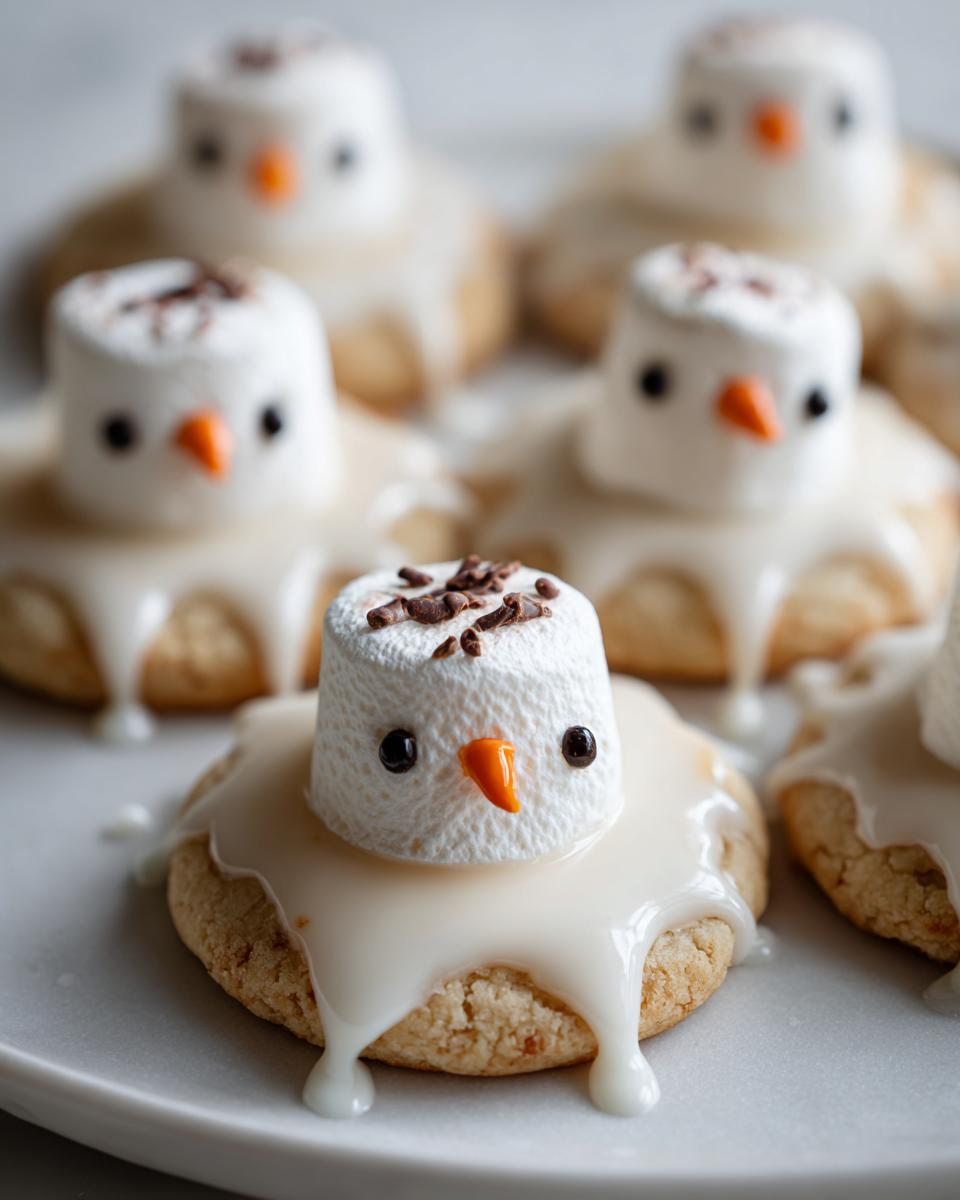
- Place one large marshmallow near the top center of your slightly set icing puddle. This is the main body of the snowman.
- Take one mini marshmallow and gently set it right on top of the large one—that’s the topper for his head!
- Time for the face. Press two mini chocolate chips into the big marshmallow for eyes, and then carefully press one orange sprinkle or candy right down the center for the nose.
- Now for the arms! Use two more mini chocolate chips and press them into the sides of the large marshmallow so they stick out like little stick arms.
- Finally, give him some style! Drape a small, colorful candy piece or pipe a tiny, quick line of colored icing across the neck area where the head meets the body. That’s his scarf!
- Set your finished **melted snowman cookies** aside on the rack and let the icing harden up completely before you dare touch them or stack them up!
Expert Tips for Successful Melted Snowman Cookies
Okay, now that you have the recipe down, I want to share a few little secrets that take these from “cute” to “absolutely show-stopping.” Because even simple **kid friendly cookie crafts** benefit from a seasoned baker’s touch, right? These tips really help when you’re working with the marshmallows because they love to stick to everything!
My biggest advice when dealing with the icing and the marshmallows involves timing and a little bit of cornstarch—don’t worry, it’s an easy fix if things get sticky!
- Don’t Overbake the Base Cookies: Since these cookies are going to be soaked in icing and then topped with soft marshmallows, you want the base cookie to be slightly softer than you might normally bake a cutout cookie. Pull them out right when the edges just start to turn pale gold. That slight softness prevents the whole thing from feeling like a cracker once it’s all assembled.
- The Five-Minute Icing Set is Non-Negotiable: When you dip the cookie into the white icing and let it drip, you absolutely must let it sit for about five minutes before placing the large marshmallow on top. If the icing underneath is too wet, the weight of the marshmallow will push the icing right off the sides, and you’ll just have a melted white mess instead of a melted snowman puddle!
- Taming the Marshmallows: Marshmallows are sticky little things, especially when you try to push them into icing! Before dipping them into the white icing, it sometimes helps—especially for the big body marshmallow—to briefly dust both sides very lightly with a tiny bit of cornstarch or powdered sugar. This stops the marshmallow itself from getting ridiculously sticky when you handle it, though you still want the bottom of the marshmallow sticky enough to bond with the cookie icing.
- Chocolate Chip Placement: When you push those mini chocolate chips in for the arms, push them just slightly into the side of the large marshmallow. If you just lay them on top of the icing, they tend to slide off later. We want those arms proudly sticking out, not hiding in the puddle!
And speaking of sticky situations, if you ever need a foolproof base for dipping things, my recipe for easy thick no-cook homemade pizza sauce reminds people to trust the process, and it applies here too—trust the cooling and setting times!
Ingredient Notes and Creative Variations for Melted Snowman Cookies
One thing I learned from my grandmother is that recipes are starting points, not handcuffs! While this recipe is wonderful as written—especially if you are using convenience dough for **easy holiday baking**—I always encourage folks to make it their own. Don’t be afraid to swap out cookie bases or change up what the melting snowman is wearing!
If you’ve ever struggled with cutting out sugar cookies, you might want to hop over and check out my Red Velvet Cake Mix Cookies. They use pre-made mixes to speed things up, and that same shortcut mentality can absolutely apply here if you prefer skipping the rolling and cutting!
Here are a few ways we can get creative with these **cute Christmas desserts**:
- Peanut Butter Snowman Cookies: Oh my gosh, this is a game-changer! If you love peanut butter, swap the plain sugar cookie dough base for your favorite, sturdy peanut butter cookie dough. The flavor combination of peanut butter, melting marshmallow, and that sweet white icing is just divine. This variation makes for truly rich **peanut butter snowman cookies**.
- Change Up the Melted Puddle Color: Instead of plain white icing, use almost all the liquid in the recipe above, but swap out a few drops of milk for a tiny bit of clear corn syrup and a touch of blue food coloring to make an icy blue puddle! Or, if you want a thicker, less drippy look, just reduce the milk in the icing recipe significantly—that gives you a thicker frosting that makes for great **creative cookie decorating** if you want to pipe designs instead of letting it drip naturally.
- Different Cookie Bases: Shortbread cookies work beautifully here because they are already firm. If you want a darker accent, try using a simple chocolate wafer cookie as the base instead of sugar cookies. Imagine a melted snowman on a chocolate puddle!
- Accessorizing the Scarf: Be creative with what you use for the scarf! Instead of hard candies, try using a sliver of Fruit Roll-Up cut into a rectangular strip, or you can even use melted chocolate piped in bright red or green stripes before putting on the marshmallow head. It’s all about having fun with these **snowman themed treats**!
Just remember, no matter what base you use, make sure it’s completely cool before the icing touches it. We need that solid foundation for our little melting sculptures!
Serving Suggestions for Festive Holiday Desserts
Once you have your beautiful **melted snowman cookies** set and ready to go, the next logical step is figuring out what to serve them with! These aren’t just great cookies; they are little edible centerpieces for any seasonal spread. I always like to pair something sweet and fun like this with a cozy, comforting drink, especially when we have the cousins over in the afternoon.
Presentation is everything during the holidays, even when the cookie design itself is supposed to look wonderfully messy. A few simple choices can elevate these from a fun bake to a truly special moment.
- Warm Drinks Are a Must: You can’t have a winter treat without something warm to sip on! These cookies are fantastic alongside a mug of rich hot cocoa. If you’re having an evening gathering, I actually have a fantastic recipe for Boozy Hot Chocolate that pairs surprisingly well with the vanilla sweetness of the sugar cookie base.
- The Contrasting Texture Platter: Because these cookies are soft from the icing and marshmallows, try serving them on a platter next to something crisp and crunchy. A platter of salty, buttery shortbread or maybe some homemade toffee provides a wonderful textural contrast that makes every bite exciting.
- Keep It Simple, Keep It White: For display, I love placing the cookies on a simple white cake stand or a rustic wooden cutting board covered with a dusting of powdered sugar—it looks like fresh snow around the puddles! It really lets the little orange noses and colorful scarves pop.
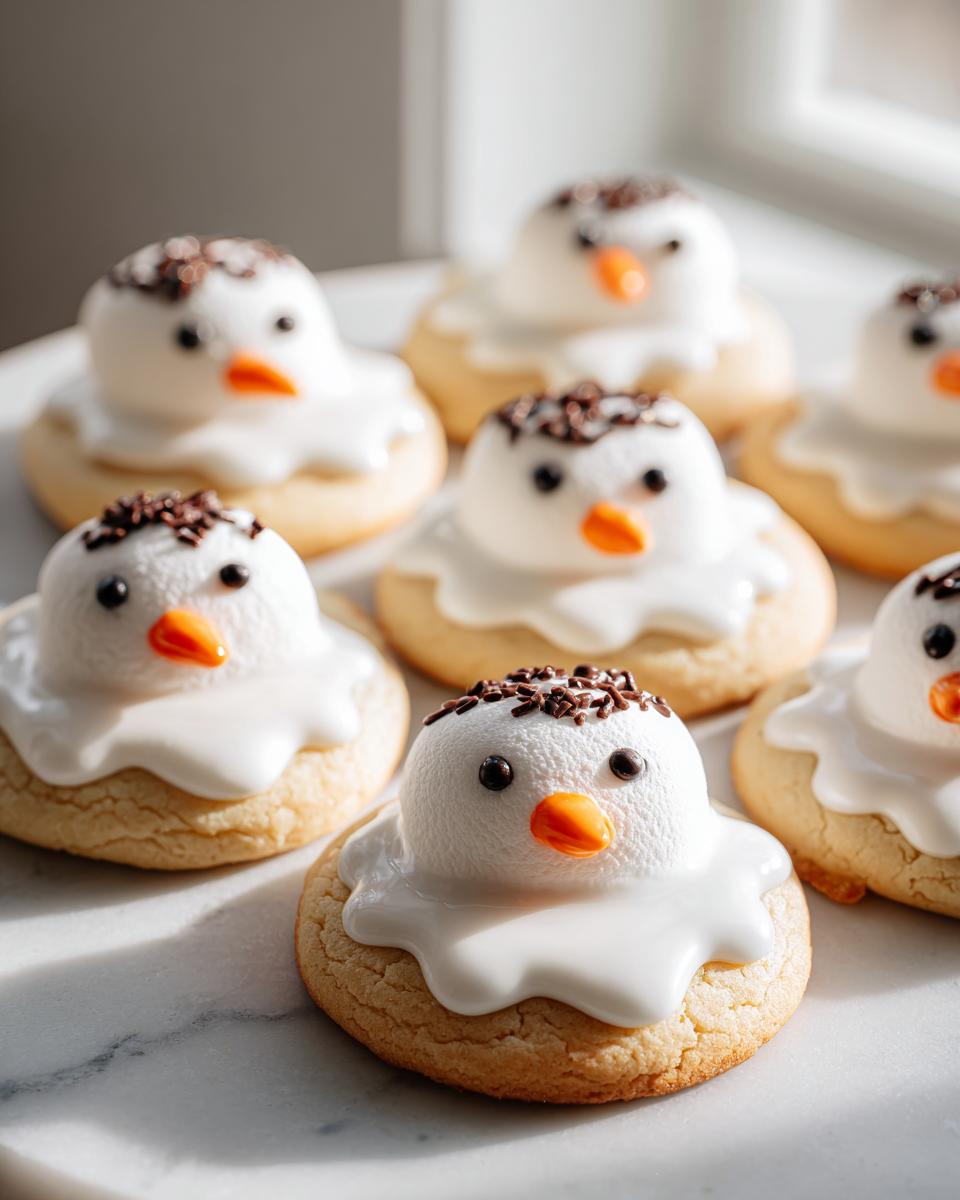
Honestly, the only real suggestion you need is to put them where everyone can see them. They are such fun **festive holiday desserts** that people tend to grab them right away!
Storage and Reheating Instructions for Melted Snowman Cookies
Now that you’ve wrestled the marshmallows into place and they are looking perfectly silly, the biggest question is: how do we keep these masterpieces looking good until the party starts? Storing beautifully decorated cookies, especially ones topped with soft marshmallows and slick icing, requires a little bit of care. I always think ahead, because nobody wants a sticky, squashed snowman!
The good news is that because these **melted snowman cookies** rely on a simple powdered sugar icing and not temperamental buttercream, they are fairly straightforward to store. The key thing to remember is that we are keeping them at room temperature—never the fridge!
Here’s my usual approach for keeping these cute little puddles safe and sound:
- Airtight is Everything: Once that royal icing has fully set—and I mean totally rock hard, which might take a few hours depending on humidity—you need to get them into an airtight container. Why airtight? Because moisture is the enemy of crisp cookies and shiny icing.
- Layering with Care: If you are stacking them, you absolutely must use parchment paper or wax paper between the layers. If you don’t, the sticky marshmallow/icing on the bottom of one cookie is going to weld itself right to the face of the cookie underneath. I usually only stack two layers high, just to be safe.
- Room Temperature Only: Please, please, resist the temptation to put these in the refrigerator! Cold air tends to make the sugar cookie base dry out faster, and condensation builds up when you take them back out, making the icing weep and look dull. As the recipe notes suggest, they hold up beautifully at room temperature for up to three days.
As for reheating? Well, these aren’t exactly the kind of cookie you want to warm up! The sugar cookie base would be fine, but heating up marshmallows and royal icing just leads to a sticky mess. These are best enjoyed at room temperature, which is exactly how they taste perfect!
Frequently Asked Questions About Making Melted Snowman Cookies
I always get the same few questions whenever I post these silly little creations! It just shows how popular these **snowman themed treats** are. Below I’ve answered the most common concerns I hear about troubleshooting or swapping ingredients for these **easy snowman cookies**. If you have another question, pop it in the comments, because I love talking baking with you! When you’re looking for pointers on how to make **easy holiday baking** less stressful, you know where to find me! You can also check out my general tips for easy holiday baking adventures!
Can I use store-bought cookies instead of baking the base for these easy snowman cookies?
Oh, absolutely! If you are short on time, or maybe you just want to focus all your energy on the fun decorating part, using store-bought cookies is a total lifesaver. You want to look for **flat, pre-baked sugar cookies**—the kind you buy in a sleeve, not the refrigerated dough. They are already firm and the perfect size, which makes this recipe even faster for **easy holiday baking**. Just use those as your base, let them cool if they came warm from the bakery section, and jump right to the icing step!
What is the best way to achieve the ‘melted’ look with the icing?
Consistency is really the entire secret here. You want that base white icing to do what I call a “slow ribbon” when you lift your spoon. If you look at my detailed instructions, you’ll see I emphasize making it **thick but pourable**. If it pours off the spoon instantly, you need more powdered sugar. If it just sits there in a lump, add a tiny, tiny bit more milk. When you dip the cookie and tilt it, the icing should easily coat the top and slowly drape over the edges, giving you those natural, beautiful drips for the puddle effect. That slight drape gives you the perfect look for your **cute Christmas desserts**!
Are these cookies suitable for freezing before they are decorated?
That’s a smart question related to **Christmas cookie recipes**! Yes, you can definitely bake the sugar cookie bases ahead of time and freeze them! Once they are completely cool, place them in a single layer inside a freezer-safe, airtight bag or container. To prevent them from getting crushed, I usually place a layer of parchment paper between any stacks. Then, thaw them on the counter for about an hour before you start icing. You don’t want to freeze them once they are iced, though—the marshmallows and the white icing don’t love the freezer environment!
Can I use peanut butter cookies instead of sugar cookies?
Yes, this is one of my favorite ways to change things up! If you prefer a richer flavor, swapping the sugar cookie dough for a sturdy **peanut butter snowman cookies** base is amazing. The slight saltiness of the peanut butter cuts the sweetness of the marshmallow and icing perfectly. Just make sure the peanut butter cookie isn’t too thick. We still want that satisfying ‘melted’ puddle effect, so keep the cookie rounds relatively thin if you can!
Share Your Cute Christmas Desserts Creations
Well friends, that’s the whole process! From rolling out simple dough to placing that final tiny chocolate chip arm, you’ve now got everything you need to create the most charming **melted snowman cookies** on the block. I seriously cannot wait for you to try these fun **festive holiday desserts**!
Baking is supposed to be joyful, and for me, the absolute best part isn’t eating the cookies (though that’s a very close second!), it’s seeing how *you* all bring these visions to life in your own kitchens. Did your snowmen melt dramatically? Did you use blue icing for a super icy puddle? Did your kids get marshmallows stuck everywhere?
Please, don’t be shy! Jump down below and leave a star rating for this recipe. It helps me know what’s working in your ovens. More than that, I want to hear all about it in the comments. Tell me what candy you used for the scarf or if you tried the peanut butter variation!
If you snapped a picture of your adorable **cute Christmas desserts**—and I hope you did!—I would absolutely love to see it on social media! Tag me so I can cheer you on. You can find me on all the usual spots. If you’re looking for even more fun family inspiration, check out my main blog page.
As always, thank you so much for inviting my little corner of the kitchen into your holiday baking plans. Happy baking, and I hope your season is sweet, cozy, and perfectly messy!
Warmly,
Sarah Peterson
P.S. If you end up sharing any photos online, feel free to link back—I always love seeing where these recipes travel! Maybe you’ll even see your creation featured next year, especially if you tested out that version from that great resource book I mentioned earlier!
PrintEasy Melted Snowman Sugar Cookies
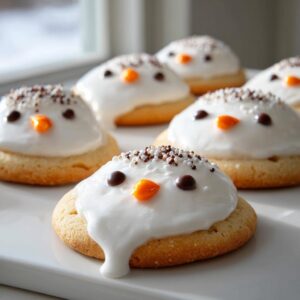
Make these adorable melted snowman sugar cookies for a fun and festive holiday treat. This recipe uses simple steps, making it perfect for baking with kids.
- Prep Time: 20 min
- Cook Time: 10 min
- Total Time: 30 min
- Yield: 18 servings 1x
- Category: Dessert
- Method: Baking and Decorating
- Cuisine: American
- Diet: Vegetarian
Ingredients
- 1 package (16.3 ounces) refrigerated sugar cookie dough (or use your favorite no chill sugar cookie dough)
- 1 cup powdered sugar
- 2 tablespoons milk
- 1/2 teaspoon vanilla extract
- 1 bag large marshmallows
- 1 bag mini marshmallows
- Orange sprinkles or small orange candies (for noses)
- Mini chocolate chips (for eyes and arms)
- Small candy pieces or colored icing (for scarves)
Instructions
- Preheat your oven to the temperature specified on the sugar cookie dough package. Line baking sheets with parchment paper.
- Prepare the cookie base: Roll or cut the sugar cookie dough into circles, about 3 inches in diameter. Place them on the prepared baking sheets.
- Bake the cookies according to the package directions until lightly golden brown around the edges. Let the cookies cool completely on a wire rack.
- Make the royal icing: In a small bowl, whisk together the powdered sugar, milk, and vanilla extract until smooth. You want a thick but pourable consistency for the ‘melted’ look. Add a few more drops of milk if the icing is too thick.
- Decorate the cookies: Dip the top of each cooled cookie into the white icing, allowing some of the icing to drip slightly over the edges to create the melted puddle effect. Let the icing set slightly, about 5 minutes.
- Assemble the snowman: Place one large marshmallow near the top center of the icing puddle to form the snowman’s head. Place one mini marshmallow on top of the large marshmallow for the top of the head.
- Add facial features: Press two mini chocolate chips into the large marshmallow for eyes. Press an orange sprinkle or small orange candy into the center of the large marshmallow for the nose.
- Add arms and scarf: Press two mini chocolate chips into the sides of the large marshmallow to look like stick arms. Drape a small candy piece or pipe a line of colored icing across the neck area for a scarf.
- Allow the icing to dry completely before serving or storing your cute Christmas cookie crafts.
Notes
- For a quicker version, use pre-made, flat sugar cookies instead of baking your own dough.
- If you want a richer chocolate flavor for the arms, use melted dark chocolate in a piping bag with a small tip.
- Store finished cookies in an airtight container at room temperature for up to 3 days.
Nutrition
- Serving Size: 1 cookie
- Calories: 180
- Sugar: 22g
- Sodium: 110mg
- Fat: 8g
- Saturated Fat: 3g
- Unsaturated Fat: 5g
- Trans Fat: 0g
- Carbohydrates: 26g
- Fiber: 0g
- Protein: 2g
- Cholesterol: 5mg