
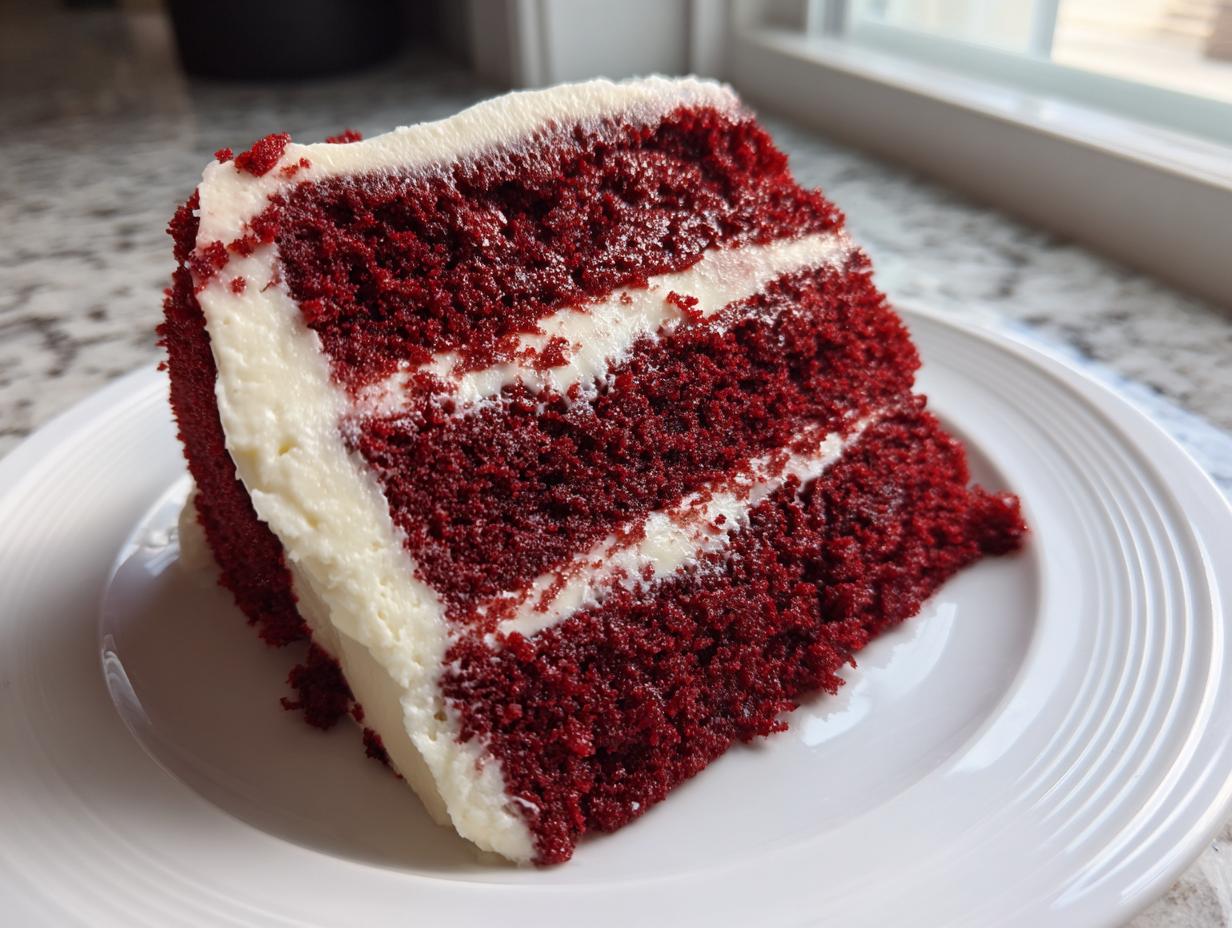

There’s something truly magical about cutting into a slice of perfectly baked, deeply colored cake, isn’t there? It should feel like velvet between your fingers and melt when it hits your tongue. Forget those dry, vaguely pink imitations! I’m sharing the recipe that has become my go-to for every birthday, holiday, and craving: The Best Ultra-Moist Southern Red Velvet Cake. This isn’t just another recipe; it’s a classic American standard perfected right here in my kitchen, just like my grandmother taught me about following tradition while still aiming for perfection. If you want that iconic crimson color and cloud-like texture, you need to stick with me on this journey.
- Why This Is the Best Red Velvet Cake Recipe You Will Ever Make
- Gathering Ingredients for Your Classic Red Velvet Cake
- Step-by-Step Instructions for the Easiest Red Velvet Cake
- Tips and Tricks: Mastering the Southern Red Velvet Cake
- Serving Suggestions for Your Red Cake for Celebrations
- Storage and Make-Ahead Instructions for Your Red Velvet Cake
- Frequently Asked Questions About This Red Velvet Cake Recipe
- Nutritional Snapshot of This Homemade Red Velvet Cake
- Share Your Decadent Crimson Cake Creation
Why This Is the Best Red Velvet Cake Recipe You Will Ever Make
I know, everyone claims to have the ‘best’ anything, but trust me on this one. This Southern Red Velvet Cake is different. We’re aiming for ultra-moist, nearly feather-light, and that deep, unapologetic crimson color that looks perfect for any special occasion. My goal, always, is foolproof baking, so even if you’re nervous about layer cakes, this recipe will deliver. It’s the ultimate classic recipe, tweaked for maximum deliciousness. If you want a guaranteed winner, this truly is the Moist Red Velvet Cake Recipe you need saved!
Achieving the Signature Soft and Fluffy Cake Texture
The secret to that actual ‘velvet’ is twofold: oil and buttermilk. We skip butter in the cake batter because oil keeps things incredibly moist that sticks around longer than butter does. The buttermilk, especially when mixed with a tiny bit of vinegar, reacts beautifully with the baking soda. It creates the softest crumb structure you can imagine!
But here’s my biggest plea: make sure everything is at room temperature. Warm buttermilk and eggs blend into that oil mixture so much better. If they are cold, the batter can curdle slightly, and that’s when the velvet texture goes flat. You want fluff, not lumps!
Tips for a Deep, Authentic Red Velvet Cake Color
Nobody wants a pale pink cake; we want deep, dramatic red. This is where you can’t skimp! If you use the standard liquid food coloring from the grocery aisle, you end up needing way too much, and it can really throw off the taste. That’s an amateur mistake, oops!
I insist on using high-quality gel food coloring. It’s concentrated, so you use less product, which means you don’t mess with the chemistry of the batter. Mix the gel right into your buttermilk before adding it to the flour mixture. That way, you get that rich, decadent crimson color every single time!
Gathering Ingredients for Your Classic Red Velvet Cake
Okay, now that we know *why* this cake is going to be amazing, let’s talk about what you need to pull out of the pantry. Baking a truly great red velvet cake from scratch requires precision, but it uses mostly common ingredients. Remember what I said about room temperature? That applies here too! You need beautiful, cooperative ingredients ready to play well together.
Don’t even *think* about grabbing cold cream cheese for the frosting, or you’ll end up struggling to mix it. Organization is my secret weapon when I’m getting ready to bake. Lay everything out!
Ingredients for the Ultra-Moist Red Velvet Cake Layers
For the cake itself, we rely on oil for moisture and buttermilk for that slight tang. Here’s the exact lineup you’ll need for those two gorgeous 9-inch layers:
- 1 1/2 cups vegetable oil (not melted butter, remember!)
- 1 1/2 cups granulated sugar
- 2 large eggs
- 1 teaspoon vanilla extract
- 1 tablespoon unsweetened cocoa powder (just a touch for depth)
- 1 teaspoon baking soda
- 1 cup buttermilk, room temperature (this is non-negotiable!)
- 1 teaspoon white vinegar
- 2 1/2 cups all-purpose flour
- 1 teaspoon salt
- 1/4 cup red food coloring (gel is highly recommended)
Ingredients for the Superior Cream Cheese Frosting Recipe
This is the classic frosting that makes or breaks the experience. You cannot substitute margarine here; real butter and real cream cheese give you that superior tanginess needed to cut through the richness of the cake. Make sure your dairy components are softened!
- 1 (8 ounce) package cream cheese, softened (softened!)
- 1/2 cup unsalted butter, softened (also soft!)
- 3 cups powdered sugar, sifted (sifting prevents lumps, seriously)
- 1 teaspoon vanilla extract
Step-by-Step Instructions for the Easiest Red Velvet Cake
I promised you an easy, foolproof recipe, and here we go! This method is streamlined so you can get that stunning result without a headache. Before we mix anything, make sure your oven is humming along at 350°F (175°C). And if you haven’t already, grease and flour those two 9-inch cake pans. Trust me, these simple starting steps prevent so much heartache later on. This is how you make the Easy Red Velvet Cake everyone raves about! For more simple baking victories, check out my guide to an easy chocolate cake.
Mixing the Red Velvet Cake Batter
Grab your big bowl first! Whisk your vegetable oil and sugar together nice and smooth. Then, beat in those two eggs one at a time, followed by the vanilla. In a *separate* tiny spot, mix your dry additions—the cocoa and baking soda. Now, let’s get that buttermilk activated; mix it with the white vinegar and let it sit for five minutes to curdle just a touch. Finally, mix your deep red food coloring right into that buttermilk mixture.
The magic happens in the alternating steps. Alternate adding the flour/salt mix and that gorgeous red buttermilk to your wet ingredients. But listen closely: start and end with the dry ingredients. Mix gently only until it’s just combined. If you see streaks of flour, stop mixing immediately! Overmixing kills the velvet.
Baking and Cooling the Red Velvet Cake Layers
Pour the batter evenly into your prepared pans. Pop them into that 350°F oven for about 30 to 35 minutes. You know it’s ready when a wooden pick slides out clean. Don’t peek too early, or you might lose that fluffy top!
This next part is important for clean release. Let the cakes chill out in the pans for exactly 10 minutes. After ten minutes, you invert them gently onto a wire rack to cool completely. If you try to frost them warm—we’ve all been there—you’ll end up with a melted, runny mess. Patience pays off here!
Preparing the Classic Cream Cheese Frosting
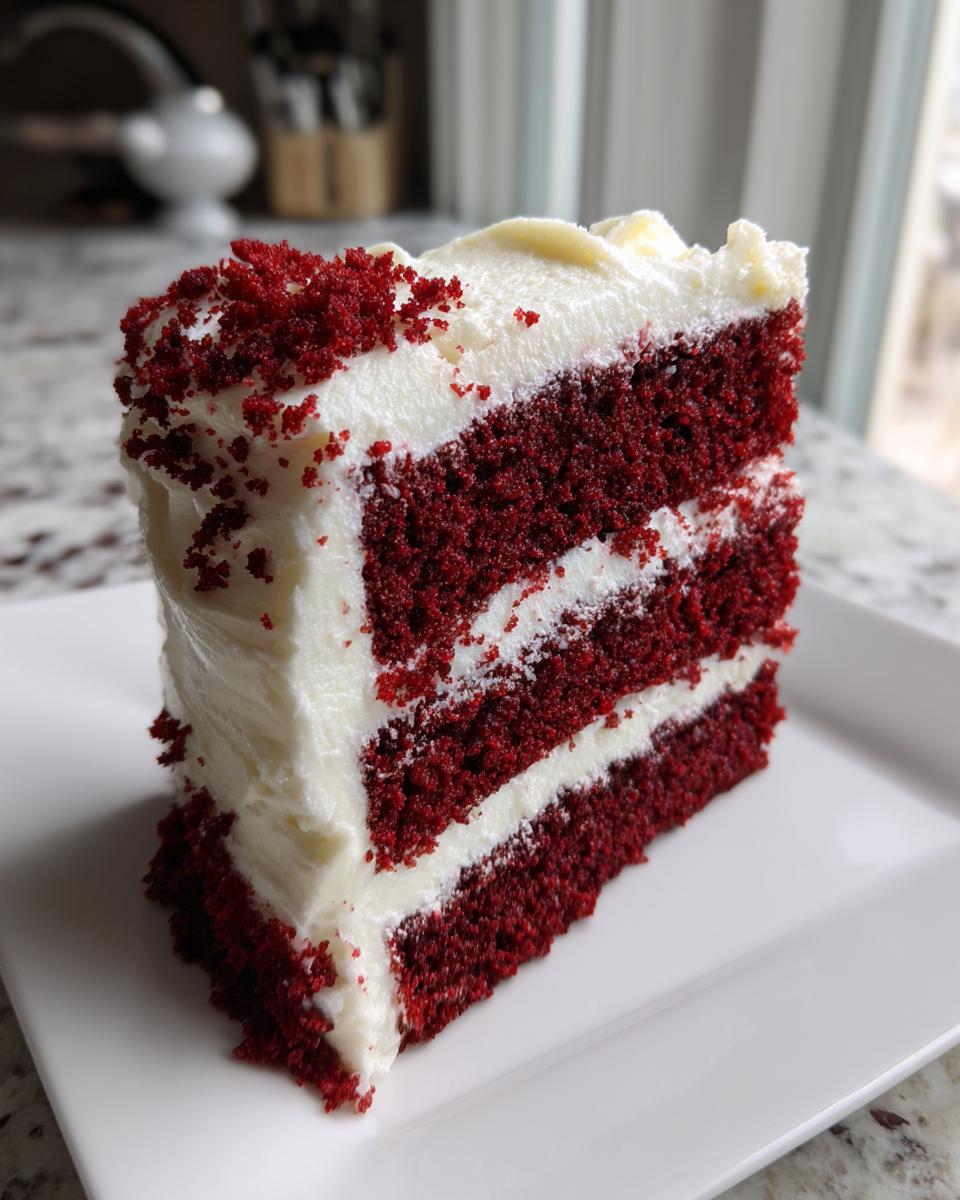
While those layers are cooling, make the star of the show! In a large bowl, beat your softened cream cheese and softened butter until it looks creamy and there are no lumps left—smooth is the goal. Now, turn the mixer speed down low! Slowly add your sifted powdered sugar, cup by cup. If you dump it all in at once, you’ll redecorate your kitchen in white powder. Once it’s incorporated, crank the speed up and beat until it’s light and fluffy. Swirl in that vanilla right at the end.
Assembling Your Velvety Layer Cake
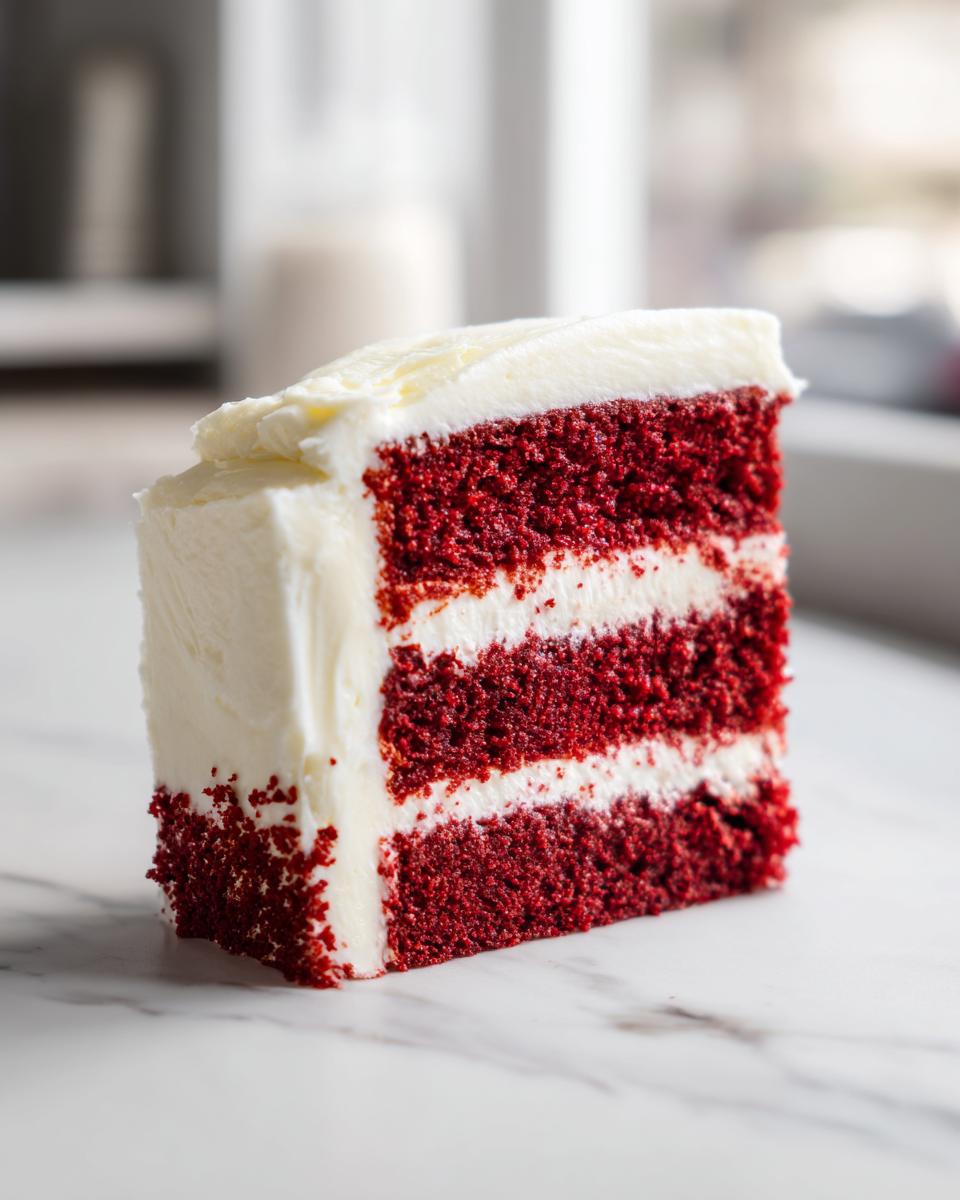
Make absolutely certain those cakes are completely cool—I mean *cool* to the touch, not just ‘not hot.’ Once cooled, place your first layer down. Spread a generous blanket of that homemade cream cheese frosting over the top. Place the second layer on top of that, and then use the remaining frosting to cover the sides and top beautifully. This finishes off the look of your stunning, Velvety Layer Cake!
Tips and Tricks: Mastering the Southern Red Velvet Cake
Baking is chemistry, but great baking is all about experience, right? I know, I preach about following the steps, but when you’ve tested a recipe as many times as I have right here in my own kitchen, you pick up a few secrets. This section is where I pass along my cheat sheet so you can nail that perfect Southern Red Velvet Cake on the first try. You won’t need fancy equipment or weird ingredients if you follow these key pointers. Think of these as the actual Red Velvet Tips and Tricks that never fail, ensuring you get that decadent crimson cake!
Ingredient Quality for the Best Red Velvet Cake
Let’s circle back to the most critical elements: color and flavor boosters. For that unbelievable deep red I keep talking about, you really need to invest in gel coloring. I learned the hard way that liquid dye just doesn’t pack the punch, and you end up needing way too much, which can throw off the taste. Gel gives you maximum color impact with minimum interference.
Also, don’t underestimate the little bit of cocoa powder we threw in there! It’s not for making it a chocolate cake; it really just balances out the sweetness and helps the red dye pop. If you’re thinking about substituting, maybe check out my favorite pumpkin cheesecake bars sometime, but for this red velvet cake, stick to the list! Stale cocoa smells dusty, and that will definitely ruin the delicate flavor profile we’re building here.
Troubleshooting Common Red Velvet Cake Issues
Even with the best instructions, sometimes things go sideways! Here are my go-to fixes based on what used to happen to my cakes when I first started testing this recipe.
What if my cake sinks in the middle? Usually, that means your oven temperature was inaccurate, or you opened the door too early. Never open that oven before the 25-minute mark! If it sinks slightly but smells done, cover it loosely with foil and bake 5 more minutes. A slight dip is fine, especially if you plan on piling on that lovely frosting. We want perfection, but we also accept reality in a real kitchen—it happens!
Now, for the frosting: if your Cream Cheese Frosting Recipe turns out too runny, don’t panic! It happens if your cheese or butter was a tad too warm. Just pop the whole bowl into the freezer for about 10 minutes. This chills the fats down just enough so they can grab onto more powdered sugar when you beat it again. Add a little more sifted powdered sugar, and you’ll be back to piping perfection!
One last thing, which I mentioned in the notes earlier: if you want that classic, slightly sharp Southern tang to balance the sugar, make sure you let that buttermilk and white vinegar sit together for five minutes before adding it to the batter. That little bit of curdling is essential for that characteristic flavor!
Serving Suggestions for Your Red Cake for Celebrations
This beautiful Red Cake for Celebrations deserves a show-stopping presentation! Since this recipe is so classic and decadent, it feels fancy right out of the box, but a few little touches can elevate it from a delicious homemade cake to the centerpiece of your party. I love making a huge visual impact with something that was actually simple to execute. That’s my favorite kind of cooking victory!
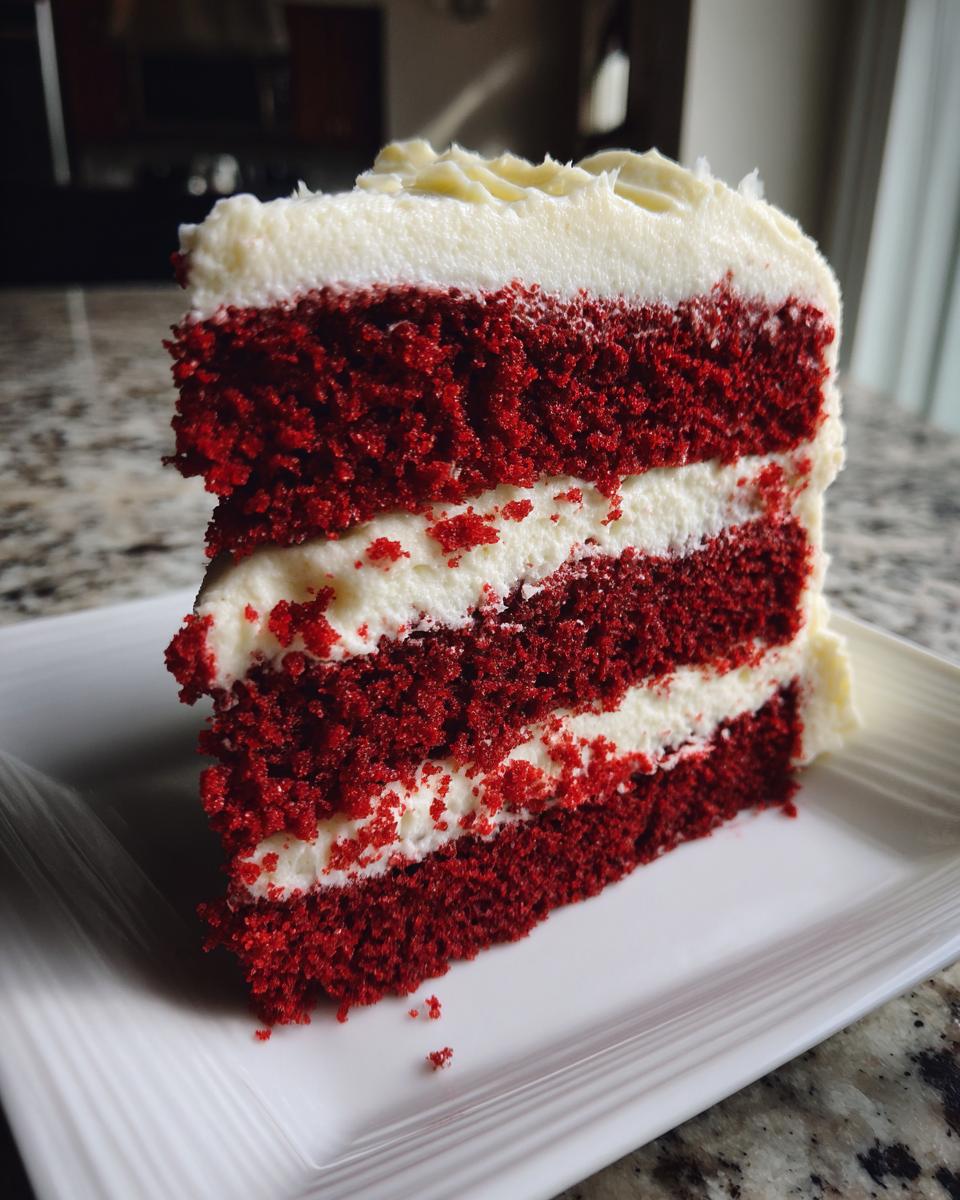
For birthdays, I always make extra cake crumbs from trimming the layers completely flat. Then, I press those moist crumbs gently around the bottom edge of the cake after it’s frosted. It frames the cake beautifully and makes for a perfect little snack for whoever helps clean up later! It adds a bit more texture, too.
Pairing Ideas for Valentine’s Day and Holidays
Red Velvet just screams romance, doesn’t it? For Valentine’s Day, skip the fancy piping and try to keep the frosting smooth and pristine. A few edible rose petals scattered on top or maybe some dark chocolate shavings contrasting against that bright red looks absolutely stunning. It feels so elegant, but honestly, it’s just a layer cake!
If you’re making this for Christmas or another winter get-together, you can go high-contrast. Use that cream cheese frosting, but don’t try to cover the whole thing perfectly smooth. Instead, try rustic swoops and peaks, making it look like freshly fallen snow! A couple of small, sugared cranberries sprinkled on top adds a festive touch without making it look too busy. For an entirely different, but equally festive holiday bake, you should look at my easy apple galette when you need a break from all that red!
Presentation Tips for the Perfect Slice
The best way to serve this, in my humble opinion, is slightly chilled but brought out about 30 minutes before eating. That way, the cake layers are soft, but the cream cheese frosting has held just enough structure that it doesn’t run everywhere when you cut into it. A warm cake plus cold frosting equals a sliding disaster!
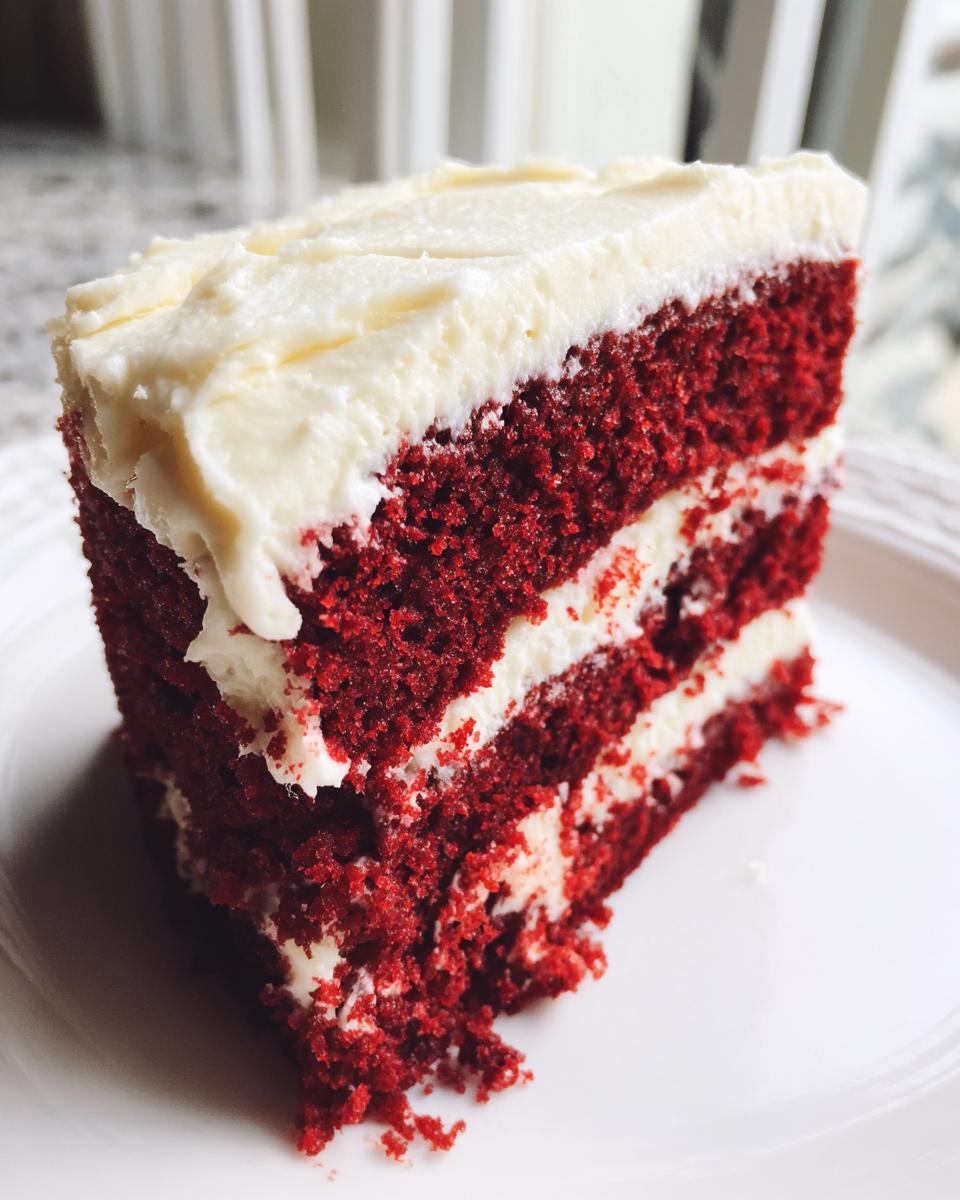
Always use a long, thin, sharp knife, and clean the blade between every single cut with a warm, damp paper towel. That tip separates those of us who make beautiful slices from those who end up with messy layers on the serving plate. Clean cuts mean everyone gets to see that perfect, soft, velvety crumb inside!
Storage and Make-Ahead Instructions for Your Red Velvet Cake
Okay, this cake is so good that you might have leftovers—which is a wonderful problem to have! Knowing how to store this beauty correctly is key to making sure you get that fresh, soft texture the next day. Since this is a classic Southern favorite, designed for celebrations, knowing how to prep ahead of time is a lifesaver when you’re hosting a big party. I’ve got a few tricks up my sleeve for keeping this red velvet cake perfect until you’re ready to serve it. You can totally get a head start on this, just like I do when I prep my make-ahead recipes earlier in the week.
Keeping Your Frosted Cake Fresh
When it comes to storage for a frosted cake, we have to think about the cream cheese frosting. Dairy means refrigeration is usually required, but chilling cake layers too much can actually make them taste a little dense. Here’s my rule of thumb:
If you live somewhere cool or dry, you can keep this cake covered tightly on the counter for up to two days. Make sure it’s in a container or under a cake dome to protect it from air. The high sugar content in the frosting helps keep it stable enough for short periods.
If your kitchen is warm, or if you plan on keeping it longer than two days, you must refrigerate it. When you decide to serve it, pull that cake out of the fridge about an hour before slicing. This gives the butter and cream cheese in the frosting time to warm up slightly, returning that beautiful soft texture to both the frosting and the cake layers underneath.
Making This Red Velvet Cake Ahead of Time
For big events where I need every minute on the day of the party, I always bake the layers ahead of time. You can bake the layers and let them cool completely, wrap each one tightly in plastic wrap while they are still slightly cool (this locks in moisture!), and store them in an airtight container in the freezer for up to three months. Yes, months!
When you’re ready to assemble, pull the layers out, let them thaw on the counter for about an hour while still wrapped. Once unwrapped, they are ready to frost! I usually make the frosting the afternoon before I plan to assemble the cake. Keep that frosting covered tightly in the fridge, and give it a quick hand-whisk before spreading it on the cake. This lets you tackle the wet, messy part of the recipe earlier, leaving only assembly and decorating for the big day!
Frequently Asked Questions About This Red Velvet Cake Recipe
It’s funny how many questions pop up when you bake something classic like this! I’ve tried to cover everything in the recipe notes, but I know sometimes you just need a direct answer. I pulled together some of the most common things I hear from readers when they are tackling their first Classic Red Velvet Cake, or when they are trying to make it even better than the last time. Check these out—I hope they clear up any last-minute baking jitters. If you ever need more inspiration or want to see what else is cooking in my kitchen, check out the main blog!
Why is it called ‘Red Velvet Cake’ if it has cocoa powder?
That’s such a good question that gets to the heart of tradition! Back in the day, before we had this super-concentrated gel coloring, the small amount of natural acidity from the buttermilk reacting with the cocoa powder gave the cake a subtle reddish-brown hue. It wasn’t bright red like ours is today, but it had a rich, velvety tint. We now rely heavily on the food coloring for the color, but that hint of cocoa is still essential for the slightly complex, not-too-sweet flavor profile of this Old Fashioned Cake Recipe.
Can I use regular milk if I don’t have buttermilk for this moist red velvet cake recipe?
You absolutely can fake it if you need to, but I highly recommend finding the real thing or making your own substitute! If you must use regular milk, add the 1 teaspoon of white vinegar to 1 cup of whole milk, give it a quick stir, and let it sit for 5 to 10 minutes until it looks slightly curdled. That little bit of acid activates the baking soda and gives you that necessary lift and tenderness that makes this cake so Soft and Fluffy. Without it, your cake might be a little denser.
How much food coloring is truly necessary for the best red velvet cake?
If you use the liquid food coloring that comes in the little plastic bottle, you might need almost the entire 1/4 cup, and honestly, I worry that much liquid might change the batter structure. That’s why I push the gel coloring! With a good gel, you can usually achieve that deep, vibrant color with just a teaspoon or two. Always mix the coloring into the wet ingredients (the red buttermilk mixture) before combining everything. You want to see that bold color before it goes into the oven, not hope it shows up later. See this article if you want to read more about the history!
Can I make this red velvet cake recipe ahead of time?
Yes, you totally can! This is one of my top Party Cake Ideas because it’s so great for scheduling. I bake the layers ahead, cool them completely, wrap them super tight in plastic wrap—sometimes two layers of wrap—and freeze them. They stay perfect for weeks! Then, you can frost the cake the day before your big event. Just make sure you pull it out of the fridge about an hour before you plan to serve it so the cake and frosting soften up nicely.
Nutritional Snapshot of This Homemade Red Velvet Cake
Now, don’t look at this part if you’re trying to avoid temptation! This is where we face the delicious reality of baking from scratch. Because we use oil and lots of sugar in this decadent recipe, it’s certainly a treat rather than an everyday snack. I always make everything with love, measuring carefully, but remember what I always say: these numbers are just estimates!
My kitchen isn’t a sterile lab, and your ingredients might vary slightly in fat or sugar content depending on the brand of oil or how firmly you pack your powdered sugar. That’s the reality of real, passionate home cooking! But for those of you doing some rough tracking or planning for keto meal plan delivery alternatives, here’s the general idea for one generous slice of this Red Velvet Cake, assuming you get 12 servings total:
- Serving Size: 1 slice
- Calories: Approximately 450
- Total Fat: 25g (with about 9g saturated fat)
- Total Carbohydrates: 58g
- Sugar: 55g (Yep, it’s a celebration cake!)
- Protein: 4g
- Sodium: 300mg
Because we aren’t obsessing over substitutions here—we want flavor!—this isn’t a low-sugar option. If you ever need to compare this to something like a keto meal plan delivery service, just know this cake is worth every single glorious calorie when it’s time to celebrate!
Share Your Decadent Crimson Cake Creation
That’s it! Now you have all the secrets to making the most incredibly moist, truly crimson Southern Red Velvet Cake. I’ve poured my heart into this recipe, showing you exactly how to get that velvety crumb and that tangy cream cheese frosting just right. But the story doesn’t end with you pulling yours out of the oven!
This is where the fun really begins. I absolutely love hearing from you all when you try one of my family recipes. Did you manage to get that perfect color? How did your layers stack up? Did the kids devour it in five minutes flat?
Leave a Comment and Rate the Recipe
Please take a moment to drop a comment below. Tell me how the process went for you. Honesty helps everyone out! If you feel like this is truly the **Best Red Velvet Cake** you’ve ever made, please give it the five stars it deserves! Your feedback helps other home bakers feel confident enough to try this classic recipe, too.
Show Off Your Stunning Red Cake
And of course, I want to see the beauty you created! If you snap a picture of your finished cake—maybe it’s ready for a birthday, or waiting for Valentine’s Day—please share it on social media and tag me! It makes my day to see my recipes living happily in your kitchens. Use the hashtag so I can find your pictures easily!
If you ever have a question while you’re baking or need to get in touch for any other reason, don’t hesitate to reach out through my contact page. Happy baking, and enjoy every single decadent, crimson slice!
PrintThe Best Ultra-Moist Southern Red Velvet Cake with Classic Cream Cheese Frosting
Follow this easy, foolproof recipe to create a classic Southern Red Velvet Cake. You get a deeply colored, soft, and velvety crumb paired with a superior homemade cream cheese frosting for your next celebration.
- Prep Time: 25 min
- Cook Time: 35 min
- Total Time: 60 min
- Yield: 12 servings 1x
- Category: Dessert
- Method: Baking
- Cuisine: American
- Diet: Vegetarian
Ingredients
- 1 1/2 cups vegetable oil
- 1 1/2 cups granulated sugar
- 2 large eggs
- 1 teaspoon vanilla extract
- 1 tablespoon unsweetened cocoa powder
- 1 teaspoon baking soda
- 1 cup buttermilk, room temperature
- 1 teaspoon white vinegar
- 2 1/2 cups all-purpose flour
- 1 teaspoon salt
- 1/4 cup red food coloring (liquid or gel)
- 1 (8 ounce) package cream cheese, softened
- 1/2 cup unsalted butter, softened
- 3 cups powdered sugar, sifted
- 1 teaspoon vanilla extract
Instructions
- Preheat your oven to 350°F (175°C). Grease and flour two 9-inch round cake pans.
- In a large bowl, whisk together the vegetable oil and granulated sugar until combined. Beat in the eggs one at a time, then mix in the vanilla extract.
- In a separate small bowl, mix the cocoa powder and baking soda. Add this mixture to the wet ingredients and stir until just combined.
- In a small cup, mix the buttermilk and white vinegar together; let it sit for 5 minutes to curdle slightly.
- In another small bowl, mix the red food coloring into the buttermilk mixture until you achieve a deep crimson color.
- In a medium bowl, whisk together the flour and salt.
- Alternate adding the dry ingredients and the red buttermilk mixture to the wet ingredients, beginning and ending with the dry ingredients. Mix only until the batter is smooth. Do not overmix.
- Pour the batter evenly into the prepared cake pans.
- Bake for 30 to 35 minutes, or until a wooden pick inserted into the center comes out clean.
- Let the cakes cool in the pans for 10 minutes before inverting them onto a wire rack to cool completely.
- Prepare the frosting: In a large bowl, beat the softened cream cheese and butter together until smooth and creamy.
- Gradually add the sifted powdered sugar, mixing on low speed until incorporated, then increase speed to medium and beat until fluffy. Mix in the vanilla extract.
- Once the cakes are completely cool, frost the layers and the outside of the cake. This recipe is a great alternative to using meal planning services when you want a homemade treat.
Notes
- For the deepest red color, use a high-quality gel food coloring instead of liquid.
- Use room temperature ingredients, especially the buttermilk and eggs, for a better cake texture.
- If you want a slight tang that balances the sweetness, add 1 teaspoon of white vinegar to the buttermilk mixture and let it sit for 5 minutes before adding it to the batter.
- This cake pairs well with a simple keto meal plan for those watching sugar intake, though the cake itself is a treat.
Nutrition
- Serving Size: 1 slice
- Calories: 450
- Sugar: 55g
- Sodium: 300mg
- Fat: 25g
- Saturated Fat: 9g
- Unsaturated Fat: 16g
- Trans Fat: 0g
- Carbohydrates: 58g
- Fiber: 1g
- Protein: 4g
- Cholesterol: 50mg