
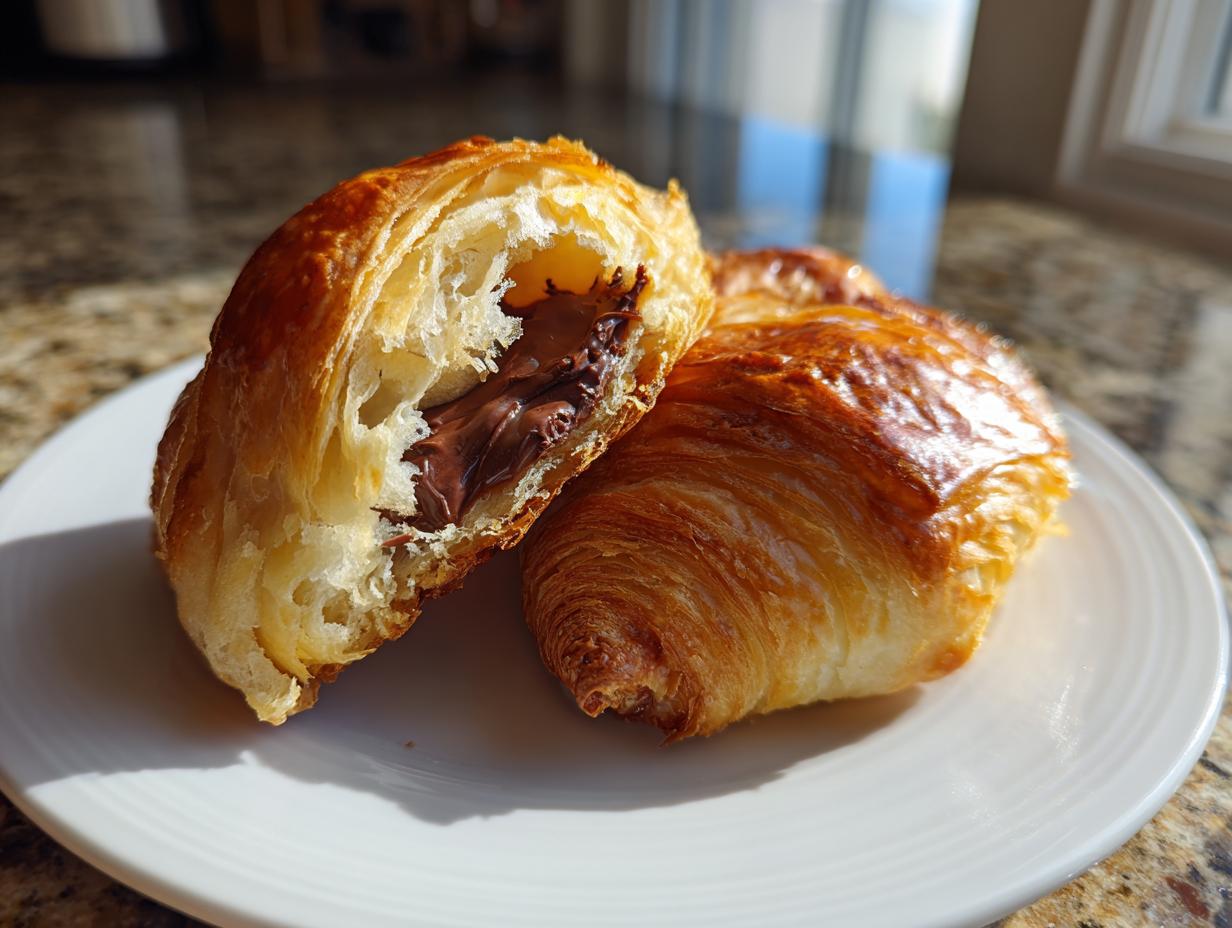

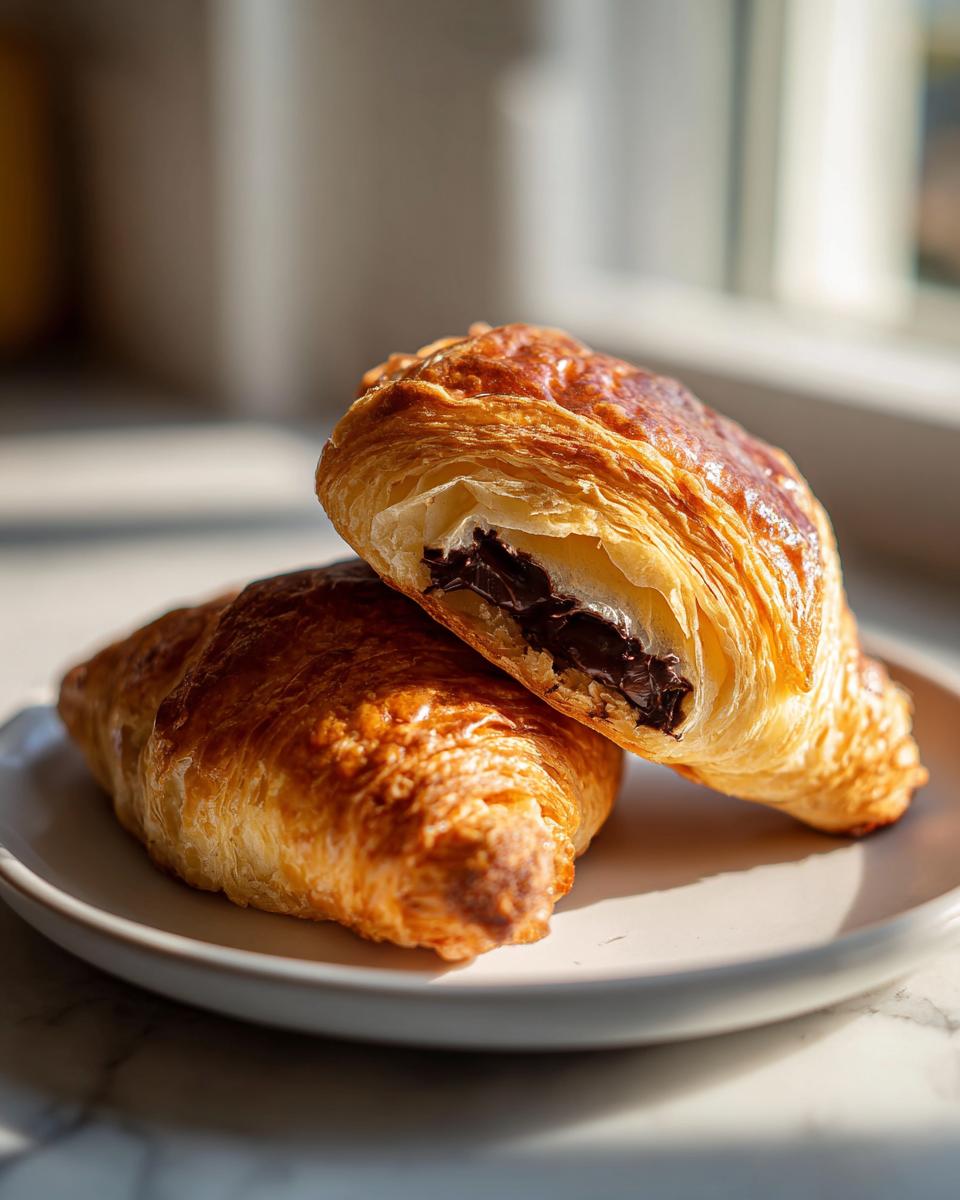
Oh, friends, let me tell you something important: I love the romance of making *pain au chocolat* from scratch, folding butter fifty times, and spending an entire day playing pastry chef. But let’s be real, who has that time on a regular Tuesday morning? Nobody! That’s why I swear by this particular recipe. It’s my little secret weapon for getting that unbelievably flaky, buttery, rich **chocolate croissant** experience in under 40 minutes of total time. Trust me, using good quality, store-bought puff pastry isn’t cheating; it’s just being smart. It means you get those perfect layers without the kitchen disaster. You’re going to love how simple this is! Need more quick breakfast ideas? You can check out my dedicated section for all my favorite breakfast bakes right here.
- Why You Will Make These Easy Chocolate Croissants Often
- Ingredients for Quick Chocolate Croissants Using Puff Pastry
- Step-by-Step Guide to Making Flaky Chocolate Croissants at Home
- Tips for Achieving Bakery Style Chocolate Croissants
- Ingredient Notes and Substitutions for Your Chocolate Croissant
- Storage and Reheating Instructions for Leftover Chocolate Croissants
- Serving Suggestions for Homemade Pain au Chocolat
- Frequently Asked Questions About Making Easy Chocolate Croissants
- Share Your Homemade Pain au Chocolat Creations
- Share Your Homemade Chocolate Croissant Creations
Why You Will Make These Easy Chocolate Croissants Often
I’m not kidding when I say these little beauties will become a weekly staple once you try them. They hit that perfect sweet spot between being truly indulgent and being ridiculously fast to pull together. Forget waiting for a leisurely Saturday morning; these are for right now!
- You get that authentic, bakery-style flakiness without spending hours laminating dough. It’s pure magic thanks to that pre-made puff pastry!
- The total time commitment is less than 40 minutes from start to finish. Seriously, that’s faster than driving to the nearest good French bakery.
- The melted chocolate filling is heavenly. I use bittersweet because it balances the butteriness of the pastry so well, but use what you love!
- They are beautiful! Even with the shortcut, they puff up perfectly and get that gorgeous golden sheen from the egg wash. They look like you spent all day on them.
- This recipe is completely reliable. If you can handle opening a package and rolling dough, you won’t have any failures here. That’s the best part about this quick chocolate croissant recipe.
Ingredients for Quick Chocolate Croissants Using Puff Pastry
Look, the real brilliance of this recipe is that it leans heavily on the store-bought puff pastry. If you tried to make the dough from scratch, you wouldn’t call this an easy chocolate croissant, right? So let’s celebrate the freezer aisle hero! I always keep a package of all-butter puff pastry tucked away for emergencies—or, you know, spontaneous brunch.
Here’s exactly what you need to pull this off. It’s a short list, which is exactly how I like my ingredient rundown for any good homemade French bread recipe alternative.
- One standard package (it’s usually about 14.1 ounces) of all-butter puff pastry. Make sure it’s thawed completely before you even think about touching it!
- About 4 ounces of really good chocolate. I love using bittersweet—that high-quality dark chocolate—but semi-sweet works great too if you like things a little sweeter. You need to cut this into sticks, roughly 1/4-inch thick. You’ll need about 12 sticks total for 12 croissants.
- One large egg. This is for the wash, so don’t crack it yet!
- One tablespoon of water. This thins out the egg wash just a touch so it brushes on nicely.
- One tablespoon of coarse sugar. This is totally optional, but honestly, that little crunch on top of a buttery pastry? Yes, please. It makes them look so professional!
That’s it! No fancy fermentation, no proofing for hours. Just flaky, buttery goodness waiting to happen thanks to the best store bought puff pastry desserts hack ever.
Step-by-Step Guide to Making Flaky Chocolate Croissants at Home
This is where the magic happens, and honestly, it’s so fast you won’t believe these are going to be authentic-tasting homemade pain au chocolat. The key to success here is making sure your pastry stays cold until it hits the hot oven. If things get sticky, just pop it back in the fridge for 10 minutes—it’s the ultimate simplicity hack!
Preparation and Cutting the Puff Pastry for Your Chocolate Croissant
First things first: Thaw that pastry! I usually leave mine in the fridge overnight, but if you get the urge suddenly, let it sit on the counter for about 30 minutes. Don’t rush it too much, or it gets messy. While it’s softening up, crank your oven to 400°F (200°C) and get two baking sheets ready. Line them with parchment paper—this step saves so much cleanup later, trust me on this!
Once thawed, gently unfold your sheet onto a very lightly floured surface. If the edges are wonky, smooth them out with a knife to make a nice, clean rectangle. Now, take your sharpest knife or pizza cutter and slice that rectangle lengthwise right down the middle. You end up with two long strips. Next, slice those strips crosswise into six even pieces each. If your pastry sheet was standard size, you should have exactly 12 nice little rectangles ready to go. See? Already way faster than traditional methods!
Assembling the Melted Chocolate Filling in the Chocolate Croissant
Okay, take one of those little rectangles. Lay it down so the short edge is closest to you. Take one of your chocolate sticks—remember how we cut them earlier?—and place it right near that short edge. Now, you’re going to roll it over just once, covering that first piece of chocolate entirely. It’s important to keep the chocolate centered in the dough roll.
After that first roll, place a second chocolate stick right where the dough edge lands on top of the first piece. Then, keep rolling up the rest of the dough until you have a complete little log. Flip that whole thing over gently so the seam ends up underneath—that’s the trick to keeping them tidy while they bake! Repeat this process for all 12 pieces. If you want to see some visuals on rolling techniques, I have a few pointers on folding dough for my pretzel bites that might give you an idea on gentle handling.
Egg Wash Application and Baking the Puff Pastry Chocolate Croissants
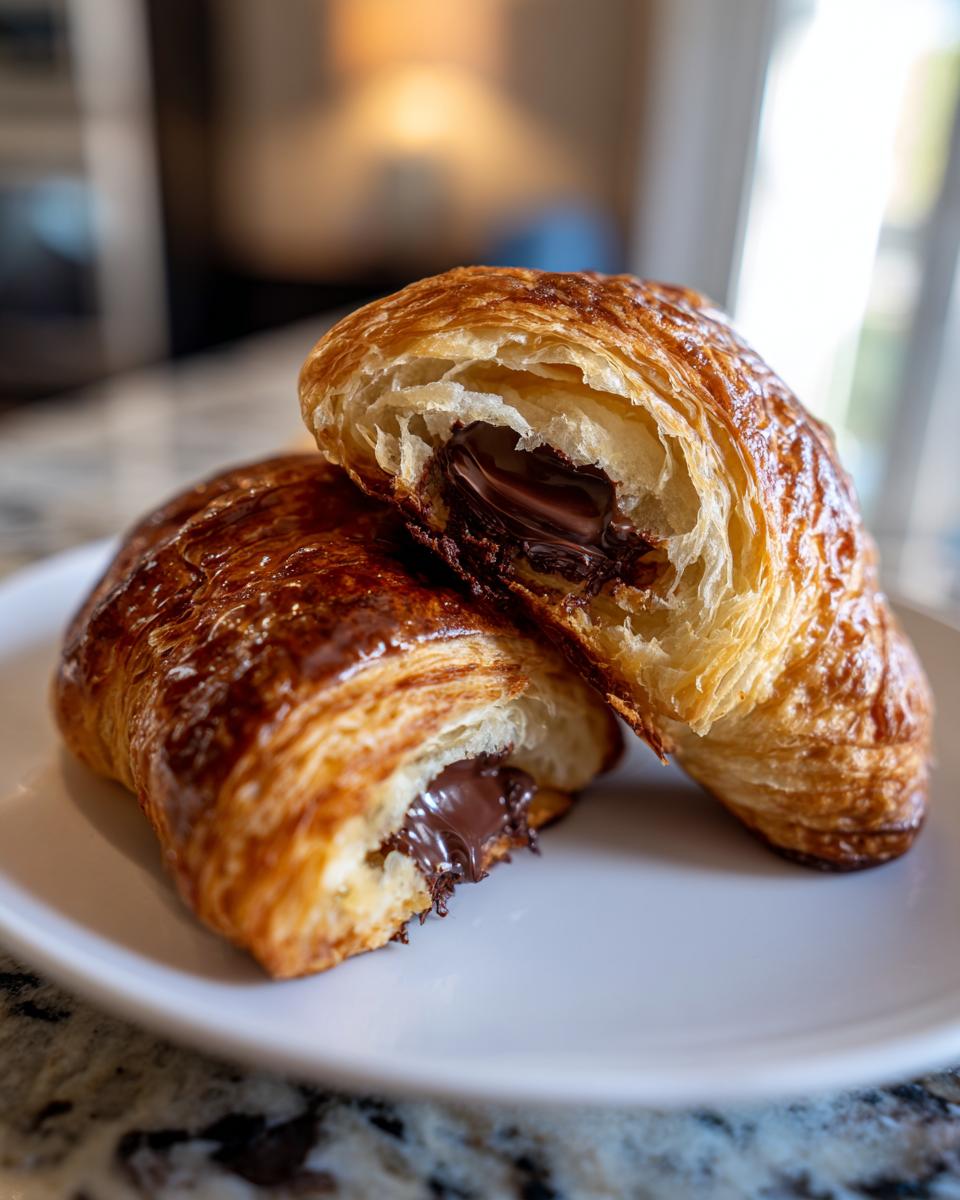
We need color and shine, so let’s make the wash! Whisk that single egg with one tablespoon of water until it’s completely blended and runny. Don’t skip this; the egg wash is what gives your puff pastry chocolate croissants that irresistible, deep golden color that screams “I probably woke up at 4 AM to make this.”
Brush the tops and sides of every assembled croissant lightly with that wash. If you’re using the coarse sugar, sprinkle it on now! Place them spaced out on your parchment-lined baking sheets. Pop them into that preheated 400°F (200°C) oven. They only need about 15 to 20 minutes. Keep an eye on them! You want them puffed up high and a beautiful, deep golden brown all over. Once they look perfect—not pale, but nicely bronzed—pull them out immediately. Let them sit on the pan for just five minutes to firm up a bit before carefully moving them to a wire rack. Serve them warm while that chocolate filling is still gooey!
Tips for Achieving Bakery Style Chocolate Croissants
Even though we’re using a shortcut, we still want that bakery magic, right? I’ve learned a few little tricks over the years to make sure these flaky croissants at home look and taste like I didn’t cheat by using the frozen aisle. It all comes down to temperature management and loving that flaky texture.
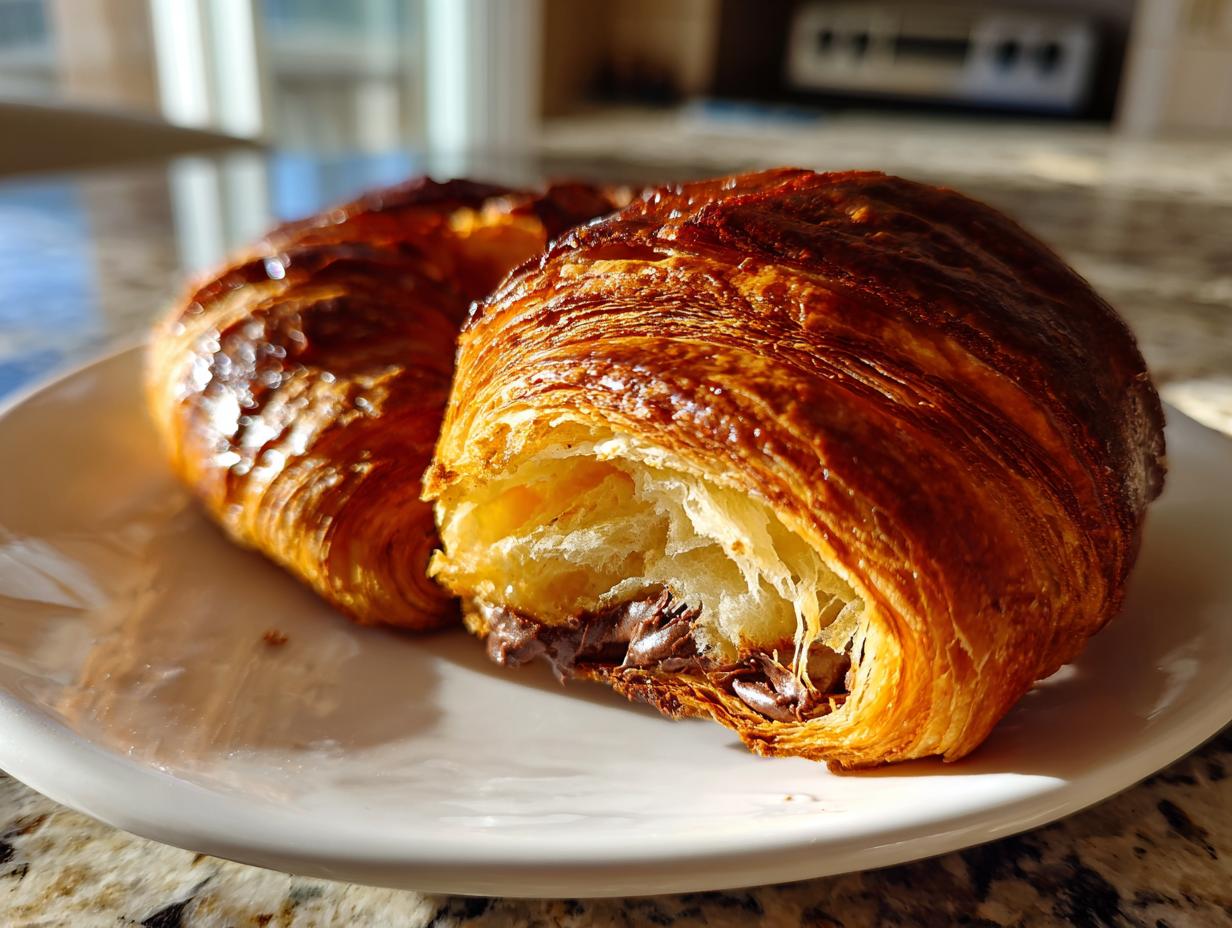
The number one enemy of puff pastry is warmth. If your kitchen is hot, or if you work too slowly, that beautiful butter layered inside the dough starts to melt. When the butter melts before it hits the oven, it just makes the pastry greasy instead of providing those steam pockets that create lift and flakiness. If you notice your dough getting soft or sticky while you’re cutting and rolling, stop immediately! Don’t push it. Just slide the whole tray of cut croissants back into the refrigerator for 10 minutes. It’s a small pause, but it firms the butter right back up, promising you those spectacular layers when they bake. This is the secret to genuinely flaky croissants at home.
Another thing that really elevates the look is the egg wash. We used one coat initially, but if you want that deep, glossy brown finish that true French bakeries boast, you need a double coat. Apply your first egg wash right before baking. Halfway through the baking time—maybe around the 10-minute mark—carefully pull the tray out, gently brush on a second, very thin layer of wash, and slide them right back in to finish. This second coat really locks in the shine and color. It makes these buttery chocolate pastries look incredible!
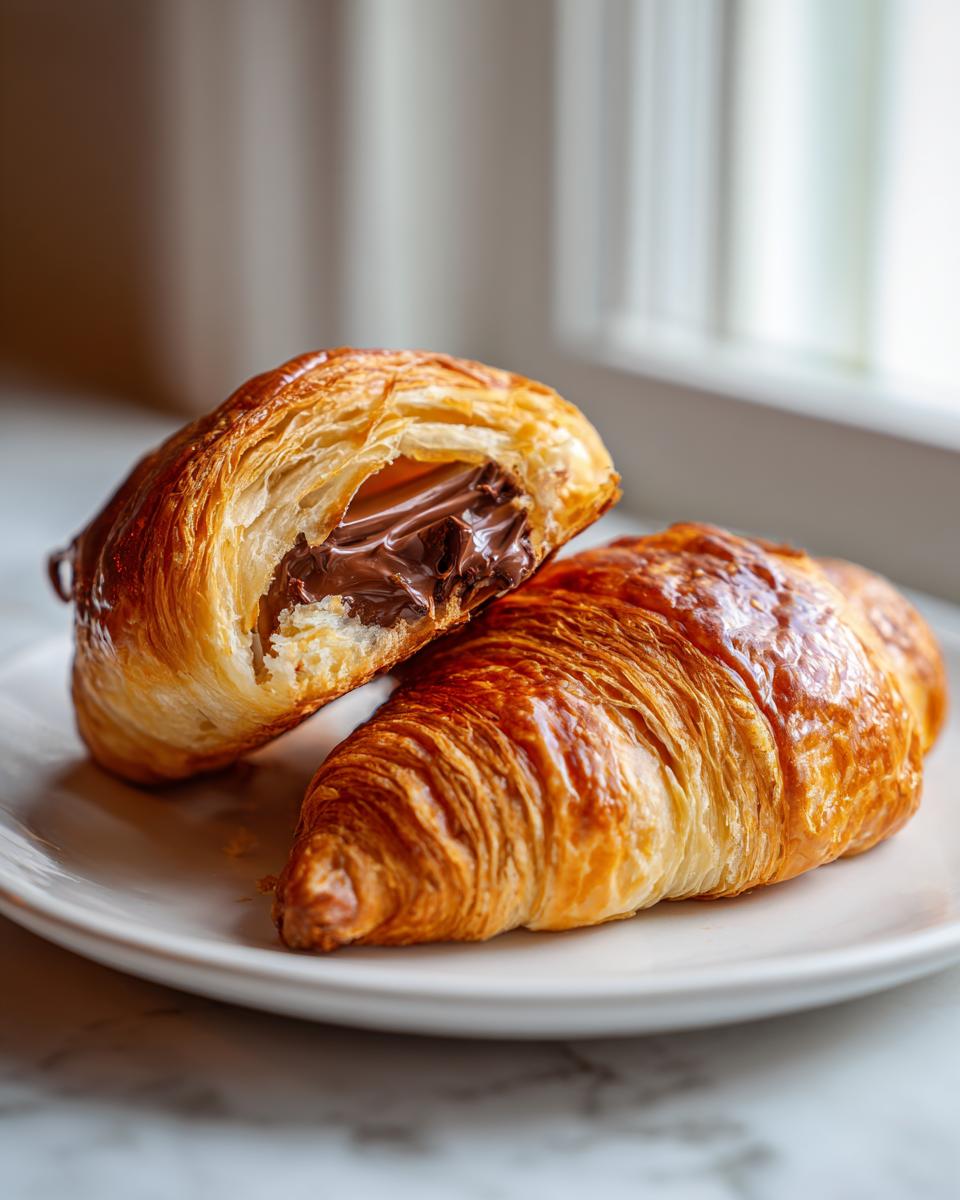
If you’re struggling with the chocolate leaking out too much, double-check how you placed the second stick. You want the seam to be tight enough to trap the chocolate center during the initial roll. A little bit of ooze is totally fine—that’s the best part when you cut into them for a great croissant breakfast idea!—but if you’re losing half the filling, make sure you are pressing that final outside edge down firmly to seal the roll before placing it seam-side down.
For more tips on getting amazing results from simple ingredients, you should check out my guide on making flaky cranberry scones. The principles of keeping cold ingredients cold apply there too!
Ingredient Notes and Substitutions for Your Chocolate Croissant
The beauty of this hack recipe is its simplicity, but even a simple recipe needs high-quality core components to shine. Since we aren’t relying on complex dough work, the two stars here—the chocolate and the wash—really need our attention. If you just toss in whatever you have lying around, the results will be just okay, and we are aiming for fantastic!
Let’s talk seriously about the chocolate first. The goal here is that satisfying, molten river of dark cocoa when you break the pastry open. If you use standard chocolate chips, they often contain stabilizers that help them keep their specific shape, meaning they might not fully melt into that luxurious goo we want. I really push for using good quality bittersweet or semi-sweet baking bars and cutting them into sticks myself. Why bittersweet? Because the pastry dough itself, made with butter, is already rich and slightly sweet. The deep, slightly bitter edge of dark chocolate cuts through that richness perfectly. It’s the classic French balance for a reason!
Now, what if you run out of eggs? Oops! That happens sometimes, especially when you are whipping up a batch of late-night treats. The egg wash is primarily for color and shine, so we need a good substitute that browns nicely. You have a couple of great options if you’re out of that last egg.
You can use plain milk or heavy cream. Milk gives you a decent golden color, but it won’t be quite as shiny as an egg wash. If you use heavy cream—and wow, this makes things decadent—you get a beautiful, rich mahogany brown color. It’s less shiny than egg, but the flavor notes are amazing, giving you an extra boost of buttery pastry richness.
If you’re in a super big rush and have absolutely no milk or cream, water works okay, but honestly, it gives very little color. For a vegan alternative, mix a tablespoon of maple syrup with about three tablespoons of water; it browns beautifully due to the sugar content, though the finish is a little more matte.
Remember, the goal of these substitutions is just to get a nice color on your easy chocolate croissants. Whether you use egg, cream, or syrup, the inside is going to be flaky, buttery, and full of melted goodness regardless. Don’t let a missing egg derail your plans for these amazing weekend brunch baking treats!
Storage and Reheating Instructions for Leftover Chocolate Croissants
Okay, I know these chocolate croissants are dangerous because they are so good they usually don’t last past lunchtime. But if, by some miracle, you have one or two left over, we need to treat them right. The absolute worst thing you can do is leave them sitting on the counter in a plastic bag. That traps moisture, and moisture is the sworn enemy of crisp, flaky pastry!
If you’re planning to eat them within a day or so, store them in a paper bag loosely folded at the top, or in a container that isn’t tightly sealed. This lets any residual moisture escape while keeping them safe from drying out too fast. Remember, these are best eaten the day they are baked, but a good reheat can bring them back to life beautifully.
How to Store Homemade Pain au Chocolat Properly
For short-term storage (1–2 days), you really want to maintain that layer separation. I prefer using an actual pastry box or just covering them loosely on a plate with a nice kitchen towel. If you have to put them in the fridge because your kitchen is super warm, make sure they are completely cool first, then use a paper bag. Keeping them in the fridge too long, though, will definitely make them taste stale, even if they are technically edible.
If you realize you won’t eat them within a day or two, the freezer is your best friend for maintaining that fresh-baked quality. Wrap the completely cooled croissants tightly in plastic wrap first—like, really snuggle them in there—and then tuck that package into a zip-top freezer bag. They freeze perfectly well for up to a month. This way, you always have an emergency batch of indulgent breakfast treats ready to go!
The Best Way to Reheat Leftover Chocolate Croissants
Listen up—a microwave is NOT your friend here. Seriously, if you microwave a flaky pastry, you are sacrificing all the beautiful crispness we worked so hard to achieve! The microwave heats the water inside the dough, turning those wonderful layers soggy and rubbery. Don’t do it!
For the best reheat, you absolutely must use an oven or a toaster oven. Preheat your oven to a gentle 300°F (150°C). Place the leftover pastry directly on the rack or on a small baking sheet lined with foil. Let them warm up for about 5 to 7 minutes. This gentle heat works to re-crisp the exterior layers and gently melt that chocolate filling again without drying out the dough. It’s like getting a second chance at that fresh-from-the-oven experience. If you are reheating frozen ones, just add a few extra minutes until they are heated through.
- For Day-Old Croissant: 5–7 minutes at 300°F (150°C).
- For Frozen Croissant: 10–12 minutes at 300°F (150°C).
You can even add a tiny drop of water to the outside of a slightly dry croissant right before popping it into the oven—it creates a little steam bath inside. For more tips on keeping baked goods perfectly moist, you might want to check out my guide on making moist applesauce cake recipe—the storage principles overlap!
Serving Suggestions for Homemade Pain au Chocolat
Now that you’ve successfully made these marvelous, quick chocolate croissants, how are you going to serve them? Presentation matters, even when you’re using a shortcut! These pastries are rich, buttery, and packed with warm chocolate, so the best pairings are usually simple things that let the pastry shine, or bright things that cut through the richness.
When I make these for a weekend brunch, I like to keep the preparation light. Honestly, if you take them straight from the oven—that perfect golden color from the egg wash—they need very little else. A light, generous dusting of powdered sugar is my go-to suggestion, especially if you didn’t use the coarse sugar topping. It catches the light and screams “French bakery treat!” You can dust it right before serving for the best effect. Take a fine mesh sieve, fill it with powdered sugar, and just dance it gently over the tops of the pastries. It’s simple, elegant, and always a huge hit.
If you want to serve them alongside something else to make it a full spread, think about balancing the heavy pastry with something fresh. Juicy citrus fruits are wonderful. We aren’t talking about making a full fruit salad, just maybe a small bowl of perfectly segmented oranges or grapefruit. The acidity helps cleanse the palate after that rich, melted chocolate filling.
And of course, you need coffee. No homemade pain au chocolat experience is complete without a strong cup of coffee or espresso. If you’re feeling extra fancy, you can serve them alongside some warm milk or a beautiful rich hot chocolate for the ultimate indulgence—perfect for a cold morning treat!
For more ideas on keeping things simple yet elegant when serving up French pastries made easy, you absolutely must check out my full guide over on my French pastries resource page. Happy serving!
Frequently Asked Questions About Making Easy Chocolate Croissants
I get so many questions whenever I post these quick beauties online! People are always skeptical about how fast they are, or if the store-bought pastry truly works. It absolutely does, but ask away! I’ve gathered up the most common things folks want to know about achieving these amazing easy chocolate croissants at home.
Can I skip the egg wash on my puff pastry chocolate croissants?
You technically can, but I really, really wouldn’t recommend it if you want that beautiful, glossy, bakery-worthy finish. That egg wash is what gives the pastry that deep golden-brown color and the lovely sheen that makes it look so appealing on the plate. If you skip it, your puff pastry chocolate croissants will still bake up flaky, but they’ll look much paler—more matte brown than shiny gold. If you truly can’t use egg, remember my tip from earlier: use heavy cream instead for a gorgeous, rich color, or even a little milk. Anything that has fat or sugar will help it brown nicely!
Is the texture really flaky if I use store-bought puff pastry?
Yes! That’s the whole point of this recipe! Modern, all-butter puff pastry, the kind you find in the freezer section, is already laminated—which means the butter layers are already perfectly folded in. When you put that very cold pastry into a very hot oven (like 400°F!), those frozen layers of butter turn to steam instantly and push the dough layers apart. That steam creates the incredible height and flakiness you see in professional croissants. Don’t worry about that part; the manufacturer did the hard work so you can focus on the rolling! These are definitely my go-to for flaky croissants at home.
What is the difference between this and true Pain au Chocolat?
That’s a great question highlighting the difference between tradition and reality! A traditional, scratch-made *Pain au Chocolat* involves a multi-day process of making and folding the dough, called lamination, which is very time-consuming. My recipe is a delicious hack—we use pre-made puff pastry, which achieves a very similar flaky texture in minutes. While a purist might argue about the dough, I promise you, for a quick, delicious, and structurally sound chocolate croissant, this method can’t be beaten for flavor payoff versus effort.
How important is the type of chocolate I use?
It matters a lot for the final experience! If you use standard chocolate chips, they often contain stabilizers designed to help them keep their shape during baking, which often means they don’t fully melt into that satisfying, gooey river we are looking for. For the best results in these easy chocolate croissants, you should use good quality chocolate bars—bittersweet or semi-sweet—that you cut yourself into thick sticks. This ensures they melt richly and stay nicely contained in the pastry.
If you want to see how I use simple ingredients to create fantastic meals, you can check out my guide on making quick pepper steak stir-fry—sometimes the best cooking is the fast cooking!
Share Your Homemade Pain au Chocolat Creations
I truly hope you get as much joy out of making these as I do. They are perfect for a surprising weekend breakfast or even a fast, impressive dessert. If you end up whipping up a batch of these beautiful pastries, please, please take a picture and tag me on social media! I absolutely adore seeing your finished projects—it always makes my day.
If you loved how easy this recipe was and it fits perfectly into your routine, please come back over and rate the recipe right here on the blog—five stars is always appreciated! And if you’re looking for more quick home baking triumphs, cruise on over to my main blog page to see what else I’ve been testing in the kitchen lately. Happy baking, everyone!
Share Your Homemade Chocolate Croissant Creations
I truly hope you get as much joy out of making these as I do. They are perfect for a surprising weekend breakfast or even a fast, impressive dessert. If you end up whipping up a batch of these beautiful pastries, please, please take a picture and tag me on social media! I absolutely adore seeing your finished projects—it always makes my day.
If you loved how easy this recipe was and it fits perfectly into your routine, please come back over and rate the recipe right here on the blog—five stars is always appreciated! And if you’re looking for more quick home baking triumphs, cruise on over to my main blog page to see what else I’ve been testing in the kitchen lately. Happy baking, everyone!
PrintEasy Chocolate Croissants Using Store-Bought Puff Pastry

Make flaky, buttery chocolate croissants quickly using pre-made puff pastry for a simple homemade pastry experience.
- Prep Time: 15 min
- Cook Time: 20 min
- Total Time: 35 min
- Yield: 12 servings 1x
- Category: Breakfast
- Method: Baking
- Cuisine: French
- Diet: Vegetarian
Ingredients
- 1 package (14.1 ounces) all-butter puff pastry, thawed
- 4 ounces bittersweet or semi-sweet chocolate, cut into 1/4-inch thick sticks (about 12 sticks)
- 1 large egg
- 1 tablespoon water
- 1 tablespoon coarse sugar (optional, for sprinkling)
Instructions
- Thaw the puff pastry according to package directions, usually in the refrigerator overnight or at room temperature for about 30 minutes. Preheat your oven to 400°F (200°C). Line two baking sheets with parchment paper.
- Unfold the thawed puff pastry sheet onto a lightly floured surface. If the pastry is rectangular, trim the edges to make a neat rectangle. Cut the rectangle lengthwise into two equal strips.
- Cut each strip crosswise into six equal rectangles, resulting in 12 smaller rectangles total.
- Place one piece of chocolate near the short edge of one rectangle. Roll the pastry over the chocolate once. Place a second piece of chocolate near the new edge and roll the pastry up completely, keeping the seam on the bottom.
- Place the rolled croissant seam-side down on the prepared baking sheet. Repeat with the remaining pastry and chocolate.
- In a small bowl, whisk the egg with the water to create an egg wash. Brush the tops and sides of each croissant lightly with the egg wash. Sprinkle with coarse sugar if you are using it.
- Bake for 15 to 20 minutes, or until the croissants are puffed and deep golden brown.
- Remove from the oven and let cool on the baking sheet for 5 minutes before transferring to a wire rack to cool slightly. Serve warm.
Notes
- Use high-quality chocolate for the best melted filling flavor.
- If your pastry gets too soft while working, place the cut pieces back in the refrigerator for 10 minutes.
- For a richer color, apply a second thin coat of egg wash halfway through baking.
Nutrition
- Serving Size: 1 croissant
- Calories: 280
- Sugar: 12
- Sodium: 250
- Fat: 18
- Saturated Fat: 10
- Unsaturated Fat: 8
- Trans Fat: 0.5
- Carbohydrates: 25
- Fiber: 1
- Protein: 5
- Cholesterol: 50