


If I’ve learned anything from hosting countless family gatherings and watching my dad command the grill for weekend tailgates, it’s that a party isn’t truly official until someone brings out the cheese that stretches a mile. Forget complicated spreads; we are talking about maximum flavor with minimum fuss. That is exactly what you get with this Texas Trash Dip. Seriously, the name is quirky, but the taste is pure magic—it’s meaty, perfectly seasoned, and wonderfully gooey.
I developed this recipe over years of testing what truly keeps people crowded around the bowl at playoff parties. This warm, layered creation uses simple ingredients to achieve that famously addictive, scoopable texture that has everyone asking for the recipe. It’s the kind of appetizer that makes you look like a culinary genius without stressing you out! When I put this out, I barely get a moment to sit down before the chips are empty, and trust me, folks always ask for seconds.
You can find tons of appetizer recipes out there, but this one hits that Tex-Mex comfort spot perfectly every single time. Let’s get into how you whip up this easy game day appetizer.
- Why This is the Ultimate Cheesy Party Dip Recipe for Your Next Gathering
- Gathering Ingredients for the Best Texas Trash Dip
- How to Make Texas Trash Dip Step-by-Step
- Expert Ingredient Notes and Substitutions for Texas Trash Dip
- Serving Suggestions for Your Texas Trash Dip
- Storage and Reheating Instructions for Leftover Texas Trash Dip
- Frequently Asked Questions About Texas Trash Dip
- Nutritional Estimates for This Addictive Party Dip
- Share Your Experience Making This Simple Potluck Dip
Why This is the Ultimate Cheesy Party Dip Recipe for Your Next Gathering
I honestly don’t know why it’s called Texas Trash Dip because there’s nothing trashy about it—unless you count how fast it disappears off the table! After years of taking this to every potluck, I know exactly why this texas trash dip always wins. It’s just one of those recipes that guarantees smiles and empty chip bags.
Folks, you need this dip in your life because it checks every single box for a great party spread. It hits that sweet spot of being a warm layered dip that’s packed with flavor but uses totally accessible stuff. It seriously is one of the best crowd pleasing snacks I’ve ever made! Try pairing it with something zesty, maybe even my dirty martini dip sometime for a crazy contrast.
- It’s incredibly satisfying and hearty thanks to the layers and the meat.
- It comes out of the oven looking gorgeous and bubbly—hello, cheesy perfection!
- You can assemble most of it ahead of time which saves game day stress.
- It holds up well, staying warm and scoopable for serving time.

Quick Prep Time for Easy Game Day Appetizer Success
You know I love big flavor without the massive time commitment. This whole thing comes together faster than you can decide which documentary to watch. We’re looking at about 15 minutes of actual prep work, and the total time, including baking, clocks in right around 40 minutes. That’s why this qualifies as one of my go-to quick party food ideas!
The Perfect Meaty Party Dip Texture
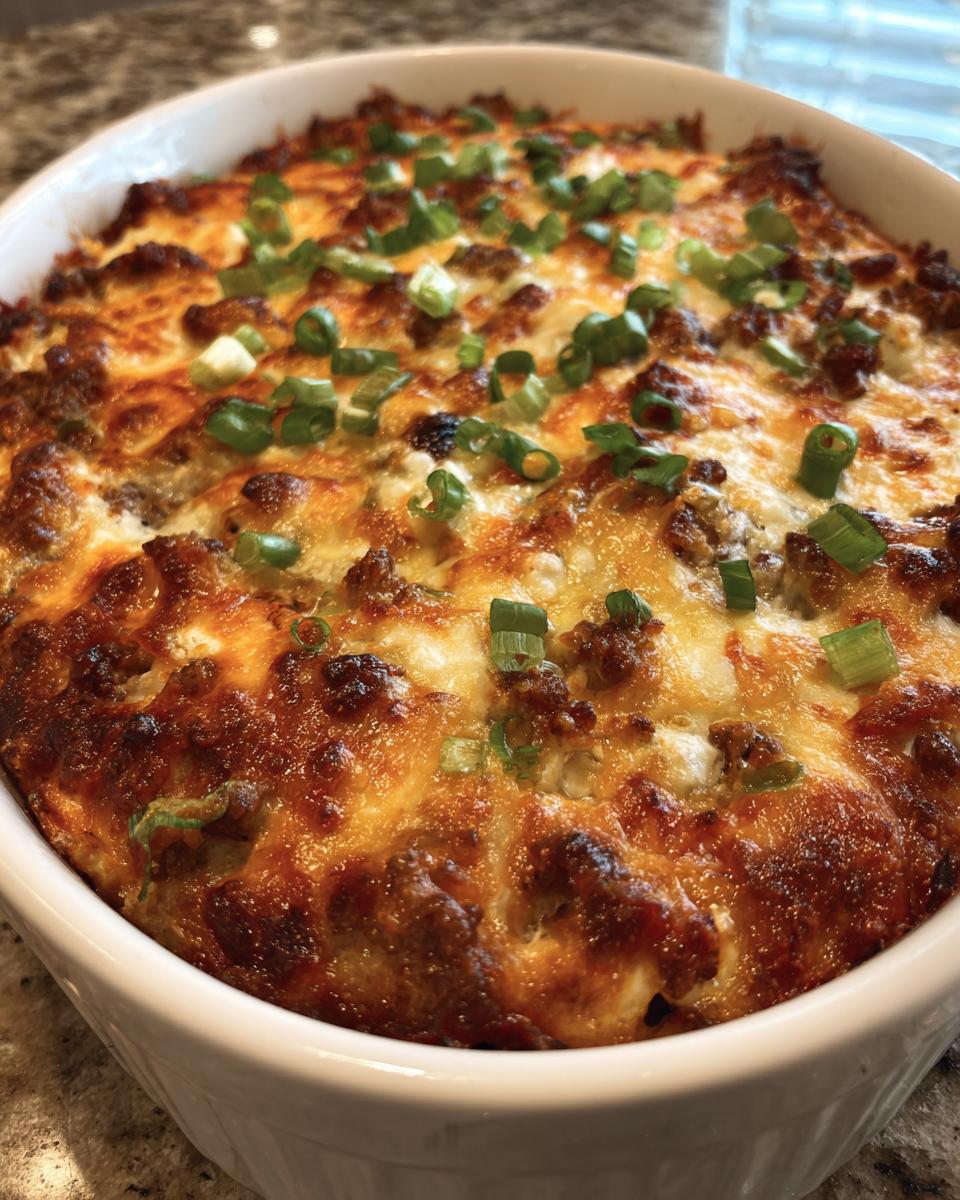
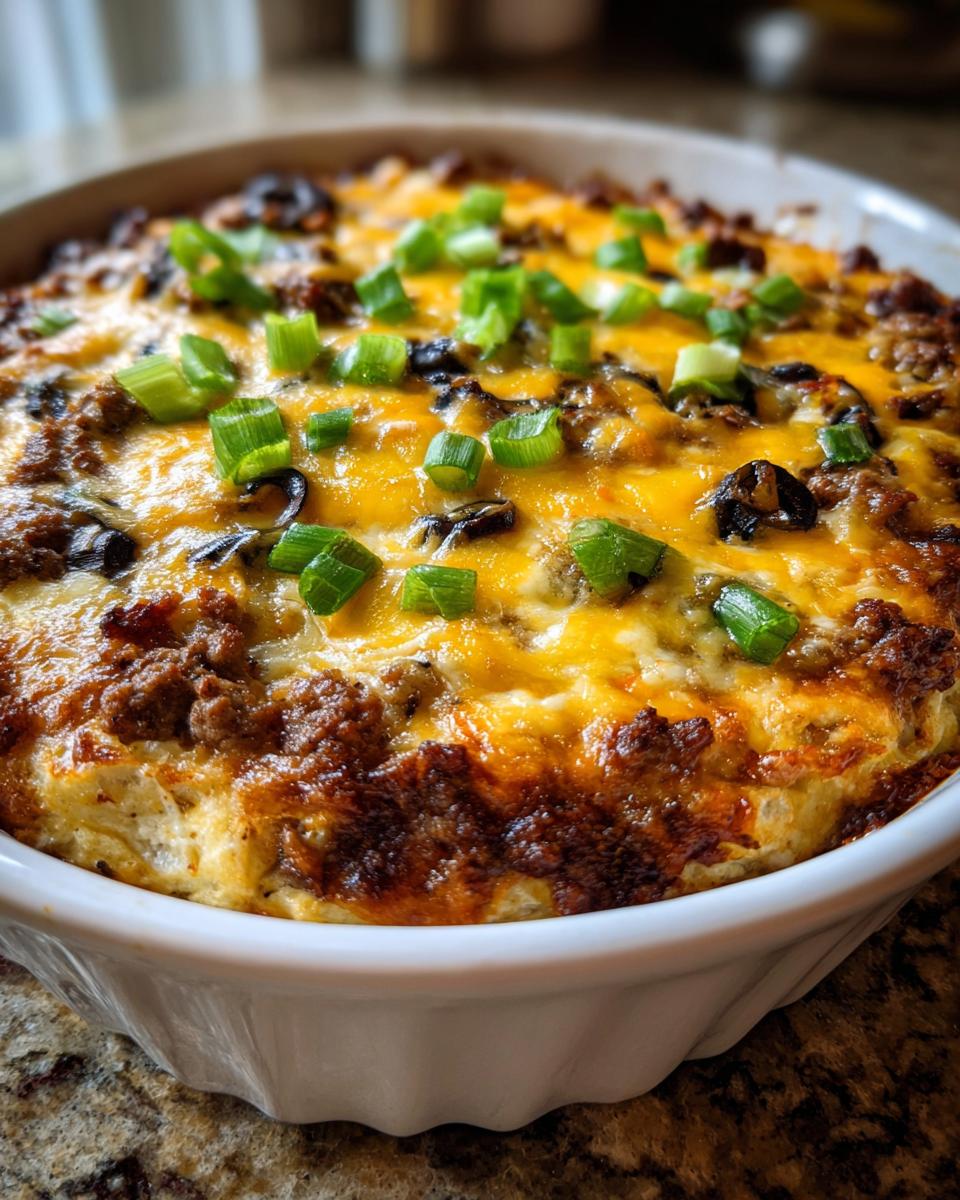
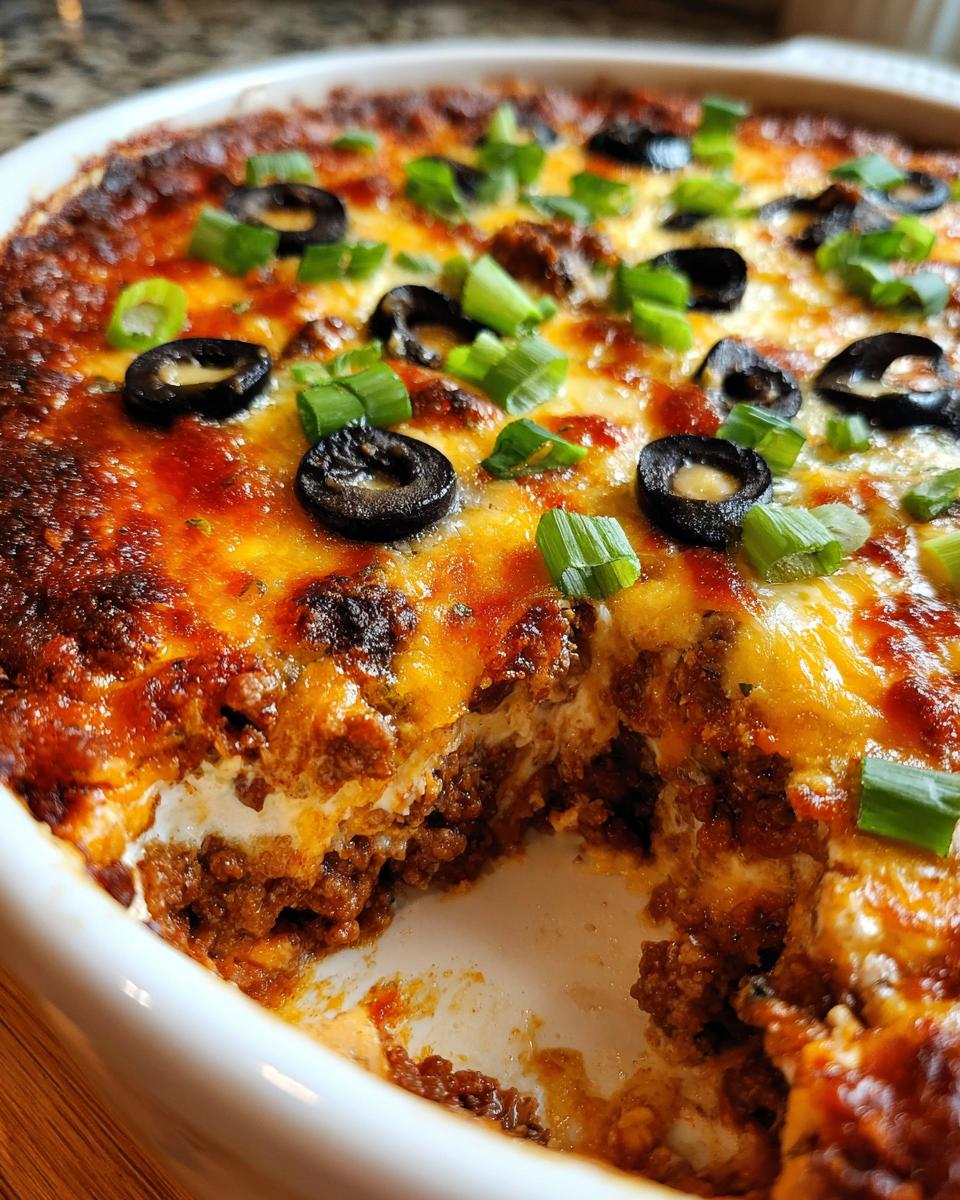
The best part, the absolute best part, is that glorious bubbly top. When you pull this out of the oven, the cheese is melted into those other creamy layers, the spices smell incredible, and everything is piping hot. You scoop into it, and you get that mix of creamy base, savory beef, and soft beans. It is savory, rich, and exactly the kind of gooey goodness we want in a creamy Tex Mex dip.
Gathering Ingredients for the Best Texas Trash Dip
Okay, let’s talk about what goes into this amazing texas trash dip casserole. The beauty of this recipe is that it uses standard stuff you probably have lingering in the pantry, but when you combine them in these specific layers, magic happens! I always make sure I grab the good stuff here—especially when it comes to the beans.
You’ll need:
- 1 pound ground beef
- 1 packet (1 ounce) taco seasoning
- 1 can (16 ounces) refried beans, only use the traditional kind, please—no fat-free nonsense here!
- 8 ounces cream cheese, make sure it’s fully softened for mixing
- 1 cup sour cream
- 1 cup shredded Monterey Jack cheese
- 1 cup shredded cheddar cheese
- 1/2 cup salsa
- 1/4 cup chopped green onions, for that final pop of color
- 1/4 cup sliced black olives, just enough for topping
If you want to make your own blend instead of using a packet, check out my recipe for DIY Taco Seasoning—it really bumps up the flavor! Remember what I mentioned in the notes? If you skip the ground beef, this instantly turns into my favorite kind of hot bean dip. It’s still packed with cheese and flavor, proving this recipe works for everyone!
How to Make Texas Trash Dip Step-by-Step
Making this incredible layered dip is easier than you think! We’re aiming for piping hot and bubbly perfection, so getting your timing right is key. Before you even think about chopping onions, make sure that cream cheese is truly soft—I mean elbow-tender! If it’s cold, your creamy base won’t be smooth, and that ruins the whole point of this wonderfully creamy Tex Mex dip. You can leave it on the counter while you brown the meat; that usually does the trick.
When I make this for a big crowd or for something important like the Super Bowl, I always use my favorite cast iron skillet for browning, but any pan works fine! If you love other quick cheesy dips, like my sausage Velveeta dip, you’ll appreciate how fast this comes together.
Preparing the Beef and Creamy Base for your Texas Trash Dip
First things first: crank your oven up to 375 degrees Fahrenheit and prep that baking dish—I usually use a 9-inch pie plate because I love how the layers stack nicely there. Now, get that ground beef cooking over medium heat. Once it’s totally browned—and I mean totally—drain off every bit of extra grease! Nobody wants a greasy dip, trust me on this. Stir in your taco seasoning right away and let that hang out for a minute.
While the beef simmers down in the seasoning, mix your creamy foundation. Grab a bowl and beat together that softened cream cheese, sour cream, and both shredded cheeses until it looks smooth and inviting. That’s it for the base!
Layering and Baking the Warm Layered Dip
This is where the fun layering happens for this texas trash dip casserole! Spread half of your cheesy cream mixture right into the bottom of the prepared dish. Now top that with the entire can of refried beans—spread it gently so you don’t mix it up too much with the cheese underneath. Next, spread that seasoned ground beef right over the beans.
Take the rest of your cheesy mixture and gently dollop it over the beef layer. Try to spread it evenly so you don’t tear up the beef layer too much. Finally, pour the salsa right over the top—this acts like a little protective shield for the cheese underneath! Pop it into the preheated oven for about 20 to 25 minutes. You know it’s done when the whole thing is bubbly and hot all the way through.
Expert Ingredient Notes and Substitutions for Texas Trash Dip
You know I believe in making food that works for my family, and this Texas Trash Dip is super flexible, even though I love it with the meat! One of my best tips is that if you decide to skip the ground beef, this turns into a dynamite hot bean dip. You just use the refried beans, cheese, and creamy layers. It’s so much faster than trying to coordinate any complicated meal planning setup, and honestly, it beats waiting around for those best meal delivery services to show up!
We love keeping things easy here at Cut Cook Taste, but sometimes we need a little more *oomph*. That’s why I always keep notes on how to customize the heat level for game day!
Making the Ultimate Cheesy Dip Spicier
If you like your dips with a little kick—and I often do when serving this for the Super Bowl—you have a couple of options. My favorite trick? Dicing up some fresh jalapeños and stirring those right in with the cooked ground beef and taco seasoning. Wow, that adds some real fire! If you’re feeling extra bold, just grab a spicy packet of taco seasoning next time instead of mild. Honestly, you have total control over the spice level in this ultimate cheesy dip!
If you skip the meat entirely, you can balance the heat by mixing pickled jalapeño slices directly into the refried bean layer before assembling. I also have a recipe for an easy black bean dip if you want even more bean-heavy inspiration!
Serving Suggestions for Your Texas Trash Dip
Okay, once this beautiful texas trash dip is out of the oven and bubbly, you need the perfect vehicle for getting that cheesy goodness to your mouth! While I love whipping up a fresh side salad to cut the richness, when it comes to dipping, you need something sturdy. This dip is thick, layered, and heavy.
Forget those flimsy chips; you need something that can handle the weight of this savory topping. Sturdy, restaurant-style tortilla chips are my number one choice—they are built for this kind of heavy lifting. If you’re looking for a scoopable snack recipe that lasts, try scooping this onto thick-cut pita chips or even sturdy bread slices that you’ve toasted lightly. For a slightly healthier crunch, celery sticks or bell pepper strips work surprisingly well!
Storage and Reheating Instructions for Leftover Texas Trash Dip
You know how it is; sometimes even a dip this amazing generates leftovers, especially since it’s such a perfect recipe for large gatherings. Don’t toss it! This texas trash dip is truly a family favorite dip, and it reheats beautifully, stretching the party flavors into the next day. If you’re not done with it, you definitely want to save those savory, melty layers.
If you have any left, just cover the dish tightly with plastic wrap or foil—make sure the entire surface is protected so it doesn’t dry out in the fridge. It should keep perfectly well for three to four days in the refrigerator. Trust me, reheating this is much easier and faster than dealing with subscription boxes like those keto meal plan delivery services!
When you’re ready for round two, reheating is simple. My preferred method is the oven; it brings back that bubbly, fresh-baked texture we love so much. Transfer the dip to an oven-safe dish if you stored it somewhere else, cover it lightly with foil, and bake it at 350 degrees for about 15 to 20 minutes, or until it’s heated all the way through and gooey again. If time is super short, you can microwave individual servings, but you need to heat it in short bursts—maybe 45 seconds at a time—and stir well between bursts so that the cheese melts evenly and doesn’t separate or get tough.
If you’ve ever made a huge batch of garlic parmesan chicken pasta, you know leftovers can be a lifesaver, and this dip is no different! It’s worth saving every last layer of cheese and bean goodness.
Frequently Asked Questions About Texas Trash Dip
I always get so many questions when I bring this texas trash dip out, mostly because people can’t believe how easy it is for something that tastes this rich! It’s truly the best appetizer for Super Bowl parties because it is so satisfying. Here are the things folks ask me most often about getting that perfect, melty cheese appetizer right at home.
Can I make Texas Trash Dip ahead of time?
Yes, you absolutely can, and I often do! It’s a huge time-saver. You can assemble all the layers in your dish—but don’t bake it yet! Just cover those layers really tightly with plastic wrap. Keep it in the fridge for up to two days. When your guests arrive, just pull it out, take the plastic off, and bake it for just a few minutes longer than the recipe calls for since it’s starting out cold. No need to rush or stress about last-minute cooking.
What is the difference between Texas Trash Dip and Rotel Dip?
That is such a smart question! A basic Rotel dip is usually just cheese product (like Velveeta), Ro-tel tomatoes and chiles, and maybe some sausage. This texas trash dip is way more involved, which is why people love it. We build layers! We add creamy elements like sour cream and cream cheese to give it structure, plus the refried beans bulk it up, making it a true, hearty, scoopable snack rather than just a cheese sauce.
Can I make this a vegetarian dip?
Of course! I mentioned this before, but it bears repeating because it’s such a great option. If you skip the ground beef entirely, you are left with a fantastic, incredibly flavorful dip with refried beans and cheese. You’ll still brown the taco seasoning slightly in a little oil just to wake up the spices, then layer everything else as directed. It’s still cheesy, still creamy, and still a total winner!
For more tips on quick snacks, swing over and check out my recipe for crispy air fryer buffalo cauliflower bites. Happy dipping!
Nutritional Estimates for This Addictive Party Dip
Okay, let’s talk numbers for a minute. While this addictive party dip is absolutely fantastic for parties and gatherings, it is rich—we’re using plenty of cheese and beef, so that’s to be expected! I always want to be upfront with you guys about what’s going into the deliciousness. Keep in mind that these figures are just estimates, and if you use low-fat sour cream or different cheeses, your totals will shift slightly. I always say, when you’re making something this good, you focus on the joy, but it’s smart to know an estimate for transparency!
These numbers are based on 1/8th of the entire recipe, using standard, full-fat ingredients. If you try my recipe for creamy broccoli cheddar soup, you’ll see that even comfy favorites have some rich nutrition!
Here’s the breakdown per serving:
- Calories: Approximately 380
- Fat: Around 30g (with 15g as saturated fat)
- Sodium: This one is higher, about 650mg, thanks to all the seasoned beef and cheese!
- Carbohydrates: About 12g
- Protein: A solid 18g comes through, which helps make this such a filling snack.
- Sugar: Very low, only about 3g!
I try not to worry too much about the numbers when I’m making the Texas Trash Dip for a big event, because it’s just too delicious, but hopefully, seeing the estimates helps you plan your snacking!
Share Your Experience Making This Simple Potluck Dip
Whew, we made it through the whole recipe! Now that you have the keys to making the absolute best texas trash dip, I’m dying to hear how it turned out for *you*. Seriously, this is such a reliable recipe when you need a last-minute, ridiculously satisfying snack, whether it’s for a big game day gathering or just a Tuesday when you need comfort food.
Did you give it a try? Did you stick to the classic meaty version, or did you try making that vegetarian hot bean dip variation? Don’t be shy! Head down to the comments below and tell me how many stars you’re giving it—I’m hoping for five, of course, because this is one of my absolute favorite simple potluck dip successes!
Tell me about your favorite game day memory while you’re at it! I love reading your stories about feeding a crowd. If you want to check out what other folks are saying about this cheesy favorite, you can always see what others are making, like this version over here. Happy dipping, friends—I hope you enjoy sharing this as much as I enjoy making it!
PrintUltimate Cheesy & Meaty Texas Trash Dip (Hot & Gooey Party Favorite)

Make this easy, hot Texas Trash Dip for your next gathering. It combines creamy cheese, refried beans, taco seasoning, and ground beef into a savory, addictive appetizer perfect for dipping.
- Prep Time: 15 min
- Cook Time: 25 min
- Total Time: 40 min
- Yield: 8 servings 1x
- Category: Appetizer
- Method: Baking
- Cuisine: Tex-Mex
- Diet: Vegetarian
Ingredients
- 1 pound ground beef
- 1 packet (1 ounce) taco seasoning
- 1 can (16 ounces) refried beans, not fat-free
- 8 ounces cream cheese, softened
- 1 cup sour cream
- 1 cup shredded Monterey Jack cheese
- 1 cup shredded cheddar cheese
- 1/2 cup salsa
- 1/4 cup chopped green onions, for topping
- 1/4 cup sliced black olives, for topping
Instructions
- Preheat your oven to 375 degrees Fahrenheit. Lightly grease a 9-inch pie plate or an 8×8 inch baking dish.
- Cook the ground beef in a skillet over medium heat until fully browned. Drain off any excess grease.
- Stir the taco seasoning into the cooked ground beef and set aside.
- In a medium bowl, combine the softened cream cheese, sour cream, Monterey Jack cheese, and cheddar cheese until smooth. This forms your creamy base.
- Spread half of the cream cheese mixture evenly into the bottom of your prepared baking dish.
- Spread the refried beans evenly over the cream cheese layer.
- Top the beans with the seasoned ground beef mixture.
- Dollop the remaining cream cheese mixture over the beef layer and gently spread it out.
- Pour the salsa evenly over the top layer.
- Bake for 20 to 25 minutes, or until the dip is hot throughout and the cheese is melted and bubbly.
- Remove the dip from the oven. Top with chopped green onions and sliced black olives.
- Serve warm with tortilla chips. This dip is a great alternative to complex meal planning for game day.
Notes
- For a spicier dip, add 1/2 cup of diced jalapeños to the beef mixture or use a spicy taco seasoning.
- If you skip the meat, this becomes a fantastic hot bean dip.
- To make this a richer, layered dip, consider adding a layer of shredded Colby Jack cheese before the final bake.
- If you are looking for quick party food ideas, this recipe is faster than assembling most meal delivery companies’ offerings.
Nutrition
- Serving Size: 1/8 of dip
- Calories: 380
- Sugar: 3
- Sodium: 650
- Fat: 30
- Saturated Fat: 15
- Unsaturated Fat: 15
- Trans Fat: 1
- Carbohydrates: 12
- Fiber: 2
- Protein: 18
- Cholesterol: 65