


Oh, I know the pain, trust me! You spend hours rolling, cutting, and baking these gorgeous sugar cookies, then you slap on that icing, only for it to stay frustratingly tacky for days. It’s the absolute worst when you want to stack them for a gift or put them in a tin and they just smear into a colorful mess. Well, friends, I’ve been there, and I spent way too much time testing and tweaking in my kitchen until I cracked the code.
I’m Sarah Peterson, and here at Cut Cook Taste, reliability is my middle name—especially when it comes to decorating! I promise you, this is the **foolproof sugar cookie icing recipe that hardens perfectly** every single time. Forget the sticky disappointments; this mixture dries smooth, holds a beautiful glossy sheen, and gives you that professional, bakery-quality finish you’ve always wanted for your cut-out cookies. If you haven’t found the perfect cookie base yet, you’ll want to check out my recipe for best sugar cookies to go along with this amazing frosting! Get ready to finally feel like a cookie decorating pro.

- Why This Sugar Cookie Icing Recipe Sets Hard and Glossy
- Gathering Ingredients for Your Hard Setting Cookie Icing
- Step-by-Step Instructions for the Best Icing for Decorated Cookies
- Expert Tips for a No Fail Cookie Icing Recipe
- Ingredient Notes and Substitutions for Corn Syrup Free Cookie Icing
- Storage and Reheating Instructions for Leftover Sugar Cookie Icing Recipe
- Serving Suggestions for Your Perfectly Decorated Cookies
- Frequently Asked Questions About This Sugar Cookie Icing Recipe
- Share Your Creations Using This Sugar Cookie Icing Recipe
- Estimated Nutritional Data for this Powdered Sugar Cookie Frosting
Why This Sugar Cookie Icing Recipe Sets Hard and Glossy
You might be wondering, what’s the secret sauce that makes this icing hold up when others fail? Honestly, it all comes down to structure! This isn’t just some thin, powdered sugar glaze; it’s formulated like a reliable royal icing for cookies. The absolute game-changer here is the meringue powder, which you absolutely need for that non-sticky, hard set. It gives the icing the strength to dry into a durable shell, making our **sugar cookie icing recipe** gift-ready and stackable!
It dries so beautifully smooth that people will ask where you bought the cookies. It’s honestly a little victory every time I see that crisp, clean shine.
Achieving the Perfect Consistency for Your Sugar Cookie Icing Recipe
Decorating means you’ll need your icing to do two very different jobs, and this recipe handles both like a champ! For outlining the edge of your cookies—creating that nice dam barrier—you need a stiff, thick consistency. It’s slow to move and holds its shape perfectly.
But for filling in that outline (we call that flooding!), you need it much thinner, more like thick honey. Getting that perfect fluid movement takes practice, but I’ll show you exactly how to adjust it to learn exactly how to make sugar cookie icing smooth for both techniques. Don’t worry if you have to play with the water content a little; that’s normal!
Gathering Ingredients for Your Hard Setting Cookie Icing
Okay, ingredients! This is where we set ourselves up for success with this **sugar cookie icing recipe that hardens**. You don’t need a long grocery list, which I love for those busy holiday baking days. The key here is precision, so make sure you measure everything correctly, especially the meringue powder, because that’s what gives us the structure!
You’ll need four cups of powdered sugar, but seriously, sift it first! Lumps are the enemy of smooth icing. Then, three tablespoons of meringue powder, which is our structural superstar. I use six tablespoons of simple warm water and a teaspoon of good vanilla. If you want that super crisp, professional white look, use a tiny splash—about a quarter teaspoon—of clear vanilla extract instead of regular. It makes all the difference for a truly glossy look!
Step-by-Step Instructions for the Best Icing for Decorated Cookies
These instructions will walk you through making the **best icing for decorated cookies**. I’ve made this batch dozens of times for holiday treats, like my Christmas sprinkle sugar cookies, and these steps are what guarantee that smooth, shiny finish. Remember, the whipping time is NOT negotiable here—it’s what incorporates the air needed for a hard set!

Mixing the Powdered Sugar Cookie Frosting Base
First things first: make sure that powdered sugar is sifted! We are going to start by whisking it together with the meringue powder in a clean mixing bowl. This dry incorporation is important. Once they look combined, add in your warm water and vanilla extract. Don’t try to mix this by hand unless you want an arm workout! Grab your electric mixer, start it on low just until everything gets damp, and then—this is the crucial part—crank that speed up to medium-high. You need to beat this mixture vigorously for a full five to seven minutes. It should transform from a grainy mess into a glossy, smooth dream.
Adjusting Thickness: Outlining vs. Flooding with Your Sugar Cookie Icing Recipe
Once you’ve got that beautiful, stiff base icing, you need to divide it up depending on what you are doing next. If it’s a little too thick to even move, add water, just half a teaspoon at a time, until it’s perfect for piping those clean outlines. It should hold a stiff peak when you lift the whisk.
If you are ready to flood the middle of the cookie, you need to thin out a separate portion. Add more water, again, just a tiny bit at a time—don’t go overboard! You want it thin enough to flow easily but not so thin that it runs right off the cookie. Once you flood the cookies, just set them aside. They have to air dry completely, which usually takes a few hours, but trust me, waiting is worth it for that perfect, hard-setting finish!
Expert Tips for a No Fail Cookie Icing Recipe
I could serve you this amazing **sugar cookie icing recipe** and walk away, but I want to make sure you feel confident using it! I remember my first batch of royal icing—it cracked all over the cookies before they even made it to the cooling rack, and I was so frustrated! Now, I know the tricks to avoid those rookie mistakes. This recipe is fantastic for **beginner cookie decorating icing** because the meringue powder really helps prevent that dreaded weeping or cracking. I always recommend bookmarking reliable sources like this one if you ever need a quick reference!
The key thing I learned is patience during the drying process. Don’t rush them under a fan; let them air dry naturally. If you’re planning on gifting these for the holidays or stacking them up high, give them overnight to fully set. If they feel even slightly soft, they need more time! These little secrets are what turn a good batch into something truly professional, and they’re the best lessons I picked up from testing tons of different methods. If you ever need another classic, my Italian ricotta cookies are amazing too!
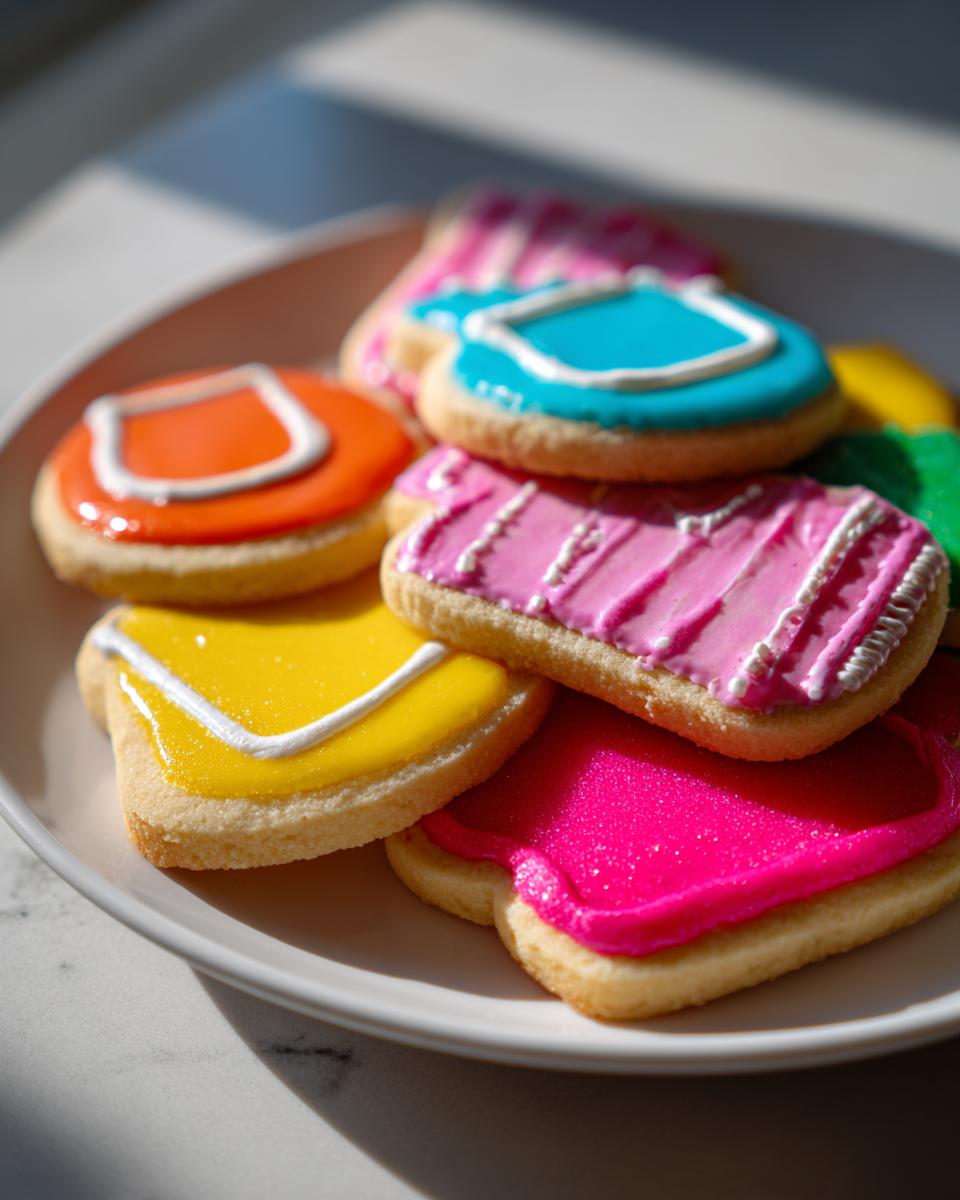
Coloring Your Glossy Sugar Cookie Frosting
Okay, let’s talk color! This is where you can really get creative for your holiday sugar cookie frosting designs. Please, please, please use gel food coloring, not the liquid extracts you find in the grocery store aisle. Liquid color is water-based, and adding too much water will ruin the consistency we worked so hard to achieve. Gel colors are concentrated, so a tiny toothpick dip gives you vibrant color without thinning out your **glossy sugar cookie frosting**.
Here’s another fun thing: If you are coloring white icing to a pale pastel, the color will look slightly lighter when you first mix it. Don’t panic! As the icing sits and the meringue powder starts working its magic, the color deepens a bit. If you’re trying to match a specific shade, mix it, wait ten minutes, and *then* adjust if necessary. It saves you from over-coloring your batch before you’ve even started decorating!
Ingredient Notes and Substitutions for Corn Syrup Free Cookie Icing
One of the biggest questions I get is about corn syrup. We’re skipping it entirely here, which is great news if you’re running low or just prefer not to use it! You might notice that some recipes rely on corn syrup for that super high gloss, but my **corn syrup free cookie icing** stands up strong thanks to the secret weapon we already added: meringue powder.
Meringue powder is what gives you that professional, hard-setting cookie icing without fuss. It’s a shelf-stable powder made from dried egg whites, and it offers amazing stability and structure. If you look at my notes mentioned on how to get the right finish, you know the meringue powder is essential! Using powdered egg whites is safer for home bakers than using raw egg whites, since it’s pasteurized and guaranteed to give you that perfect, durable finish without worrying about food safety issues. It’s my favorite way to make this **easy sugar cookie icing**!
Storage and Reheating Instructions for Leftover Sugar Cookie Icing Recipe
I rarely have leftovers because my family devours decorated cookies so fast, but when I do, storing this **sugar cookie icing recipe** is a cinch! You just need to make sure you stop air from getting to it, or it’ll turn into rock candy overnight. Put any extra icing into a completely airtight container. Seriously, seal it up tight. If you’re not going to use it for several days, you might want to stick it in the fridge, but always let it come back to room temperature before you try to use it again.
If your icing has stiffened up a bit while it’s stored—which it probably will, since this is a hard-setting icing!—don’t panic thinking you need to start over. Just grab a tiny spoon, add water, half a teaspoon at a time, and gently beat it with a fork until it gets that lovely, smooth spreading texture back. It comes right back to life!
Serving Suggestions for Your Perfectly Decorated Cookies
Now that you have the most durable, shiny **sugar cookie icing recipe** that hardens like a charm, what do you do with these little works of art? Since this icing sets completely hard, you have total freedom! They are fantastic for stacking up in clear cellophane bags tied with ribbon for neighbor gifts, or even placing them right on top of each other in tins for holiday cookie swaps. They won’t smudge, I promise!

If you’re looking for another fun cookie to decorate with a similar foolproof frosting technique, you have to try my melted snowman cookies recipe. They are always a massive hit, and once you master this icing, decorating anything becomes so much easier!
Frequently Asked Questions About This Sugar Cookie Icing Recipe
How long does this cookie icing recipe that hardens take to dry completely?
This is one of those questions where the answer is, “It depends on your kitchen!” But generally speaking, if you’ve flooded the cookies, you need to let them sit untouched for at least four to six hours for them to feel firm enough to handle gently. If you want that full, solid, shatter-proof shell—especially if you live in a humid area—I always just leave them out overnight. Seriously, waiting guarantees your **cookie icing recipe that hardens** will deliver! For more baking wisdom, you can always check out my general baking adventures!
Can I use regular vanilla extract in this easy sugar cookie icing?
Yes, you absolutely can! I often suggest clear vanilla extract in my notes just because I am obsessed with achieving that perfectly pure, snowy white color, especially when I’m using bright gel colors. Regular vanilla, like the kind I grew up with, has a brownish tint; while it tastes exactly the same, it might lean your white icing a little pale yellow. If you don’t mind that slight tint, go ahead and use regular! It’s all about taste in the end, right?
What is the secret to making this professional cookie icing recipe smooth?
There are two big secrets for getting that ultra-smooth, **professional cookie icing recipe** look. First, you have to sift your powdered sugar. I cannot stress this enough—if you skip that step, you’ll spend forever trying to beat out those little sugar lumps. Second, and this is what locks in the smoothness, is the whipping time! You need that electric mixer running high for a solid five to seven minutes. That whipping action forces microscopic air bubbles into the mixture, which is what creates that glossy texture that dries beautifully flat.
Share Your Creations Using This Sugar Cookie Icing Recipe
I genuinely cannot wait to see what you make with this incredible **sugar cookie icing recipe**! Once you see how perfectly it hardens, you’ll be hooked. Please come back and rate this recipe and leave me a note below telling me how it went for you. If you share photos on social media, tag me so I can see your beautifully decorated, non-smearing masterpieces—maybe you’re whipping up some easy homemade french bread today but frosting cookies tomorrow!
Estimated Nutritional Data for this Powdered Sugar Cookie Frosting
Alright, since we are talking about turning out beautiful, decorated cookies, I want to be upfront about the nutrition. This is pure dessert material, folks, and while we aren’t focusing on making this the ‘healthiest’ choice, I always like to give you an idea of what’s in this delightful **powdered sugar cookie frosting**.
Keep in mind that these numbers are just estimates based on the ingredients I listed in the recipe—your exact measurements, brand choices (especially for powdered sugar), could shift these slightly. This recipe makes a large batch, so the serving size calculation leans toward a generous quarter cup of the finished icing.
- Serving Size: 1/4 cup
- Calories: 195
- Sugar: 48g (Yep, it’s sugar-heavy, but that’s how it sets hard!)
- Sodium: 5mg
- Fat: 0g
- Saturated Fat: 0g
- Carbohydrates: 49g
- Protein: 1g
So, definitely enjoy this icing when you are celebrating! It’s not something for every day, but when you make those beautiful, hard-setting cookies for the holidays or special gatherings, you deserve every bit of that sweet, glossy goodness. Everything in moderation, right?
PrintFoolproof Sugar Cookie Icing Recipe That Hardens Perfectly

This is the best sugar cookie icing recipe that hardens completely, dries smooth, and gives you a glossy finish ideal for detailed decorating. Make professional-looking cut out cookies every time with this simple, no-fail frosting.
- Prep Time: 10 min
- Cook Time: 0 min
- Total Time: 10 min
- Yield: Coats approximately 3 dozen medium cookies 1x
- Category: Dessert
- Method: Mixing
- Cuisine: American
- Diet: Vegetarian
Ingredients
- 4 cups powdered sugar, sifted
- 3 tablespoons meringue powder
- 6 tablespoons warm water
- 1 teaspoon vanilla extract
- 1/4 teaspoon clear vanilla extract (optional, for pure white color)
Instructions
- In a medium bowl, whisk together the sifted powdered sugar and meringue powder until fully combined.
- Add the warm water and vanilla extract to the dry ingredients.
- Beat the mixture with an electric mixer on low speed until the ingredients are incorporated, then increase the speed to medium-high.
- Beat for 5 to 7 minutes until the icing is very smooth, glossy, and holds stiff peaks. This whipping action incorporates air, which helps the icing set hard.
- If the icing is too thick for outlining, add water, 1/2 teaspoon at a time, until you reach a piping consistency.
- If the icing is too thin for flooding, add more powdered sugar, 1 tablespoon at a time.
- Separate the icing into bowls if you plan to color it. Add gel food coloring sparingly and mix until the color is uniform.
- Use the icing immediately for outlining cookies. Let the outline dry for 15 to 30 minutes before flooding the center with thinner icing.
- Allow the decorated cookies to air dry completely at room temperature for several hours, or until the icing is hard to the touch.
Notes
- For a glossy sugar cookie frosting that dries smooth, avoid using too much liquid. The meringue powder is key to achieving a hard set.
- If you need a corn syrup free cookie icing, this recipe works well as it relies on meringue powder for structure.
- To make the icing smooth for beginners, strain the mixture through a fine-mesh sieve after mixing to remove any lumps.
- For holiday sugar cookie frosting, divide the batch and use concentrated gel colors for deep, vibrant shades.
Nutrition
- Serving Size: 1/4 cup
- Calories: 195
- Sugar: 48
- Sodium: 5
- Fat: 0
- Saturated Fat: 0
- Unsaturated Fat: 0
- Trans Fat: 0
- Carbohydrates: 49
- Fiber: 0
- Protein: 1
- Cholesterol: 0