
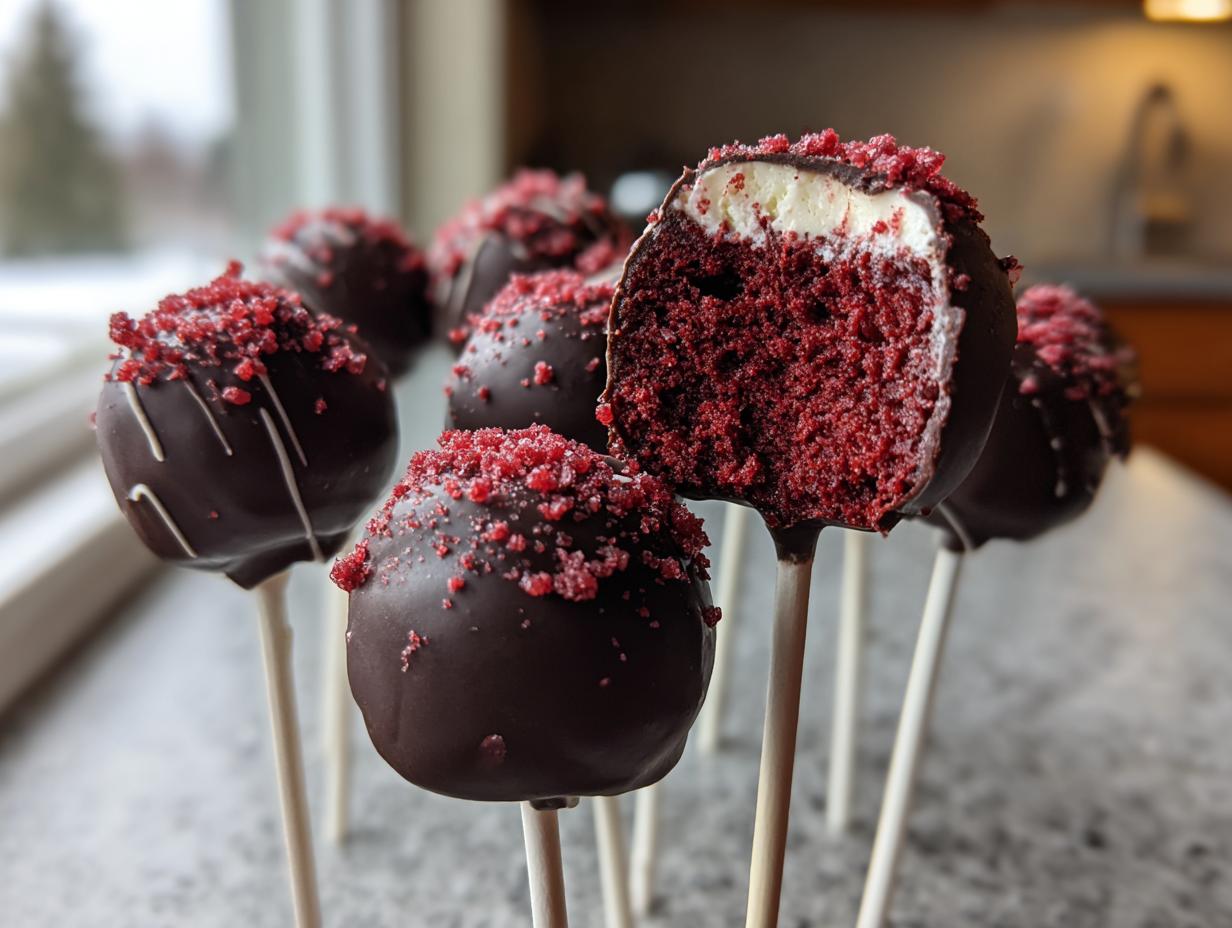

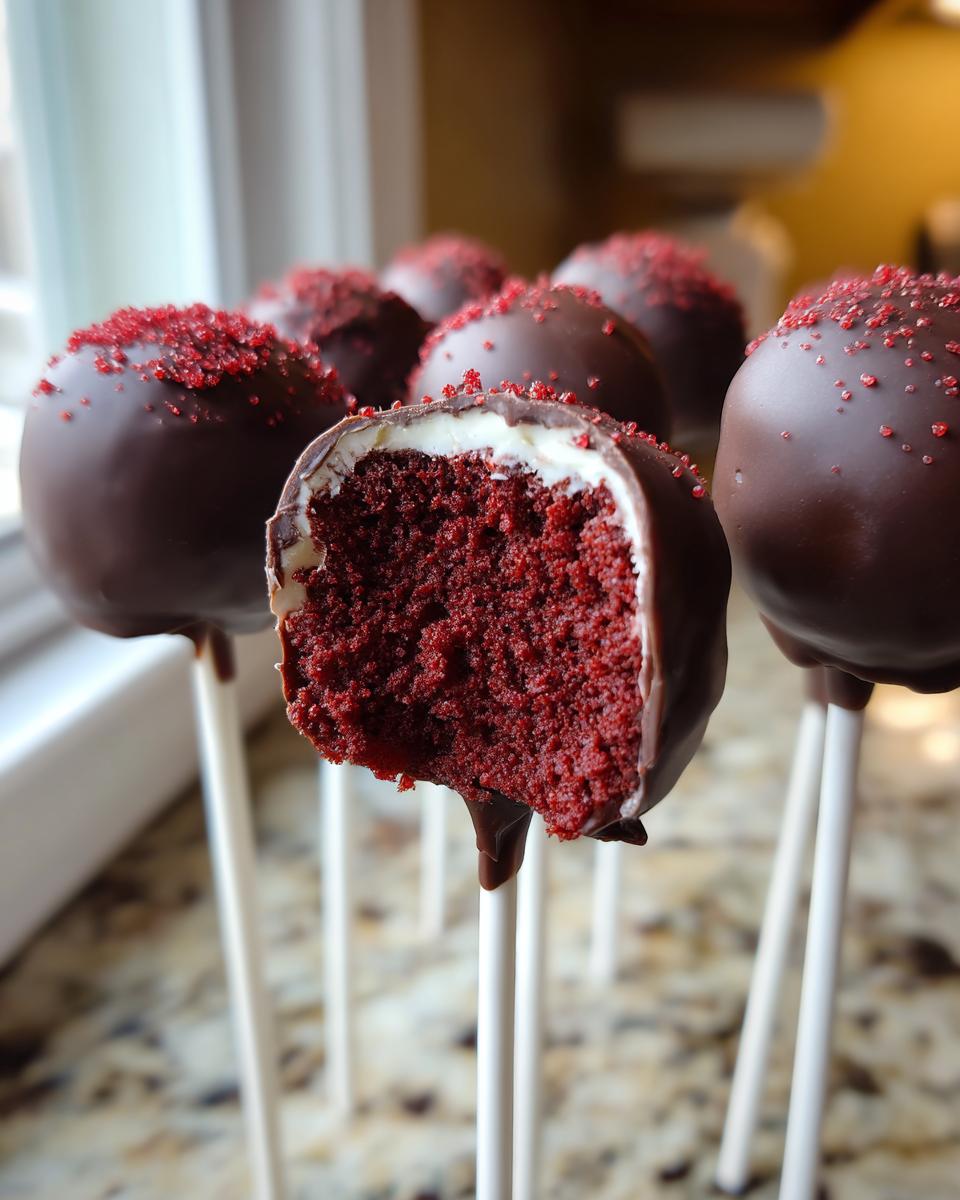
Oh my goodness, you are going to absolutely adore making these! If you need a show-stopping dessert that vanishes instantly, you need to know how to make foolproof red velvet cake pops. Seriously, nothing beats that combination of rich, tangy red velvet and smooth chocolate coating, especially when you need bite sized desserts for parties or something special for the holidays. Here at Cut Cook Taste, my goal—my promise to you, really—is absolute perfection every time. I’ve spent countless hours in my kitchen translating my grandmother’s focus on quality ingredients and my dad’s desire to celebrate into recipes that are easy but taste incredible. We are going to focus on keeping these incredibly moist so they melt in your mouth! Check out all my best dessert recipes for more sweet inspiration.
- Why These Are the ULTRA Moist Red Velvet Cake Pops You Need
- Gathering Ingredients for Your Red Velvet Cake Pops Recipe
- How to Make Moist Red Velvet Cake Pops Step-by-Step
- Expert Tips for Perfect Homemade Red Velvet Cake Pops
- Creative Cake Pop Coating Ideas for Festive Cake Pops
- Serving Suggestions for Your Red Velvet Frosting Cake Pops
- Storage Instructions for Decadent Sweet Treats
- Frequently Asked Questions About Red Velvet Cake Pops
- Estimated Nutritional Data for Red Velvet Cake Pops
- Share Your Red Velvet Cake Pops Creations
Why These Are the ULTRA Moist Red Velvet Cake Pops You Need
Listen, I’ve made cake pops that taste like sugary bricks, and we are NOT going there today. The number one reason these are the best cake pops recipe out there is simple: we use cream cheese frosting as the binder, not just regular buttercream. That tangy, rich frosting keeps the interior of these red velvet cake balls super moist!
Plus, we are keeping things simple. This is definitely an easy cake pop recipe because we start with a box mix. It cuts down on time but doesn’t cut down on that amazing, decadent sweet treat flavor we want.
- Guaranteed Moisture: Thanks to the magic of cream cheese frosting mixing right in.
- Perfect for Sharing: They are the ideal bite sized desserts for parties—they look fancy but are surprisingly simple.
- That Classic Color: That vibrant red velvet hue pops beautifully when coated!
If you love easy but impressive no bake treats, you absolutely have to try these peanut butter cup stuffed donuts too!
Gathering Ingredients for Your Red Velvet Cake Pops Recipe
Okay, before we dive into the fun part—the rolling and dipping—we need to get everything prepped! This list is pretty standard, but pay close attention to that frosting amount. It’s the secret weapon for ensuring these are truly moist red velvet cake pops.
For the Cake Base and Binder
Since we’re aiming for a simple but delicious result, we’re starting with a box mix. Trust me, nobody is going to know the difference once all that deliciousness is mixed in!
- One box (15.25 ounces) of red velvet cake mix—the regular size works perfectly.
- You’ll need whatever the box calls for to bake it—usually eggs, oil, and water. Follow those directions exactly on the back of the box!
- One full cup of cream cheese frosting. Yes, that’s right, a whole cup! This ensures we get that perfect density and keeps things wonderfully moist. We’re using this frosting as the glue that turns baked cake into red velvet cake balls.
For the Chocolate Covered Cake Pops Coating
This part is where we dress up our beautiful red balls! You need something that melts smoothly, so I highly recommend melting wafers over standard chocolate chips if you can grab them.
- Twelve ounces of semi-sweet or white chocolate melting wafers. Pick your favorite—both are stunning when dipped!
- One tablespoon of vegetable shortening or coconut oil. This is totally optional, but if your chocolate feels too thick once melted, a tiny bit of this thins it out so dipping is easier and you get a cleaner coat.
- Cake pop sticks—don’t forget these, unless you want messy fingers!
- And whatever you use for decorating—sprinkles, colored candy melts, whatever makes your heart sing!
How to Make Moist Red Velvet Cake Pops Step-by-Step
Alright, friends, here’s the part where we turn those ingredients into happiness on a stick! This is the core of the how to make cake pops tutorial, and honestly, it’s super satisfying. We are going to take our time and make sure everything is chilled correctly. If you rush the chilling, you end up with a melty mess, and we worked far too hard on that perfect red velvet cake base to let that happen!
Baking the Cake and Creating the Red Velvet Cake Balls
First things first, we bake the cake just like the box tells you to. Don’t try to use overripe bananas or anything weird here; we need the structure the box mix provides!
- Bake the cake according to the directions on the box.
- Let that beautiful red cake cool down completely. Seriously, I mean stone cold. If it’s warm, the frosting just melts into soup, and we want a doughy mixture, not a lukewarm puddle.
- Once cool, crumble the entire cake into a big mixing bowl. I like to use my hands for this, just breaking it all up until there aren’t any big, stubborn chunks left.
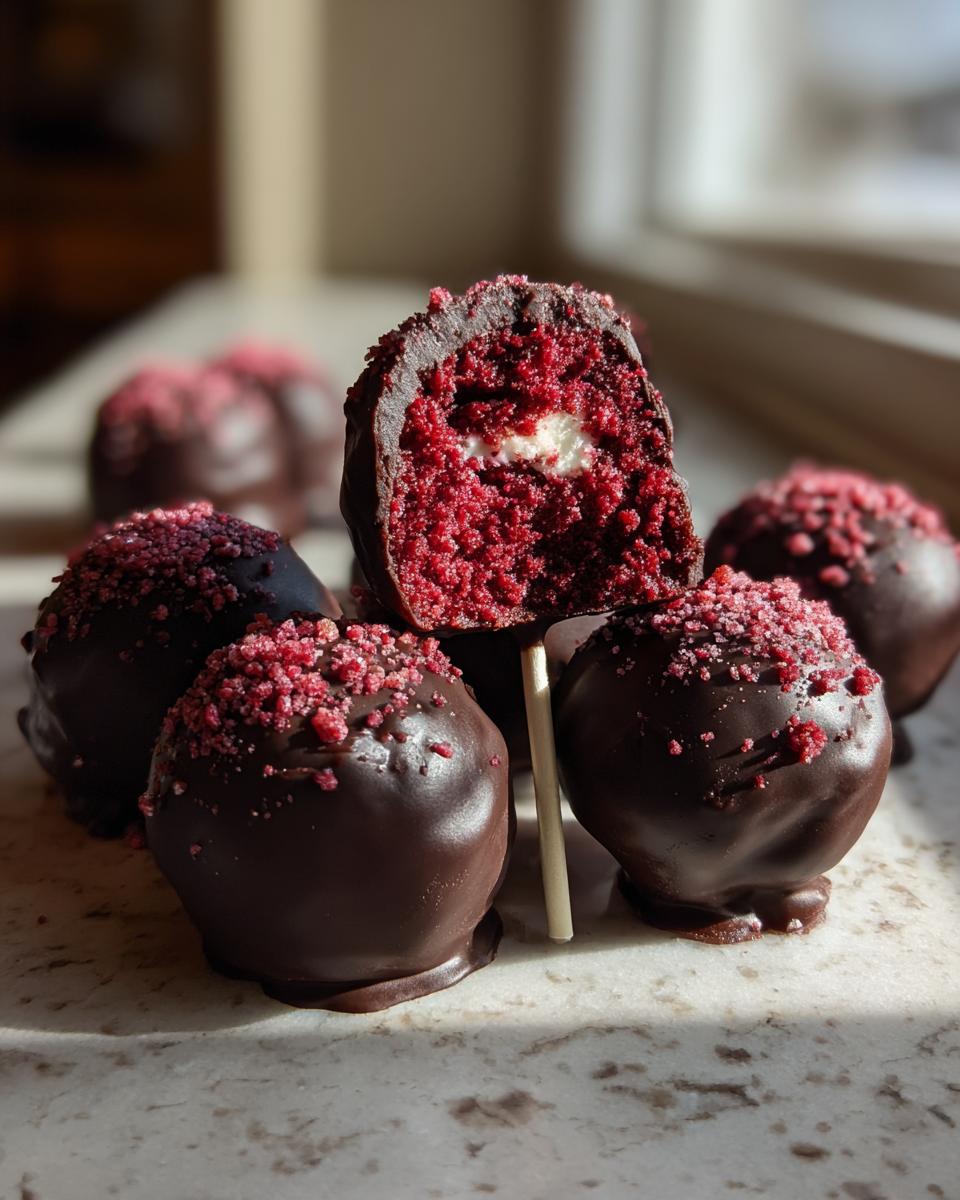
- Now, add in your cup of cream cheese frosting. This is my favorite part! You need to mix this in really well. I always start with a fork but usually end up using clean hands. You’re mixing until it all comes together, looking like super dark, damp cookie dough that sticks when you press it.
- Roll those crimson beauties into uniform balls, about 1 to 1.5 inches across. Place them on a baking sheet lined with parchment paper.
Chilling and Preparing the Sticks for Dipping
This chilling step is non-negotiable if you want the best cake pops recipe results! It helps them firm up so they won’t crack or fall off when they hit the chocolate.
- Pop that sheet pan full of cake balls into the refrigerator for at least 30 minutes. If your kitchen is warm, give them 45 minutes!
- While those are chilling, get your dipping chocolate ready. Melt your wafers slowly, usually according to the package instructions (short bursts in the microwave work for me, stirring often!). If the chocolate seems too thick to properly coat—like thick toothpaste—stir in that tiny bit of shortening or coconut oil.
- Take your chilled cake balls out. Now, for the stability trick: Dip the very tip of a cake pop stick just barely into your melted chocolate. Then, immediately (and gently) push that chocolate-tipped stick about halfway into a cake ball.
- The chocolate acts like cement! Return the tray to the fridge for 10 more minutes so that stick sets up rock solid inside the ball.
Achieving the Perfect Chocolate Covered Cake Pops Finish
We’re almost there! This part moves fast, so have your sprinkles ready to go right next to your dipping setup. This final coating is what makes them look like professional, festive cake pops!
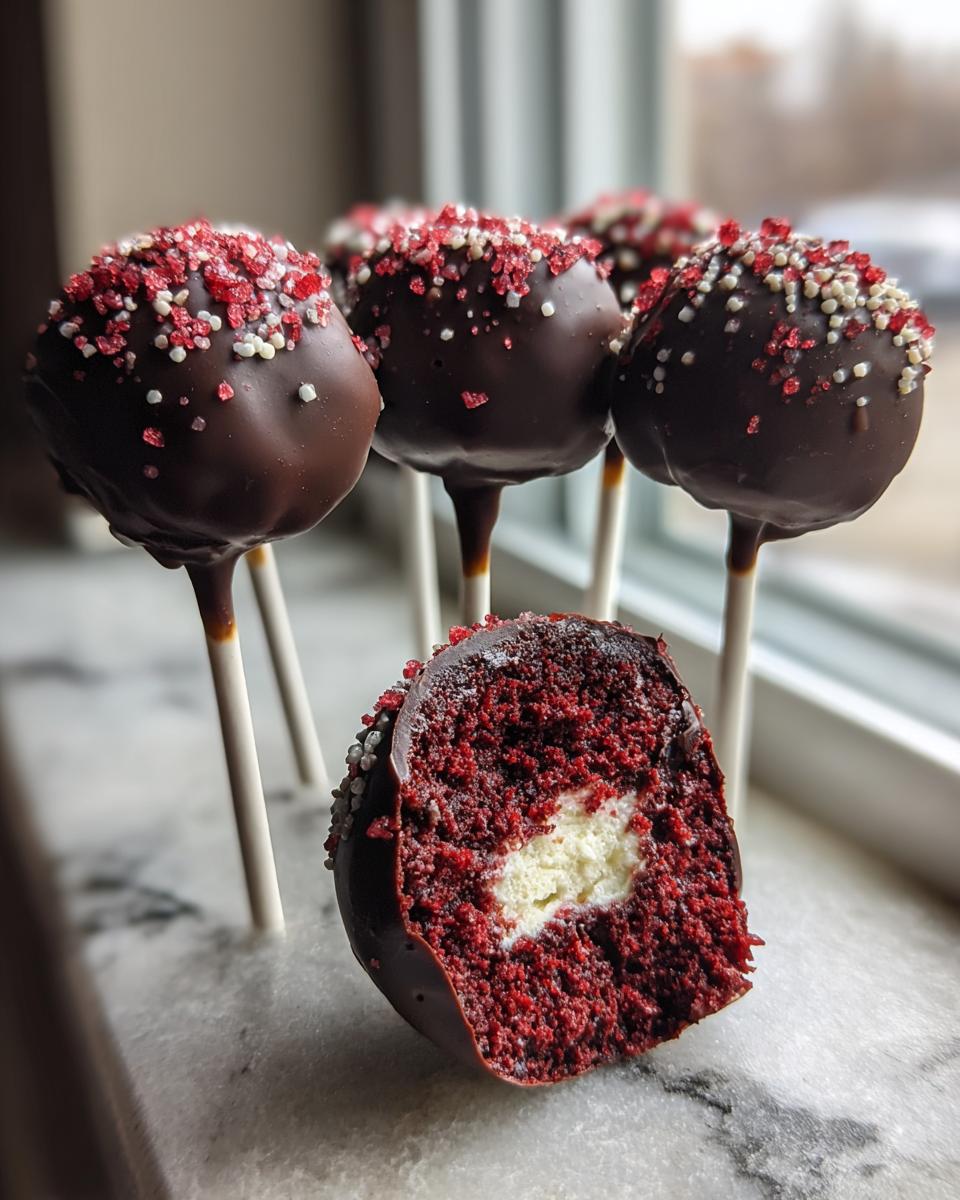
- Take your set-up sticks and dip the entire cake ball down into the melted chocolate. Try to do this mostly in one smooth motion.
- As soon as it’s submerged, pull it out, letting the excess coating drip back into the bowl. You can gently tap the stick against the side of the bowl—don’t shake it too hard or you might crack the center! Just a light tap or two.
- Immediately finish them! While the chocolate coating is still wet, dip the top into your sprinkles or drag it across some colored candy melts.
- Place the decorated pops upright in a piece of styrofoam or a dedicated cake pop stand to dry completely. We need them to stand straight—we don’t want them leaning over and pooling chocolate at the base!
Don’t forget to check out my recipe for no bake pecan pie lasagna if you’re loving all this fast dessert action!
Expert Tips for Perfect Homemade Red Velvet Cake Pops
So, you’ve got your red velvet cake pops rolled and chilled—fantastic! But sometimes, even when we follow the steps perfectly, things go a little wonky when dipping. Don’t stress! These little bumps are part of learning the simple cake pop techniques, and I’ve figured out exactly how to handle them.
Troubleshooting Common Red Velvet Cake Pops Issues
The biggest enemy here is temperature! If your cake balls are too warm, they’ll crack the chocolate coating as they go in, or worse, they’ll just crumble apart into the melted chocolate bath. Cold cake balls hitting super hot chocolate can cause cracking too, though!
My rule is this: If your cake balls have been chilling for at least 30 minutes, they should be firm, but not rock hard. When you dip them, if you notice the chocolate coating seizing up or getting too thick too fast, that’s when you add that tiny bit of shortening we talked about to thin it out just enough for an even coat. Don’t try to dip until the chocolate cools down a little bit if it starts getting chunky because you’ll just end up fighting it.
Making Cream Cheese Cake Pops Ahead of Time
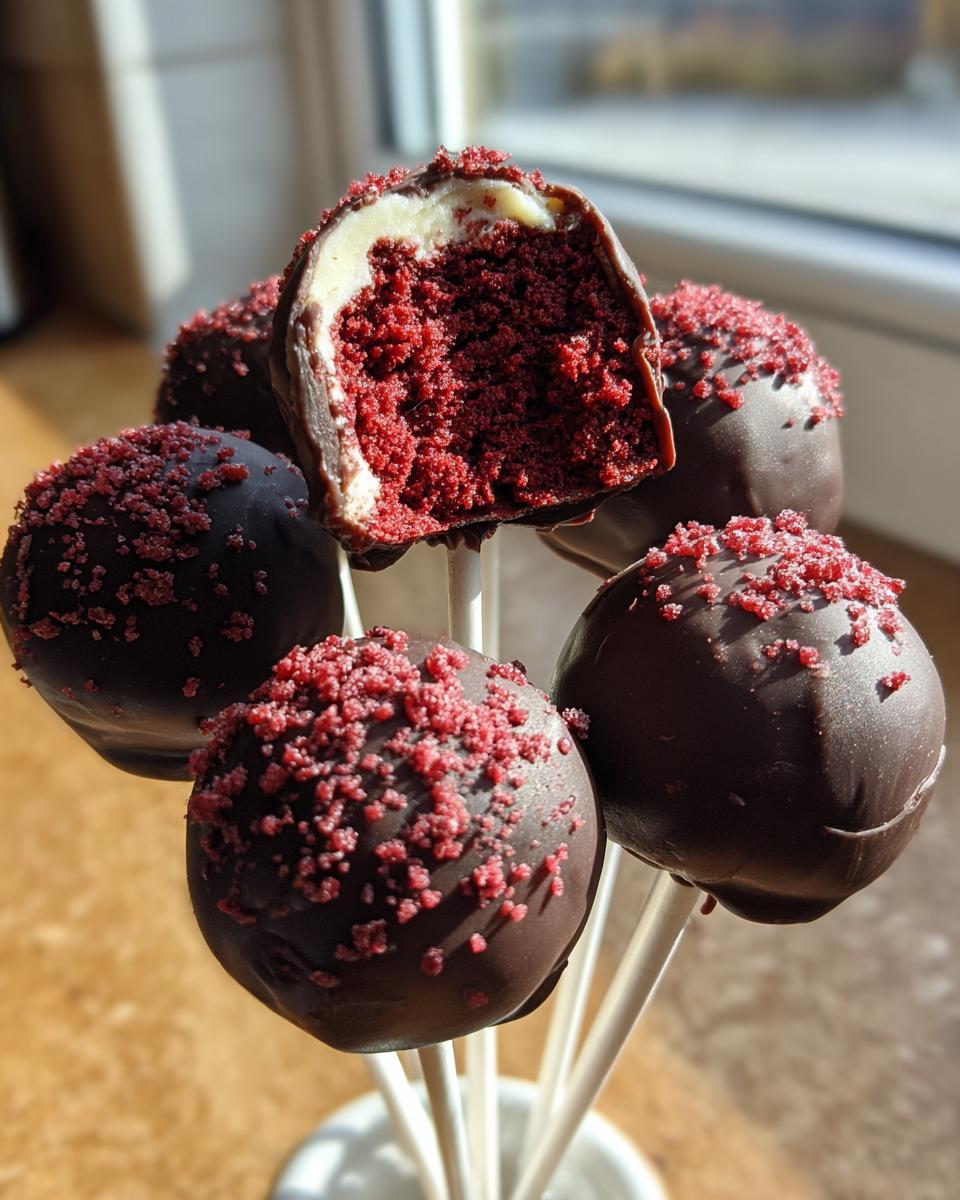
The great thing about these cream cheese cake pops is that they are practically designed to be made early! If you’re planning a big party or holiday bash, you can totally prep these ahead of time. After you finish dipping them and decorating them, let them dry completely, then they just go straight into an airtight container.
I keep mine in the refrigerator, and honestly, they taste just as good on day seven as they do on day one! My only advice here is this: If you are serving them straight from the fridge, let them sit on the counter for about 15 or 20 minutes first. That little bit of warmth softens the chocolate coating slightly and makes the red velvet center even more decadent and moist. This tip really elevates them from good to great!
If you’re looking for other make-ahead desserts, you might want to see how I make my pumpkin cheesecake bars.
Creative Cake Pop Coating Ideas for Festive Cake Pops
While the classic semi-sweet chocolate covering these red velvet cake pops is divine, sometimes you need a little extra pizzazz, especially if you are aiming for specific holiday colors or just want to mix things up!
Since these red velvet treats are already so vibrant inside, the coating is where you can really play around with texture and color. This is perfect if you’re looking for more sophisticated red velvet dessert ideas beyond a simple holiday display.
First up: Candy Melts! If you want super vibrant colors that really pop against the dark red interior—think bright pinks for valentine red velvet treats or even teal for a fun birthday vibe—colored candy melts are your best friend. They melt just like the chocolate wafers, sometimes even easier, and they set up beautifully hard.
But what if crunch is what you crave? Oh, I love texture! Once you dip your cake pop into the wet chocolate or candy melt, don’t wait long! You can roll the pop gently in:
- Finely crushed pecans or walnuts (they pair gorgeously with the red velvet flavor!).
- Red and white sanding sugar for a sparkly effect.
- Tiny edible pearl sprinkles for an elegant birthday party treats look.
Remember, whatever you choose needs to be small enough that it won’t unbalance the pop when you insert the stick. Just roll gently and place it straight up to dry. It’s such a simple technique, but it changes the entire presentation!
If you are looking for more baking fun, you absolutely have to see my recipe for peppermint cheesecake cookies!
Serving Suggestions for Your Red Velvet Frosting Cake Pops
Now that we have these gorgeous, perfectly moist red velvet frosting cake pops ready to go, the only thing left is showing them off! These aren’t just desserts; they are little edible decorations, and how you present them makes all the difference, especially when you’re planning out those big birthday party treats or making a festive spread.
Don’t just lay them flat on a platter! That lets the pretty coating settle weirdly. The absolute best way to display them is upright. You can grab yourself a simple block of styrofoam—I just cut mine down to size so it fits nicely in a decorative serving dish—and stick the pops right into it. It looks so professional, and it keeps them tidy!
If you’re doing a Valentine’s Day theme, use pink or red sanding sugar on the stand instead of styrofoam, or grab some square acrylic risers for a modern look. They look amazing grouped with simple white dishes holding other decadent sweet treats.
And how do you serve them? These rich flavors pair wonderfully with something light. They’re decadent, so I always suggest pairing them with a strong, hot cup of coffee or a simple espresso. For an afternoon party, a sparkling cranberry or raspberry mocktail is just perfect—the tartness of the drink cuts right through the richness of the chocolate and cream cheese. You’re layering flavors, and that’s what makes a dessert spread truly memorable!
Speaking of cozy flavors, you should really try my apple cider cinnamon bread when you need something warm and comforting!
Storage Instructions for Decadent Sweet Treats
Okay, you’ve made these amazing decadent sweet treats, and now you might have leftovers—lucky you! Or perhaps you made them a few days early for a big weekend party? Don’t stress about keeping them fresh; they are super resilient, which is great when you’re planning out your blog schedule and need make-ahead desserts.
The absolute best way to keep your gorgeous chocolate covered cake pops looking shiny and tasting fresh is by storing them in the refrigerator. You need an airtight container, and I mean totally sealed. If you just toss them in a regular container without a solid lid, the cake inside can start to dry out faster, or they might accidentally pick up any lingering smells from your fridge. Not good!
Make sure those cake pops are completely dry and set before you put the lid on. If you stack them, put down a layer of wax paper or parchment paper between the layers so the chocolate coating doesn’t stick together. They can easily last a full week stored this way! They are perfectly fine for your holiday dessert recipes made well in advance.
Now, here’s my major PSA about texture. While I tell you to chill them, eating them straight from the fridge dulls the flavor a little, and the chocolate shell gets a bit too hard. So, when it’s time to serve, pull them out about 20 minutes before you plan on enjoying them. Letting them sit on the counter allows the cake to soften up just right. That little bit of temperature adjustment makes these homemade red velvet cake pops taste unbelievably fresh, almost like they just came out of the oven!
Frequently Asked Questions About Red Velvet Cake Pops
These questions pop up all the time when people are trying to get their homemade red velvet cake pops just right. Since I learned everything the hard way, I want to save you the trouble! Here are the tricks to getting these perfect every time.
Can I skip the cream cheese frosting and just use regular frosting?
Oh, I wouldn’t recommend it if you are aiming for moist red velvet cake pops! The beauty of this recipe is that the cream cheese frosting reacts with the cake crumbs in a way that keeps everything tender. If you use standard buttercream frosting with just powdered sugar, it tends to be much stiffer and sweeter, and it doesn’t bind quite as well. Your finished red velvet cake balls might end up a little dry or crumbly, especially as they age in the fridge.
What is the secret to making this an easy cake pop recipe? Can I use leftover cake?
The real no bake cake pops trick is starting with a cake mix—it’s already perfectly structured and moist, so you don’t have to worry about over-mixing a from-scratch batter. And yes, you can absolutely use leftover red velvet cake! The only caveat is that leftover cake tends to be slightly drier, so you might need to cheat and add just an extra tablespoon or two of frosting to make sure it still holds its shape nicely when rolled.
Why do my cake pops crack when I dip them in chocolate?
Cracking happens for two reasons, usually! First, your cake ball isn’t cold enough. It needs to be quite chilled so it doesn’t warm up the chocolate when you dip it, causing sudden temperature shock. Second, if your chocolate is too thick, the cake pop has to push too much chocolate away to be fully coated, which stresses the shell. If your melted chocolate seems super thick, add that touch of coconut oil or shortening—it thins it out perfectly without ruining the flavor!
Do I have to use sticks? Can I just make red velvet cake balls?
You absolutely can just make red velvet cake balls! They are often called truffles, and they are just as delicious. If you skip the sticks, you skip the step where you dip the stick tip in chocolate first, of course. You’ll just roll them, chill them, and then dip the whole ball completely. They set beautifully on wax paper, and honestly, they look just as elegant piled high on a platter that way!
If you’re tired of baking and want something different, I’ve got a killer recipe for boston cream pie fudge that requires zero oven time!
Estimated Nutritional Data for Red Velvet Cake Pops
Now, I know some of you are tracking macros or just curious about what’s in these little bites of heaven. It’s important for me to be transparent, even when we are talking about inherently sweet things like red velvet cake pops! Remember, baking is an art, and just like painting, different brands of chocolate or even the exact measurement of frosting can change these numbers slightly.
The data below is my best estimate for one single, gorgeous cake pop using the mix specified and standard semi-sweet wafers. These figures are based on the recipe making about 24 servings.
For planning your meals, especially if you are thinking about structured eating plans, remember that ingredients like the cake mix and the chocolate coating play the biggest role here. You’ll see the full breakdown below:
- Serving Size: 1 cake pop
- Calories: 250
- Sugar: 25g
- Sodium: 150mg
- Fat: 15g
- Saturated Fat: 8g
- Trans Fat: 0.5g
- Carbohydrates: 28g
- Fiber: 1g
- Protein: 3g
- Cholesterol: 25mg
Just a quick note, though—if you load these up with extra thick white chocolate and tons of colored candy, you are definitely bumping those sugar and fat numbers up! But look at that protein and fiber? Not bad for such a satisfyingly decadent sweet treat, if I do say so myself!
Share Your Red Velvet Cake Pops Creations
Now that you have made what I truly believe are the ultimate red velvet cake pops, I can’t wait to hear how they turned out for you! Seriously, the best part of sharing these recipes is seeing your beautiful finished products. Did you use vibrant gold sprinkles? Did you try a white chocolate dip? Don’t be shy!
When you finish up, please head down to the comments section below and leave me a star rating! Hearing what worked for you—maybe you thought it was the easiest cake pop recipe you’ve ever tried—helps me keep creating the reliable recipes I promise here at Cut Cook Taste. If you make them for a birthday or holiday gathering, snap a picture!
Tag me on social media! Seeing your creative flair just makes my day and keeps that wonderful cycle of home cooking inspiration going strong. I love seeing how you interpret my recipes to make them your own unique family favorite. And hey, if you’re looking for even more desserts that are guaranteed crowd-pleasers, take a peek at my general blog section for endless inspiration. Happy baking, everyone!
PrintULTRA Moist Red Velvet Cake Pops with Cream Cheese Frosting

Make these irresistible, bite-sized Red Velvet Cake Pops. This recipe uses cream cheese frosting to guarantee a moist texture inside, coated in smooth chocolate for a perfect party dessert.
- Prep Time: 30 min
- Cook Time: 35 min
- Total Time: 1 hour 40 min
- Yield: 24 cake pops 1x
- Category: Dessert
- Method: No Bake (after initial cake baking)
- Cuisine: American
- Diet: Vegetarian
Ingredients
- 1 box (15.25 oz) red velvet cake mix
- Ingredients called for on cake mix box (usually eggs, oil, water)
- 1 cup cream cheese frosting (store-bought or homemade)
- 12 ounces semi-sweet or white chocolate melting wafers
- 1 tablespoon vegetable shortening or coconut oil (optional, for thinning chocolate)
- Red sprinkles or colored candy melts for decoration
- Cake pop sticks
Instructions
- Bake the red velvet cake according to the package directions, using the ingredients listed on the box.
- Let the cake cool completely on a wire rack.
- Crumble the cooled cake into a large bowl until no large chunks remain.
- Add the cream cheese frosting to the cake crumbs. Mix with a fork or clean hands until the mixture is fully combined and holds together when pressed.
- Roll the mixture into uniform balls, about 1 to 1.5 inches in diameter. Place the balls on a parchment-lined baking sheet.
- Chill the cake balls in the refrigerator for at least 30 minutes. This step helps them hold their shape when dipping.
- Prepare the coating: Melt the chocolate wafers according to package directions, often using a double boiler or microwave in short intervals. Stir in the shortening or oil if the chocolate is too thick for dipping.
- Dip the tip of a cake pop stick into the melted chocolate, then insert the stick about halfway into a chilled cake ball. Return the sheet to the refrigerator for 10 minutes to set the stick.
- Dip the entire cake ball into the melted chocolate, rotating to coat completely. Tap the stick gently against the side of the bowl to remove excess chocolate.
- Immediately apply sprinkles or decorative elements before the chocolate sets.
- Place the finished cake pops upright in a styrofoam block or cake pop stand to dry completely.
Notes
- For the best results, chill the cake balls thoroughly before dipping; this prevents them from falling apart in the hot chocolate.
- If you are looking for simple techniques for party treats, consider making these ahead of time and storing them in an airtight container in the refrigerator for up to one week.
- If you are interested in meal planning for large events, this recipe pairs well with other bite sized desserts for parties.
Nutrition
- Serving Size: 1 cake pop
- Calories: 250
- Sugar: 25
- Sodium: 150
- Fat: 15
- Saturated Fat: 8
- Unsaturated Fat: 7
- Trans Fat: 0.5
- Carbohydrates: 28
- Fiber: 1
- Protein: 3
- Cholesterol: 25